

Turn any photo into a dot grid artwork with these Photoshop actions. You'll get great results with dots that change size. They get larger in brighter areas and smaller in darker areas. Free download available.
Step 20
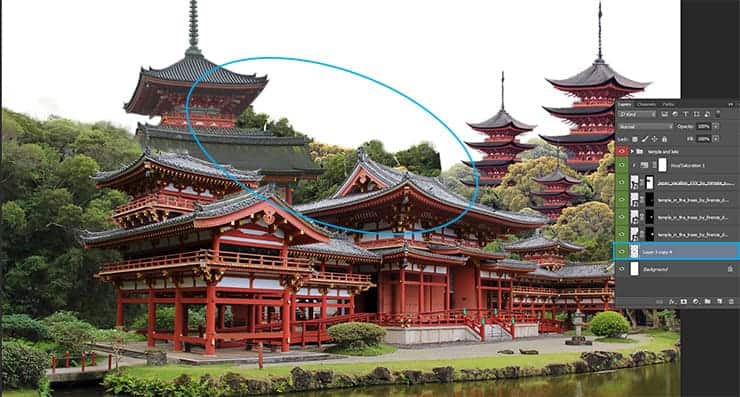
Now we need trees to close the space above the temple. Without it we can not move on vertical perspective, and move into horizontal. Exactly trees will make transition function in my landscape. I did not become a long and tedious search for a specific resource, and returned to the layer with the main temple. Used Lasso Tool (L) and select a small portion of the trees with regard to their form. Duplicate this fragment (Cmd/Ctrl + J), hold Opt/Alt and move a layer mask of temple to fragment layer (just do not move the fragment layer).

Step 21
Do the same for the yellow trees, but only with the layer on which you have the biggest "Miyajima Temple". When the pieces are ready, move both front layer and fill the space above the temple, duplicating and changing the size (the quickest and easiest way to duplicate its hold Opt/Alt when you use Move Tool (V)). Try to diversify their types using different parts of the fragments. It's okay if the edge is not very smooth or are poorly cleared the trees, then we will eliminate all.
Step 22
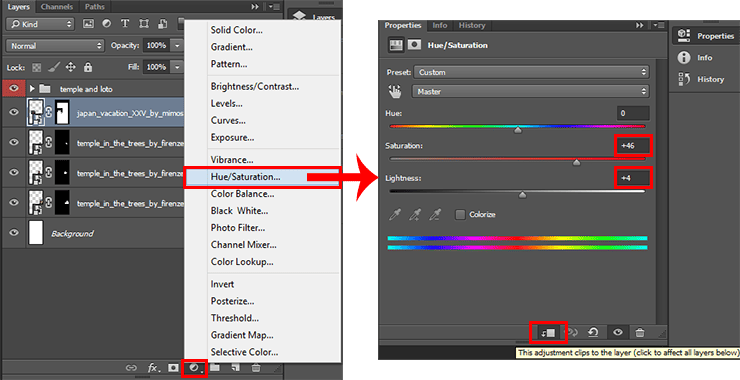
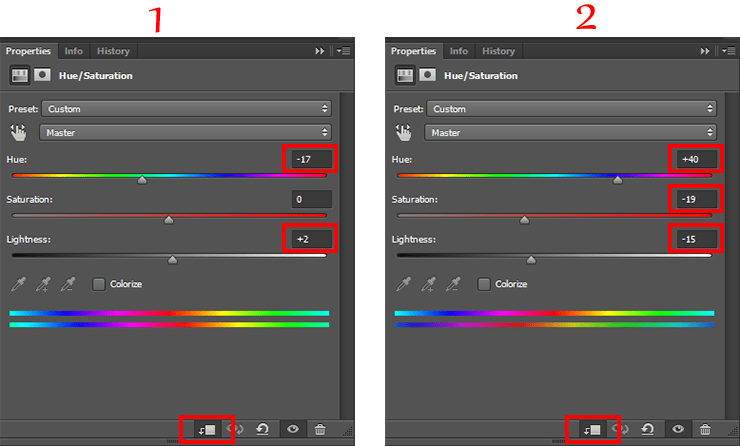
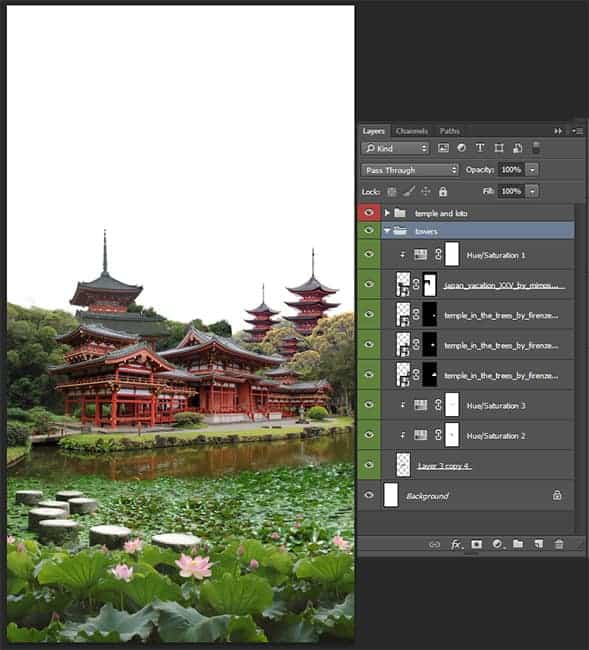
I adjust color and Saturation on created trees with two adjustment layers "Hue/Saturation" (Layer > New Adjustment layer > Hue/Saturation... or use icon on a Layer panel). For first layer: Hue: -17, Lightness: +2, clip to previous layer. For second layer: Hue: +40, Saturation: -19, Lightness: -15, clip to previous layer.
This is my result. All layers with towers and trees combined in one group "Towers". If you want to make trees more varied use the more fragments. I had enough of these two. Do not make the trees too large because the background is already at a greater distance than the tower and temple.
Step 23
Let's actually start to build mountain scene. This is an interesting part in which we start work to effects. But at first make landscape. Place mountains "huangshan_1_3_by_meihua_stock" (Huangshan) in our document (File > Place (Place Embedded)). Not needed resize this layer, just place mountains that spire of biggest of small three towers protrudes slightly from the forest, ate are connected with trees and there was no place to exude background. Duplicate this layer (Cmd/Ctrl + J).
30 comments on “How to Create a Mysterious Matte Painting Landscape in Photoshop”
also me
This looks so cool. You know what would make it even better?? ATMOSPHERIC PERSPECTIVE. But that can be a personal job for readers. Nice work
this is good thanks
kms
this actually sucks
this sucks
bro I be watching dr duke all day keep up the amazing vids man
good job!
Great!!
That's the most hideous photo that I have ever seen.
perfect
"an amazing" NOT "a amazing" !
takes to long
Great tutorial! I've learned a lot. Here is my outcome: http://oi66.tinypic.com/2a5gqbr.jpg
Thanks
Possibly the best tutorial I have done. Absolutly awesome image, and I love the way you explain how you see it & why. It is like a noval.
Please do more !
Thanks you! Maria
I had finished this tutorial.
Amazing!!!
Thanks for sharing.... :-)
Nice
Amazing tutorial, now I have to go back and do the rest of your stuff. :D
A tip for Step 38: just select your top layer, go to Edit -> Select all (ctrl/cmd + A)
then Edit -> Copy merged (shift + ctrl/cmd + C)
This will copy all the visible layer (inside your selection), now you just have to paste it,
Edit -> Paste (ctrl/cmd + V) or Paste special -> Paste in place (shift + ctrl/cmd + V).
wow, what a wonderful great tutorial.
Very well explained so even a "beginner" to work with.
Thank you also for the material and links to the trouble to write it all. Once again, simply grandiose.
Kind Regards
Easy to follow. But I have some problems with making it exactly the same you have showed. I would have to search in http://google.com for photoshop basic tools documentation.
However, thanks!
awesome
Absolutely georgeous.
Nice
and AMAZING!
TAKES SO LONG, but the outcome is amazing!
one of the finest...what a refreshing work to see..
Near to natural !
wooow!!!
it's so realistic pic
great work, i like it :)
this is great i love and need turt specially on building back grounds and Invirements