
Make your artwork look like they're from an alternate universe. These Cyberpunk presets work with Photoshop (via the Camera Raw filter) and Lightroom. Download all 788 presets for 90% off.
![image054[4]](https://cdn.photoshoptutorials.ws/wp-content/uploads/2012/10/image0544.jpg?strip=all&lossy=1&quality=70&webp=70&avif=70&w=1920&ssl=1 "image054[4]")
After pressing it, click on Load Brushes:
![image055[4]](https://cdn.photoshoptutorials.ws/wp-content/uploads/2012/10/image0554.jpg?strip=all&lossy=1&quality=70&webp=70&avif=70&w=1920&ssl=1 "image055[4]")
Now, locate the brush set that we've downloaded and then open them. After loading the Winter SnowFlake Brushes, choose the following brush:
![image056[4]](https://cdn.photoshoptutorials.ws/wp-content/uploads/2012/10/image0564.jpg?strip=all&lossy=1&quality=70&webp=70&avif=70&w=1920&ssl=1 "image056[4]")
Next, input the following values for this brush set:
- Brush size: 476 px
- Hardness: Default
- Opacity: 100%
- Flow: 100%
- #: ffffff
Now, let's start painting:
![image057[4]](https://cdn.photoshoptutorials.ws/wp-content/uploads/2012/10/image0574.jpg?strip=all&lossy=1&quality=70&webp=70&avif=70&w=1920&ssl=1 "image057[4]")
The result:
![image058[4]](https://cdn.photoshoptutorials.ws/wp-content/uploads/2012/10/image0584.jpg?strip=all&lossy=1&quality=70&webp=70&avif=70&w=1920&ssl=1 "image058[4]")
Step 28
Next, create another layer again and name it "sparkles 2". Activate the Brush tool (B) and input the following:
- Brush size: 476 px
- Hardness: Default
- Opacity: 100%
- Flow: 100%
- #: ffffff
Then start painting:
![image059[4]](https://cdn.photoshoptutorials.ws/wp-content/uploads/2012/10/image0594.jpg?strip=all&lossy=1&quality=70&webp=70&avif=70&w=1920&ssl=1 "image059[4]")
The result:
![image060[4]](https://cdn.photoshoptutorials.ws/wp-content/uploads/2012/10/image0604.jpg?strip=all&lossy=1&quality=70&webp=70&avif=70&w=1920&ssl=1 "image060[4]")
Step 29
Next, create a new layer once again and then name it "sparkles 3". Activate the Brush tool (B) and then input the following:
- Brush size: 476 px
- Hardness: Default
- Opacity: 100%
- Flow: 100%
- #: ffffff
Then start painting:
![image061[4]](https://cdn.photoshoptutorials.ws/wp-content/uploads/2012/10/image0614.jpg?strip=all&lossy=1&quality=70&webp=70&avif=70&w=1920&ssl=1 "image061[4]")
The result should be similar to this:
![image062[4]](https://cdn.photoshoptutorials.ws/wp-content/uploads/2012/10/image0624.jpg?strip=all&lossy=1&quality=70&webp=70&avif=70&w=1920&ssl=1 "image062[4]")
Step 30
Next, create a new layer once again and then name it "sparkles 4". Activate the Brush tool (B) and then input the following:
- Brush size: 476 px
- Hardness: Default
- Opacity: 100%
- Flow: 100%
- #: ffffff
Now, let's paint:
![image063[3]](https://cdn.photoshoptutorials.ws/wp-content/uploads/2012/10/image0633.jpg?strip=all&lossy=1&quality=70&webp=70&avif=70&w=1920&ssl=1 "image063[3]")
The result:
![image064[3]](https://cdn.photoshoptutorials.ws/wp-content/uploads/2012/10/image0643.jpg?strip=all&lossy=1&quality=70&webp=70&avif=70&w=1920&ssl=1 "image064[3]")
Step 31
Next, let's create a new layer once again and then name it "sparkles 5". Activate the Brush tool (B) and then input the following:
- Brush size: 476 px
- Hardness: Default
- Opacity: 100%
- Flow: 100%
- #: ffffff
Then, ready yourself to paint:
![image065[3]](https://cdn.photoshoptutorials.ws/wp-content/uploads/2012/10/image0653.jpg?strip=all&lossy=1&quality=70&webp=70&avif=70&w=1920&ssl=1 "image065[3]")
The result:
![image066[3]](https://cdn.photoshoptutorials.ws/wp-content/uploads/2012/10/image0663.jpg?strip=all&lossy=1&quality=70&webp=70&avif=70&w=1920&ssl=1 "image066[3]")
Step 32
Now, let's create another heavenly light - make sure to put this above the sparkle layers. To start, create a new layer and then name it "heavenly light 2". Activate the Brush tool (B) and Reset the Brushes.
![image027[7]](https://cdn.photoshoptutorials.ws/wp-content/uploads/2012/10/image0277.jpg?strip=all&lossy=1&quality=70&webp=70&avif=70&w=1920&ssl=1 "image027[7]")
Then click on "Reset Brushes" from the contextual menu.
![image028[7]](https://cdn.photoshoptutorials.ws/wp-content/uploads/2012/10/image0287.jpg?strip=all&lossy=1&quality=70&webp=70&avif=70&w=1920&ssl=1 "image028[7]")
Step 33
Now, input the following values for the Brush tool (B):
- Brush size: 2200px
- Hardness: 0%
- Opacity: 15%
- Flow: 100%
- #: ffffff
Now, let's start painting:
![image067[3]](https://cdn.photoshoptutorials.ws/wp-content/uploads/2012/10/image0673.jpg?strip=all&lossy=1&quality=70&webp=70&avif=70&w=1920&ssl=1 "image067[3]")
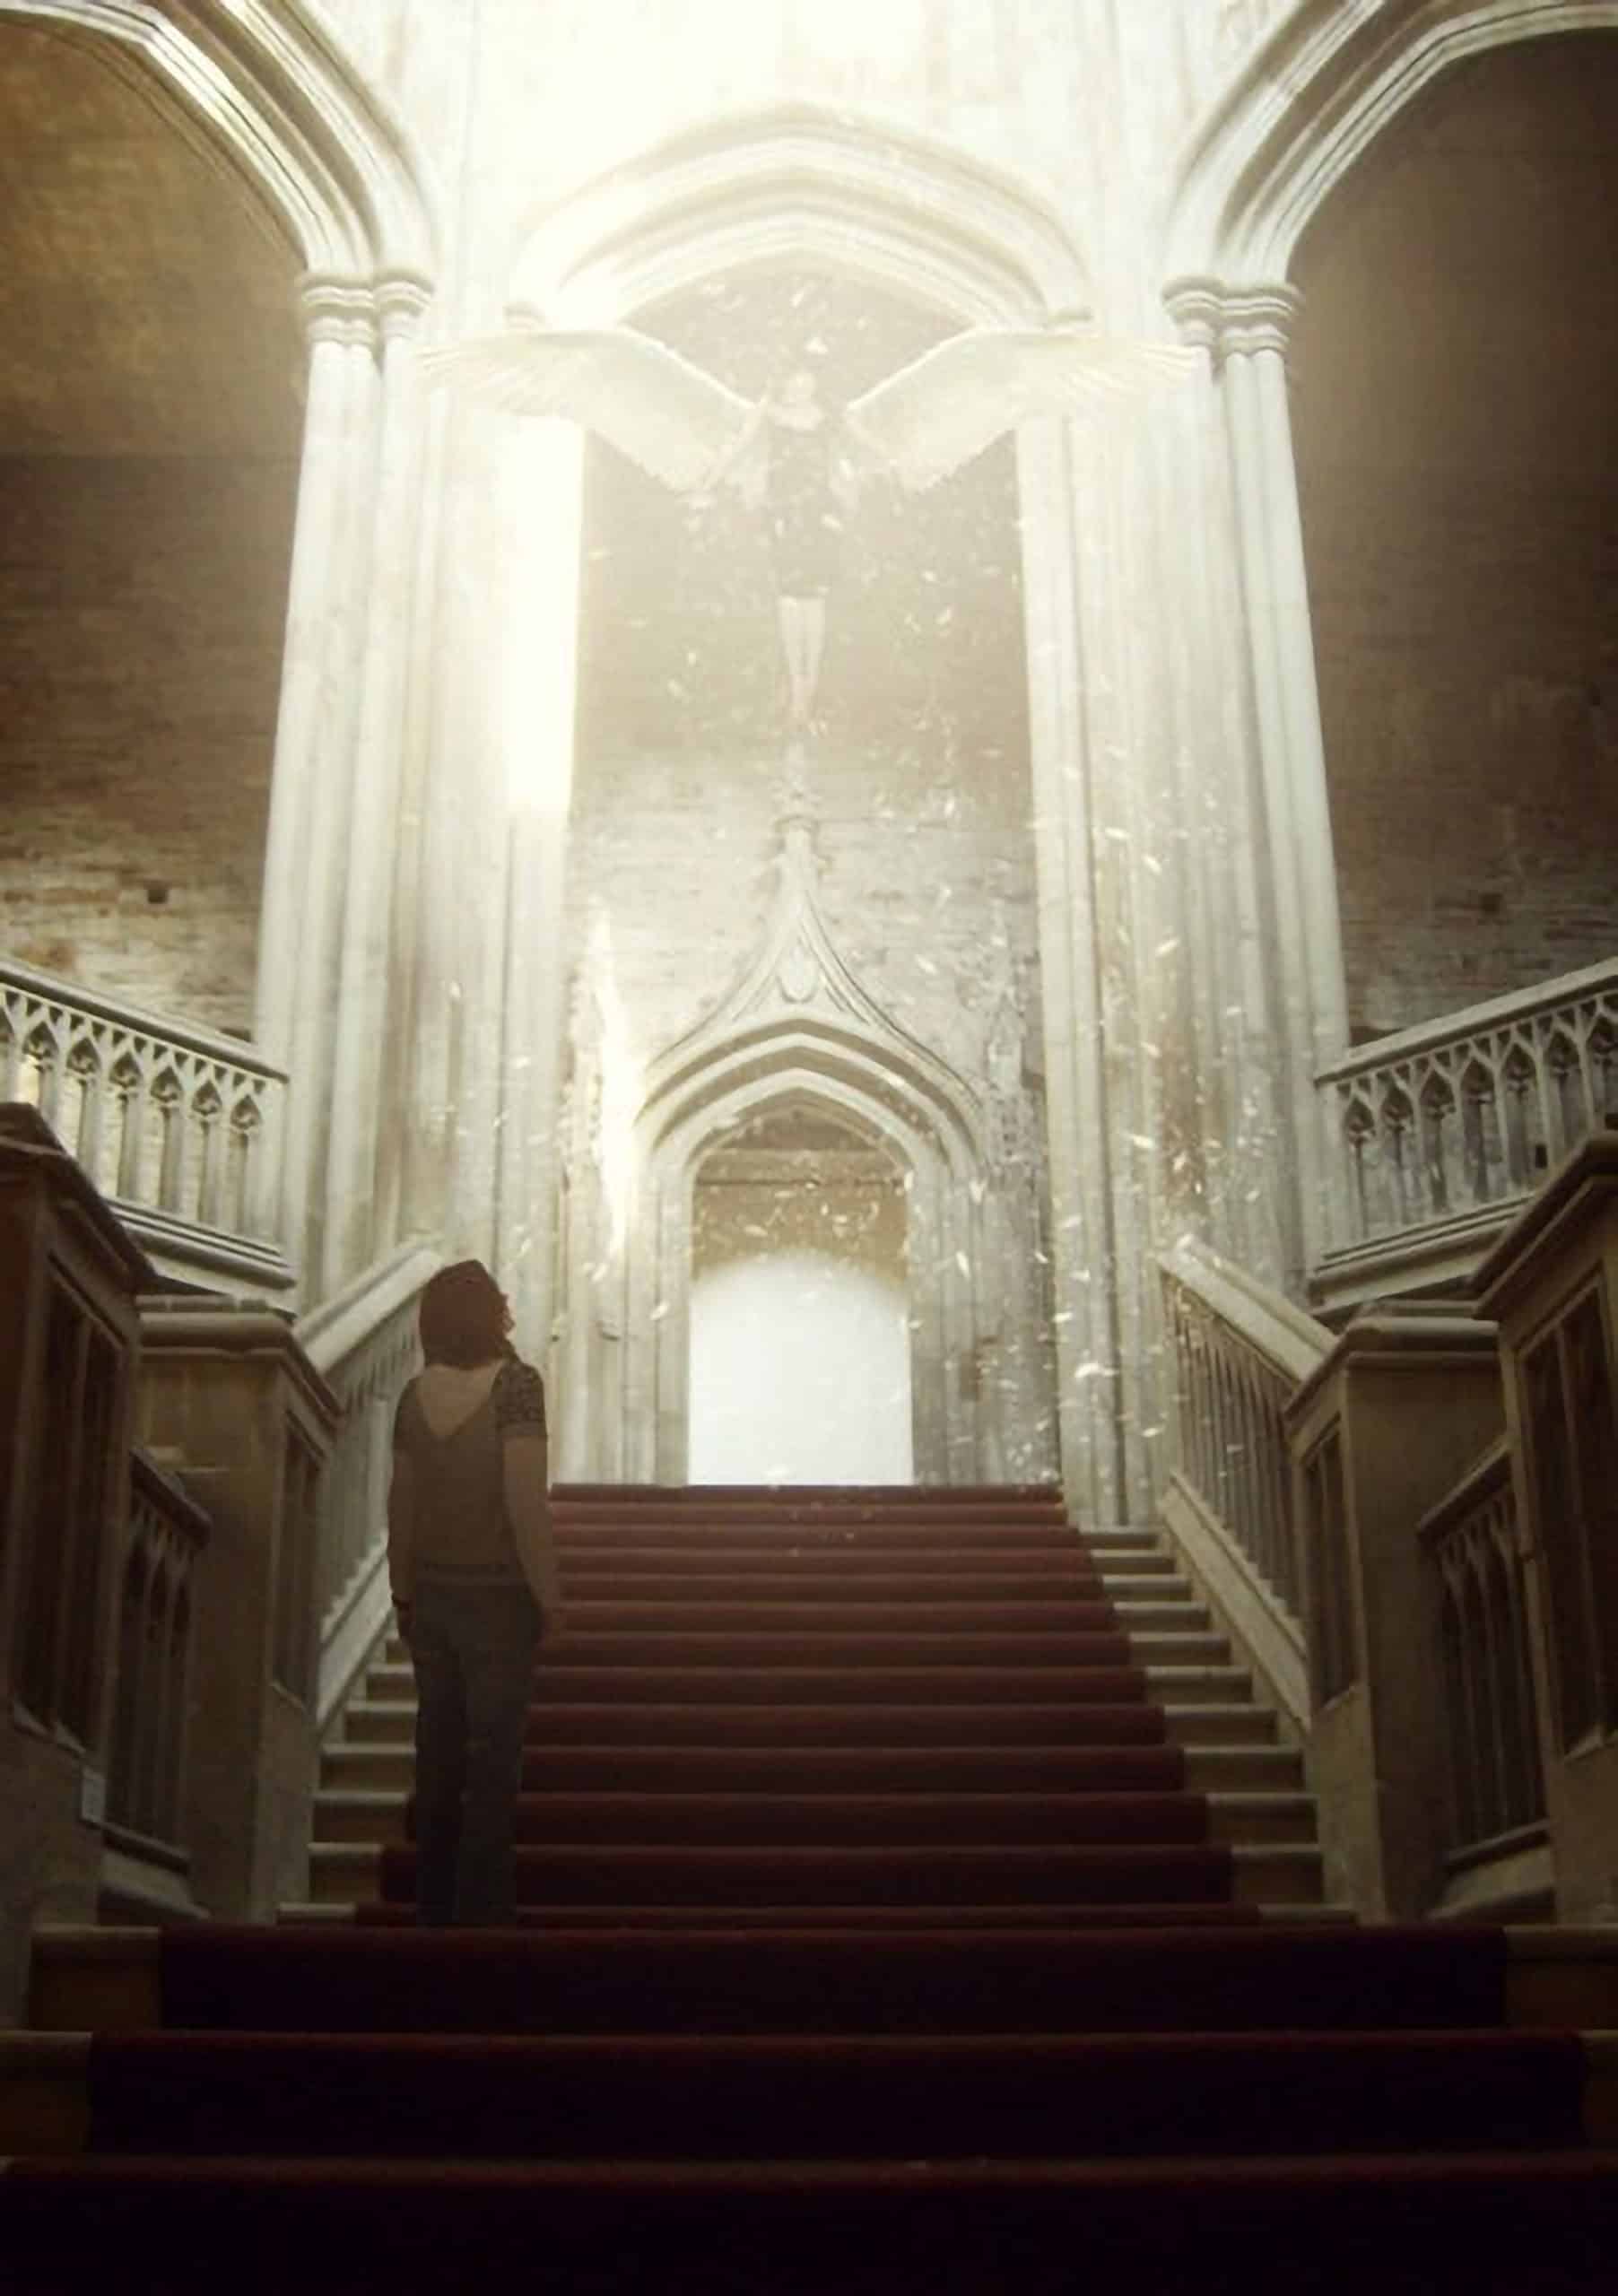
The result:
![image068[3]](https://cdn.photoshoptutorials.ws/wp-content/uploads/2012/10/image0683.jpg?strip=all&lossy=1&quality=70&webp=70&avif=70&w=1920&ssl=1 "image068[3]")
Now, that we're done, select all the layers that we've made for this layer and then press Ctrl/Cmd + G to group them. Name this group as "light and sparkles".
Step 33
Now, we will enhance the color and brightness of our image. To start let's create a Solid Color adjustment layer. From the Layer window, click on the "Create New Fill/Adjustment layer button".
![image070[3]](https://cdn.photoshoptutorials.ws/wp-content/uploads/2012/10/image0703.jpg?strip=all&lossy=1&quality=70&webp=70&avif=70&w=1920&ssl=1 "image070[3]")
Once the contextual menu opens, click on Solid Color:
![image071[3]](https://cdn.photoshoptutorials.ws/wp-content/uploads/2012/10/image0713.jpg?strip=all&lossy=1&quality=70&webp=70&avif=70&w=1920&ssl=1 "image071[3]")
Now, clicking on the Solid Color option will open the Color Picker box. Now, input the following on the #: space.
- #: 000120
![image069[6]](https://cdn.photoshoptutorials.ws/wp-content/uploads/2012/10/image0696.jpg?strip=all&lossy=1&quality=70&webp=70&avif=70&w=1920&ssl=1 "image069[6]")
Next, change the Blending mode and Opacity to the following:
- Blending mode: Exclusion
- Opacity: 40%
![image072[3]](https://cdn.photoshoptutorials.ws/wp-content/uploads/2012/10/image0723.jpg?strip=all&lossy=1&quality=70&webp=70&avif=70&w=1920&ssl=1 "image072[3]")
The result:
![image073[3]](https://cdn.photoshoptutorials.ws/wp-content/uploads/2012/10/image0733.jpg?strip=all&lossy=1&quality=70&webp=70&avif=70&w=1920&ssl=1 "image073[3]")
Step 34
Next, let's create a Color Balance adjustment layer from the Create New Fill/Adjustment layer button.
![image074[3]](https://cdn.photoshoptutorials.ws/wp-content/uploads/2012/10/image0743.jpg?strip=all&lossy=1&quality=70&webp=70&avif=70&w=1920&ssl=1 "image074[3]")
When the Color Balance box opens, input the following:
12 comments on “Create a Mystical Rising Angel Photo Manipulation in Photoshop”
How do you print the photo to capture the effects? What type of printer?
FOR ME ILIKE ET CECOMADOOO
just like a historical heritage
such a great munipulation
Thanks for the info
Were Can i download photoshop?
Beautiful, creative and acutely enjoy able!thanks for sharing!
A good theme well thought out & executed. A sublime result! Tutorial very easy to follow
Please help, how can i use Winter SnowFlake Brushes PS7??
Was easy to do this! And that says a lot since I've only started learning to use Photoshop CS6 a WEEK ago! Great tutorial Michael!
Great tutorial that was very well described. It was so well instructed all skill levels could work through it. I really enjoyed the finished result too. I would love to see more from you Michael.
Well done Sir!
great,thanks(some steps had easy alternatives, you just made it complicated,any ways thanks a trillion)