
Luminar AI lets you turn your ideas into reality with powerful, intelligent AI. Download the photo editor and see how you can completely transform your photos in a few clicks.
On this layer mask use a soft black brush to erase the foreground:
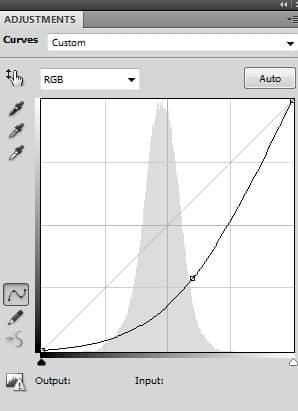
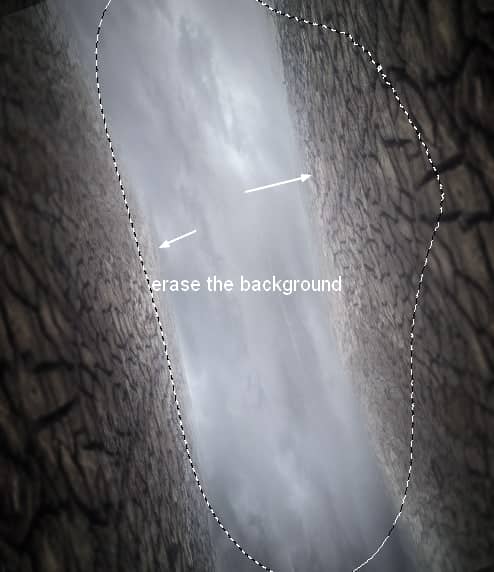
Step 9
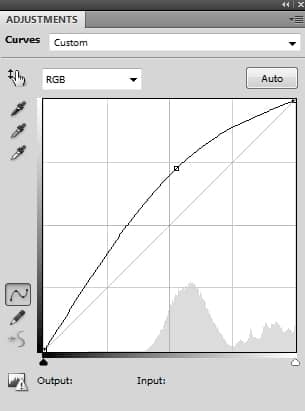
I used Curves to darken the foreground:
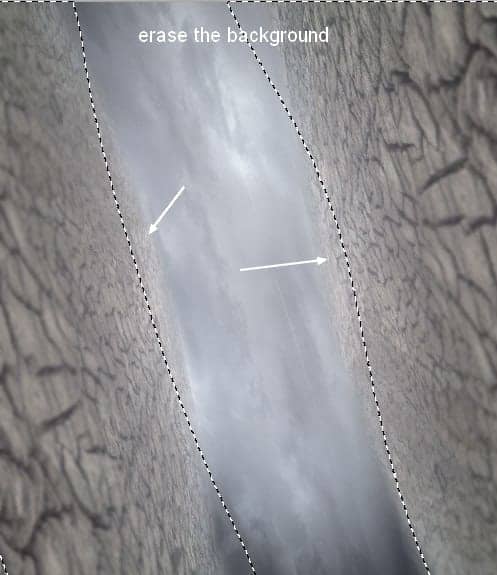
On this layer mask use a soft black brush to erase the background to keep their brightness:
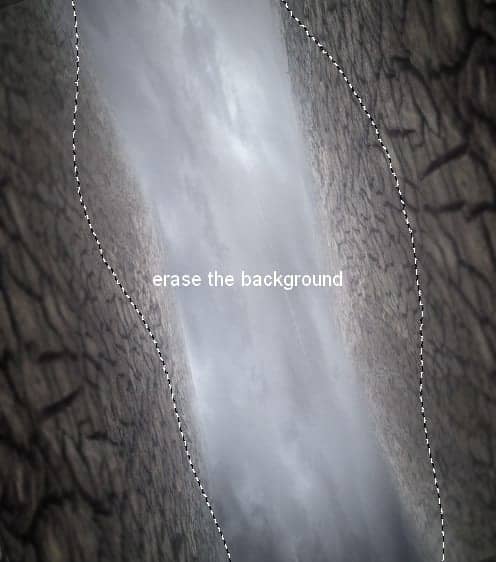
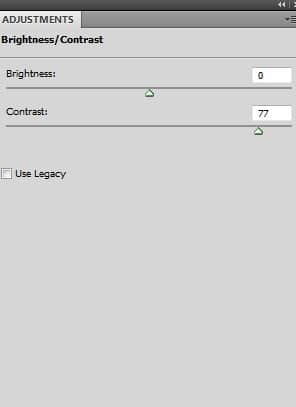
Step 10
I used Brightness/Contrast to increase the contrast of the scene:
On this layer mask erase the background as I don't want it to be affected by this adjustment layer:
Step 11
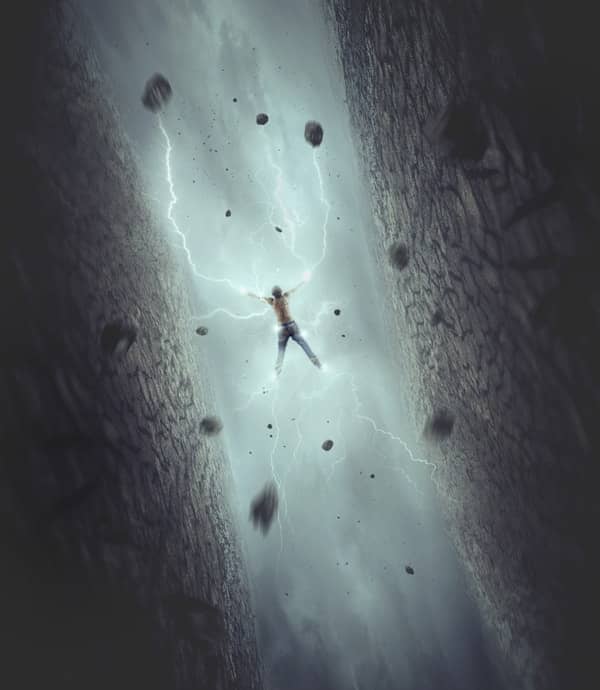
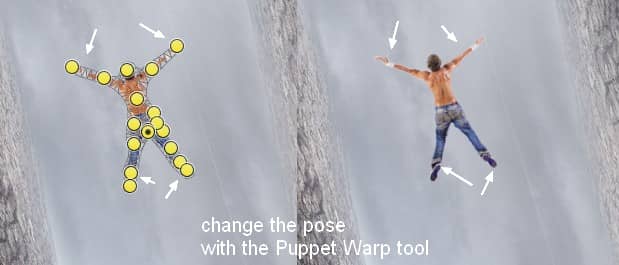
Isolate the man from the background and place him in the space between the grounds:

To create more movement for the man, go to Edit > Puppet Warp. Make the arms and legs wider:
Step 12
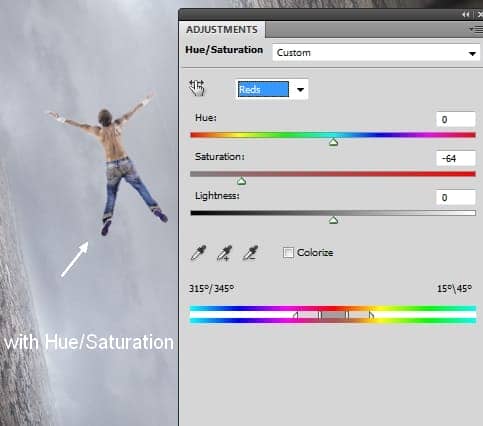
I used Hue/Saturation to desaturate the model a little:
Step 13
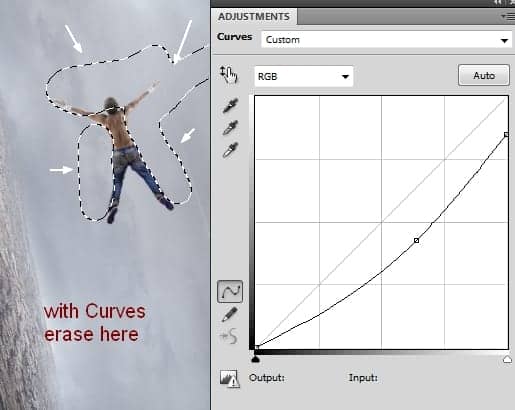
I used Curves to darken the model . On this layer mask use a soft black brush to erase the arms and the man contour, leave the dark only visible on his back :
Step 14
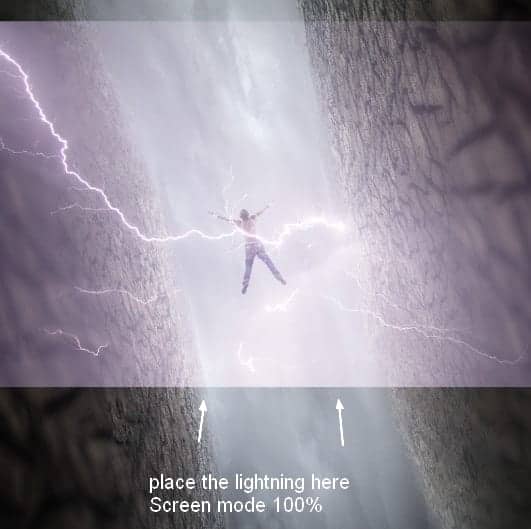
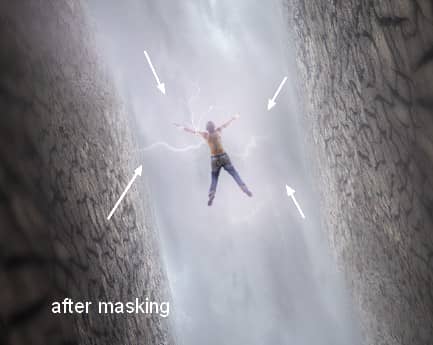
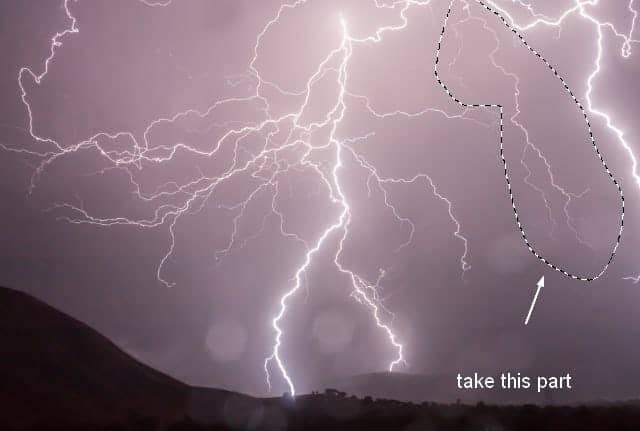
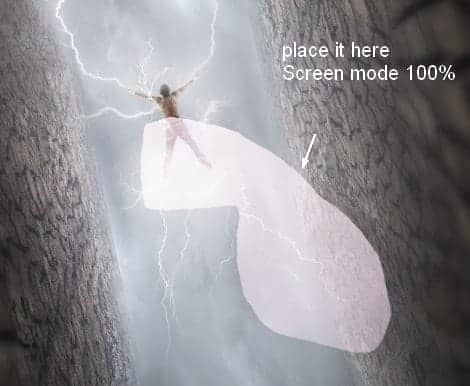
Open the lightning 1 image. Take the lightning part and place it over the middle section of the main document and change the mode to Screen 100%:

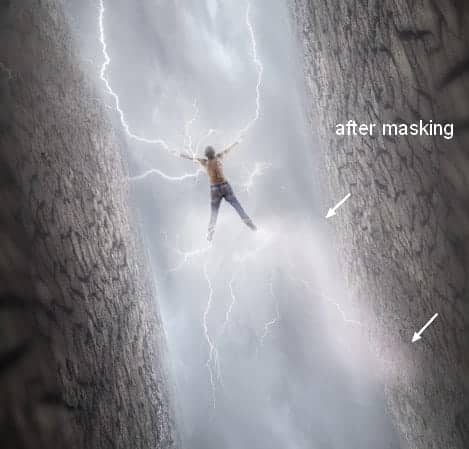
Add a mask to this layer and use a soft black brush to remove the hard edges and the parts on the grounds:
Step 15
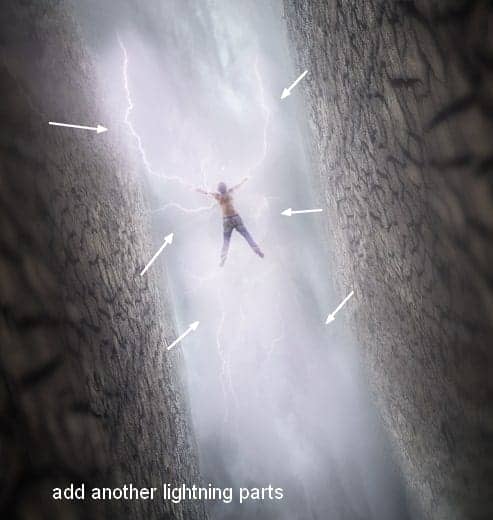
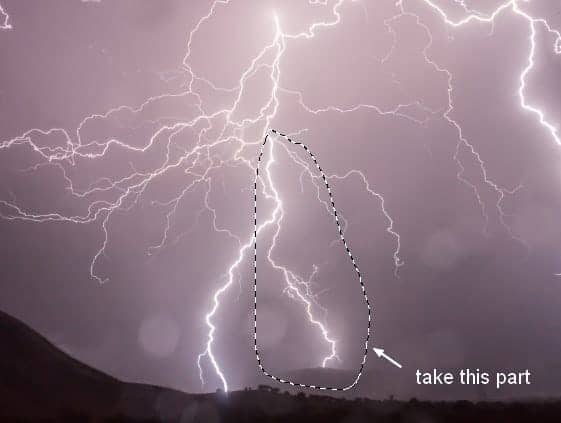
Use the Lasso Tool (L) to select another parts of the lightning to arrange around the man, hide the hard edges with the layer masks. I'm trying to make the man look like holding the lightnings:
Step 16
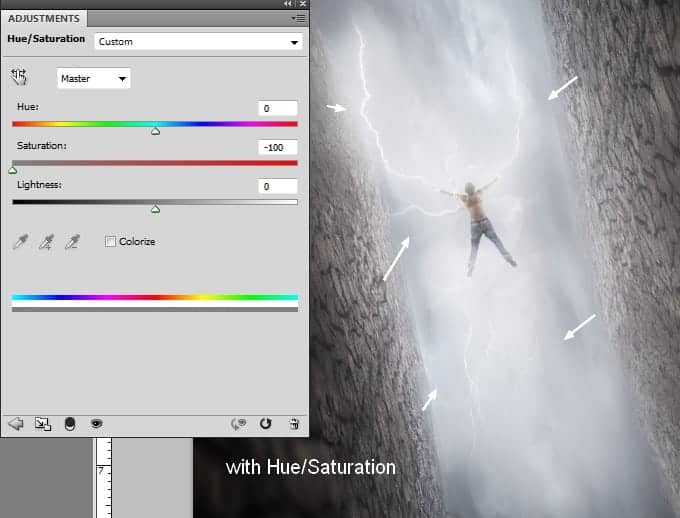
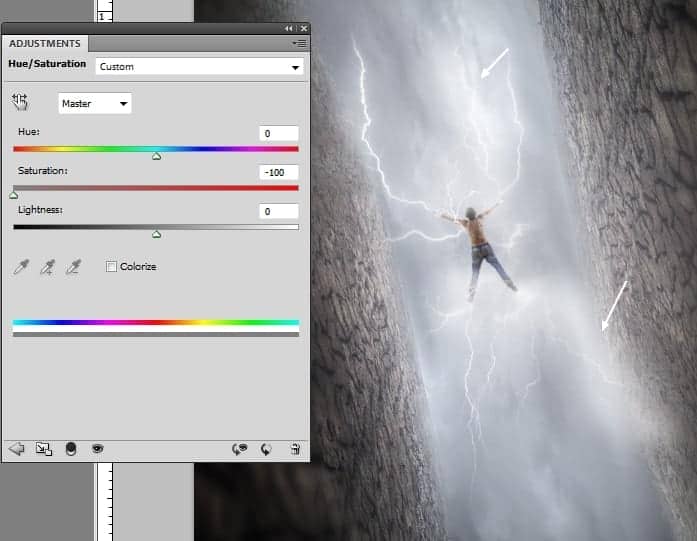
Make a group of these lightning layers and change the mode to Screen 100%. I used Hue/Saturation to desaturate the lightning color:
Step 17
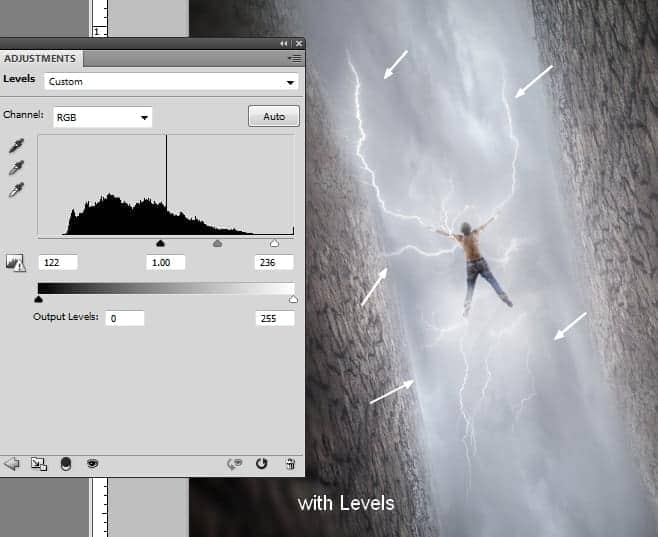
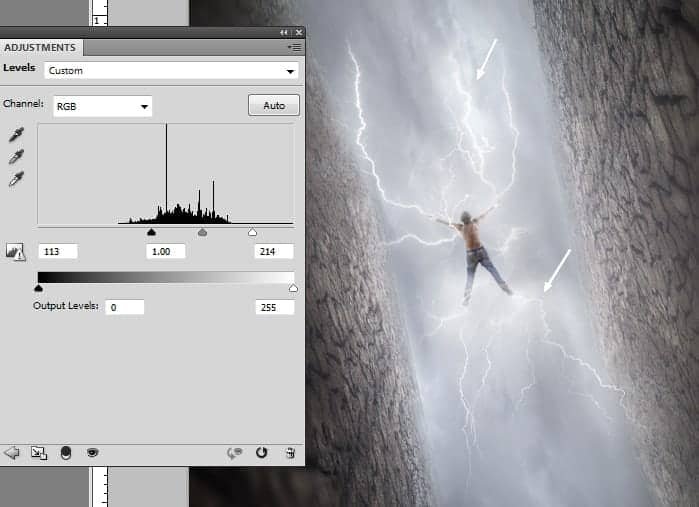
I used Levels to change the contrast and make the lightning effect more visible:
Step 18
Open the lightning 2 image. Use the Lasso Tool to select a lightning part and place it at the bottom of the right leg. Change this layer mode to Screen 100%:
Apply brush masking on this layer mask to remove the hard edges:
Step 19
Take another lightning part and place it above the right arm of the man, change the mode to Screen 100% and use a layer mask to blend it with the other lightning ones:

Step 20
Make a group for these lightning layers, change the mode to Screen 100%. Desaturate them with Hue/Saturation:
Step 21
Use Levels to make the lightnings more visible and realistic:
Step 22
Open the rocks image. Use the Lasso Tool to take the different rocks and arrange them around the man, on the ground, in the sky. I applied Motion Blur with the different angles (around(+ or -) 90 and 60) and Distance from 12 to 25 px (but you can set your own values) to some rocks (especially to the ones near the foreground) to create some movement for the scene:
9 comments on “How to Create a Dreamlike Scene of a Man with White Lights in Photoshop”
Thank you I learned a lot from following this tutorial!
Wow, this is great! Awesome job, love the final result!
Useful lesson. I love all your lessons
Love you bro...! you're awesome.., awesome piece of art
very nice, and very helpfull
here is my version
https://farm9.staticflickr.com/8774/17060403910_a0491b5ffd_b.jpg
Nice tutorial. I followed this tutorial and put my own spin to it. http://fav.me/d8pusfn
Dolan
i like memes
nice