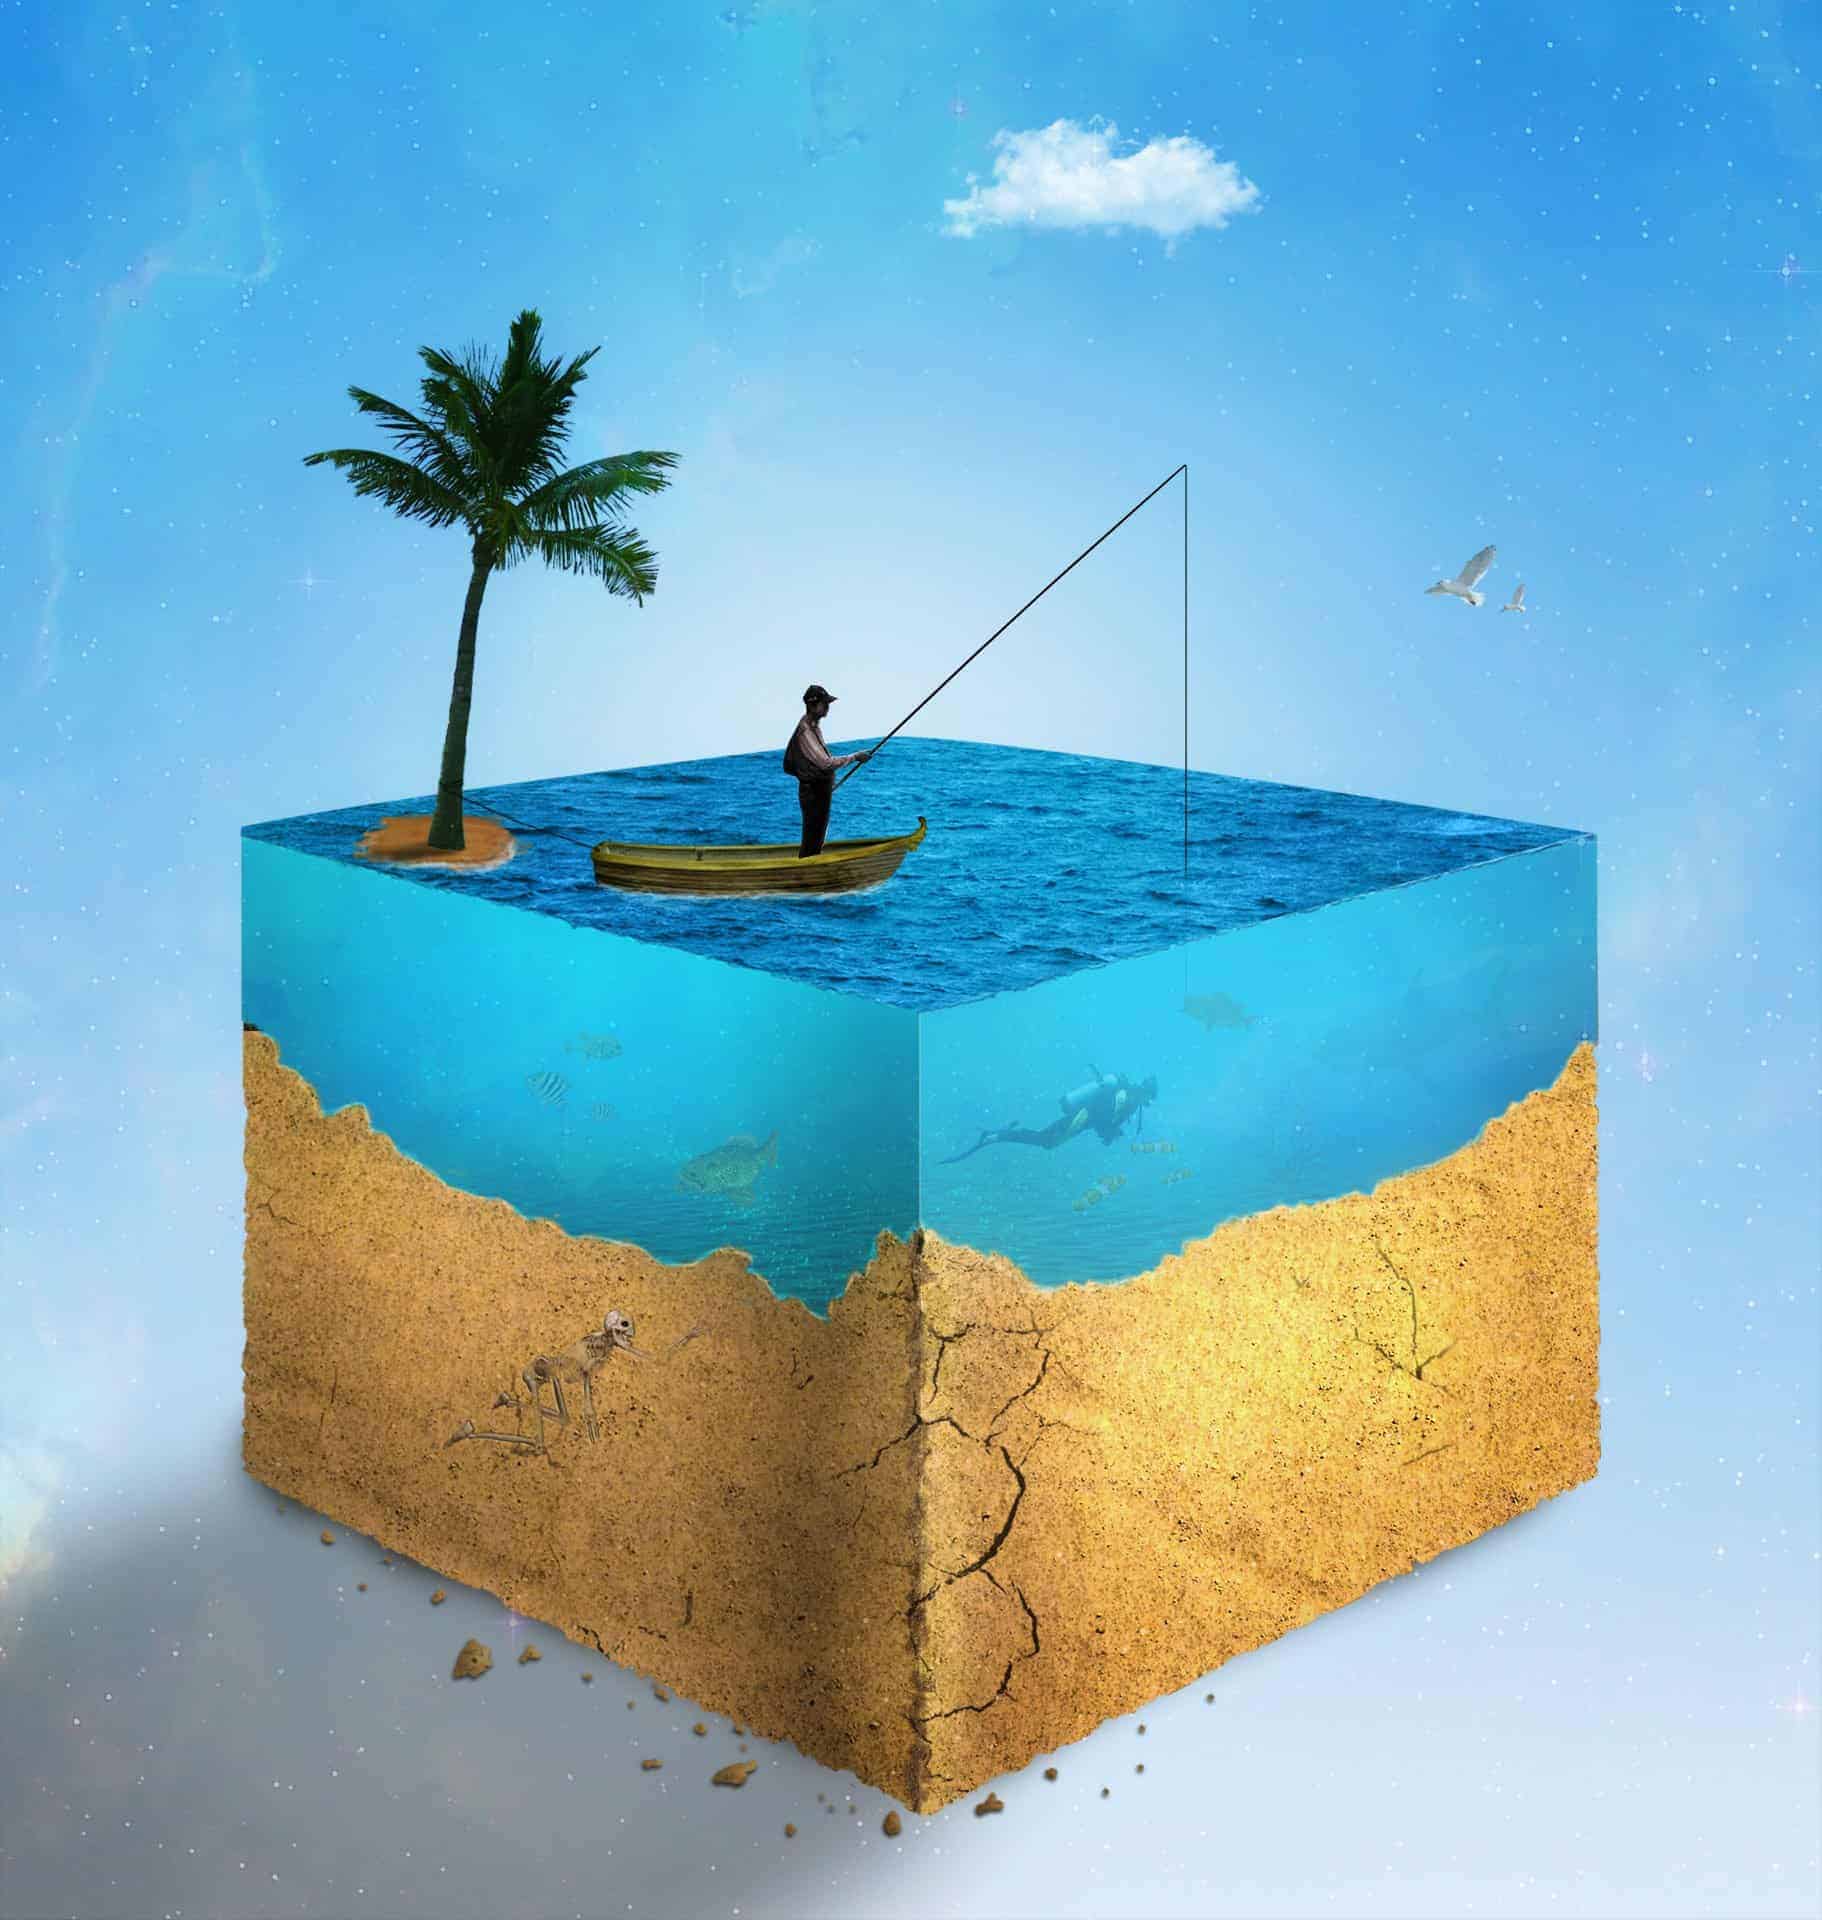


Download Lightroom presets and LUTs, absolutely free. Use the presets to add creativity and style to your photos.
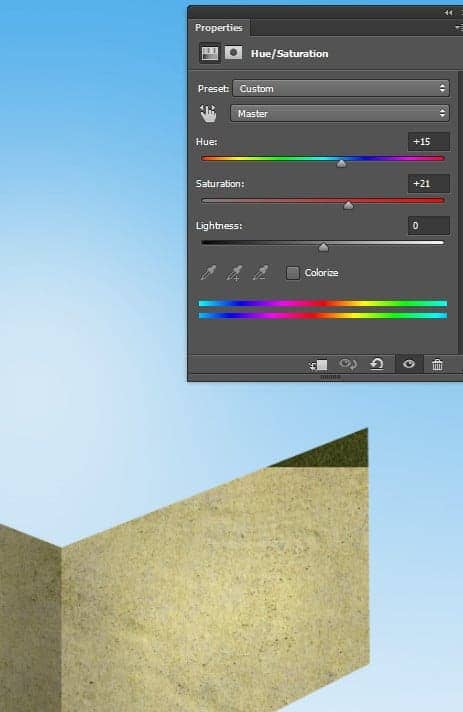
Step 10
Create a Hue/Saturation Adjustment Layer (you can find all the adjustment layers in Layer > New Adjustment Layer > …..) with the settings shown below and place it inside the “Texture” group.
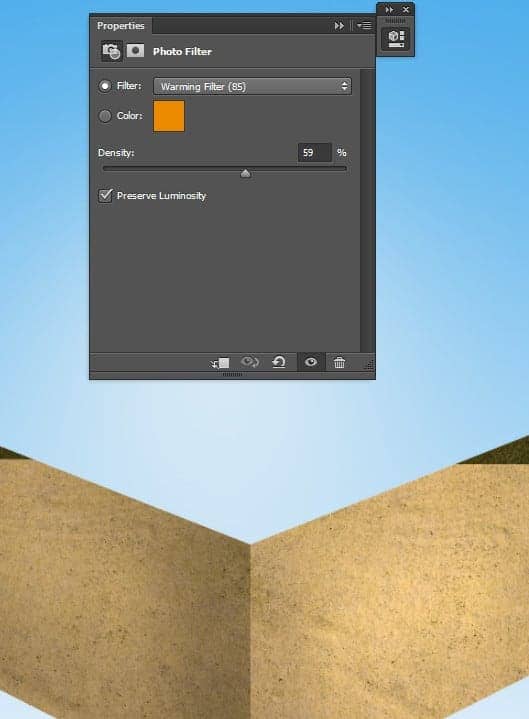
Step 11
Create a Photo Filter Adjustment layer and use a Warming Filter preset to warm up the ground and place it inside the “Texture” group.
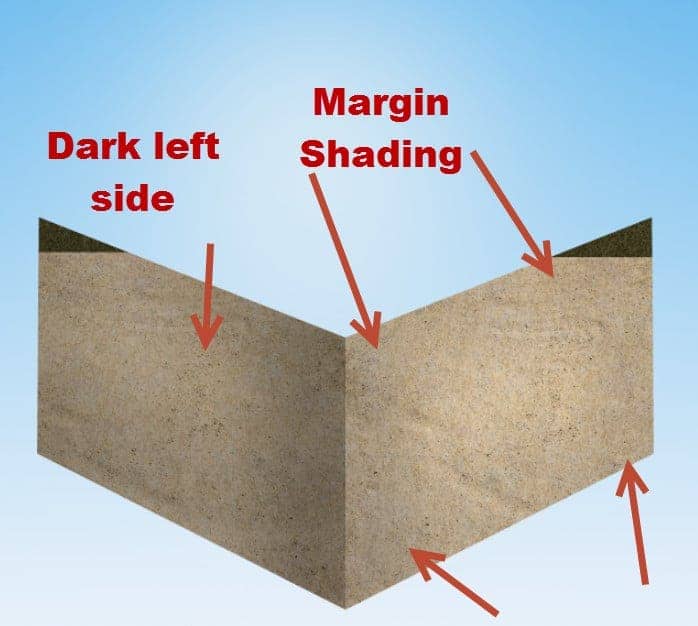
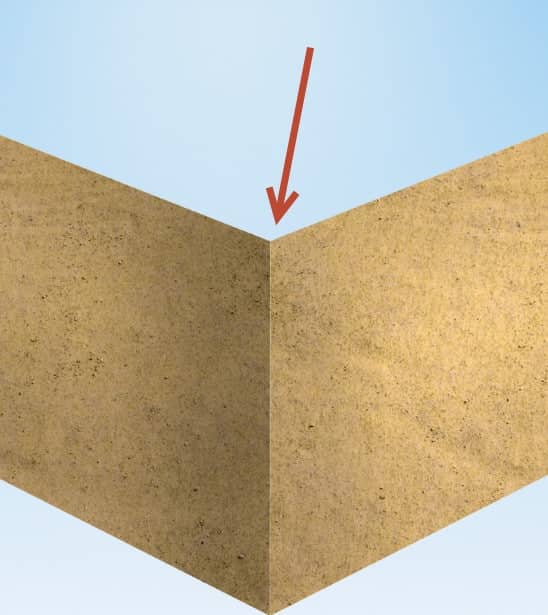
Step 12
Create a new layer and select the standard chalk brush. Lower the size to 2px and the opacity to 50%. Paint some straight white lines on the corners as shown below. In order to paint straight lines click where you want the line to begin and then Shift-click where you want the line to end.
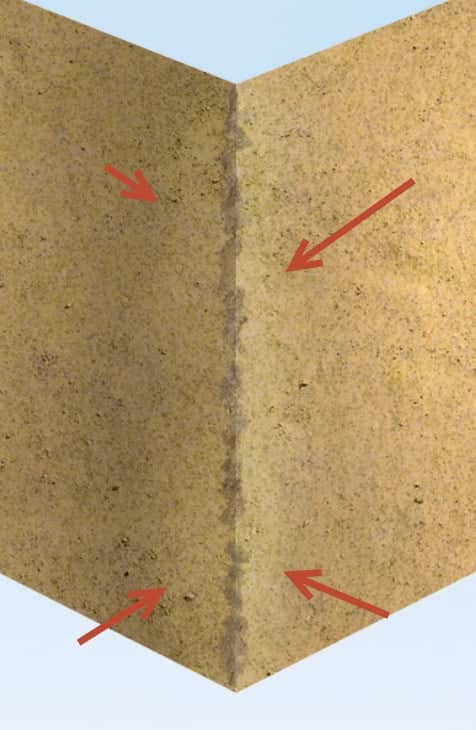
Step 13
Create a new layer and choose the standard chalk brush. Lower the opacity to 50% and the size to 10px and with a dark muddy brown (#73634e) paint some dirt on the corner indicated below.

Step 14
Create a new layer and change the blending mode to Overlay. Lower the opacity to 56%. Choose the standard round soft brush and lower the opacity of the brush to 10%. Paint with white over the corner to give it a bit more volume.
Step 15
Create a Curves Adjustment layer and use the settings shown below to increase the contrast. Place the curves layer in the “Texture” group.

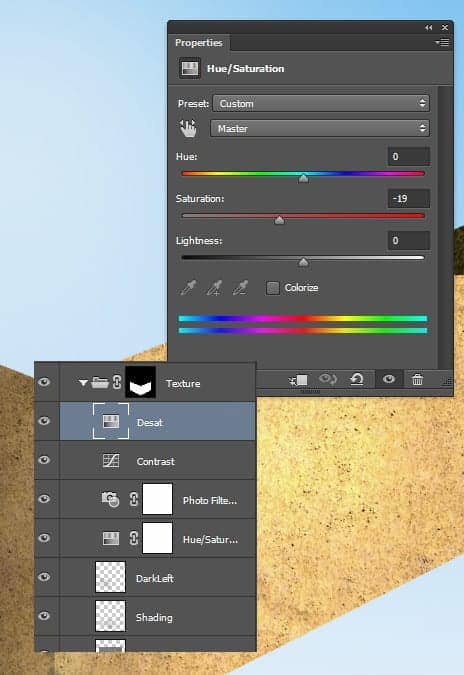
Step 16
The intensity of the ground is a bit too much so let’s tone it down. Create a Hue/Saturation Adjustment Layer and lower the saturation to -19.
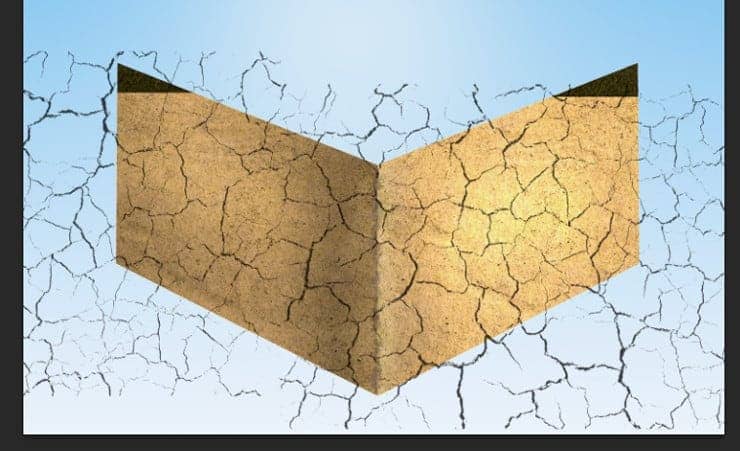
Step 17
Open the file “Cracks”. Select the black cracks ( Select > Color Range and click anywhere on the white area. Press Ok to exit the color range window and press Ctrl + Shift + I to invert the selection) and copy/paste them into our scene. Place the cracks layer on the right side of the ground. Duplicate the cracks layer (Ctrl + J) and move it to cover the left side too.
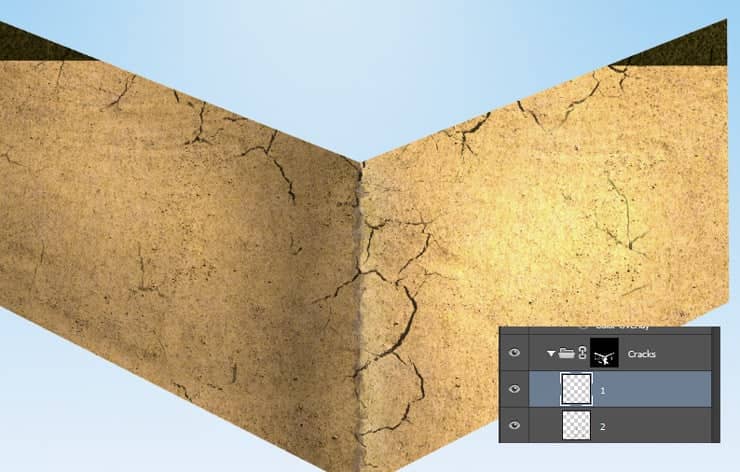
Step 18
Group the two cracks layer together (Shift-click on each and press Ctrl + G) and add a layer mask to the group (Layer > Layer Mask > Reveal All). Now paint with a black brush in the layer mask to hide the unwanted cracks – you should have something like the image below after you’re done.
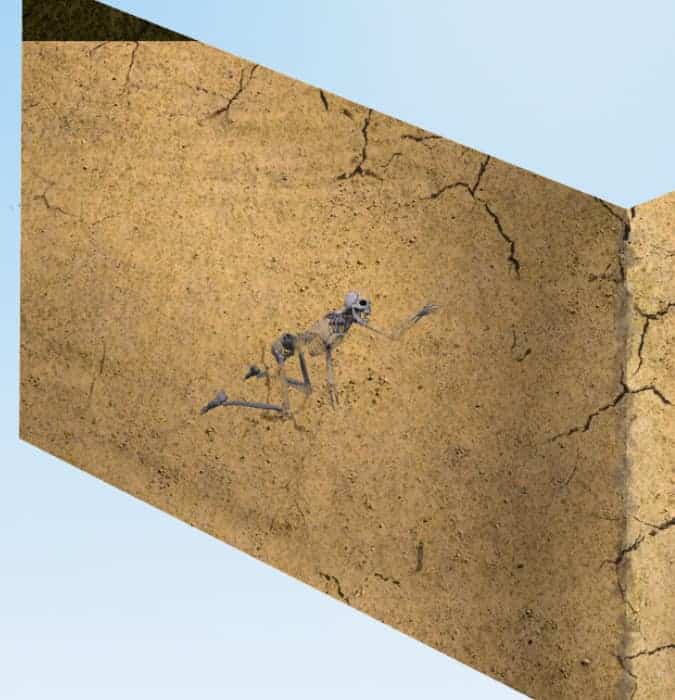
Step 19
Open the file “Skeleton”. Select all and copy paste in our document. Place the skeleton as shown below and don’t forget to convert it into a smart object.
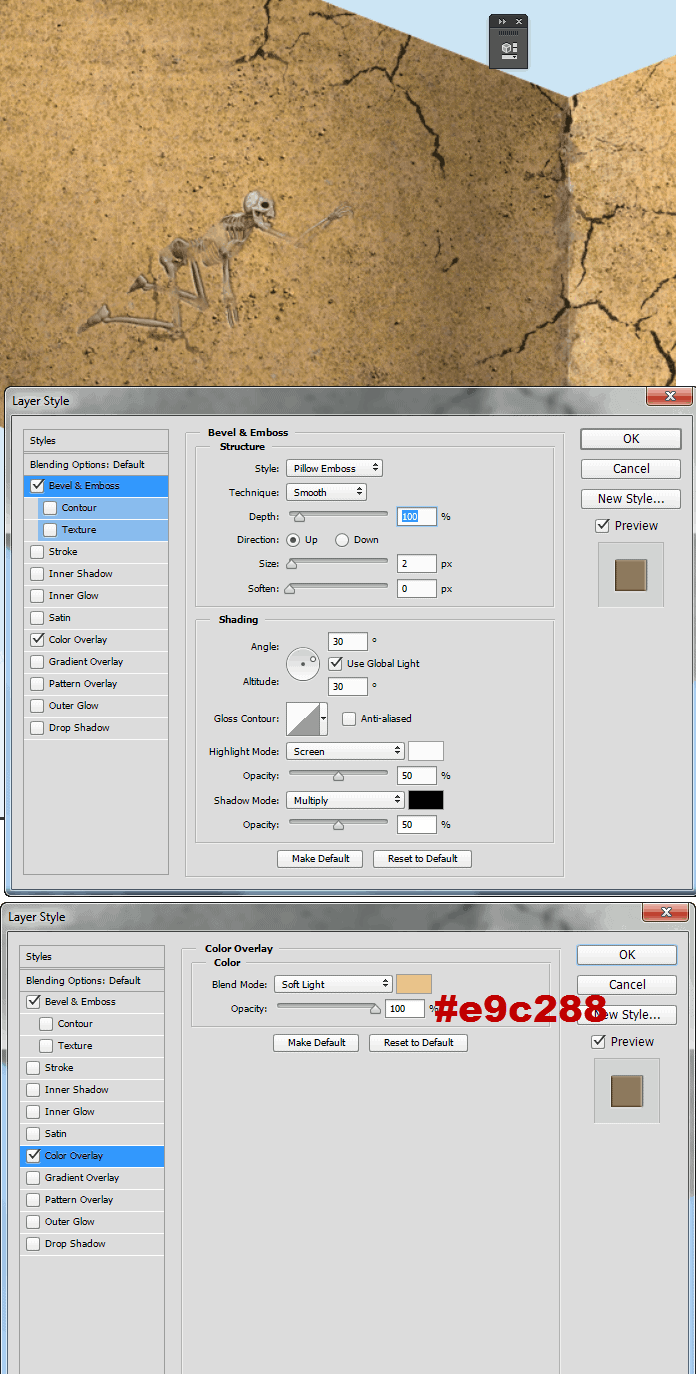
Step 20
Right click the skeleton layer and choose Blending Options from the drop down menu. Use the settings shown below to make the skeleton look like he’s belonging to the ground.
Step 21
With the standard Chalk brush paint some crumbs around the ground as shown below.
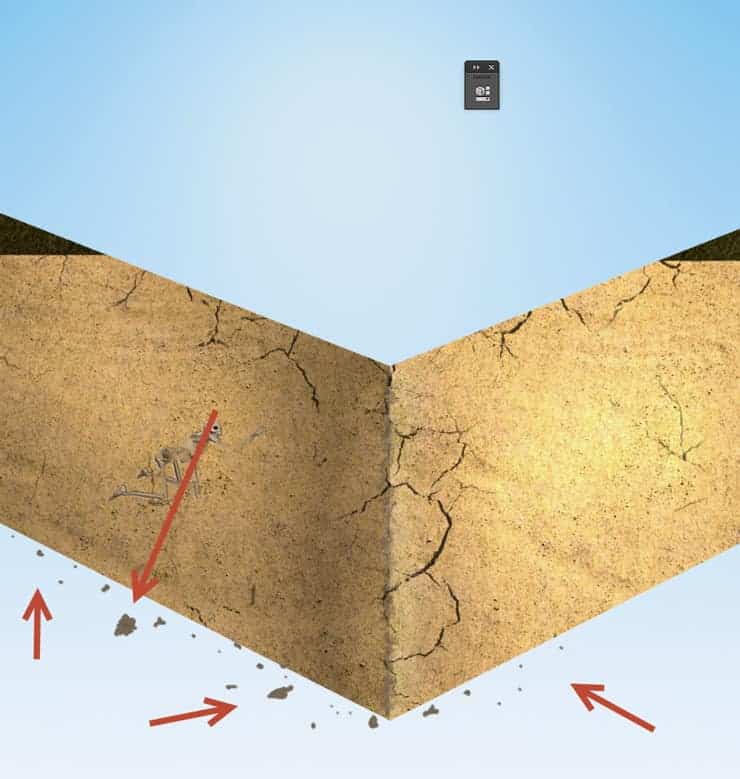
Step 22
Double click the crumbs layer and use the settings shown below to give the crumbs more volume and a 3D look.
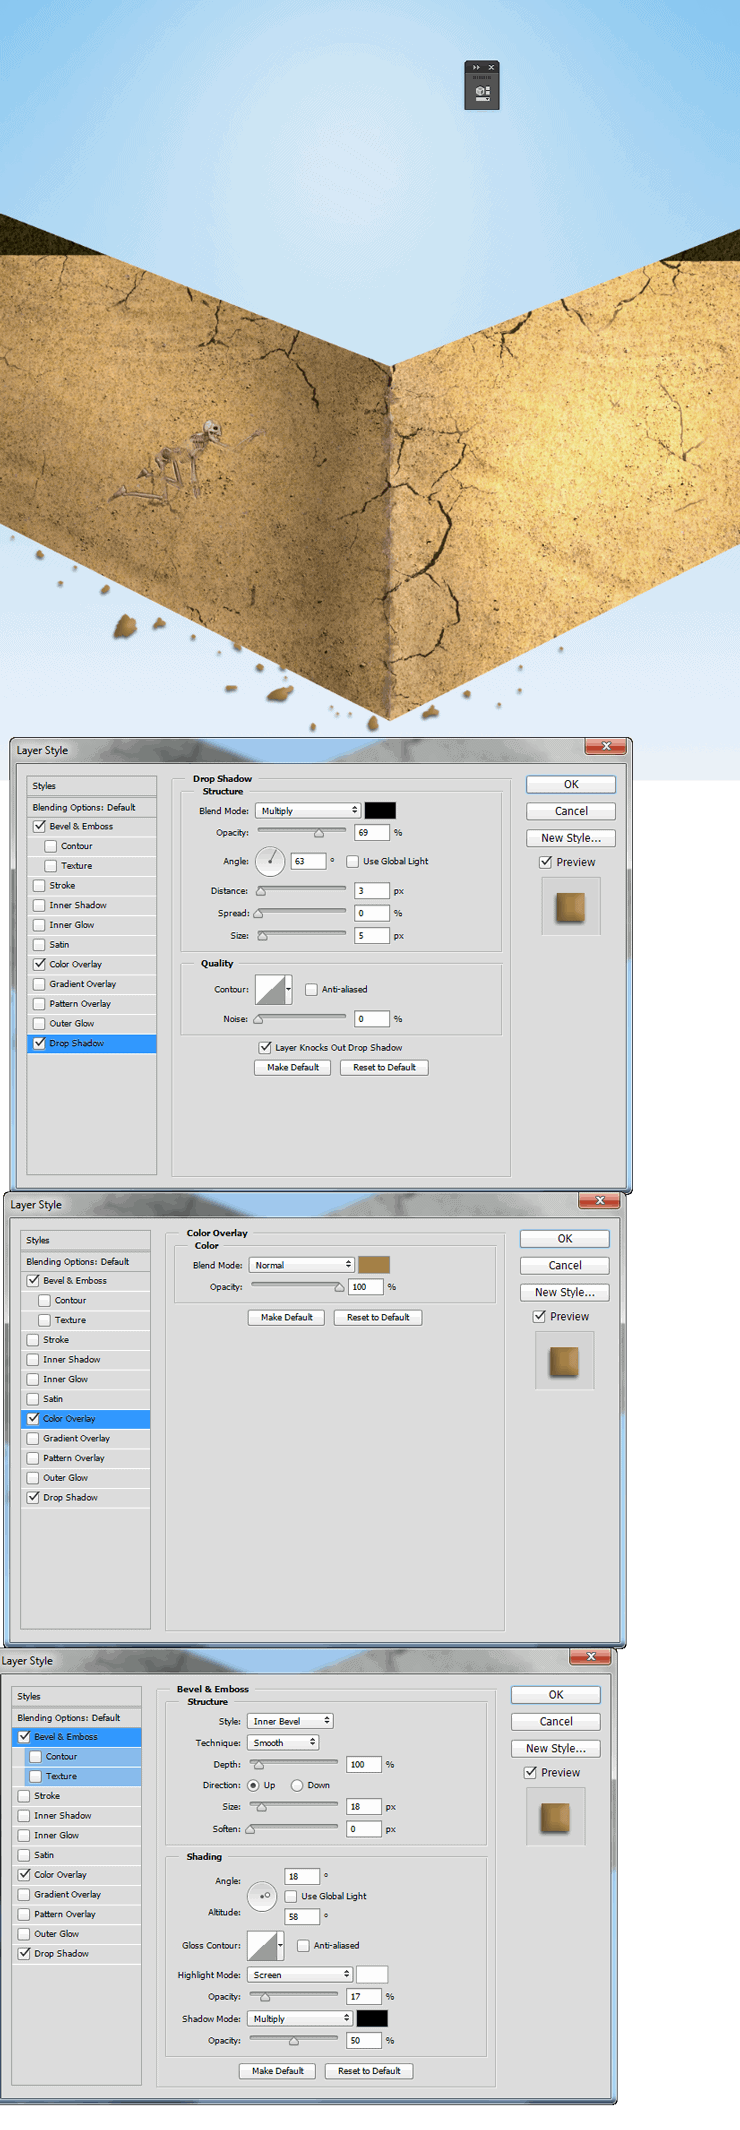
Step 23
With the same chalk brush paint with black some subtle details on a new layer over the crumbs.

Step 24
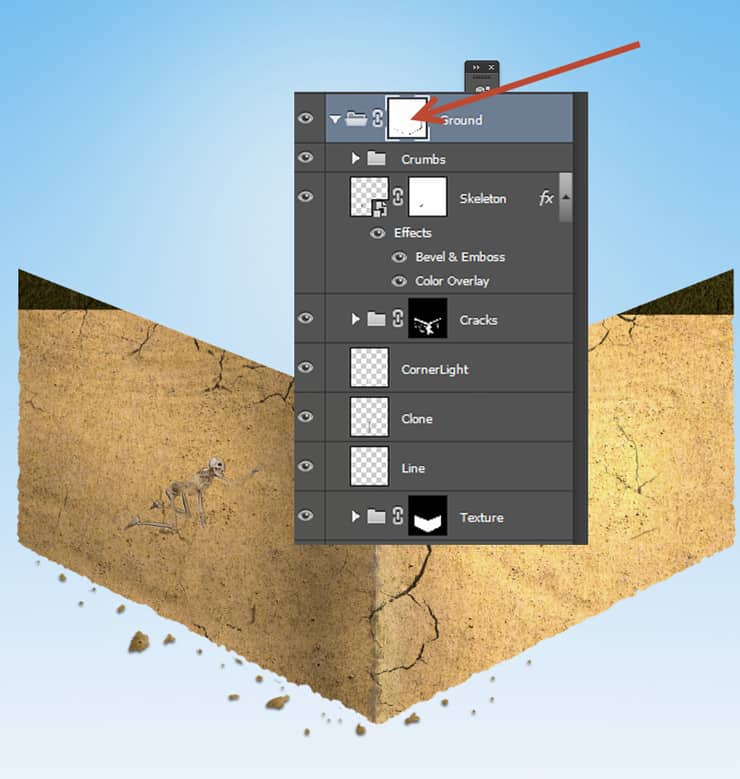
Group all the layers related to the ground together and name the layer “Ground”. Add a layer mask to the group (Layer > Layer Mask > Reveal All) and use the standard chalk brush to nip here and there (paint with black in the layer mask) in order to break the boring straight lines of the ground.
Step 25
Create a new layer and choose the standard round soft brush. Increase the size to 200px and lower the opacity to 50%. Move this layer below the “Ground” layer in the layer palette and paint some shadow as shown below.
15 comments on “How to Create a Realistic Water Cube in Photoshop”
thanks
wow
hi
Well - a floating island... -.-
so fantastic (Y)
cool with good aesthetic.
Amazing tutorial!
Hi
Sorry correct link is here: https://www.photoshoptutorials.ws/photoshop-tutorials/photo-manipulation/create-realistic-water-cube-photoshop/
thank you...works perfect now :)
Do have video?
hi dear
I have the same problem
I got the same error...
i can't open up this tut...says it has to many redirects or there is a problem with the server...any other people having the same issue?