Make your artwork look like they're from an alternate universe. These Cyberpunk presets work with Photoshop (via the Camera Raw filter) and Lightroom. Download all 788 presets for 90% off.
Step 14
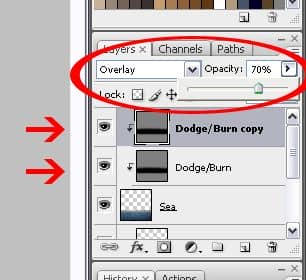
Duplicate the layer (Ctrl/Cmd+J) then reduce the opacity of this new layer to 70%. The layer should be clipped to the previous layer as well – if it isn’t, right-click on the layer and choose Create Clipping Mask.
Step 15
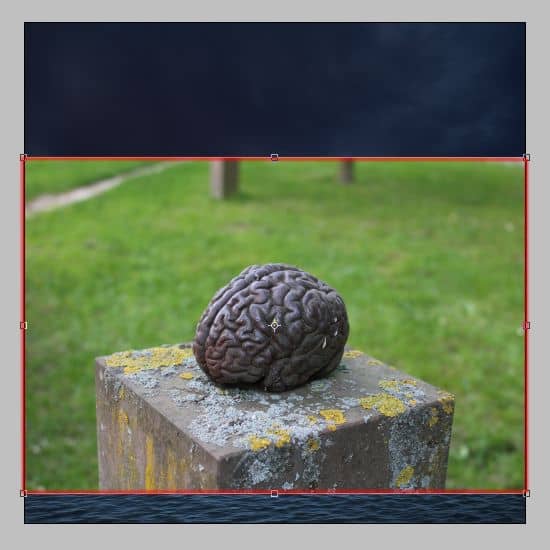
Open the Brain image then copy and paste it to your main document. Use the Free Transform tool (Ctrl/Cmd+T or Edit > Free Transform) to scale it like shown in the image below. Hold shift to constrain the proportions.
Step 16
Create a cutout of the brain. There are many ways of doing this such as using the Lasso Tool (L).

Step 17
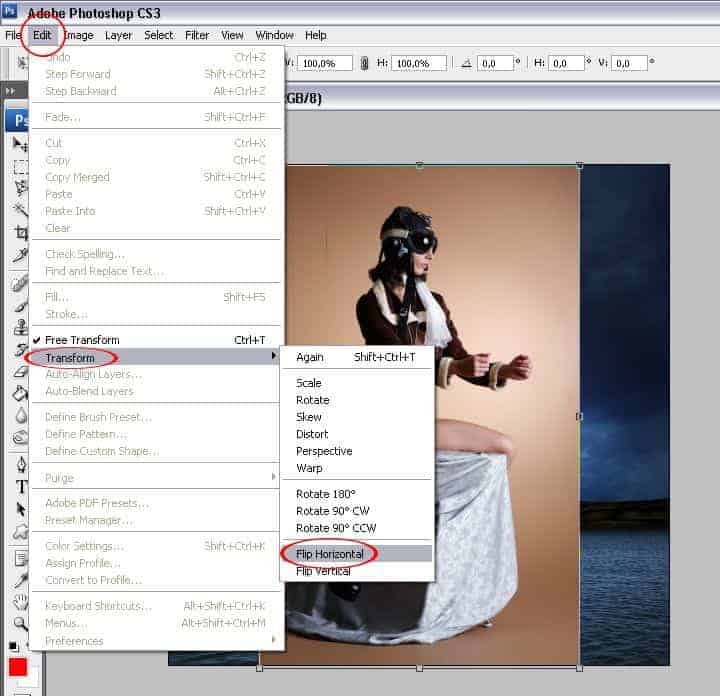
Open the image of the model then copy and paste it to your main document. Use the Free Transform tool (Ctrl/Cmd+T or Edit > Free Transform) to scale the image like shown below then go to Edit > Transform > Flip Horizontal.
Step 18
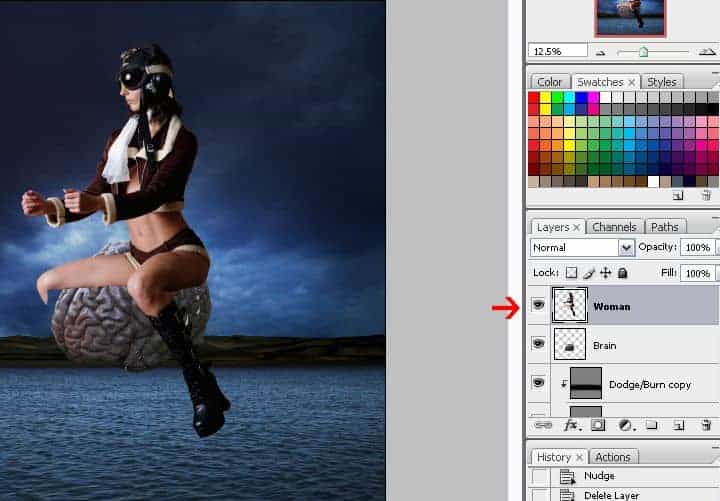
Create a cutout of the model like shown in the image below. Erase her right leg to around the knees.
Step 19
Use the Free Transform tool (Ctrl/Cmd+T or Edit > Free Transform) to scale the model so that it looks seated on the brain.
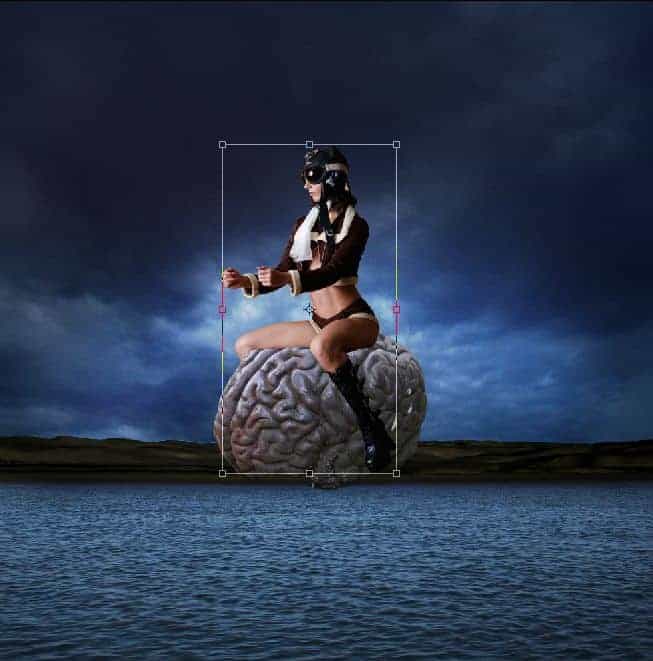
Step 20
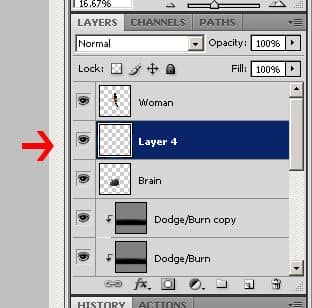
Create a new layer (Ctrl/Cmd+Shift+N or Layer > New > Layer) and position this layer below the layer of the model.
Step 21
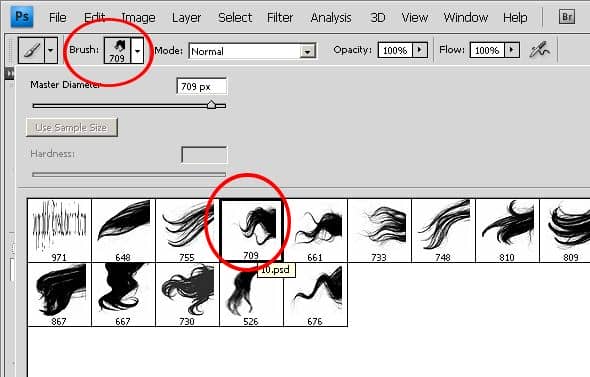
Select the Brush tool (B) then load the brush shown in the image below.
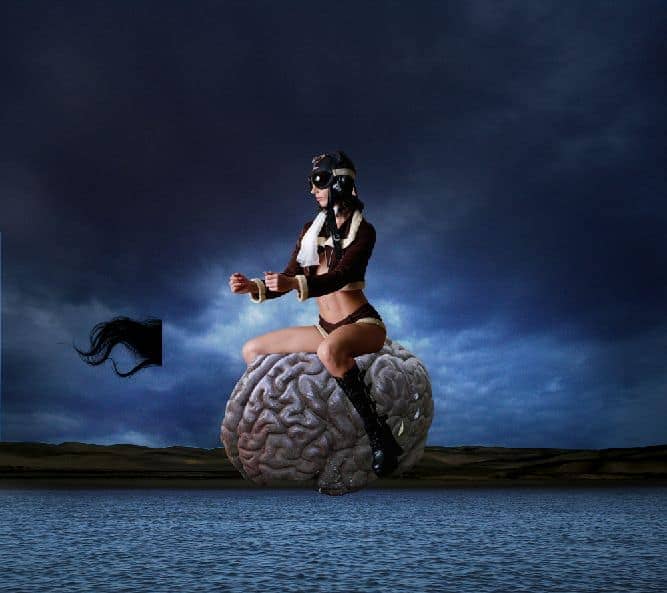
Paint the hair by clicking once anywhere. Make sure that your foreground color is black and brush opacity set to 100%.
Step 22
Rename the layer to “Hair” then go to Edit > Transform > Flip Horizontal.
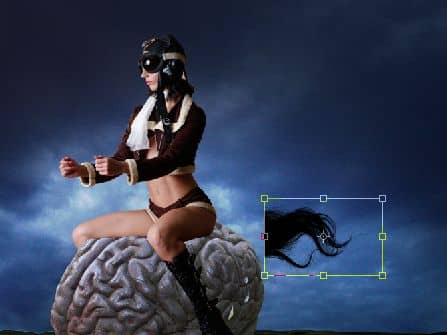
Now rotate and position her hair like shown in the image below. Once you’re done, you can duplicate the layer (Ctrl/Cmd+J) and resize it to add more hair. If you do this, make sure you merge both of the layers back together by pressing Ctrl/Cmd+E (with the top hair layer selected).
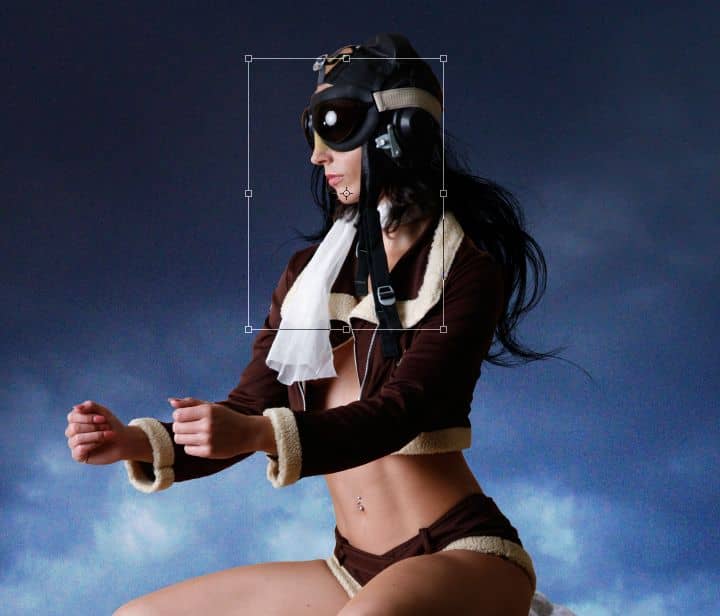
Step 23
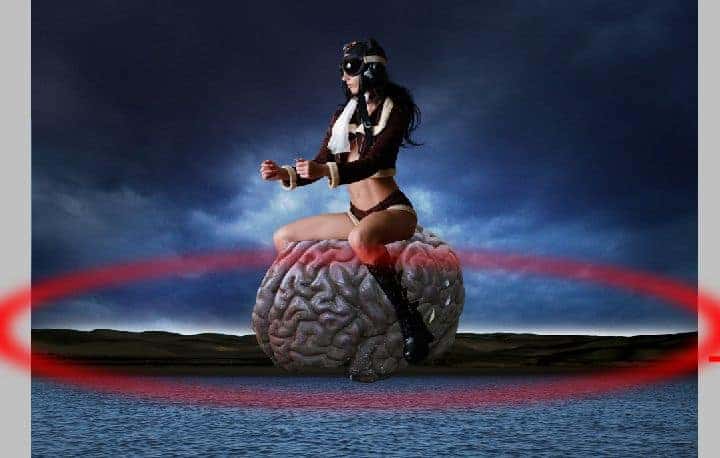
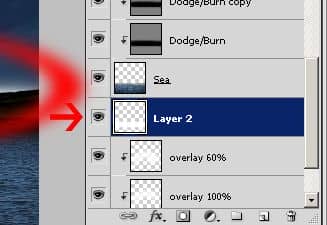
Create a new layer below the Sea layer. Set your foreground color to white then select the Brush tool. Using a soft brush (0% feather) with a brush size around 600 pixels, paint around the landscape like shown in the image below.
Step 24
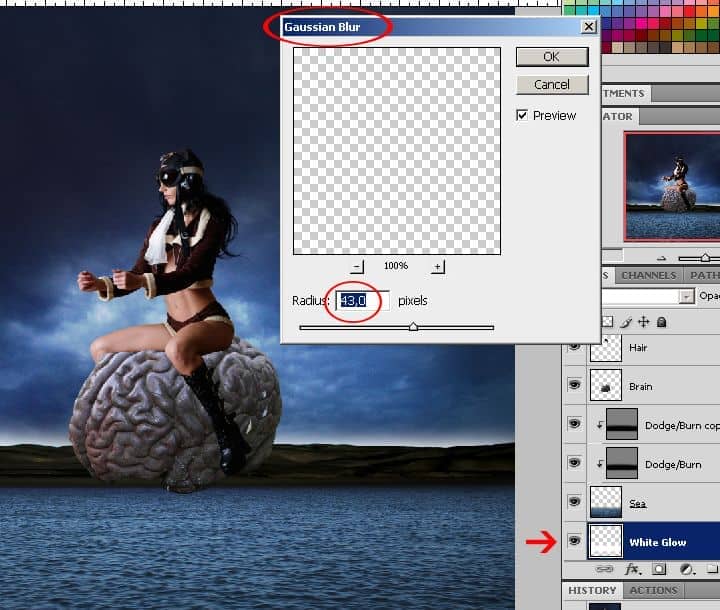
Rename this layer to “White Glow” then go to Filter > Blur > Gaussian Blur. Set the radius to 43 pixels then click OK.
Step 25
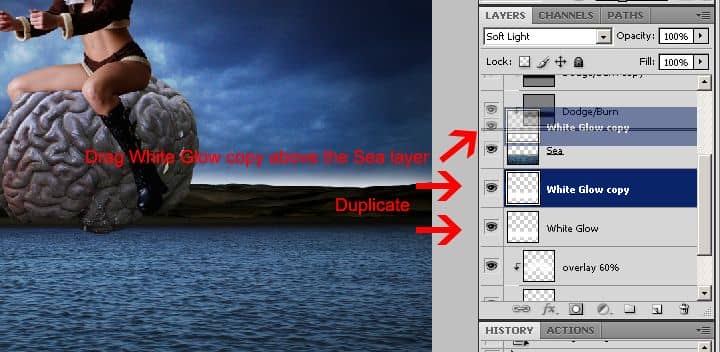
Duplicate this layer then drag the new layer above the Sea layer. Make sure it is clipped to the layer below – if it isn’t, right-click and select Create Clipping Mask. Set the blending mode to Soft Light.
Step 26
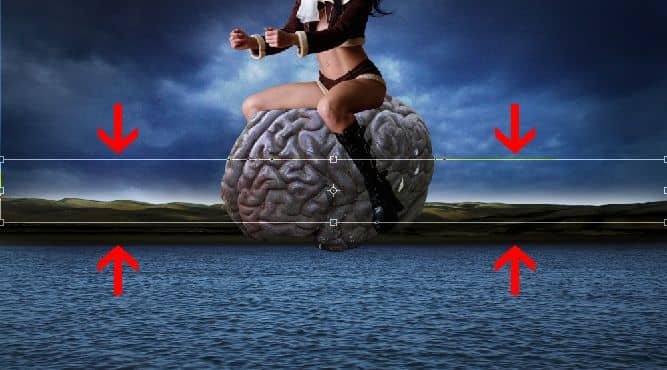
Activate the Free Transform tool (Ctrl/Cmd+T or Edit > Free Transform). Scale the image like shown below.
Step 27
Select the first Dodge/Burn layer.
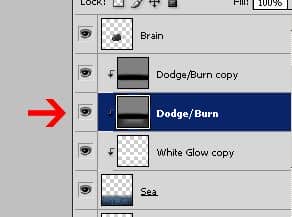
Use the Burn tool (B) to burn the area shown in the image below. I used a brush size of 1300 pixels with the range set to midtones and exposure at 100%.

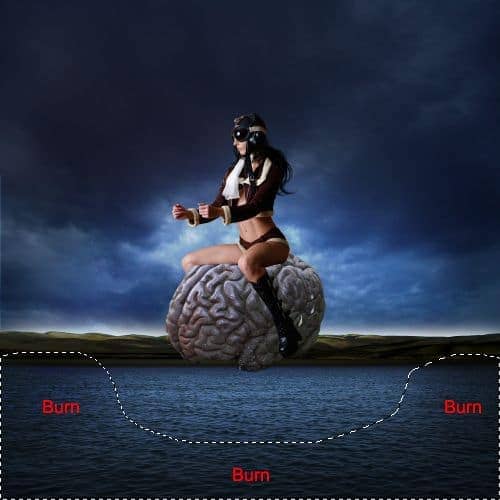
Step 28
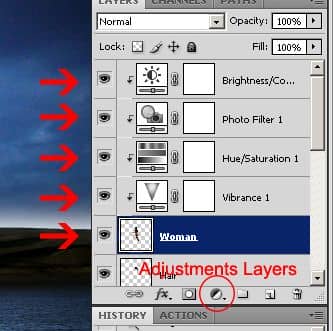
Select the layer with the model. Go to Layer > New Adjustment Layer > Vibrance. Apply the settings as shown below.
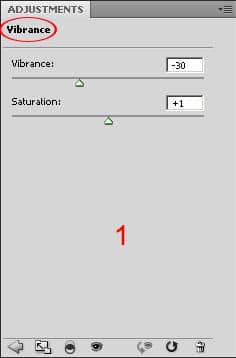
Step 29
Go to Layer > New Adjustment Layer > Hue/Saturation. Apply the settings as shown below.
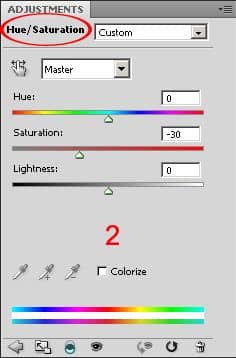
Step 30
Go to Layer > New Adjustment Layer > Photo Filter. Apply the settings as shown below.
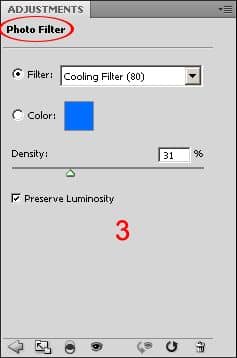
Step 31
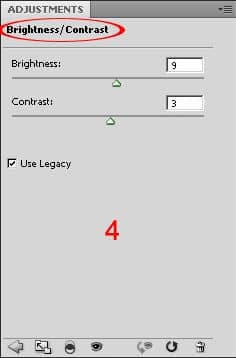
Go to Layer > New Adjustment Layer > Brightness/Contrast. Apply the settings as shown below.
Step 32
Select the four adjustment layers (Hold Ctrl/Cmd to select more than one layer) then right-click and choose Create Clipping Mask.


19 comments on “How to Create a Surreal Flying Brain Photo Manipulation in Photoshop”
Wonderful tutorial. thank you so much for sharing it!
This is very nice! Wonderful tutorial.
A very smart approach to explain the things,like your step by step tutorial.Thanks for sharing.
nice tutorial, can you send me more tutorial please on my email, thanks! bcoz i've wanted to be as good as you :)
Thanks for this tutorial...I got stuck in some parts, specially on step 23 and also I skip or did some steps a bit different (layer order) but result was almost the same (except for the glow above the mountain)...anyway Im happy to be able to do this without much issue since I started learning photoshop one month ago. tks again, Adriano
!
Dani, I didn't know you did tutorials outside of dA - this is awesome!
<3
Ivy
Results are nice.
Keep posting good tuts
nice bro!...
Wow! This is very nice Bro! invited eko15_p
@DzulmarEGG eko15_p Thank you so much for the attention!
Thanks
Thanks
@Ayaron You're welcome!
Wonderful! But it's quite hard for a beginner like me.
@ PBX I understand, but breathe... take your time and try to do it slowly, I try to build my tutorials well detailed, step by step, just try, I believe you! :D
Wonderful, Wonderful tutorial. So creative and interesting Technics. Thank you for sharing.
@nue110 Thank you for your kind words, dear!
Wonderful tutorial, very beautiful and creative thank you so much for sharing it!
@Nully Thank you so much, hope this tutorial can be useful.