
Turn any photo into a dot grid artwork with these Photoshop actions. You'll get great results with dots that change size. They get larger in brighter areas and smaller in darker areas. Free download available.

Open the group that we just created by clicking on the arrow next to it. Then click on the first layer of the group and use the Free Transform Tool (Ctrl/Cmd+T or Edit->Free Transform) to resize, move and rotate the rope.
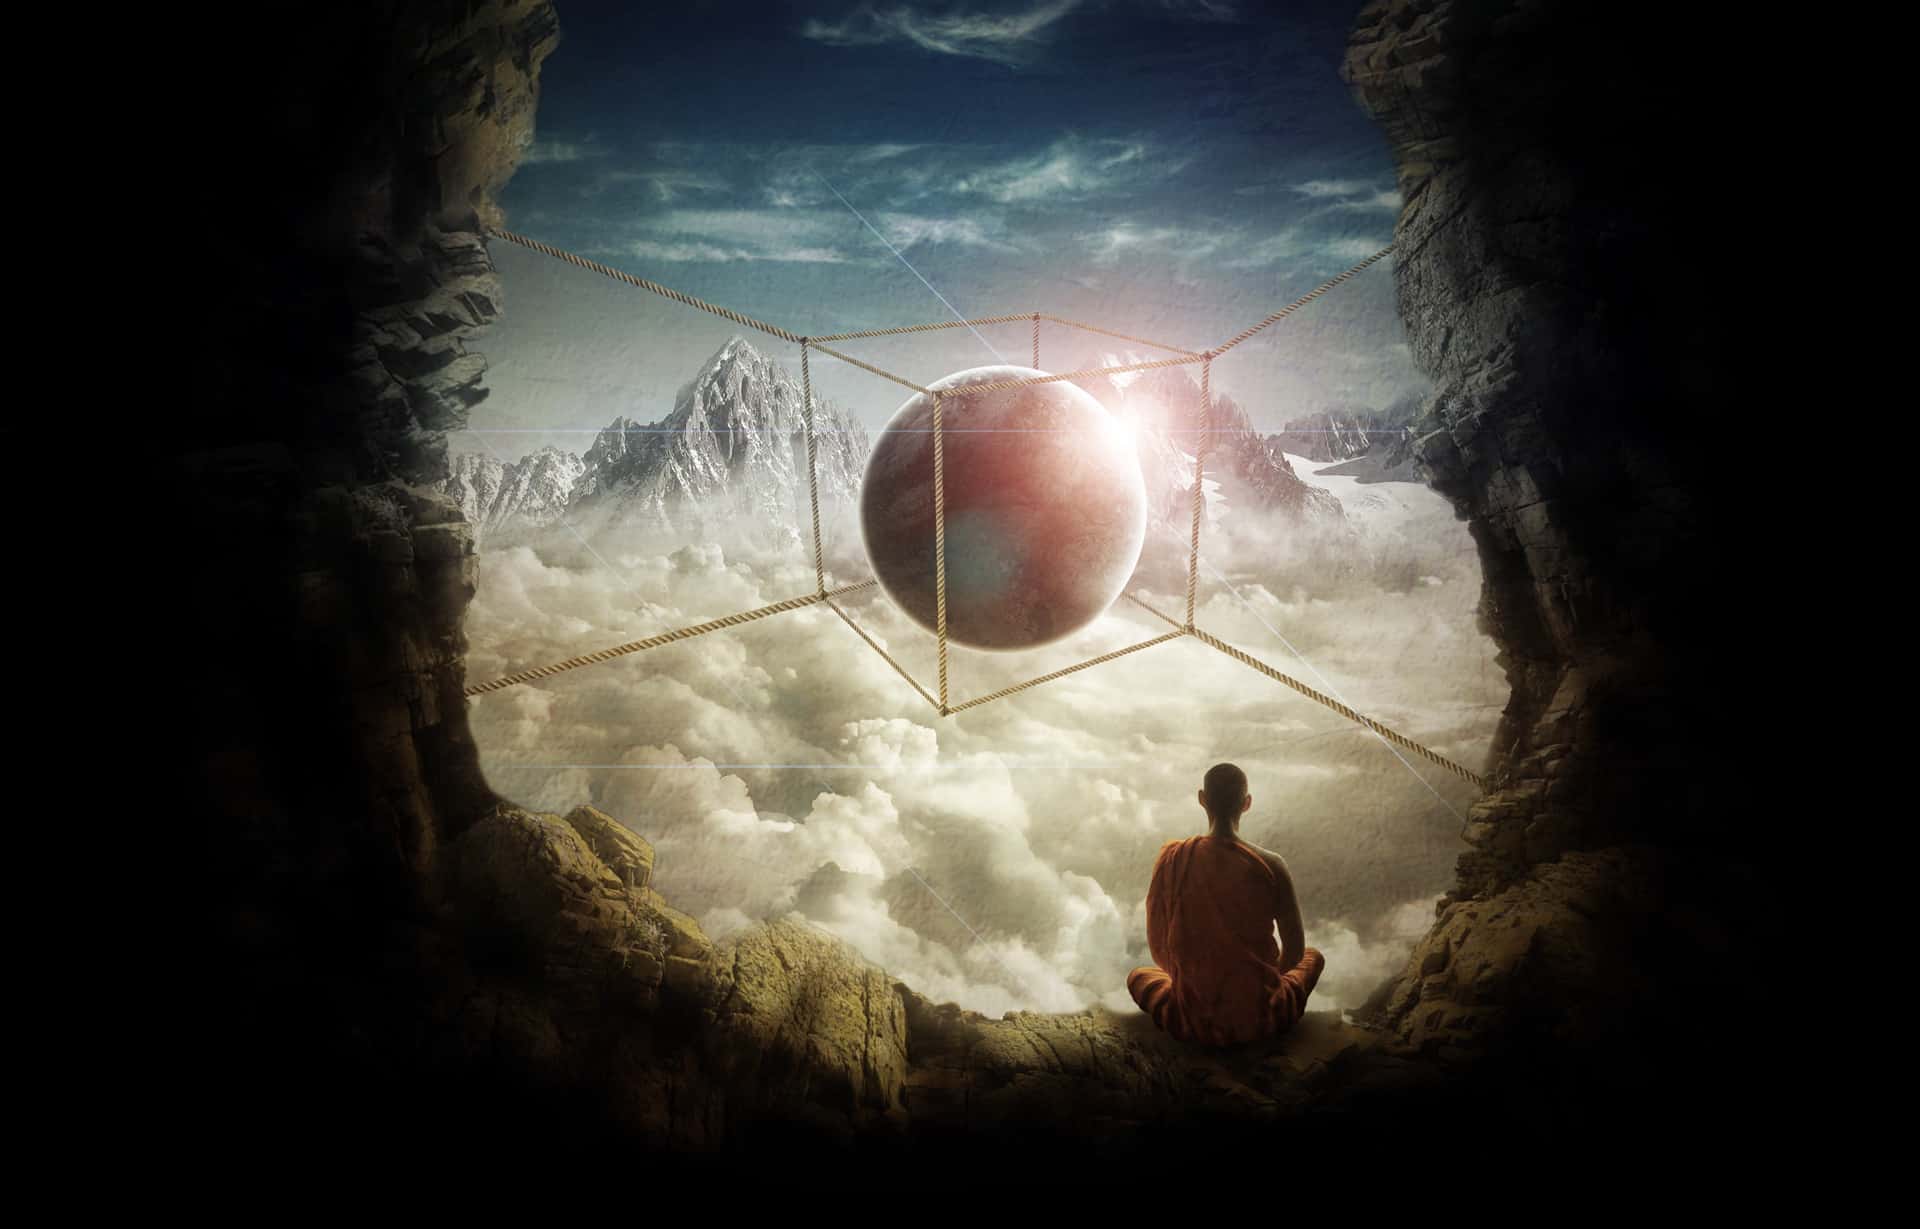
You don’t have to create a design just like mine if you don’t want to, you can use your imagination. But if you want to put the ropes in the exact same places I did, here’s my step-by-step:


And here’s how my scene turned out in the end:

And how my layers panel is right now:

Step 11: Adding the knots
Let’s put some details into our ropes. Go to File->Place and select the knot stock.

Now get the Quick Selection Tool (Shortcut:W) and try to make a selection around the knot only. Don’t worry if the selection is not perfect, it doesn’t need to be, you can fix it later. Here are some pointers on the Quick Selection Tool:
· Click somewhere in the image to add to the selction
· Hold Alt/Opt and click somewhere in the image to deselect that area


After you made the selection, create a new Layer Mask to that layer by clicking on the third button of the layers panel:

With the knot selected, use the Free Transform Tool Again (Ctrl/Cmd+T or Edit-> Free Transform) to move, resize and rotate the knot to one of the corners of the cube:
Here’s how it looks from distance:

Now repeat that process that we’re used with, make 6 copies of this know layer (one for each visible corner of the cube) by dragging this layer to the New Layer button or by pressing Ctrl/Cmd+J six times.


Using the Free Transform Tool (Ctrl/Cmd+T or Edit-> Free Transform) on each of these knot layers, resize, move and rotate them into each corner of the cube, like we’re used to do.


After that, create a new group with all of these knots (holding Shift to select them all and dragging them to the New Group button or by hitting Ctrl/Cmd+G), and name this group Knots.


And we’re done with this step! This is what your image should be looking like right now:

Step 12: More adjustments to the ropes
Let’s add some adjustments to all the ropes that we created. First, click on the Knots group and drag it to the “Ropes in front” group. Just make sure that the knots group stays on the top of the “Ropes in front” group.
29 comments on “Create a Surreal Photo Manipulation of a Monk in the Caves”
Good job Awesome work
u're wron
Beautifully done.
Love this TUT! it took me a couple of hours but well worth the end result. Great job!
Please re uploaded PSD file because when i click on download showing 404 error, this is best work for me i want check how did you do this
Thanks a lot, I learn a lot form this tutorrials
Wow. Thank you for sharing this experience with us...........and for the challenge.
Thanks for this great tutorial. One of the best I found so far. But I do have a question, since one step doesn't work out like it should. I have finished the cave and put the layers in a Group Folder as the tutorial says. The next step would be the cave lighting layer. But when I try to create it, Photoshop won't let me add a clipping mask. For some reason it won't do that above a group folder. To help myself I merged all cave layers into one, that way it works, but of course I can't change any details now, which is a bit annoying. I would be glad if you or someone else could tell me what I've been doing wrong. I use Photoshop CS4.
Hey man. Thank you so much for this awesome tutorial; thanks for being so specifici with everything. Here is what I did following your instructions, hope you like it:
https://www.facebook.com/photo.php?fbid=472778602840862&set=a.317236738395050.75554.100003261792559&type=1&theater
Regards from Mexico.
Excellent tutorial! I can't believe I did it! Thank you for such perfect instructions! I learned a lot!
nice
Very nice examples. Thanks.
i love u jerry
muawwwwww!!!!!!!!!!!!!!!!!!!!!!!!!!!!!!!!!!!!!!!!!!!!!!!
tzup@x!!!!!!!!!!!!!!!!!!!!!!!!!!!!!!!!!!!!!!!!!!!!!!!!!
Oh great! Thank you.
Great tutorial =)
Thanks a lot !
Here's my try : http://gohusdesign.com/surreal.html (in the bottom of the page)
Thanks Man, Good tutorial it really help with some techniques i already knew and did know :P Thanks!
Great tutorial. I loved it, and my end result turned out really well. I learned a tonne about layer masks so thank you :D
This worked ! Could do it as a beginner. Neat description. Great tutorials.Thank you!
A bit cheating with the cube but it works. Proper way is to create a cube with isometric transforms.
<3 <3 <3
I love your tuts!!
AWESOME
Thank you for your tutoring.I am very appreciate your time.
Wish you and your family have wonderful weekend.
Awesome tutorial...keep them coming..Thanks
Terrific tutorials, as ALWAYS!
And trust me, a lot of users see your tutorials, even if they don't leave feedback.
Thanks, as always!
I always learn something from the great Photoshop Tutorials here.
On the part where you pick random parts from the island, you should have placed the layer inside the main PSD & use layer masks. Duplicate layer, paint in layer mask, repeat.
Better vextor mask to cut out than layer mask to fading edge
One of the best tutorials- very detailed. Thanks a lot.
Awesome work!!!!