

Download Lightroom presets and LUTs, absolutely free. Use the presets to add creativity and style to your photos.
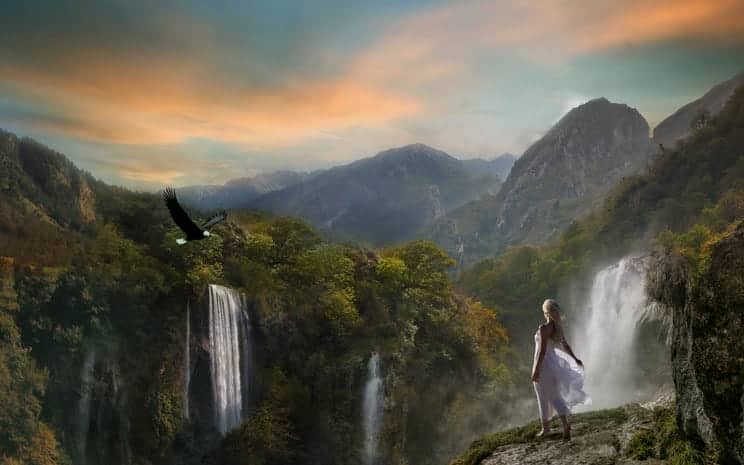
Here are the results.
Step 25
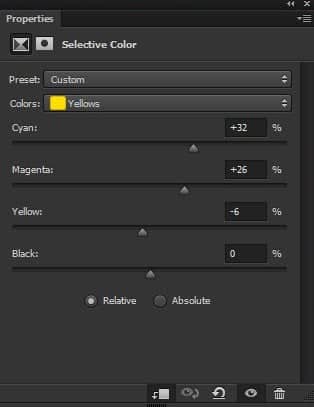
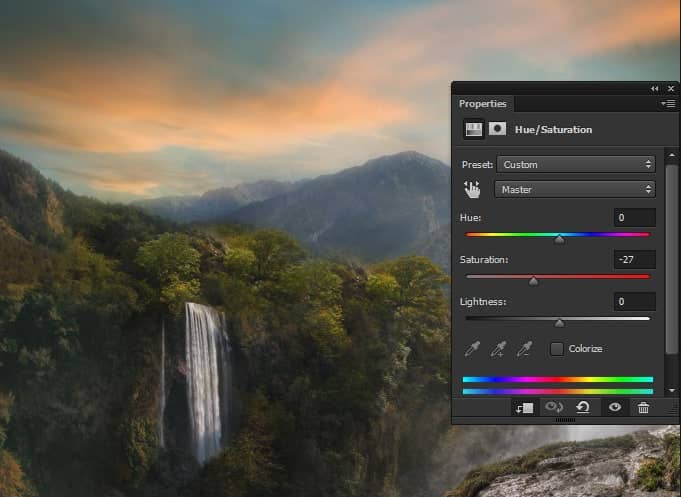
Now select the mountain 1 copy layer and then use Hue/Saturation adjustment layer to reduce the saturation.
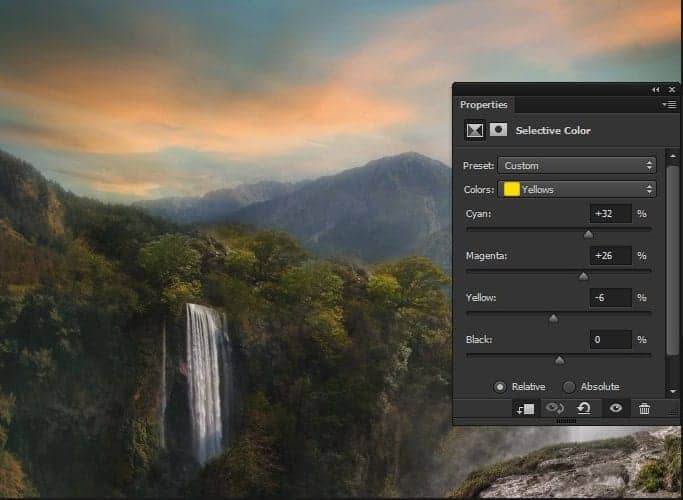
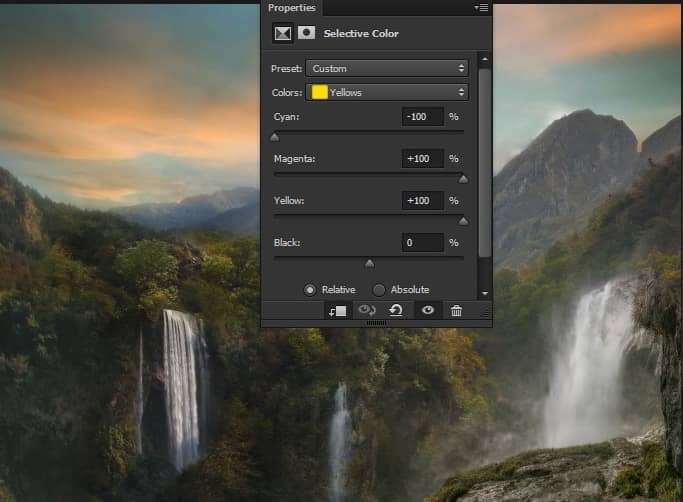
Step 26
Add also a Selective Color adjustment layer to it.
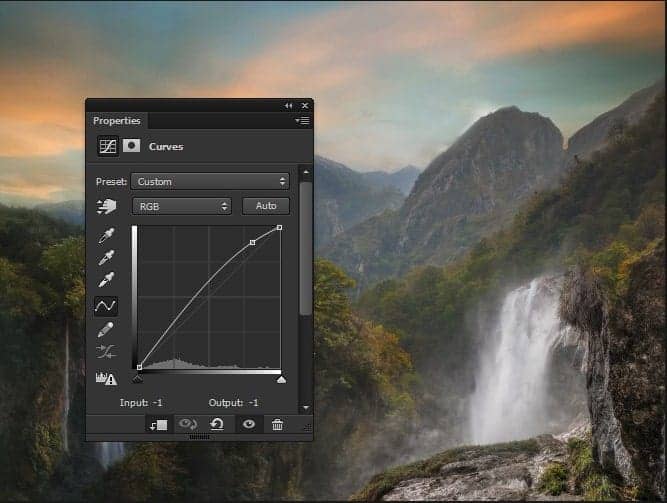
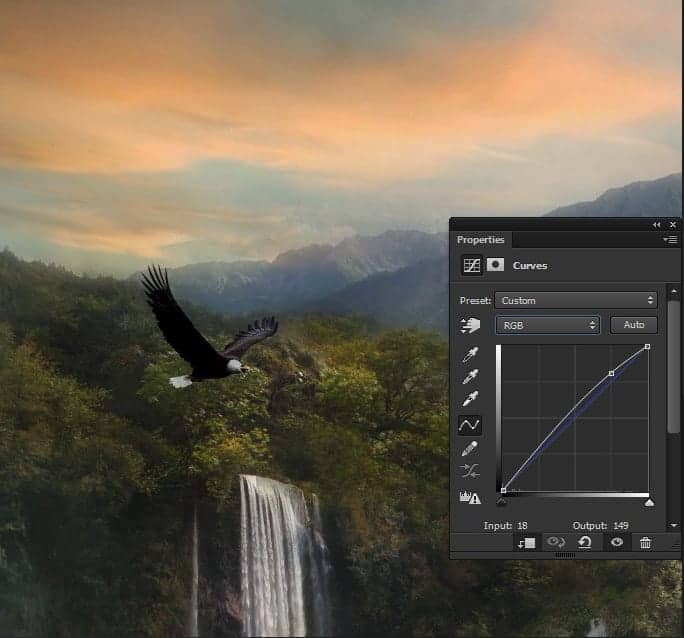
Step 27
Time for coloring the cliff layer. Select the cliff layer and increase the lightness little bit using Curves adjustment layer. Here are the setting.
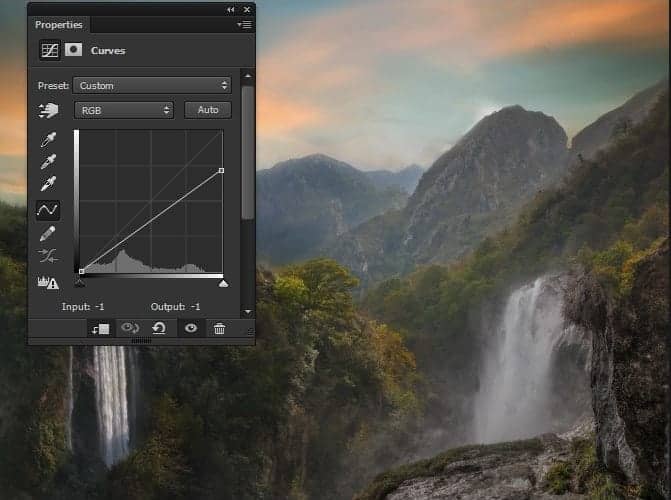
Step 28
Add again a Curves adjustment layer to it but this time to reduce the brightness.
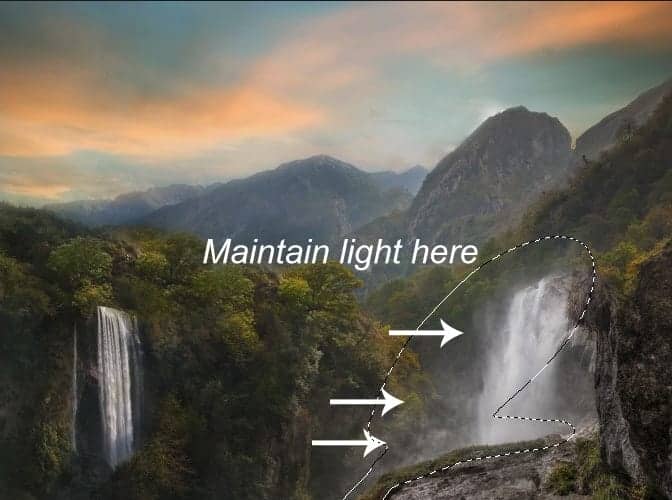
Step 29
On the layer mask of Curves adjustment layer hide the selected effect to maintain lights on selected area. By doing this we also darkening those parts which are less illuminated by light source.
Here are the results.
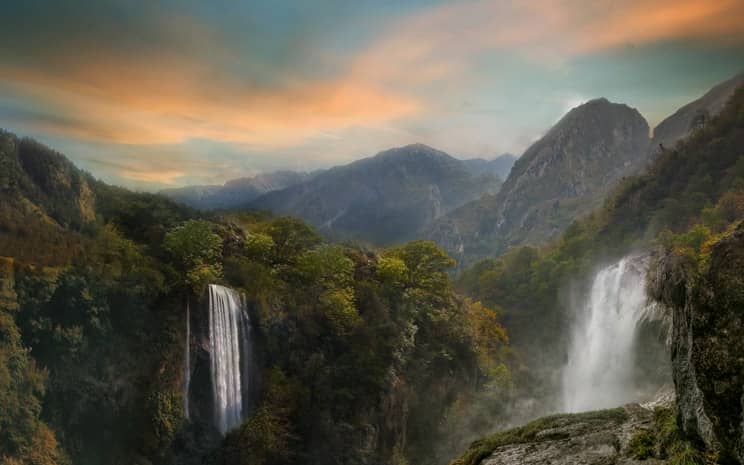
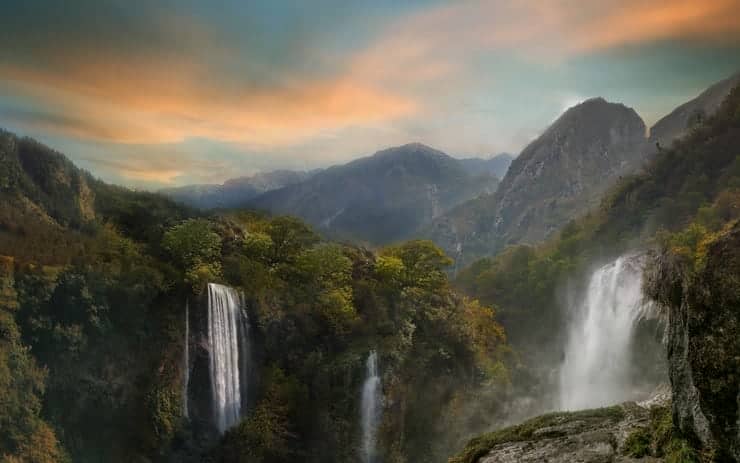
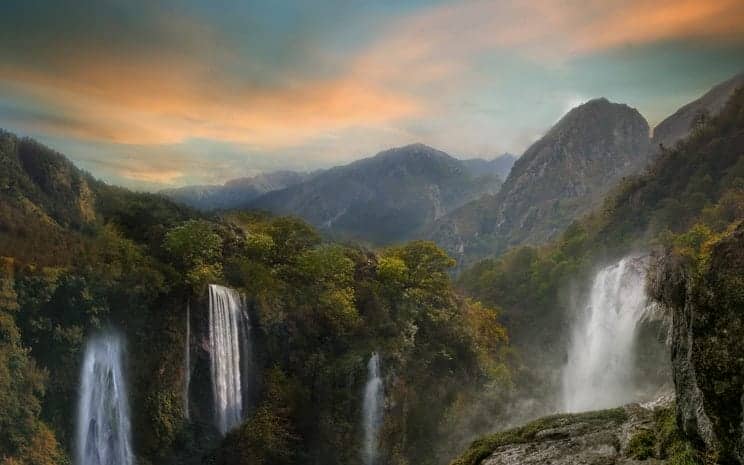
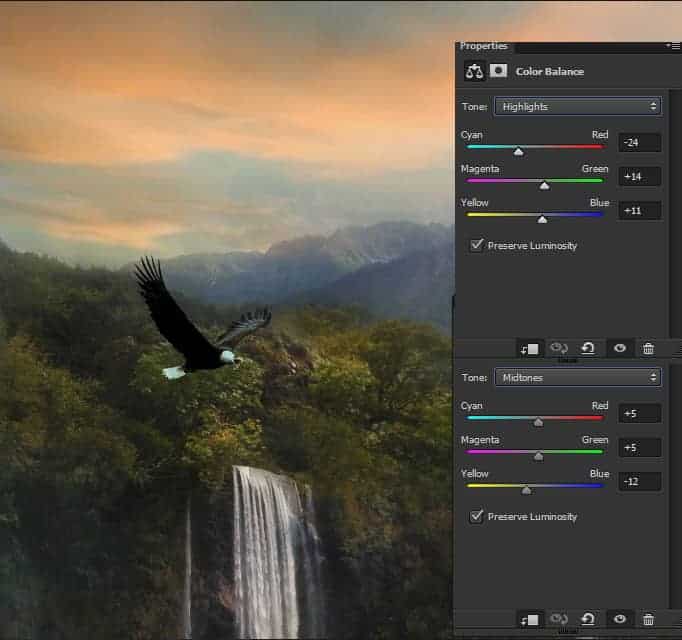
Step 30
Make a Color Balance adjustment layer to cliff layer to match it's color with the rest of the scene.
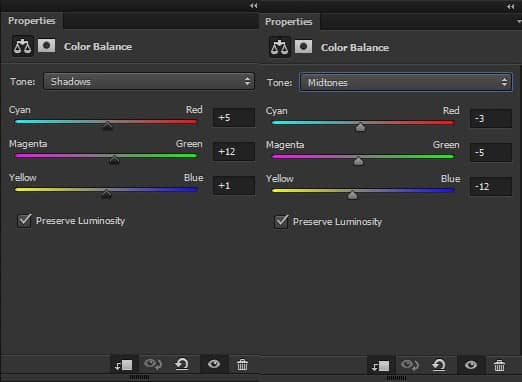
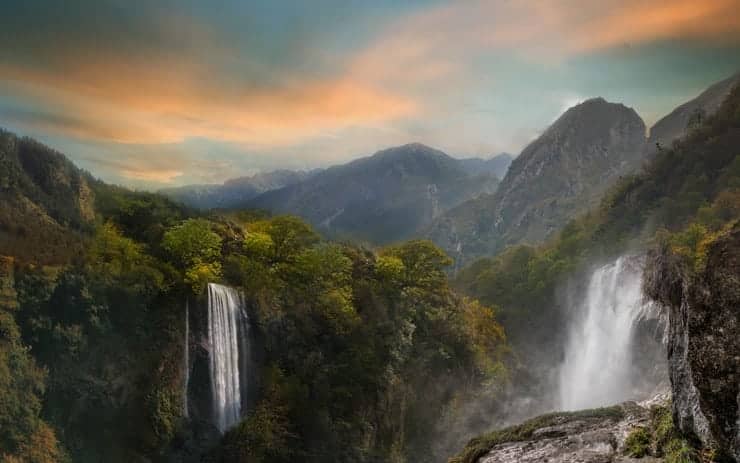
Here are the results.
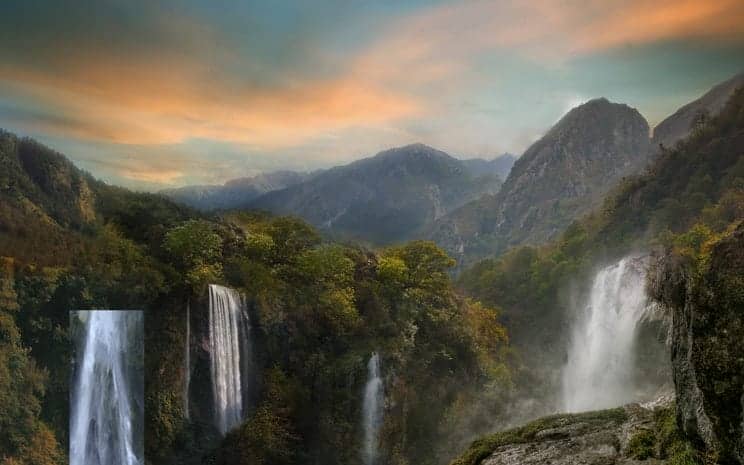
Step 31
Add some more stock to the scene. Place the waterfall 3 image to the main document.
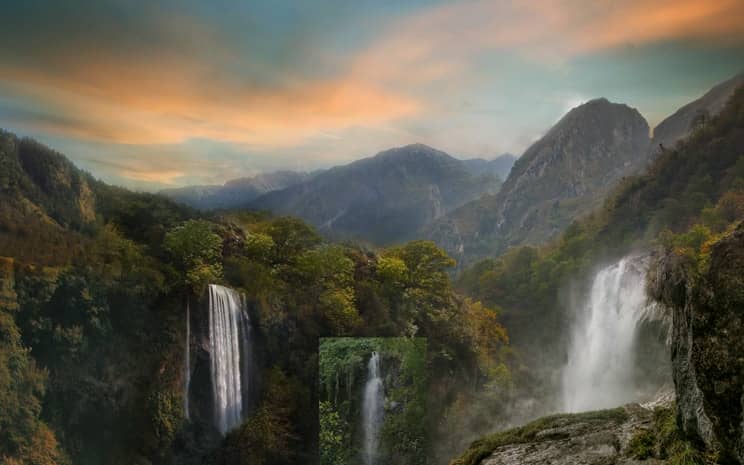
Step 32
Add a layer mask to it. Using a soft round brush paint on the layer mask of it to get rid from hard edges.
Step 33
Now add a Selective Color adjustment layer to it. Here are the results.
Here are the results so far.
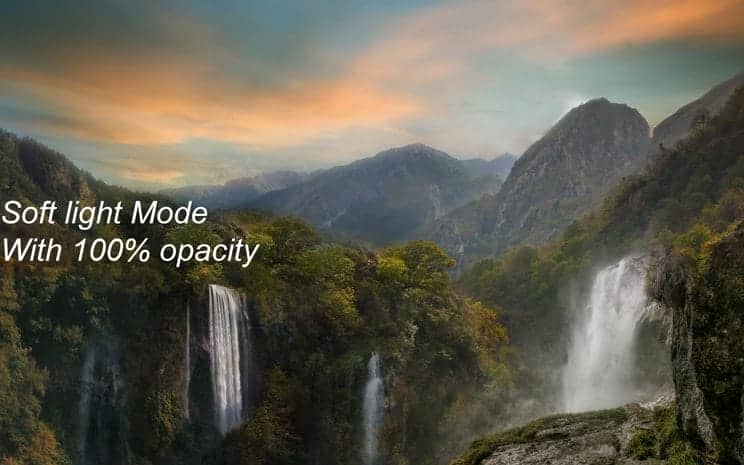
Step 34
Place the waterfall 4 image to the main document.
Step 35
Use layer mask to get rid from the hard edges of it.
Change the blend mode of waterfall 4 to soft light. Here are the results.
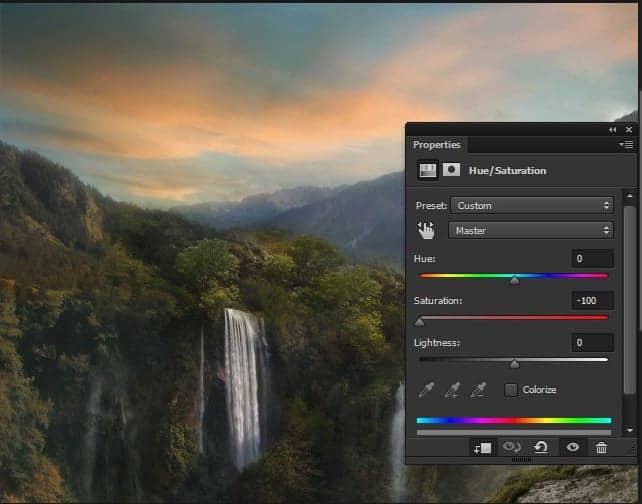
Step 36
Reduce the saturation of waterfall 4 by adding a Hue/Saturation adjustment layer to it.
Here are the results so far.

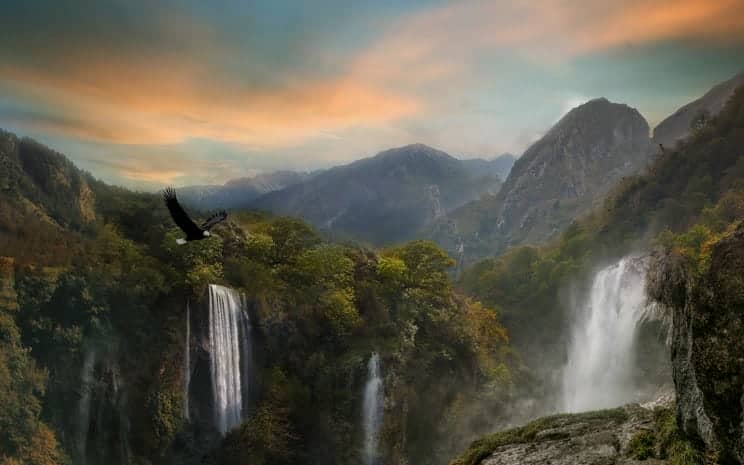
Step 37
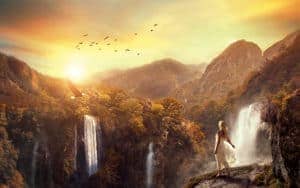
Add the Eagle image to the main document as shown in the image below.
Step 38
Make a Curves adjustment layer to eagle to increase the brightness of upper parts. Since we'll create our light source above the eagle that means the upper parts of eagle must be brighter.
Step 39
Now add a Color Balance adjustment layer to eagle to add some color to it.
Step 40
Extract the model form it's background using selection tool. Then place it over the cliff.
Step 41
Create shadow for the model. To do this, create a new layer (CRTL + ALT + SHIFT + N) under the model layer. Grab the brush tool (B) and set it's opacity and flow about 30%. Paint some shadows, using soft round black brush, where the foot of model contact the cliff layer as indicated by the arrows.
22 comments on “Create This Surreal Scene of Waterfall Mountains with Adobe Photoshop”
Thank you
Be a lot easier a Video Tut was made.
Thank you so much for this tutorial! I’ve been looking for a reliable one for quite a while and yours was extremely helpful!
This is garbage. What is"hided" in step 5. I mean come on.
I'm sorry that some of the material links in this tutorial have failed.
The link to the sky image is no longer valid but you can still access the image by downloading the completed psd document posted by the author. That should allow you to complete the tutorial :)
Thanks for the tutorial, but the link for the 'sky' image isn't correct... Could you please check it?
I have to agree with the Anonymous comment, While this had many good concepts. I spent 10-11 hours ( Not a Noob to PS CC) and due to you "resizing and mislabeling your layer names caused undue confusion made two separate attempts to complete this tutorial without success. I really appreciate your efforts to learn others learn and applaud your own ability to create, but perhaps more clear instructions than "move it to left a bit after resizing, See picture" since the guide photo made no sense. Neither did the order and naming of the layers in several steps. I spent more time trying to figure out the instructions. Just feedback. Not trying to toll you. Thanks
sir there have no page after page no. 5
Sorry link is fixed now
Sky image is here
http://mrg.bz/1634d9
You know what, I have a picture that this would work perfectly for. Thanks!
was the thing in step eight suppose to say waterfall 2 not mountain 2?
beautiful tutorial as always ;)
Amazingggggggggggggggg
Wow, I like that you provide all of the files for us to learn with. that makes things so much easier. Once I am done with something like this, I know I can replicate it.
Nice one!
Honestly a bit hard to follow. I feel like the dimensions and scale of the mountain and waterfall photos don't match up to what is pictured. I spent way too much time trying to match the photos the way they are in the tutorial. I had to stretch some of them, and move even the first one partly off the canvas, which is not mentioned. I got more experience with blending scenic stock photos that I'll use in the future, but I'm giving up on this tutorial.
The point of a tutorial is not to copy exactly, but vaguely. You're never going to fully replicate what you see. The idea is to experiment, mess around with it, until you're satisfied. If you try to make your image an exact copy, you're going to get very frustrated and it will take a lot longer too. I would suggest messing around with the sizes until you like what you have. Then continue from there.
The link to sky image is now showing the image directly. Could you give another link?
Ur tutorials is so much easier to follow… keep up the good works…
Спасибо за хорошие уроки:)