

Make skin look perfect in one-click with these AI-powered Photoshop actions.

Step 27
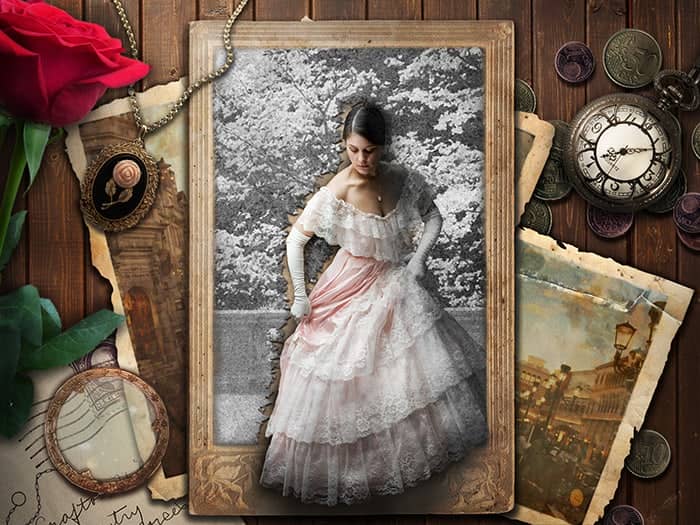
While not deselect and create Overlay-neutral Layer above model layer (Layer > New > Layer or Cmd/Ctrl+ Shift+ N with such settings: Mode: Overlay, set check box on "Fill with Overlay-neutral color (50% gray)"). Use the Burn Tool (O) for create shadow and Dodge Tool (O) to create a light. Blue is shadow, and red is light. When finished, deselect image (Cmd/Ctrl + D or Select > Deselect).


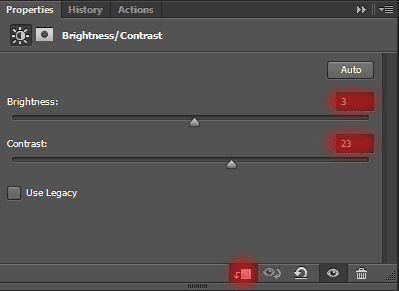
To make dress color and model a little brighter and contrasts, I added an adjustment layer "Brightness/Contrast" (Layer > New Adjustment Layer > Brightness/Contrast...). Set Brightness: +3, Contrast: +23. Make sure that this layer set as Clipping mask.
Step 28
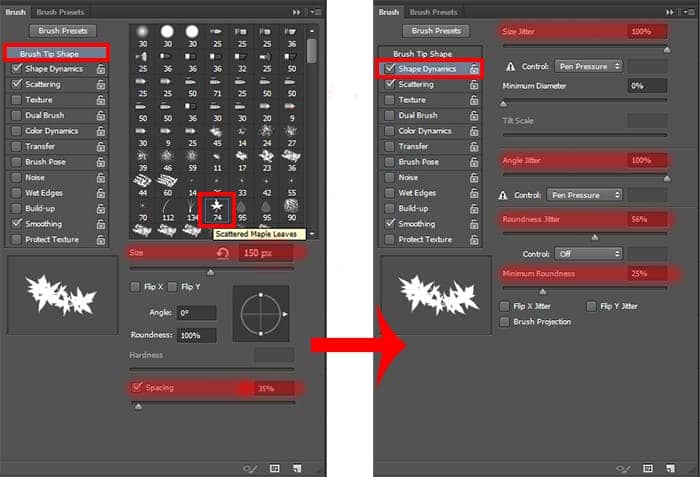
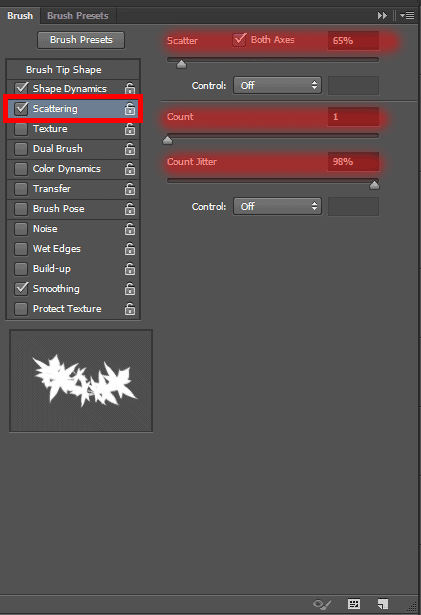
When everything in right place, you can begin created my interesting effect - bursting edges on photo. To begin, I will create the desired brush. As a basis, I used a standard "Scattered Maple Leaves" Photoshop brush, but I modified it. First select the brush into Brush Presets, then go to Brush tab (F5). Follow the pictures and you will get the desired brush.
Now on a Balcony layer mask, paint over the moving part of the model and between hand and dress, used a created brush. Follow the contour turned without a stick on a leaf (it can sometimes be seen, so remove it with hard brush). To break looks realistic, increase the size of the brush and apply it in different places.

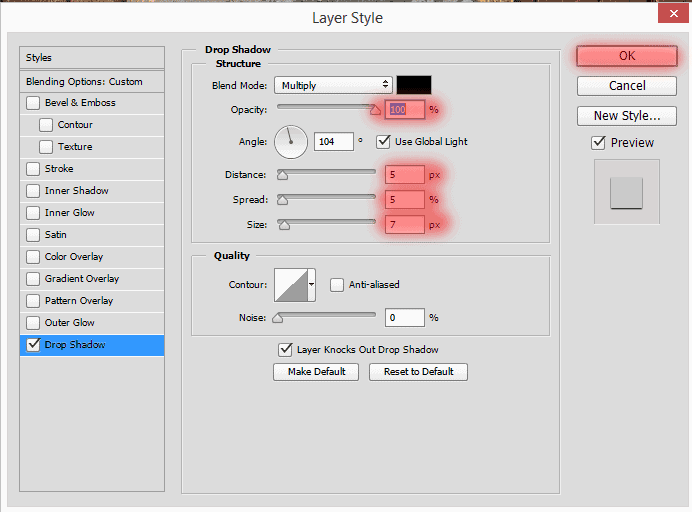
To show the gap and make it realistic add style "Drop Shadow " (Layer > Layer Style > Drop Shadow). Shadow should not be much, otherwise it will fill the lower frame.
Step 29
It remains to making a shadow on the model. Create a new layer (normal, (Cmd/Ctrl+ Shift+ N)). Set Brush tool (B) (Size: 300px, Opacity: 45%, Hardness:0%), draw a shadow under the model, over head on hand and since the middle of dress. This layer should be below a model layer.

Here's what I got at this stage. I will integrate all the layers into one group "Old photo" (Cmd/Ctrl+ G).

Step 30
Now I have added objects. They'll be much easier to work with. I decided to add a little romance in the form of a rose and a medallion. You can change the objects or change their location as you like. I will describe the working principle. Let's start with the watches. Open image "steampunk_jewellery_stock_by_darkadathea-d4d4j31" (Steampunk jewelry), (Cmd/Ctrl + O). Here a wide variety of all!
10 comments on “Create a Vintage and Romantic Scene of Old Memories in Photoshop”
PSD erroneo. No corresponde
Nice tutorial!
pin rosr stock, it is no
Thank for this nice tutorial
can you fix a picture with scratches. i have a hard copy and it has scratches
Nice Tutorial...
Thanks!
pretty :)
Some screenshots are missing on the second page.
Fixed... thanks for letting us know :)
in step two the imagine which ı place is missing when ı write this rates. how can ı solve it
is the rates wrong?