
Luminar AI lets you turn your ideas into reality with powerful, intelligent AI. Download the photo editor and see how you can completely transform your photos in a few clicks.
Step 9 – Apply the displace filter
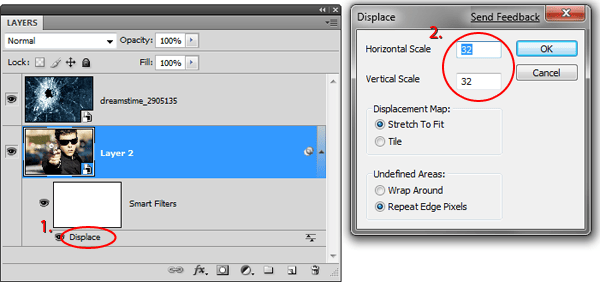
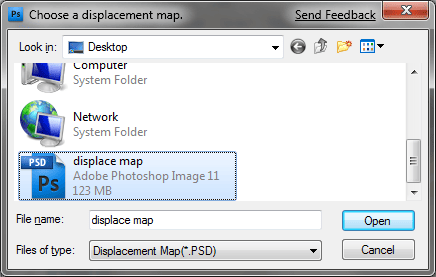
Choose Filter > Distort > Displace and start with the default settings shown in the image below. Click OK.
Browse and select the displacement map file that you saved earlier then click Open.
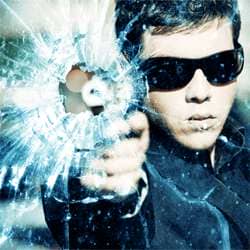
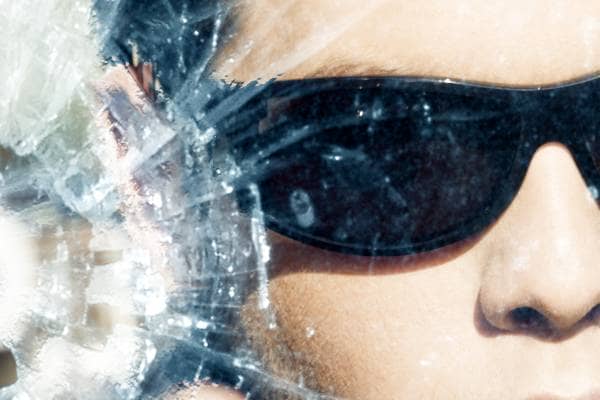
Your image should be displaced. Here’s what mine looks like so far. It is not strong enough but we’ll edit this in the next step.
Step 10 – Readjust the displace filter
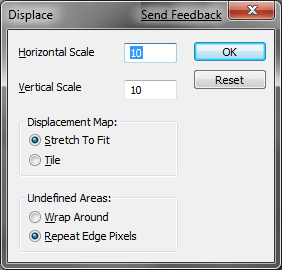
Because the displace filter doesn’t give us any live preview feature, you’ll find that you need to readjust the settings once or more to get the results that you like.
- Photoshop CS3 or newer: If you’re using Photoshop CS3 or newer, you can easily readjust the displace settings.

- Photoshop CS2 or older: If you’re using Photoshop CS2 or older, you’ll need to undo and use the displace filter again. Choose Edit > Undo to undo then choose Filter > Distort > Displace to use the displace filter again.
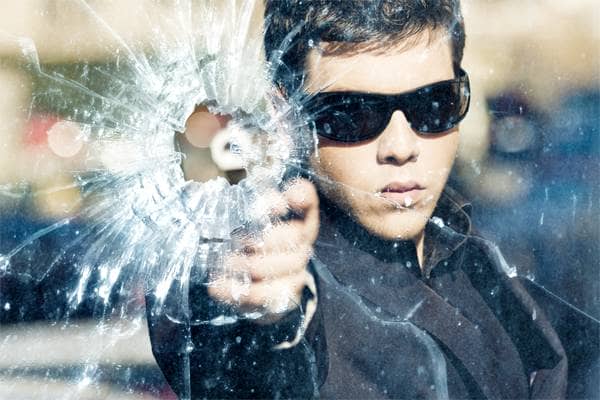
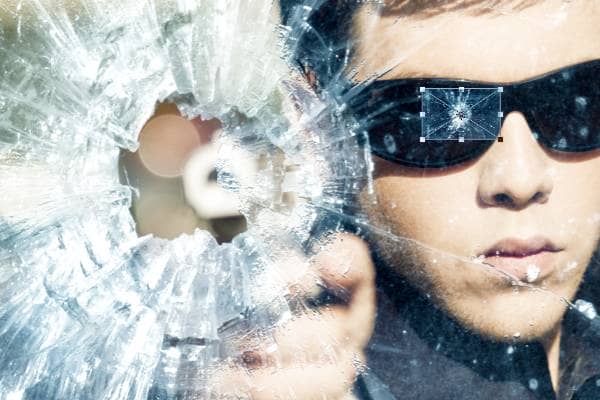
This is what our image looks like after using better displace settings.
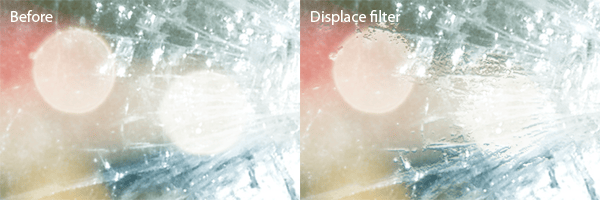
Here’s a comparison of the before and after effects of using the displace filter.
Step 11 – Add a reflection in the sunglasses
Select the layer with the bullet hole and duplicate the layer.
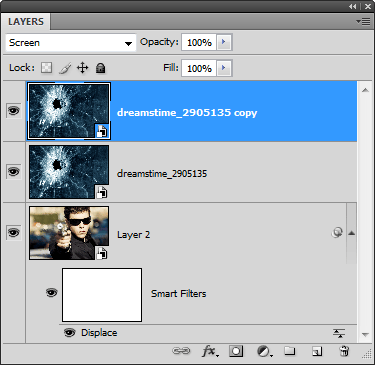
Choose Edit > Transform > Scale and resize the layer by clicking and dragging on the corners of the transform box. Make the layer a lot smaller like shown in the image below. Press enter on your keyboard to apply the changes.
Step 12 – Rasterize the layer with the reflection
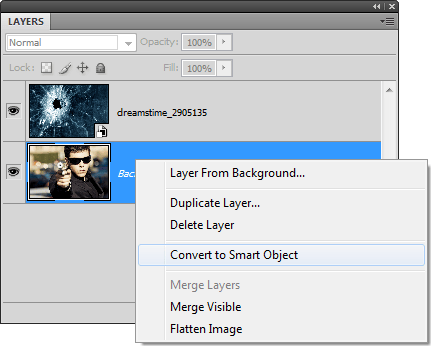
We’ll be using the levels tool next but before we can access that tool, the layer needs to be rasterized. If you are using Photoshop CS2 or older, your layer is already rasterized and you can skip this step. If you are using Photoshop CS3 or newer, your layer is currently a smart layer. The levels tool doesn’t work on smart layers so we need to rasterize it. Right click on the layer (not the layer thumbnail) then choose Rasterize Layer. You can also do this by choosing Layer > Rasterize > Smart Object.
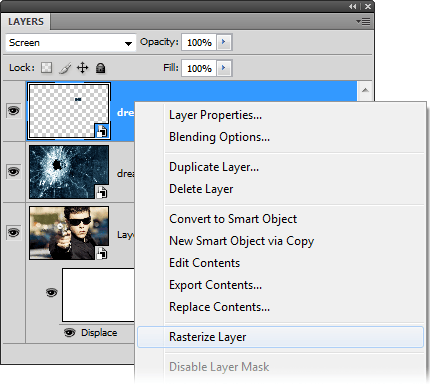
Your layer should be rasterize and you can tell it’s rasterized because it does not have the ![]() icon in the thumbnail.
icon in the thumbnail.

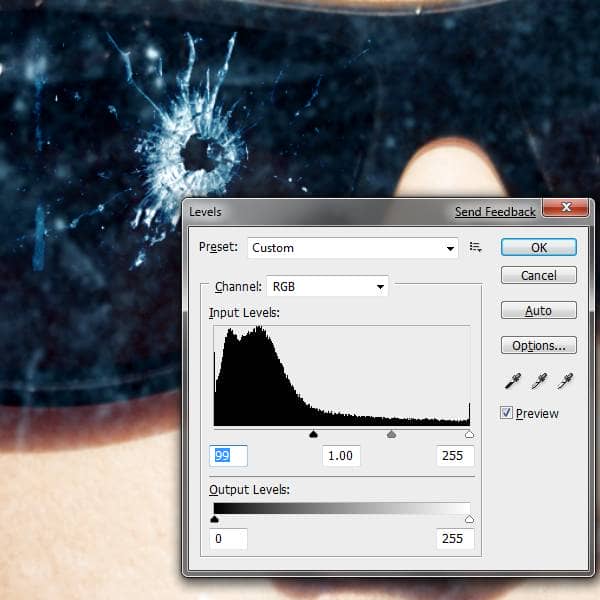
Step 12 – Blend the reflection into the sunglasses
Now that your layer is rasterized, you can access the levels tool by pressing Ctrl+L or choosing Image > Adjustments > Levels. Use the levels tool to make the glass blend into the frames behind it. To do this, drag the black input slider towards the center until only the cracks are visible.
Select the eraser tool from the toolbar. Right click anywhere in the document window to bring up the brush settings for the eraser tool. Set the hardness to 0%. This will give you a soft edge as you erase.
8 comments on “Gunshot Through a Glass”
can u share psd this link is not working
a very very very very thnx to u!!! most awsum tutorials!! so easy to go thru!! results : http://i.imgur.com/pFq4yjj.jpg
Great tutorial,with cool effects.thanks
nice
<3.<3
nice and easy tutorial for new photoshop user
Thank you! I just made it. :)
http://www.facebook.com/photo.php?fbid=569386056409105&set=a.161828827164832.41562.100000131478657&type=1&theater
Thanks...