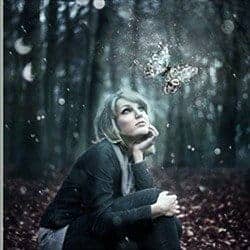

Luminar AI lets you turn your ideas into reality with powerful, intelligent AI. Download the photo editor and see how you can completely transform your photos in a few clicks.
![02_1[4]](https://cdn.photoshoptutorials.ws/560f7a332688_12DD5/02_14.jpg?strip=all&lossy=1&quality=70&webp=70&avif=70&w=1920&ssl=1 "02_1[4]")
Click on the icon Edit in Quick Mask Mode (Q) which can be found on the Tools palette (or simply press Q on your keyboard). Because of this mode you see mask painted with red.
Grab the Brush Tool (B), select some soft round brush and pick black color. Now paint over the forest. You should get something like this:
![02_2[4]](https://cdn.photoshoptutorials.ws/560f7a332688_12DD5/02_24.jpg?strip=all&lossy=1&quality=70&webp=70&avif=70&w=1920&ssl=1 "02_2[4]")
Press Q on your keyboard to switch back to normal view. You're seeing only borders of the mask again.
To be able to work with the mask later you need to save it. To do that go to Select > Save Selection... and name it e.g. LEAVES.
![02_3[4]](https://cdn.photoshoptutorials.ws/560f7a332688_12DD5/02_34.jpg?strip=all&lossy=1&quality=70&webp=70&avif=70&w=1920&ssl=1 "02_3[4]")
Let the mask activated.
Step 3 - Adjusting Leaves
In this step you're changing color of leaves to give them little bit more magical atmosphere. To do that you'll use two adjustment layers - Selective Color and Hue/Saturation.
Using of adjustment layers is much better than using direct adjustments. With adjustment layers all the changes you do are always reversible. If you use direct adjustments you can make only as many changes as your History goes plus you'll loose all the later steps.
You can find the button "Create new fill or adjustment layer" in the bottom part of the palette Layers same as the button "Add new layer" mentioned in earlier steps.
![03_1[4]](https://cdn.photoshoptutorials.ws/560f7a332688_12DD5/03_14.jpg?strip=all&lossy=1&quality=70&webp=70&avif=70&w=1920&ssl=1 "03_1[4]")
Let's begin with Selective Color. Click on the button "Create new fill or adjustment layer" and, surprisingly, choose Selective Color. Set it as on the next image.
![03_2[4]](https://cdn.photoshoptutorials.ws/560f7a332688_12DD5/03_24.jpg?strip=all&lossy=1&quality=70&webp=70&avif=70&w=1920&ssl=1 "03_2[4]")
As you can see because of the activated mask (from previous step) adjustment layer affects only leaves. On the thumbnail of the adjustment layer you can see which parts is adjusted - it's white. Part without adjustment is black.
![03_3[4]](https://cdn.photoshoptutorials.ws/560f7a332688_12DD5/03_34.jpg?strip=all&lossy=1&quality=70&webp=70&avif=70&w=1920&ssl=1 "03_3[4]")
Move on saturation. Before you're adding adjustment layer Hue/Saturation you need to activate the mask again. To do that Ctrl + click on the thumbnail of Selective Color adjustment layer. Mask activates again.
Now add new adjustment layer Hue/Saturation and set it as on the following picture.
![03_4[4]](https://cdn.photoshoptutorials.ws/560f7a332688_12DD5/03_44.jpg?strip=all&lossy=1&quality=70&webp=70&avif=70&w=1920&ssl=1 "03_4[4]")
Because of the activated mask only leaves are adjusted again.
Below you can see how your image should look so far.
![03_5[4]](https://cdn.photoshoptutorials.ws/560f7a332688_12DD5/03_54.jpg?strip=all&lossy=1&quality=70&webp=70&avif=70&w=1920&ssl=1 "03_5[4]")
Step 4 - Desaturating the Forrest
In previous step you added colder tones to the leaves. To create balance you should make also forest in the background colder looking. To do that you're using adjustment layers again, this time Color Balance and Hue/Saturation.
15 comments on “How to Change Ordinary Photo into Fantasy Photo Manipulation”
Very very good now I'm your fain I want to meet you
Can not open files... please check, thanks
Как называется фотошоп который вы используете?
Awesome tutorial! Thanks for sharing it. Your tutorials are the best among hundreds that I've watched!!!
kereeennn.....
Excellent
Very nice result and good tutorial
Thank you so much
Nice thanks For sharing !
Hi shilpa
Awesome result! :)
What a beautiful end result! Thanks for sharing!
i hate this
Atta be
Liked it but the brush set is paid
i like it,,,,,