

Luminar AI lets you turn your ideas into reality with powerful, intelligent AI. Download the photo editor and see how you can completely transform your photos in a few clicks.
Step 5
Here we can bring in the clothing. Remember to use Masks so you can make any adjustments later. Mask and place them on your model. Keep in mind things like fur around the collar and ears hanging down over or behind the clothing. Adding little pieces of depth can help add to the realism of the final product.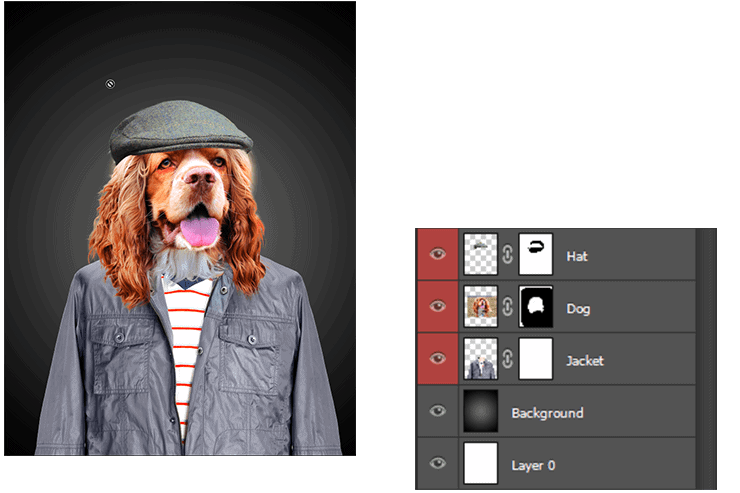
Step 6
From here we can start adding shadows, these are really what will make this image pop and give it a believable feel. First let's make a hard shadow under the ears and collar as if the main light was coming from the top right. If you place your cursor over the mask for the dog and hold Ctrl or Cmd when you click on it it will select the mask. Bring in a new layer under the animal but above the clothing called "Hard Shadow". With the Layer "Hard Shadow" active and the Subjects mask as the selection, go to Selection > Transform Selection and move it down and to the left by just a little bit. Hit enter and use a nice fluffy brush at about 10% opacity to draw in a little shadow. No need to get too harsh here just enough to define the edge. Then deselect that (Select > Deselect) and bring in a new layer above "Hard Shadow" and call it "Soft Shadow". Here we'll use abut the same brush to draw in a fluffier shadow following the same line as the last one but without the hard edge. Let the Hard Shadow define the edge and the soft shadow gives some depth.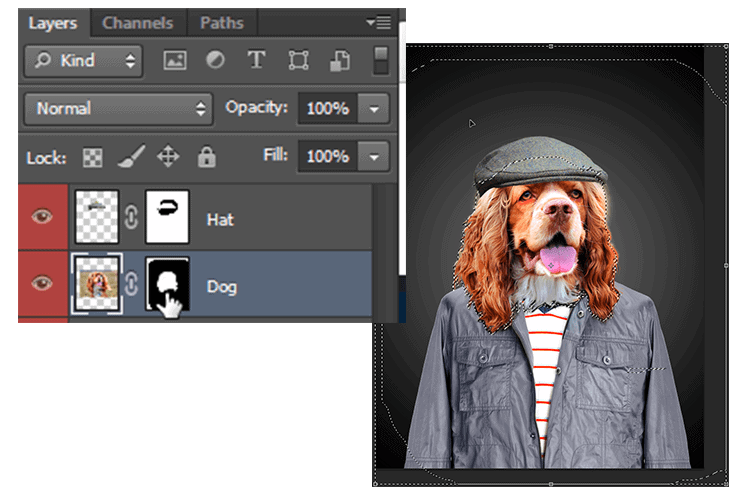
Step 7
This step depends entirely on if you chose to add a hat or any other clothing to the face - if you haven't then feel free to move on. Go ahead and create a new layer on top of your subjects layer and call it Hat Shadow (or whatever article of clothing you're using) and just brush in a nice soft shadow under the brim of the hat. Don't be afraid to make it pretty dark right under it but work in 10% increments (using a black brush with 10% opacity).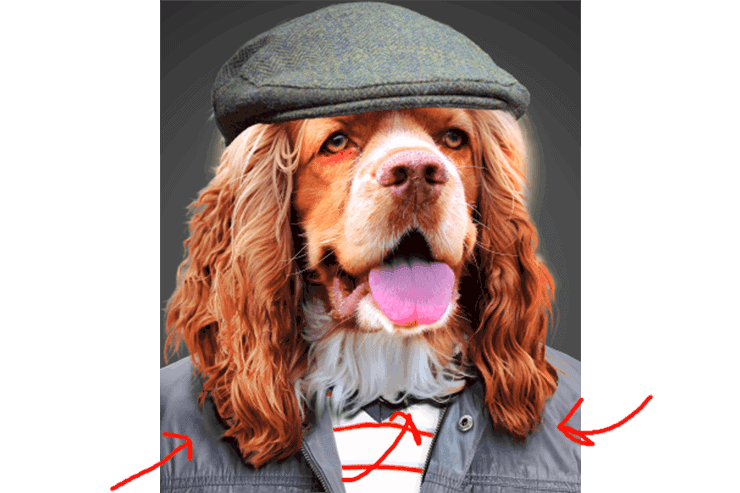
Step 8
Again this step is optional but I thought it could be useful as it helps keep things clean and organized and also helps with computer performance. Group all the layers together that are involved with your main subject by selecting them all while holding shift and pressing Ctrl+G on PC or Cmd+G on Mac. This will group them together. By right-clicking on this group you can convert it to a smart object. Making it work as one layer, however, you can double click on the thumbnail and edit it in its own window. A nice little feature that can be very helpful in certain situations.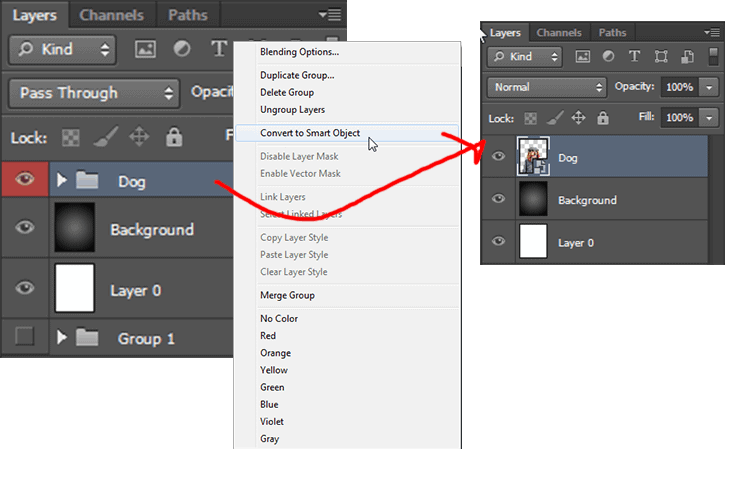
Step 9
Moving on to the overall lighting, we'll start with the backlight. Above the Background layer create a new layer (Ctrl+Shft+N on PC and CMD+Shft+N on Mac) and name it Backlight. Brush in white with a nice big soft brush a soft light behind the right side of your model, similar to below. This will help extenuate the highlights later.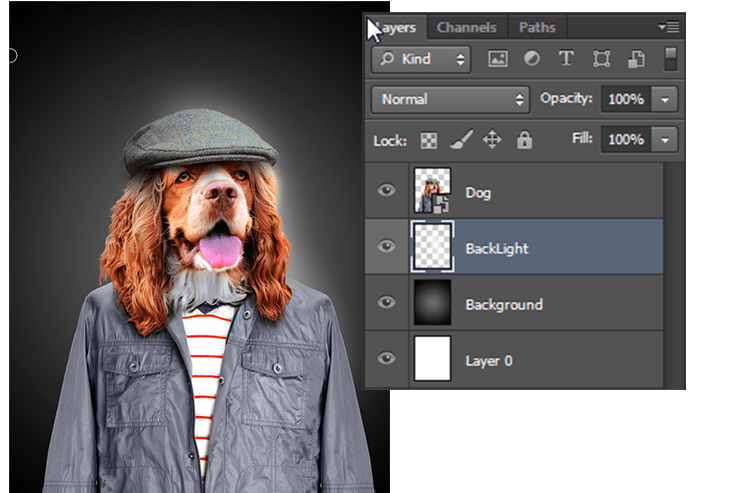
Step 10
Before going forward let's sharpen up our image to give it a real studio feel. This can really be done whenever but I chose to do it here. With the smart object layer selected go to Filters>Sharpen>Smart Sharpen, my personal settings can be seen below but your own image may require a different touch.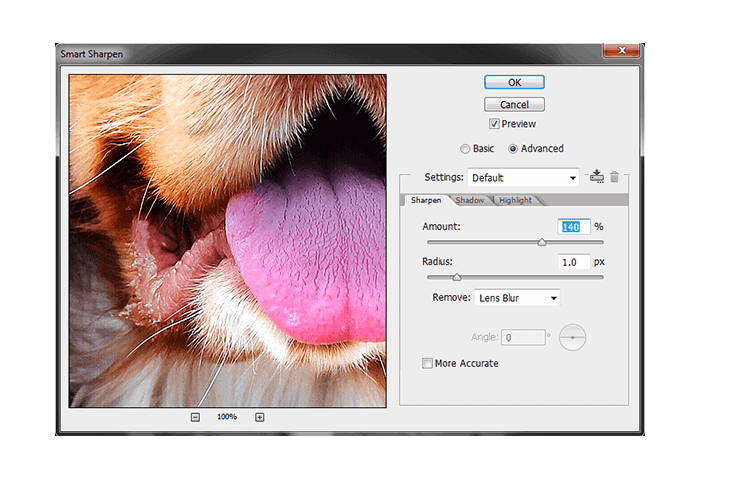
25 comments on “How to Create a Human Portrait of a Dog in Photoshop”
ima turn this project into a csgo texture and obliterate it
Amoooogus SUs
amogus
sus
do yo guys play fortnite chapter 3?
sus
Sus
I'm sorry but many of these tutorials are so lame.
Peter Smith Agree. I think is time to get out of this page
First I want to say I have no connection to this site... I just use it like thousands of others. I just had to say "Peter Smith you need to get a life". These tutorials are from talented people. If you don't like a site DON'T USE IT. I am sorry that you are so unhappy with your own life that you need to put other people down. I owned my own "very successful" 10 person marketing design firm for over 30 years. I know good design... and these tutorials are not lame. I may not use the tutorials step by step... but I always take away some technique I can use elsewhere. Social media has created an avenue for people like you to post comments "while sitting in your Mom's basement" that somehow make you feel superior. NOTE: don't bother sending back some nasty "made up" response to this comment... as I won't read it. Instead I will use my time enjoying life and expanding my knowledge. Why don't you create your own tutorial site and let people write you nasty comments. My guess is that you do not have the ambition to do something that helps make other people grateful. I am sure your comment back to me would be "I am just too busy creating great art" to create a site... but I could. If that was true... why try to tear down someone else's work. Go do your own thing and leave the people behind "Photoshop Tutorials" alone!
wanna Youtube Tutorials bro...its not easy for me ..?
Your Photoshop Tutorial is so helpful..and the dog is looking so nice...
Your Human portrait tutorial and the dog is so nice.I hope anyone learn it easily.Thanks for share an informative tutorial..
Hilarious! This effect would be good for any dog lover and I am sure they would love to see it on their wall as art.
Wow! This would be worth a lot to me
LOL awesome! My mom would love to see an image like this.
I love the results. great work
This is awesome! And I have friend who is absolutely nuts for her little pup. This would make a great gift for her! Thanks for providing the steps. :)
Oh, how funny! And something that would be perfect for my dad. Just would have to figure out which dog to do, either the English Bulldog or Boston Terrier.
Hey, it's really a funny and helpful tutorial. Thank you for sharing.
The dog link doesn't work :(
who cares
It doesn't look "real"
Best friend?
This would be what you'd look like if u were a dog Gill Gonzales bahaahaa with your hat