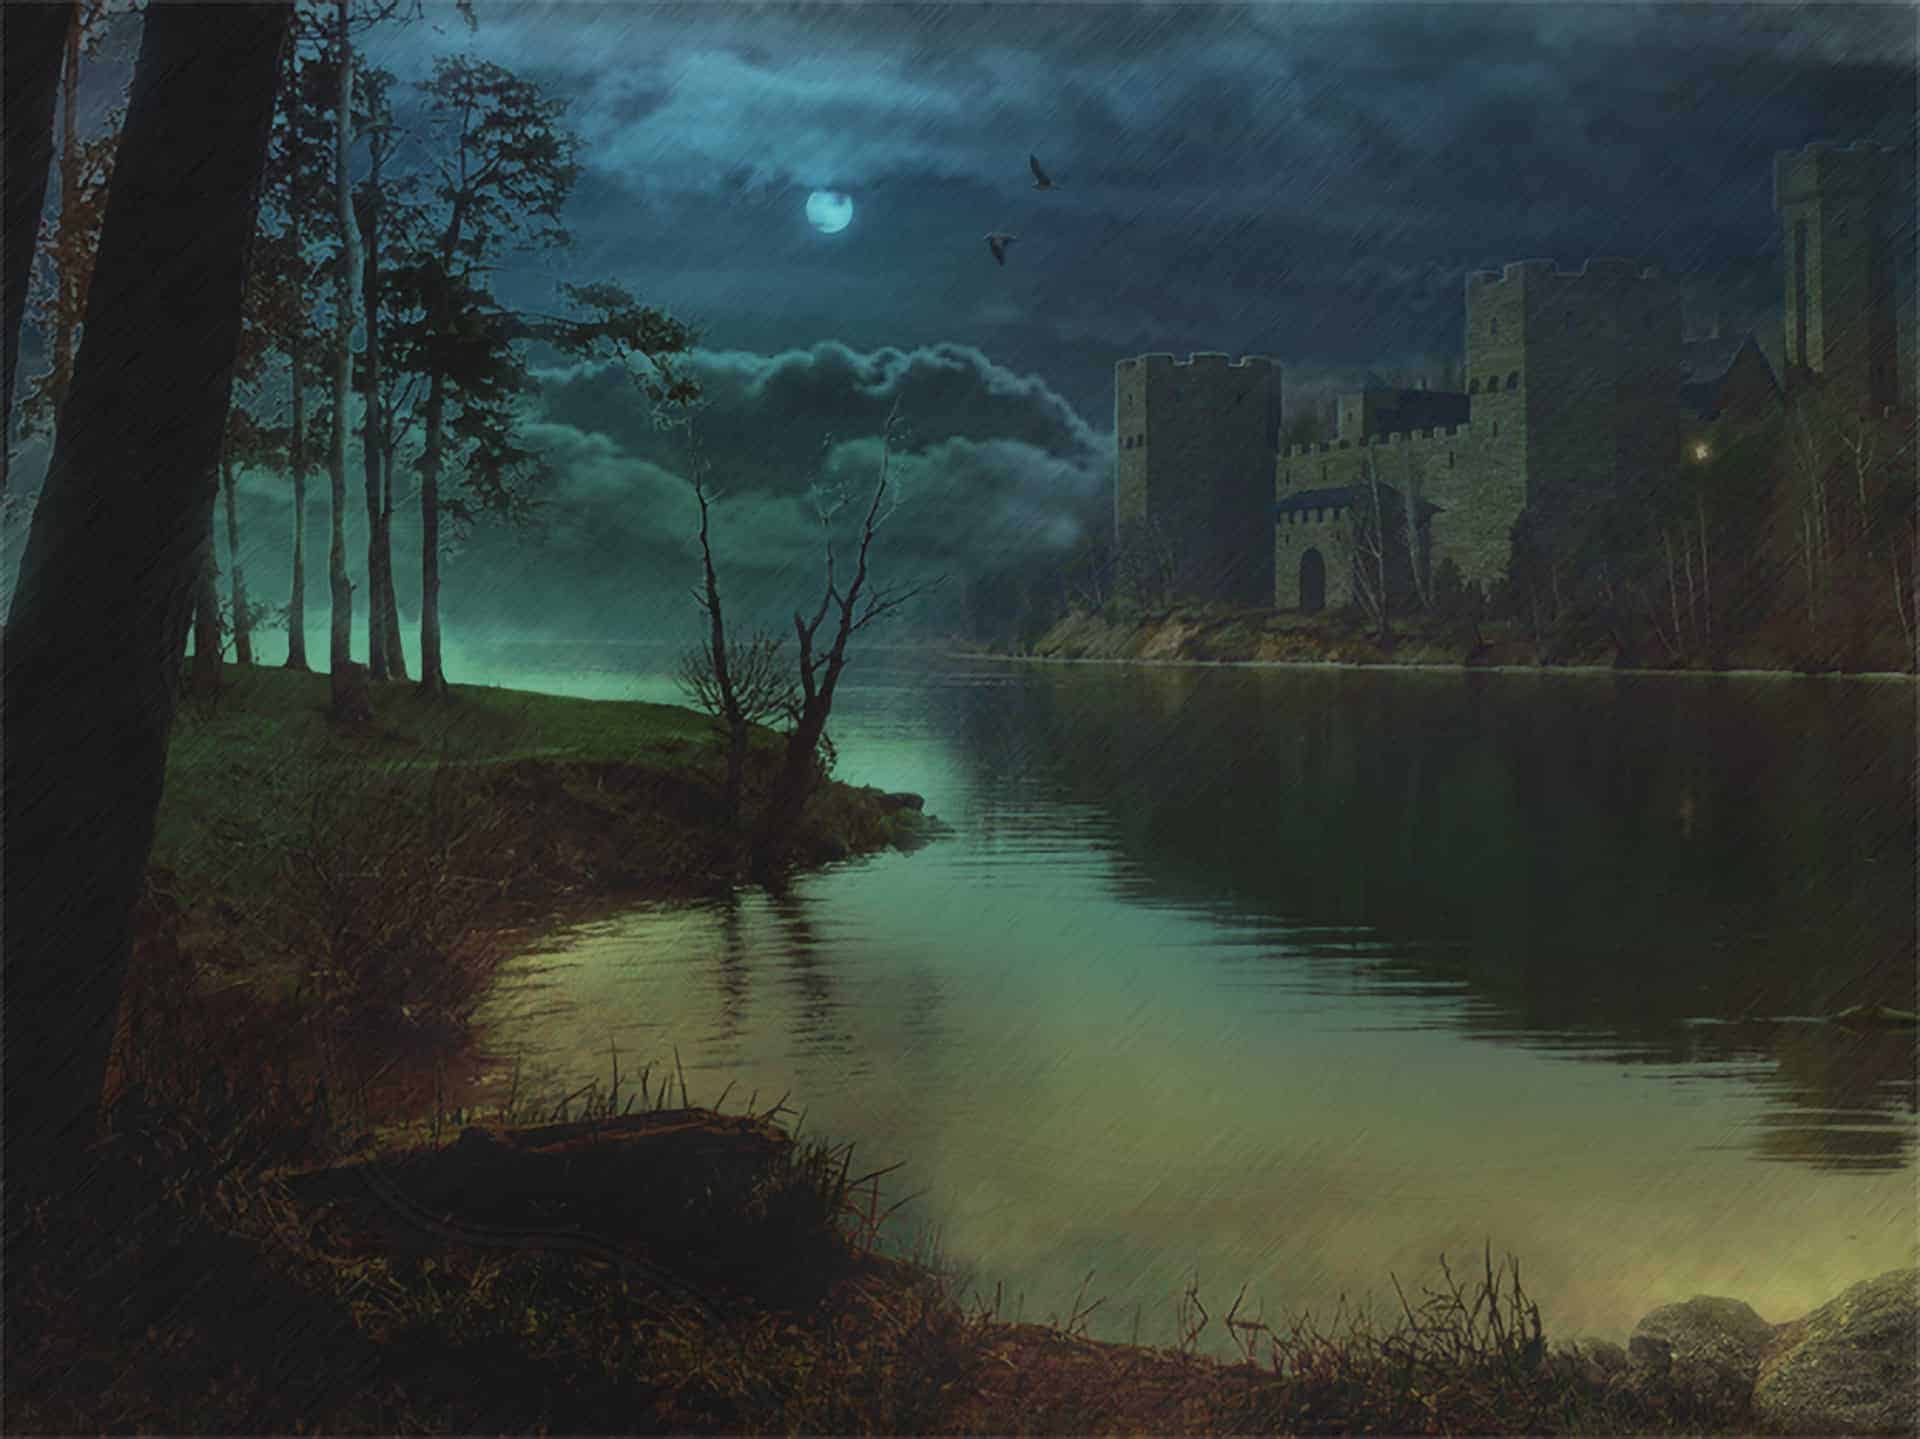

Make skin look perfect in one-click with these AI-powered Photoshop actions.

Color Correction Procedures:
Now we are moving to the main part which is "Color Correction." Color Correction is a procedure which maintains the overall mood of an image, if you succeeded in this section, you have won the race and if not, you have lost it. So it's very important part in any image to finalize the process.
But don't worry! Follow the procedures and techniques below then you will do color correction properly on a working image.
Step 14: Adding a Night Color to the image:
First, we are going to add night color to the image (means we are adding dark color to it.) So for this purpose, apply Adjustment Level Layerfor overall layers. Place it above all layers.
You will find this tool in Layer menu -> New Adjustment Layer -> select Levels.
Add values to the Adjustment Layer as shown in an image.

Step 15
Now to adjust value tone of stones with a background then select Levels tool and add this value to it.

Then you will get output like this:

Adding Dramatic Colors:
Up to this color correction procedure, you will bring beautiful effect but not the perfect. It means still we have not added dramatic look.
Step 16
So to creating dramatic light then create a new layer and randomly paint three-color tones on a layer by using Brush tool.
1st Color Tone: 3b7480 2nd Color Tone: 3f715c 3rd Color Tone: 75743b
And then using Gaussian Blur Tool, blur that color tones. So, your three-color Tone layer will look like this:

Step 17
And then in Blending Mode choose Hard Light blending mode.On that same layer to preserve brightness of moon, select Brush tool, and using Black color as Foreground just paints on moon shape. Finally, your image will look like this:

Step 18
Again to looking main image more beautiful, make some color correction to it by choosing Levels tool and add these values to it:

Step 19
To increase brightness or shine of a moon then on a new layer, exactly on a moon, using a brush tool, make one circle with opacity low as 60% and with foreground color as white.
Step 20
Use Overlay blending mode for it and apply Gaussian Blur by keeping Radius 20 pixels. Make another duplicate of this layer and keep the both layers above the main moon layer and three-color tone layer.
46 comments on “How to Create a Rainy Lake Scene in Photoshop”
Sazid এরকম পারবি এডিট
emni download dia layer korlei tw hy
তুই তাইলে ডাউনলোড কর
আমি তুকে পিক দিবো কিছু
I think stuff about tips are fab
I just found this in my email and took a good look at it on the website. Is this "awesome"?
No, it is NOT. Rather, it is error-filled.
1. Lower right-hand corner. That's the reflection of the light source, PROBABLY the Sun. Oh, but you have another light source in the top-center called the moon.
2. That light reflection off of the water IN NO WAY resembles the dark, forbidding rainy skies above. OOPS!
3. The reflection of the castle off the water is reasonable. But, where is the reflection of the two dark birds well above the castle, which would clearly be in the bright reflected skies above the castle?
There's a really CRAP sunset picture making the rounds, where the moon has replaced the sun, and it's been passed around in different hues, and it only has a very serious problem, which is that the clouds are passing behind the moon. In other words, our planet will be destroyed soon because the moon is in our atmosphere.
But a ZILLION LOONS out there say "awesome!" And this is as bad as that.
Nice one
Buen tutorial, muchas gracias. Pero el archivo PSD en zip, esta dañado y no se abre.
Saludos
Great tutorial, but there are no files in the PSD file to download; it's an empty file of 0 bytes.
Kine Melien Haugsrud test dette ??
absolutely could not agree more
Awesome!
The Lake View zipped file is empty.
I can't even see the rain =/
wow Thank you for this great tutorial. Gave me lots of ideas and direction.....great job
amazing!! great to see the amazing work of great experienced art directors!!this information most important for me.
Please fix the download link
Step 24 is so amazing! thank you for sharing! <3
great tutorial.i learnt a lot...but being a novice it took me some time to locate all the commands since the tutorial was not very clear.but i got an amazing output.thanks again author :-)
como sempre ....dos melhores a ensinar e a progredir com o photoshop ,,, meus parabéns
To the people saying this is a bad tutorial, you must be noobs.
I don't read most of the instructions, I go on by looking at how this is being created and do it my way.
You can do one thing in may forms on photoshop.
Its very amazing steps to create lake view by using photoshop.I am wondered to see this post.Everyone should read this specially designer to get inspirations.thanks
Epic fail?? I don't think so. Great ideas, apply them to your work however you see fit. I thank the person that took time to lay this out! Time out of their day, without being paid a dime. That's not a fail at all. Thanks for sharing!
Something get wrong at step 7/8 with the gaussian blur, my images whole image is blurred and not only the trees etc.
However it´s a good tut
kull stuff
this is cool...kudos..kudos again
can we add rain dropping effect into the lake, i think it will look more realistic can you please tall me how can we add that effect ?
This Is A Very Good Tutorial. But The Final Image Doesn't Look Same As The First One On The Top. I can't say Much Cause Am also New To This Software. Anyways G8 Job
I think this is awesome. Thanks.
OMG now this is what I call wicked talent.. I'm just speechless on how you've put everything together in such a beautiful harmony. splendid
This Fails so bad I am not even kidding ;)
if you don't like this tutorial so what make your own one
we're humans we make mistakes
Good job man, we are waiting the best from you.
wow, very artistic
I like this kind of photo manips....very nice imaging. With more efforts to show the effects of the raindrops on the water surface, this work would be perfect.
My "Hue & Sat" levels only go to +180.....perhaps I'm missing something?
Do you have "Colorize" selected?
I like these tutorials, however I often get stuck and there seems to be no recourse to get clarification. For example on steps 5 and 6 I have a bit of a problem duplicating your steps. I follow your steps to the letter but clearly am doing something wrong and not getting the correct result....or anything resembling it. I'm using CS4 extended. Thanks
this might be really late but what did you do to get around that step? I'm having issues.
raaly i like this tutorial
It really befuddles me why people post such negative comments. These people that create these tutorials are taking the time out of their lives to assist us novices, not hold us by the hand. I think he did a very good job.
Wow, this is such a fail... by the first two commentators! Do you SEE any other reflection than the castle's? No. You might make the lake darker, but the texture of the sky is not seen, so there is no reflection. And where the moon's reflection lands wouldn't be in the view of the lake. Also, can you make something better than this, without tutorials? No, that's why you're here. You can always make changes yourself if you don't like, idiots.
you're an idiot commentator!
hey, you know what, why don't you show us your own works and/or tutorials? if you see an high level of fail here, I'm pretty curious to look at your astonishing works
it's EPIC FAIL because the sky and the moon is not reflected in the water! :(
hahaha...level of fail is too high...how come raindrops doesnt affect the lake water surface?
Because its photoshop not reality!