

Luminar AI lets you turn your ideas into reality with powerful, intelligent AI. Download the photo editor and see how you can completely transform your photos in a few clicks.


Create a new layer. Pick a light color from the background and paint some light on the hair.


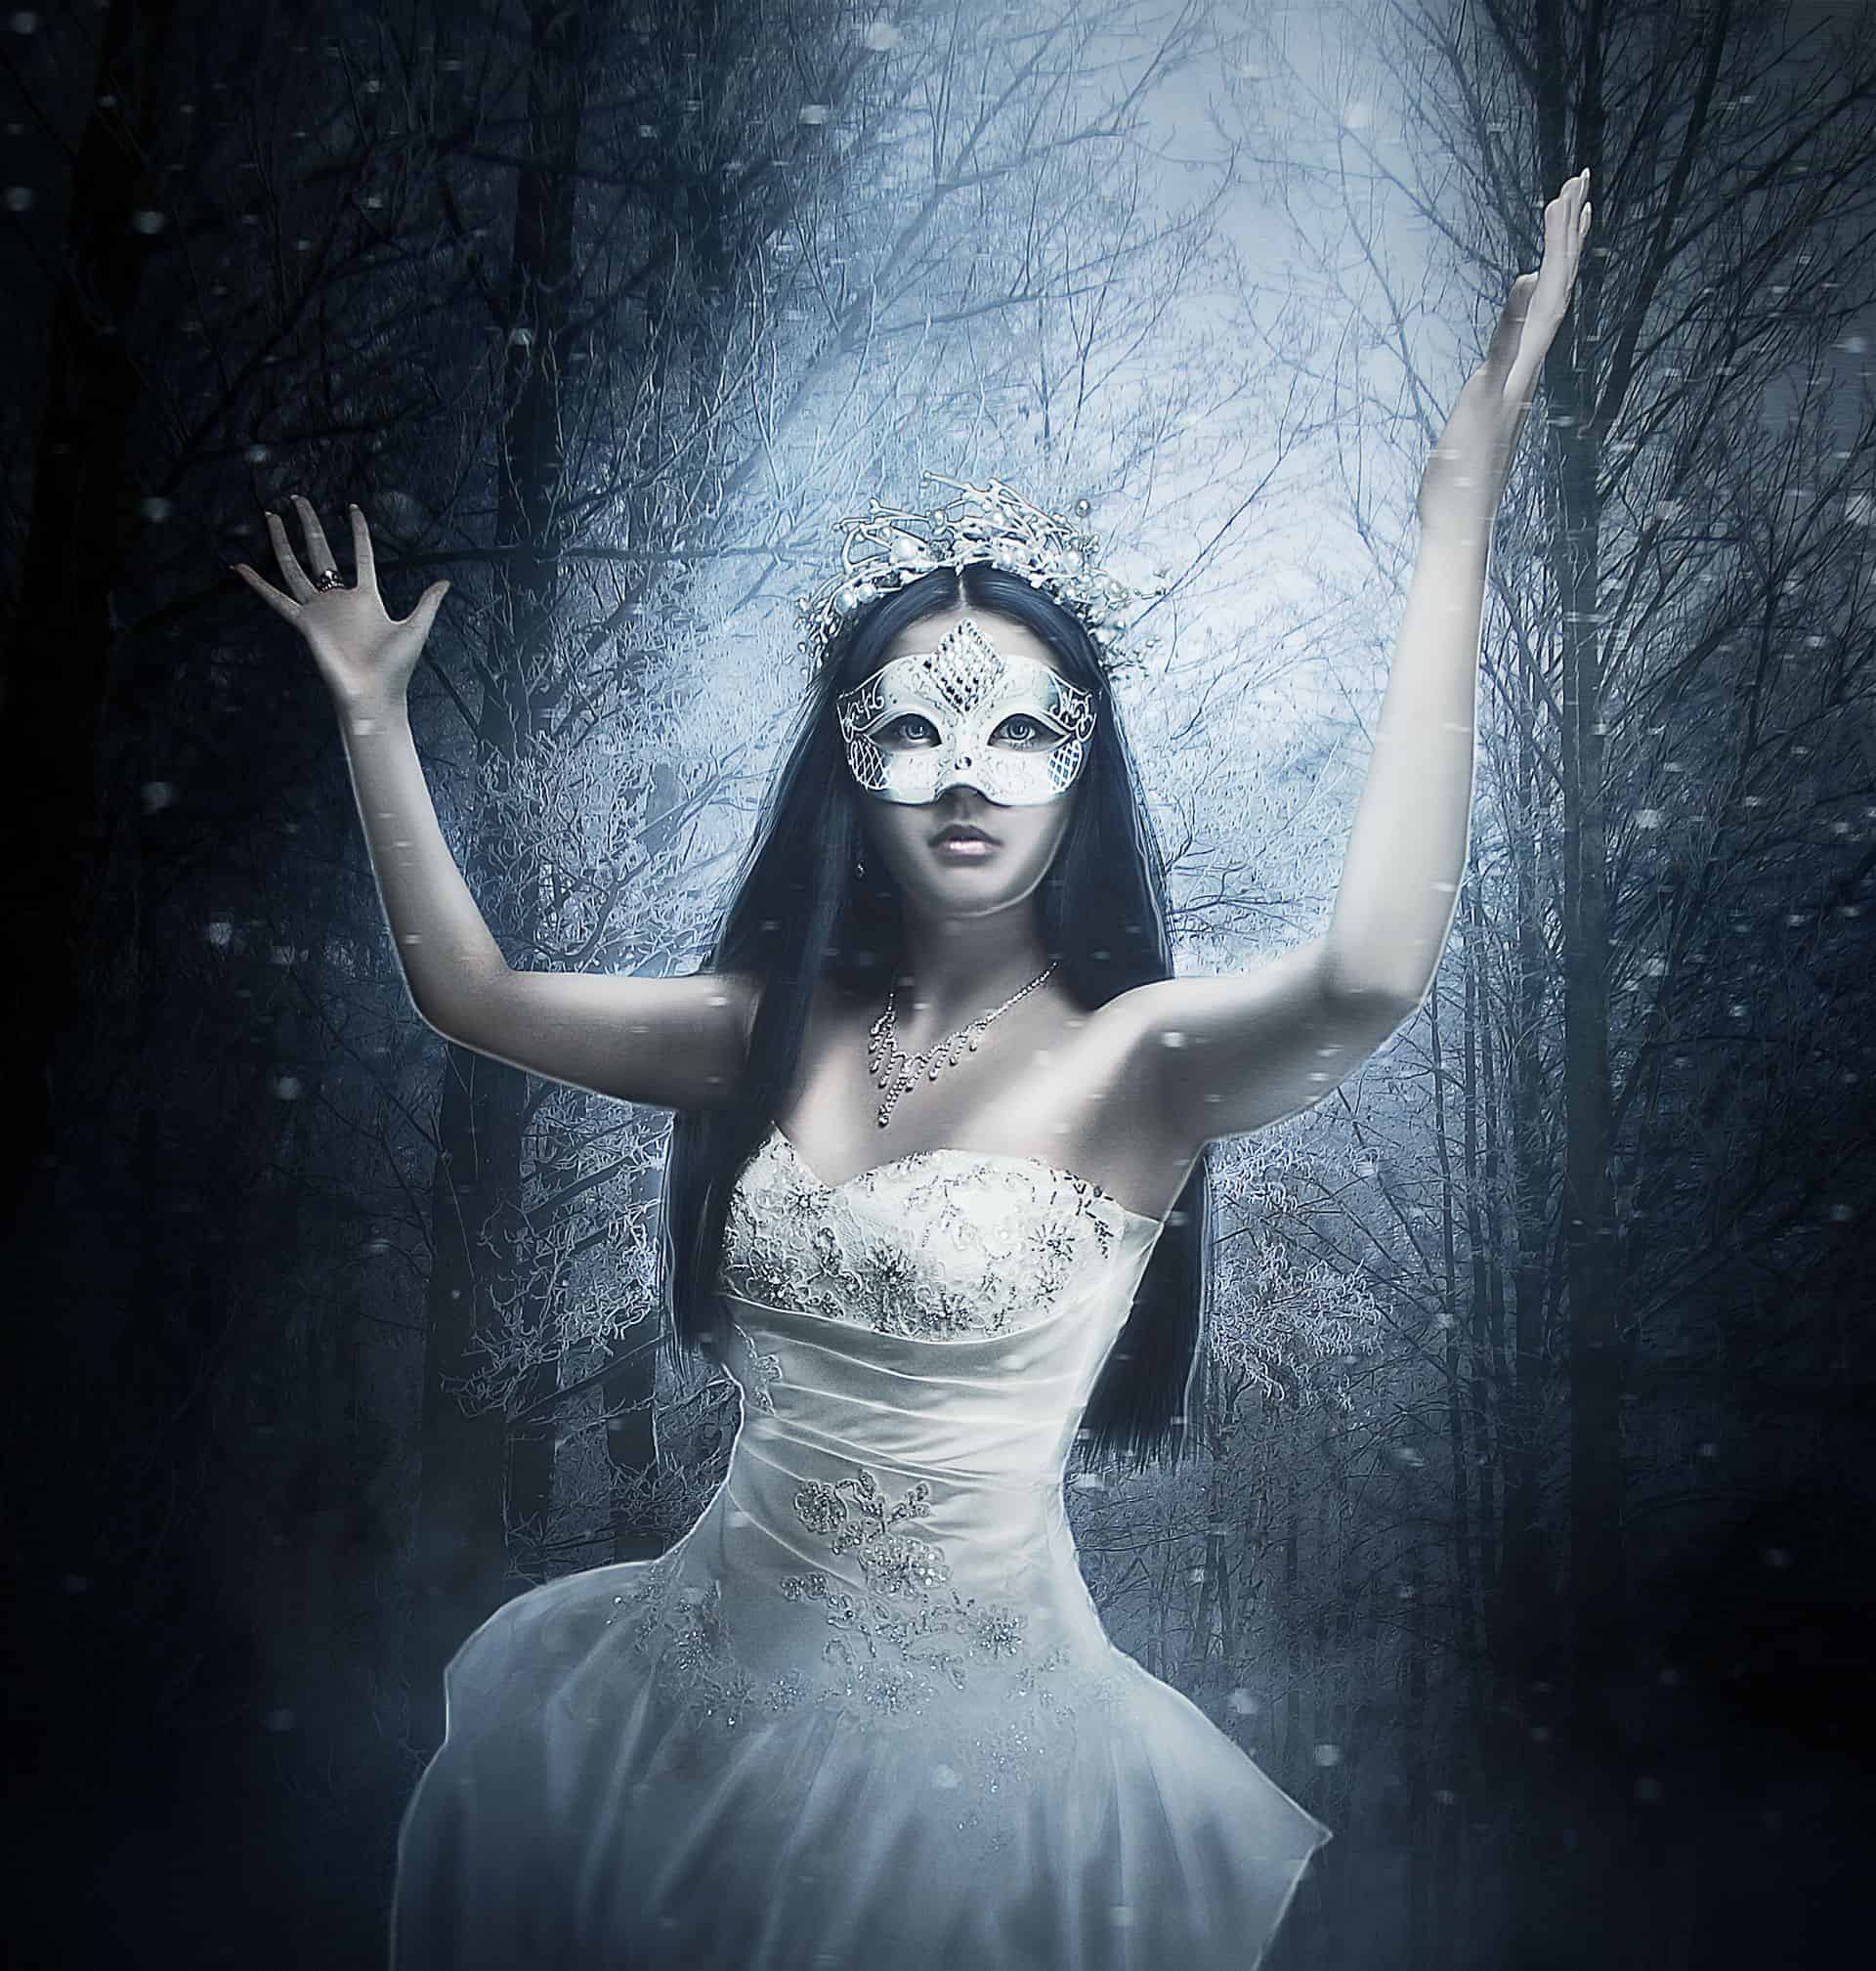
Step 3 - Snow
Open the 'Snow Texture' and put it above everything. Desaturate it and set the layer to Screen with Opacity 50% and Fill 80%. As you can see below I deleted some parts of the image but only because I didn't like the snow in those places.


Step 4 - Adjustments
Create a new layer. Choose the Smoke brush and paint some smoke at the bottom of the layer with color #e2ecf7. Layer is set to Normal with Opacity 60% and Fill 80%.

Create a new layer. Choose the Gradient Tool (Linear, Color #525869 to Transparent). Paint something like the image you see below.

Set the layer to Multiply.

Create a new layer. Make a texture like the one below (if you are not able get it from my PSD).

Set it to Soft Light with Opacity 80%.

Add a Curve Adjustment layer and choose 'Medium contrast' from the presets.


Step 5 - Burn and Dodge
Create a new layer. Fill it with 50% Gray (Edit > Fill) and set the layer to Overlay. Select the Burn Tool, Range > Midtones and Exposure > 10%-20%. With these settings you have to paint some shadows. Below you can see where I painted.


Select the Dodge Tool. Settings same as Burn Tool. There is only one difference. In the image below you'll see some strokes are whiter. In that case I used Range > Highlights.


Step 6 - Highlights
Create a new layer. Choose a hard round brush (5px) and pick one of the lighter color from the background (I picked #e5edfb). Paint highlight roughly (you can use the Pen Tool if you don't have a tablet). Then smudge them until they fit arms, dress and face egdes. You can add an additional gaussian blur. Now double click on the layer and in the pop up menu select Outer Glow. Set Opacity to 39% and change the yellow color with the one you picked before (#e5edfb for me). Below you can see where I painted highlights.


With CTRL + J copy the Highlight layer and set it to Overlay. Highlights will be more glowing.

Create a new layer. Pick another light color from the background (not the same you picked before or it would be boring). Paint some highlights on the egdes of the hair (Again you can use the Pen Tool if you don't have a tablet). Leave the mode to Normal but low Opacity and Fill until you are happy with the result.
4 comments on “How to Create a Stunning Winter Princess Artwork in Photoshop”
Excellent tutorial
Mediocre Tutorial
Thanks for sharing.
Awesome! Excellent tutorial...Thanks for sharing.