

Luminar AI lets you turn your ideas into reality with powerful, intelligent AI. Download the photo editor and see how you can completely transform your photos in a few clicks.
Step 18
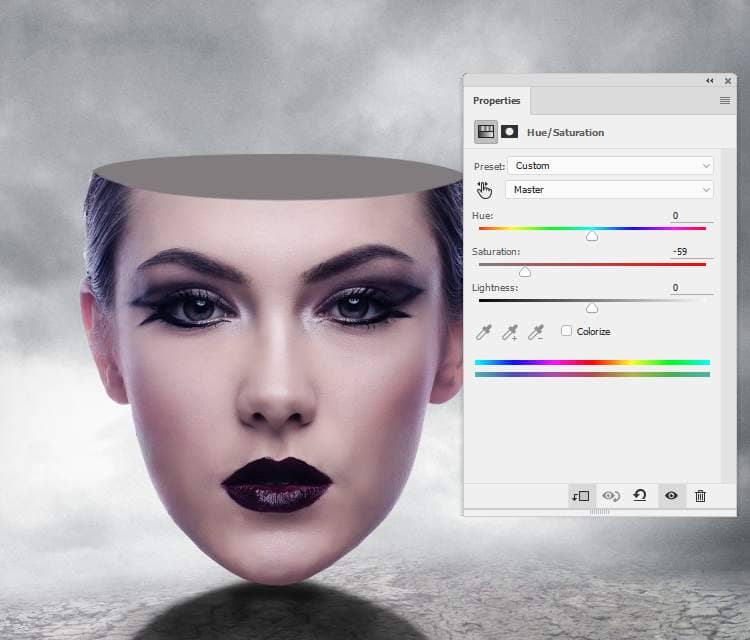
Make a new Hue/Saturation adjustment layer above this fill layer and set it as Clipping Mask. Lower the Saturation values down to -59:
Step 19
Create a new layer, change the mode to Overlay 100% and fill it with 50% gray.
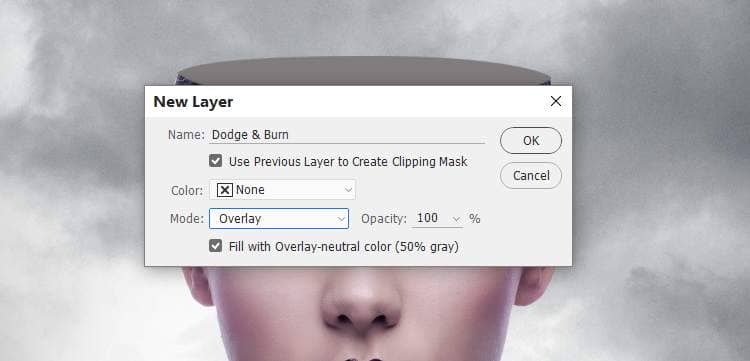
Activate the Dodge and Burn Tool (O) with Midtones Range, Exposure about 15-20% to paint light on the contour of this head hole and shadow on the lower area to fit the light from the background.
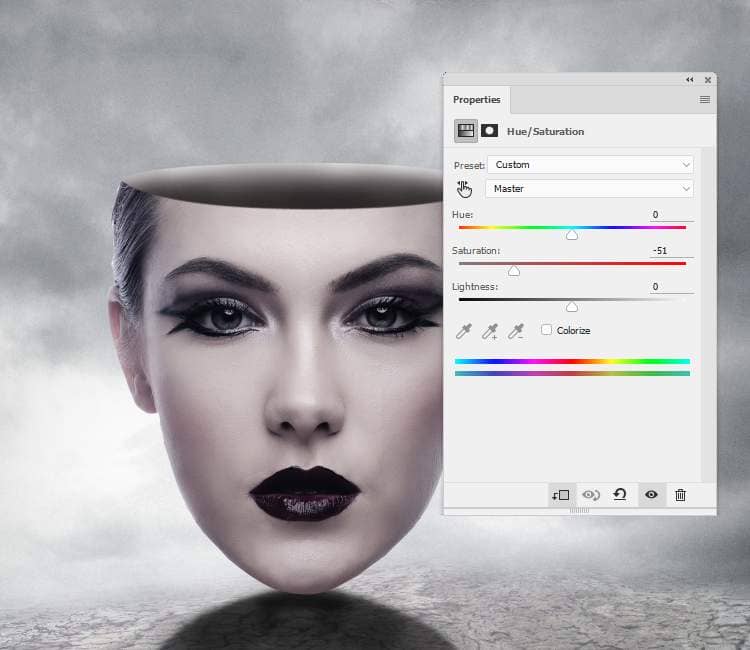
Step 20
Make a Hue/Saturation adjustment layer above the head's layer (set as Clipping Mask) and reduce the Saturation values to -51:
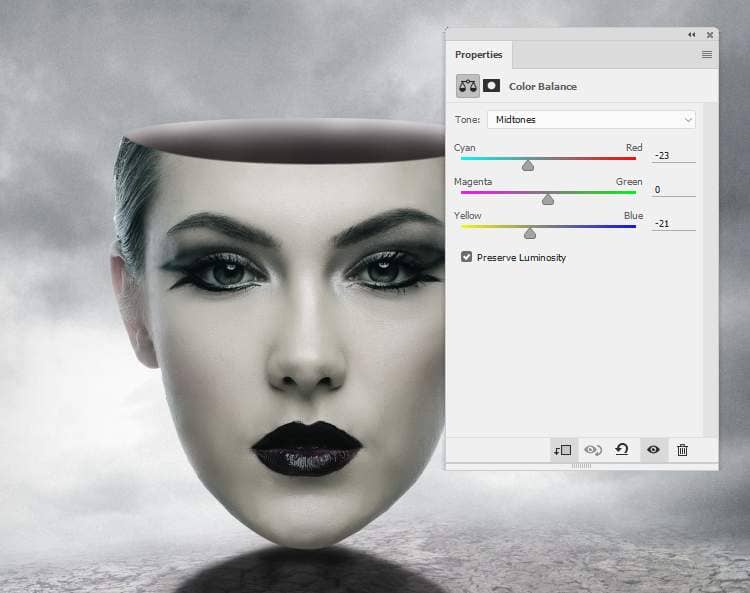
Step 21
Create a Color Balance adjustment layer and change the Midtones settings:
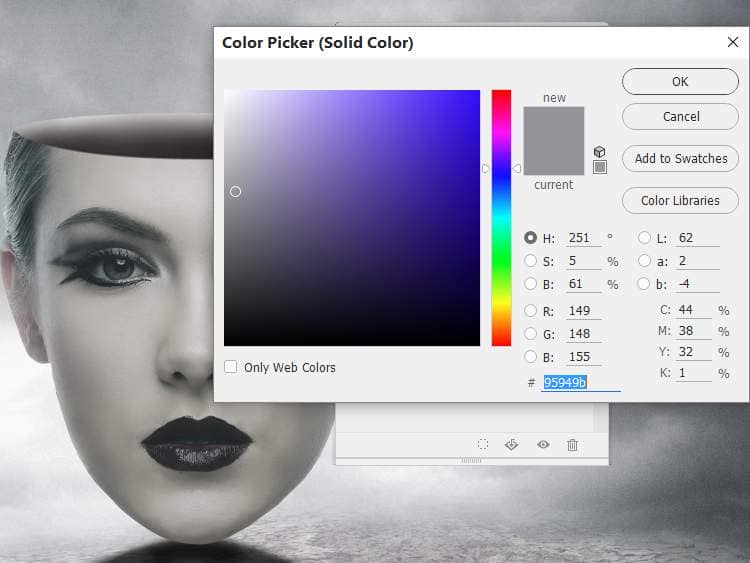
Step 22
Add a Color Fill adjustment layer and pick the color #95949b to reduce the contrast of the head. Lower the opacity of this layer to 20%.
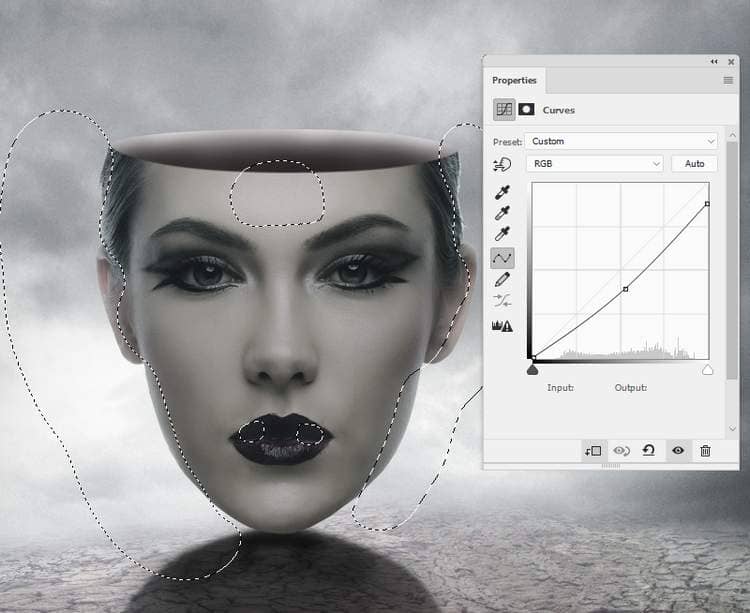
Step 23
Make a Curves adjustment layer to darken the front of the face a bit. Paint on the contour of the head, the middle of the forehead and corners of the lips so they won't be affected by this adjustment layer.
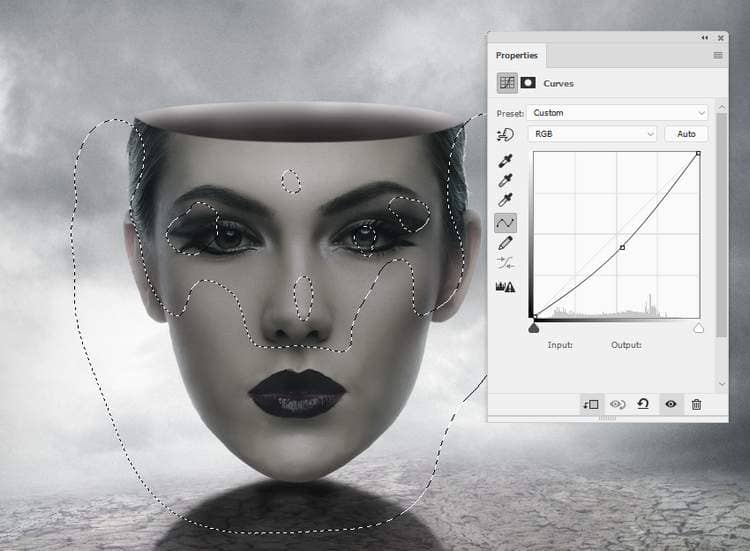
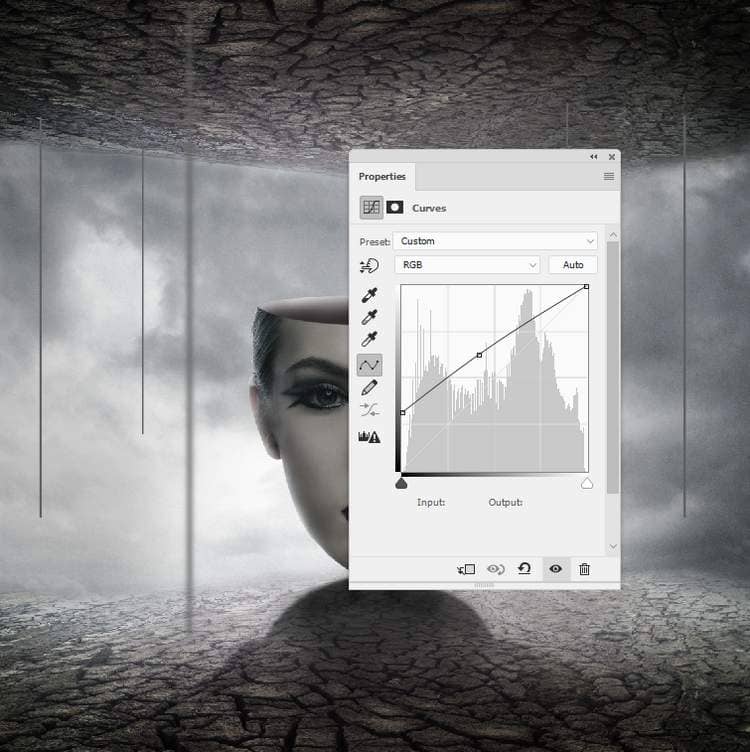
Step 24
Add another Curves adjustment layer to darken the upper of the face. The selected areas show where to paint on the layer mask.
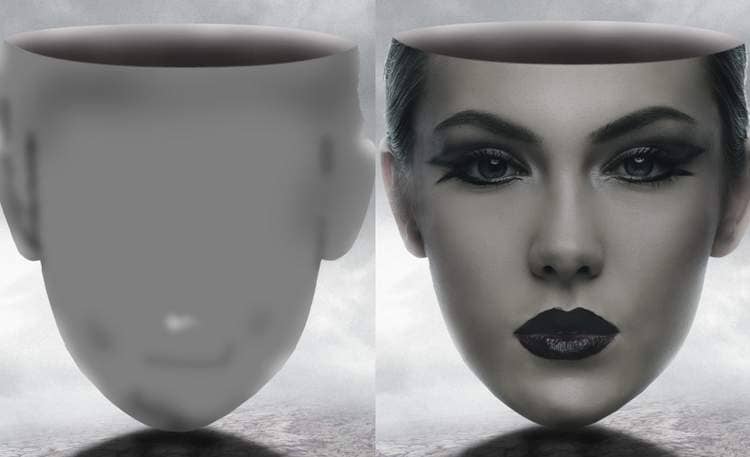
Step 25
Make a new layer, change the mode to Overlay 100% and fill with 50% gray. Use the Dodge and Burn Tool to refine the light and shadow on the head. You can see how I did it with Normal mode and the result with Overlay mode.
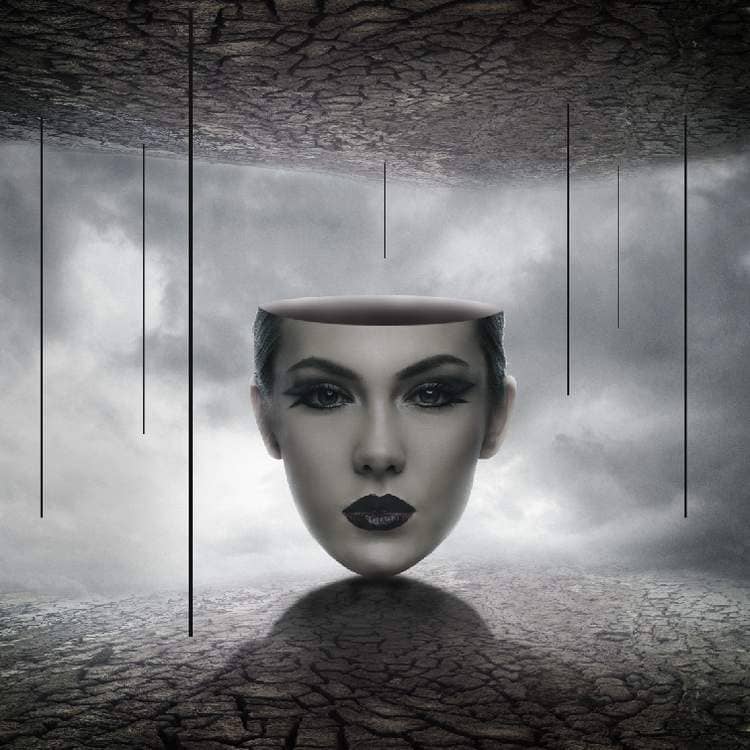
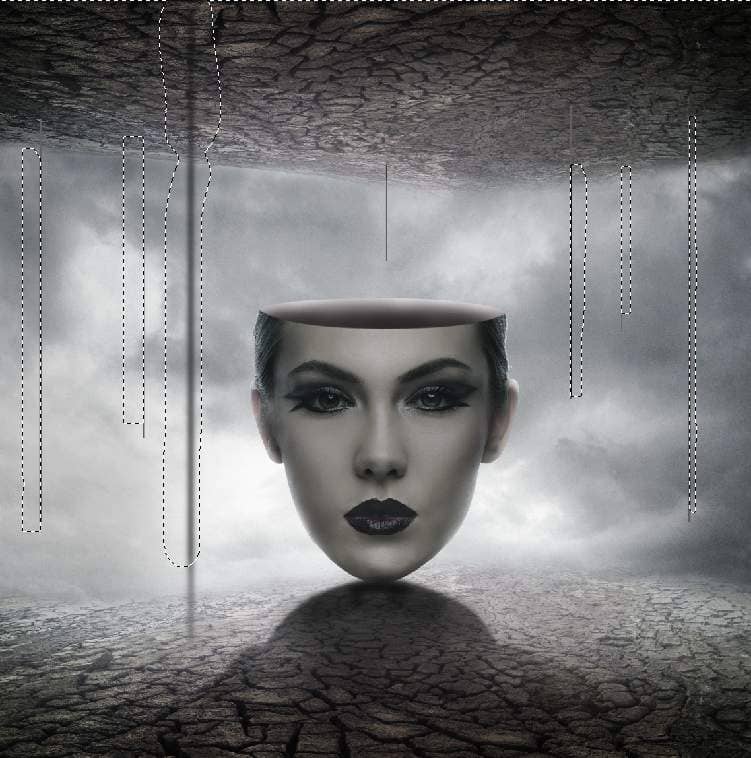
Step 26
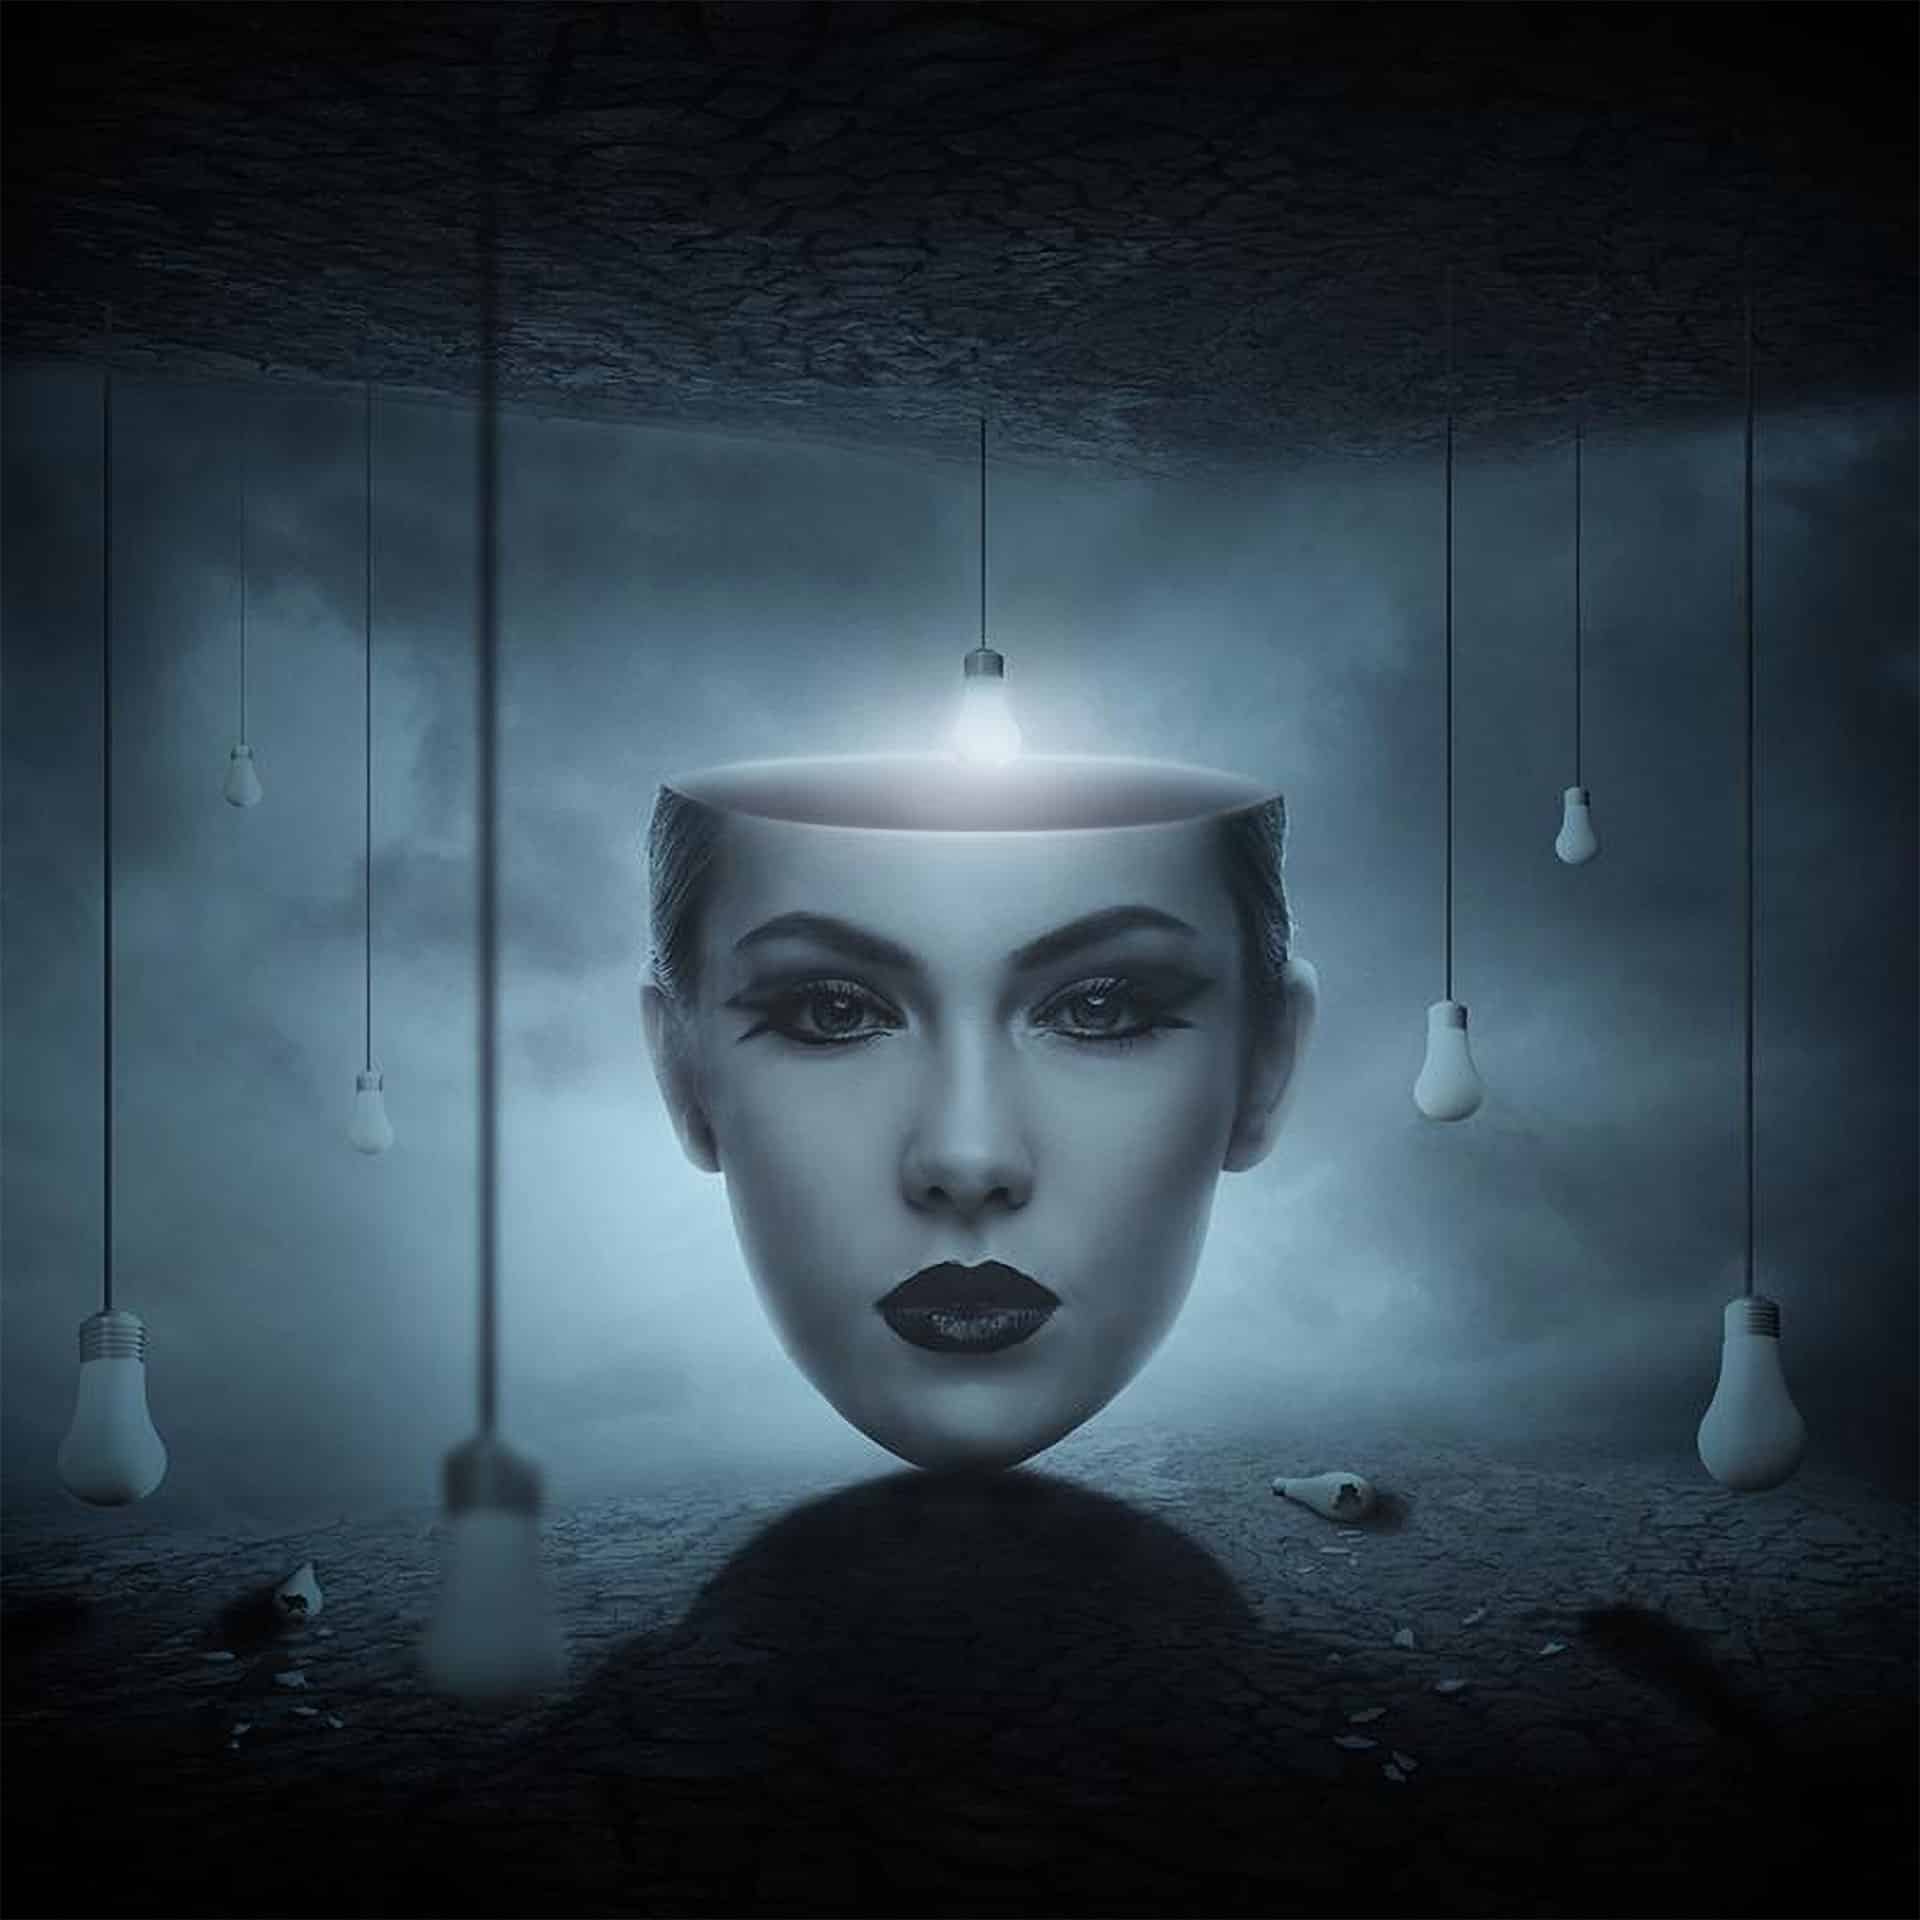
Create a new layer below the head fill one and set the foreground to #161616 . Activate the Line Tool (U) and draw several lines from the ceiling to the ground , remember to pick the tool mode as Shape. Vary the width of the lines following the rule: the further line from the viewer the smaller. Make one come down directly to the middle of the head's hole.
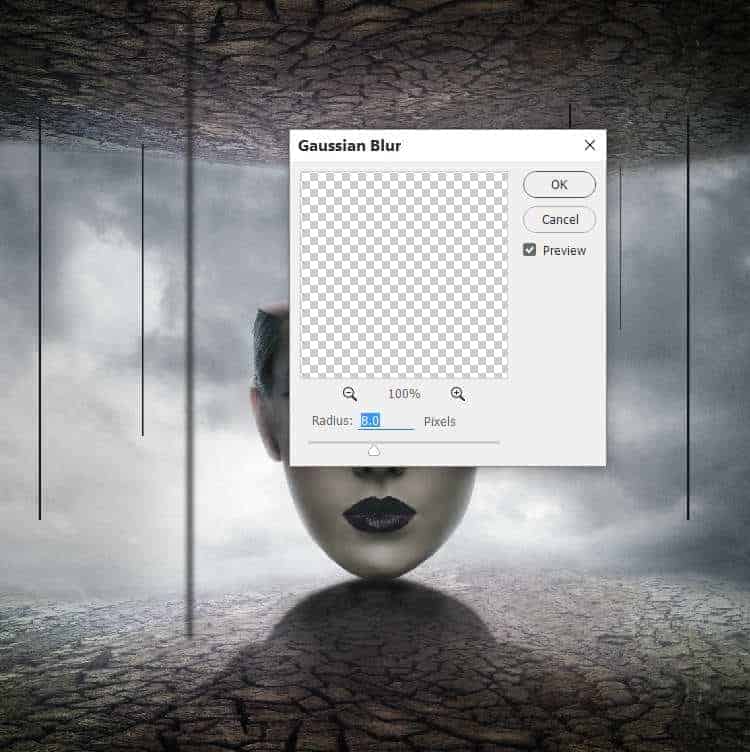
Step 27
Apply a Gaussian Blur of 8 px to the biggest line near the foreground. This step is to increase the depth of the scene.
Step 28
Make a group for the lines and create a Curves adjustment layer to make the side of the lines which comes towards the light brighter. Paint on the rest so they won't be affected by this adjustment layer.
Step 29
Cut out the lamp and add it to the our working document. Duplicate it several times and place them below the lines and two on the ground. Vary the lamp's sizes to fit the size of the lines.
5 comments on “How to Create a Surreal, Conceptual Head Photo Manipulation with Photoshop”
would be happy to see the psd file which is not listed on the tut. thanks
This is cool! Thank you!
By the way, I found a broken light bulb on DeviantArt.
https://www.deviantart.com/absurdwordpreferred/art/Broken-Light-Bulb-PNG-160293712
Thank you! I added it as a free alternative in the tutorial.
I just want to thank you so much for allowing this tuts to be available. I have been trying to get better at photo manipulation for so long but I just don't do well with video tuts, my brain just does not learn well that way. I need to be able to read the steps and then implement.
Thank you so much!
These are how I learned Photoshop. They're awsome!
Su