

Make your artwork look like they're from an alternate universe. These Cyberpunk presets work with Photoshop (via the Camera Raw filter) and Lightroom. Download all 788 presets for 90% off.
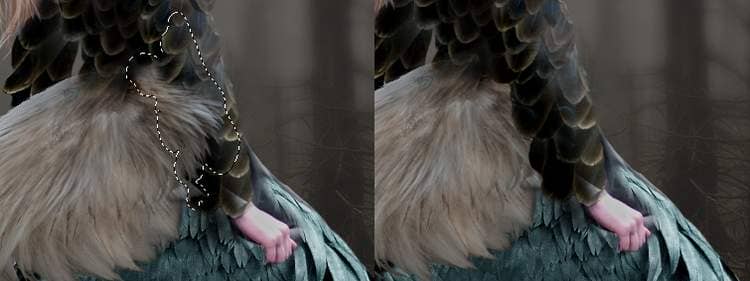
Step 42
Add aCurves adjustment layer to darken the hidden side of this feather parts. On the layer mask, paint on the rest so it won't become too dark.
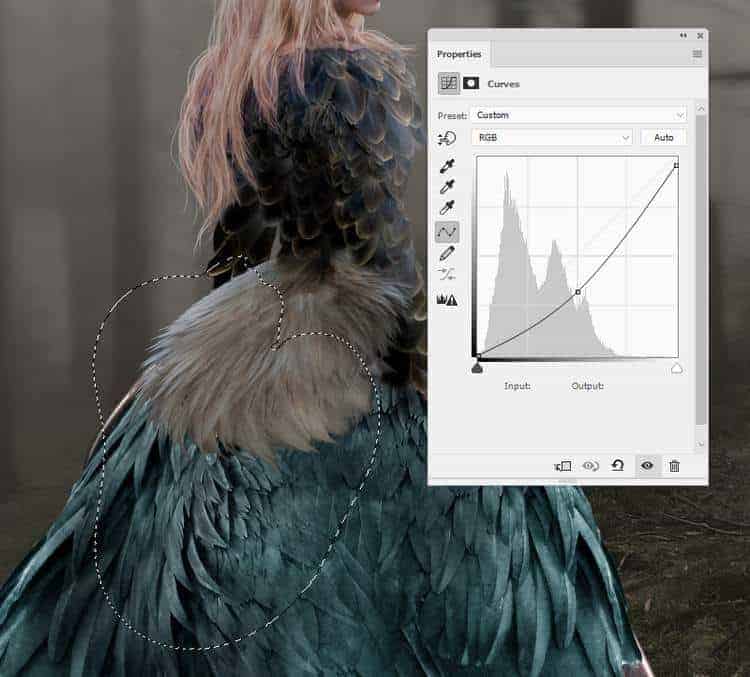
Create another Curves adjustment layer to brighten the middle section a little. The selected areas show where to paint on the layer mask.
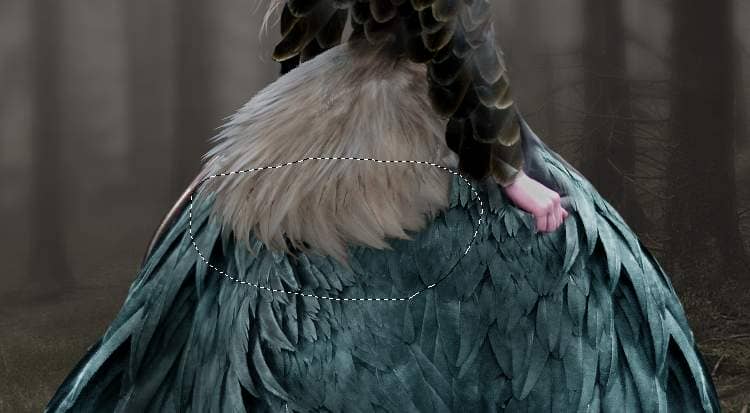
Step 43
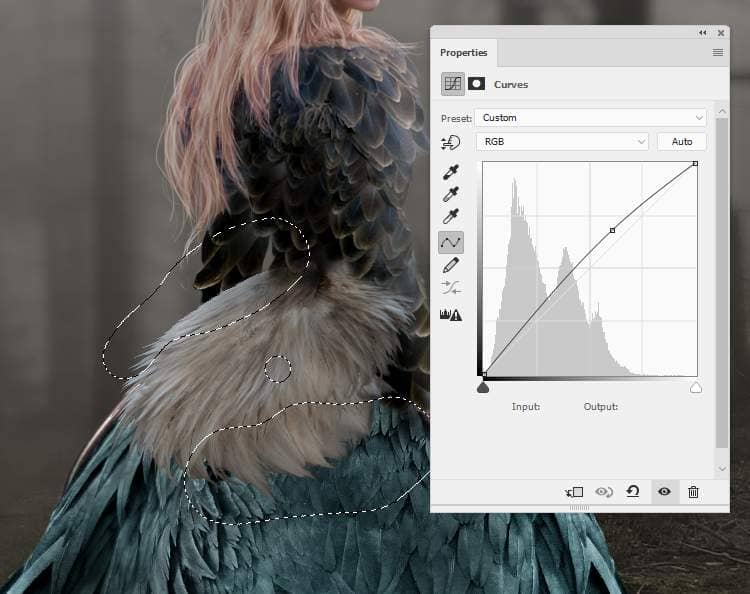
Create another Curvesadjustment layer to brighten the middle section a little. The selected areas show where to paint on the layer mask.
Make a new layer below this group and use a soft brush with the color #030904, the opacity about 20%to paint a soft shadow of this feathers area on the birdy dress.
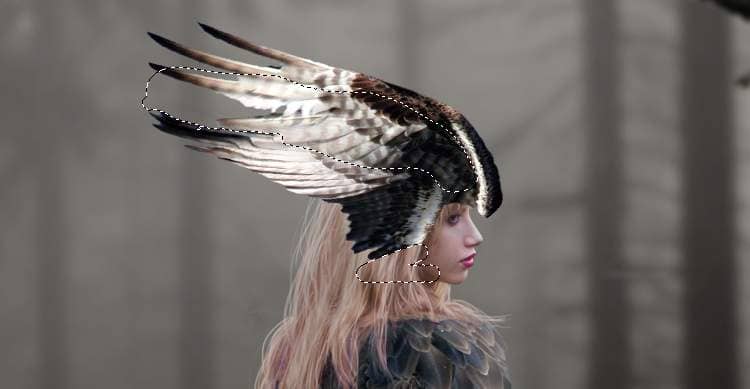
Step 44
Open the bird 9 image and take a wing only to add to the model's head. UseCtrl+Twith the Warp mode to tweak the part a little to fit the model's pose.
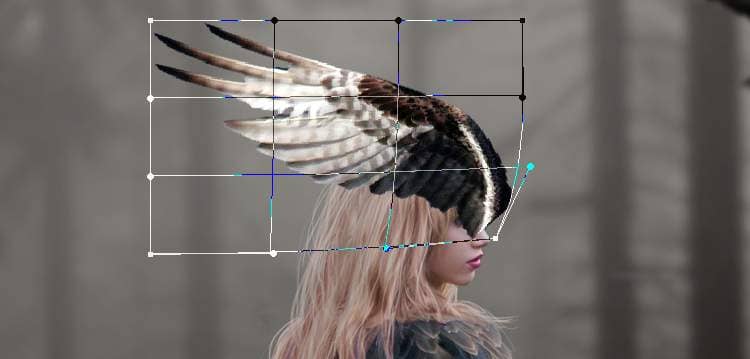
Add a mask to this layer to erase the eye and cheek.
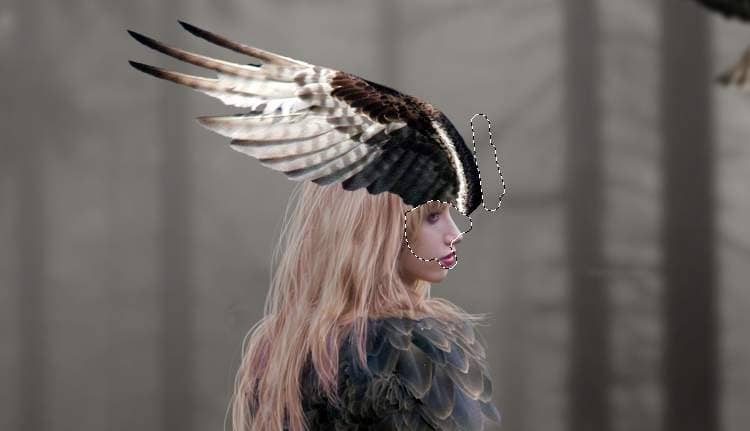
Step 45
Take another wing to add below the first one and use Ctrl+Twith the Warpmode to bend the wing as shown below:

Use a layer mask to blend this wing the existing one.
Step 46
Create a new layer below the wing ones and use a soft brush with the color #030904 to paint a soft shadow on the hair and face.

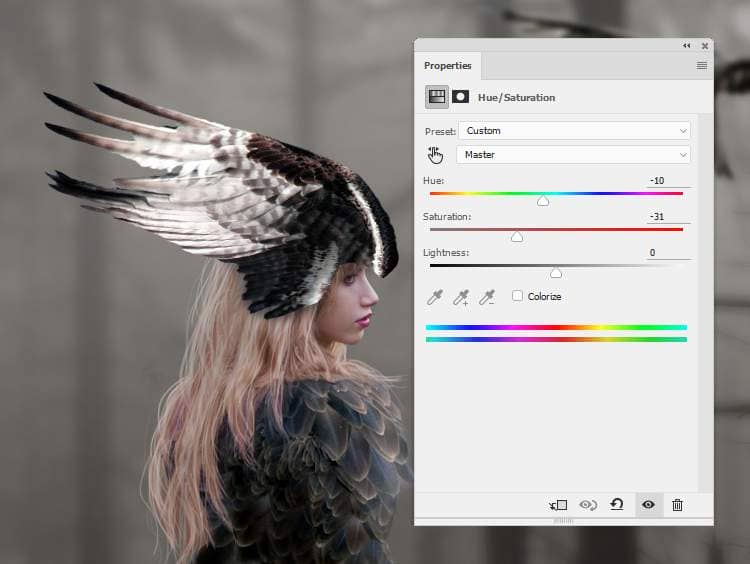
Step 47
Make a group for these wing layers and the shadow one. Add a Hue/Saturationadjustment layer to change the color of the wings a bit.
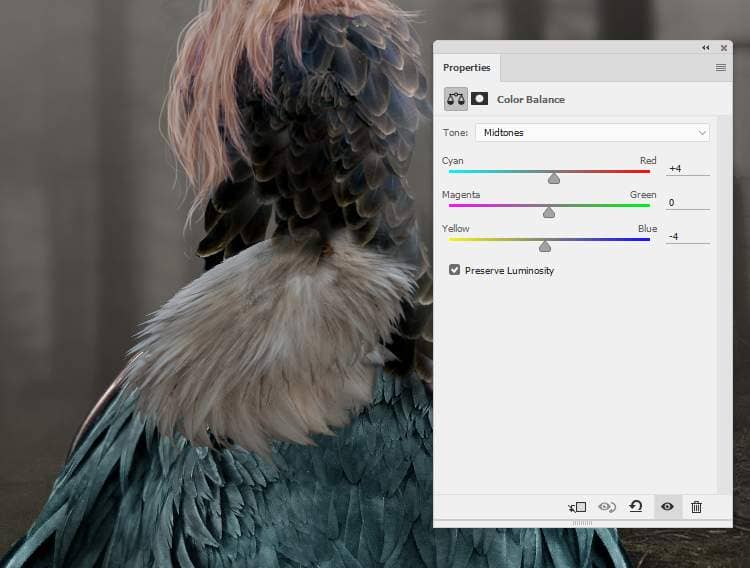
Create a Color Balanceadjustment layer and alter the Midtonessettings:

Make aCurvesadjustment layer to darken these wings. On this layer mask, paint on the top contour to reveal the lightness there.

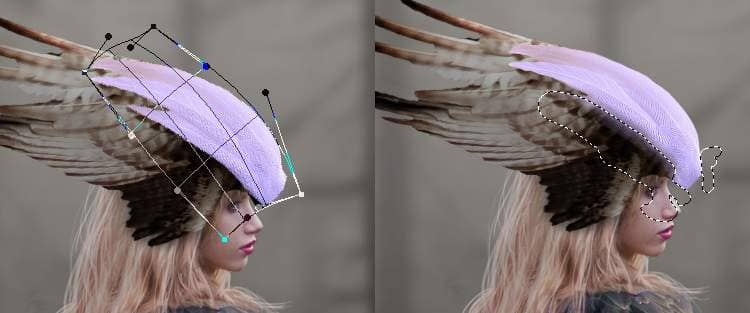
Step 48
Open the bird 10 image and take his tail only to add to the top of the head. Use Ctrl+Twith the Warpmode to tweak it a bit as done with the wings. Add a mask to this layer and use a medium-hard black brush to blend this part with the wings.
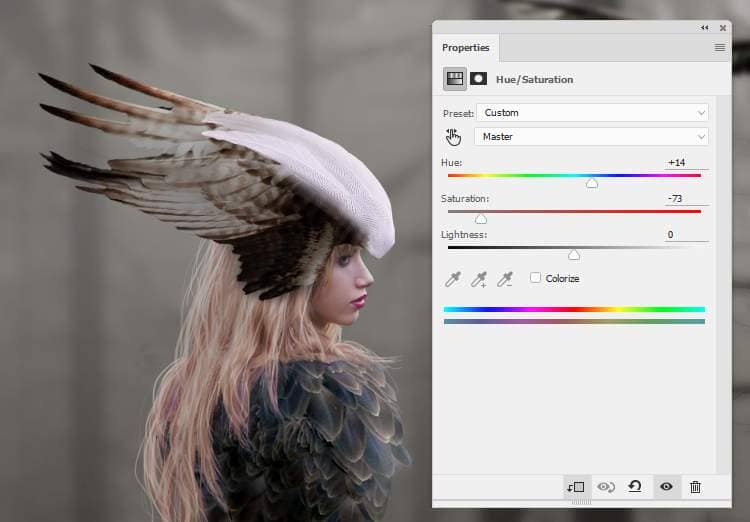
Step 49
Create a Hue/Saturationadjustment layer (set as Clipping Mask) to desaturate this part .
Add a Color Balanceadjustment layer and change the Midtonesvalues:

Make a Curvesadjustment layer to darken this part. On the layer mask, paint on the following areas below to keep its brighter than the rest.

Step 50
Create a new layer on top of the layers and press Dto turn the foreground and background to default colors (black and white). Go to Filter > Render > Cloudsand you should have a similar result like below:
4 comments on “How to Create a Queen of Bird Photo Manipulation in Photoshop”
Where is the model image?
Don't worry, I found it. :)
La photo de la femme ??? merci !!
https://www.deviantart.com/ann-emerald-stock/art/Girl-in-Fantasy-Dress-306950772