

Download Lightroom presets and LUTs, absolutely free. Use the presets to add creativity and style to your photos.
Step 6
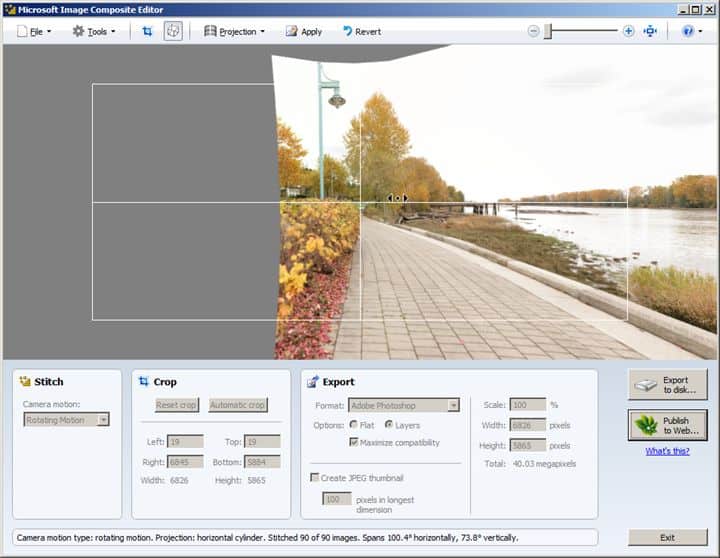
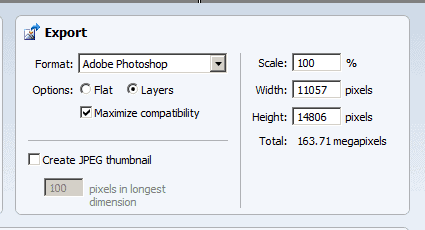
Once everything looks good, you can crop it and save the image. We prefer to leave the cropping to be done in Photoshop or Lightroom so we won’t be cropping it. Before you save, set your Export settings to Adobe Photoshop. Enable Maximize Compatibility if you’ll be using this PSD/PSB file with Lightroom.
Step 7
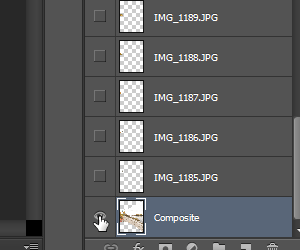
Open the PSD/PSB file into Photoshop. You’ll see a lot of layers but the only one that matters right now is the Composite layer found on the very bottom. Hold Alt and click on the visibility icon so that only the Composite layer is visible.
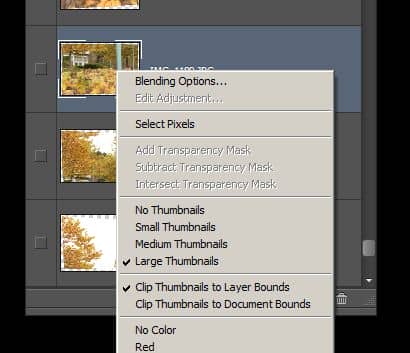
Next, you’ll want to change the appearance of your layers so that you can see the thumbnails. To do this, right-click on the thumbnail of any layer then enable “Large Thumbnails” and “Clip Thumbnails to Layer Bounds”. Now it’s way easier to see your layers!
Step 8
Use the Crop tool to crop the image. Make sure that the “Delete Cropped Pixels” option is disable – this way you can uncrop the image at anytime.


Step 9
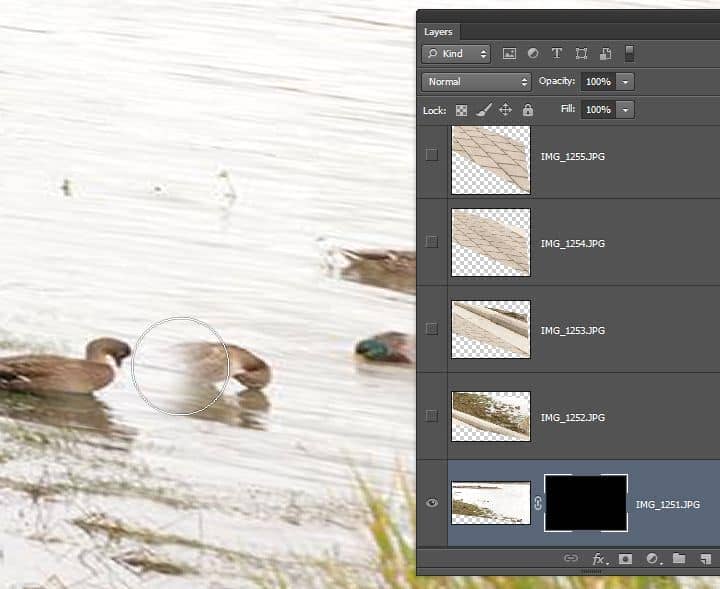
You can use layers to remove or add object. For example, I have a problem with this duck and want to remove him from the picture. To do so, find the layer without the duck, add a black layer mask to the layer (Layer > Layer Masks > Hide All), then used the Brush tool (B) with a soft edge to paint over the duck that I want to remove. This is the benefit of working on a layered panorama.

Why use Microsoft ICE?
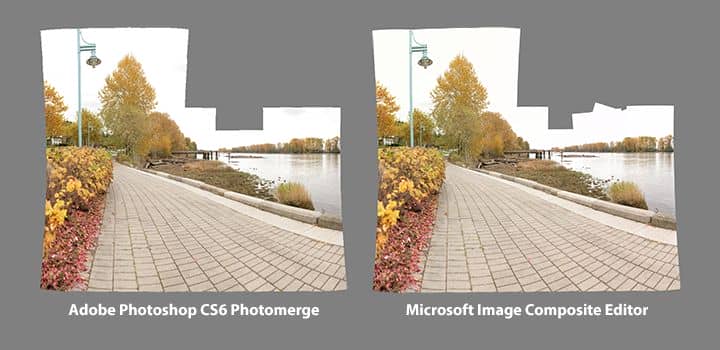
Both ICE and Photomerge do a great job stitching panoramas. The panoramas look almost identical and had the same errors with complex panoramas.
The biggest difference between the two panorama stitchers is speed. Microsoft ICE was able to show the preview 1m59s seconds faster than Photoshop’s Photomerge. The whole rendering time including saving time in Microsoft ICE was 3m02s in ICE vs 3m58s in Photomerge.
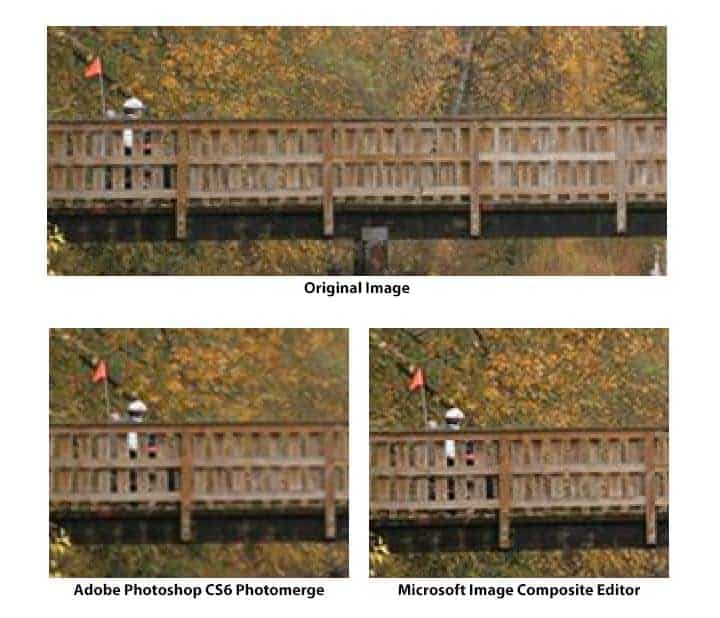
What I love most about ICE is the image sharpness. While Photomerge reduces the sharpness slighly, ICE increases the sharpness with what looks like a superresolution effect.
Summary
If you do any kind of panoramas, I would recommend stitching them in Microsoft ICE and saving them as a PSD. ICE isn’t the solution for every situation and lacks some features that Photomerge has (ex. PSD with layer masks), but overall it performs better and has additional features that Photomerge doesn’t.
9 comments on “Photoshop Tip: Create Layered Panorama PSDs with Microsoft ICE”
Really enjoyed reading ur blog.
Nice technique. Really useful…amazing!! great to see the amazing work of great experienced art directors!!thanks for the post…
Good info.. thanks! I'd love to have a Gigapan for myself one day.
Your blog is great! These pictures are so interesting , I like cartoon very much, I want to make friends with you
I don't care about making panoramas but the last picture of the sharpness is interesting. Can you do that with a set of photos and trick it into just sharpening the image? I.E. Using burst mode to take 3 pictures of the same scene then putting it into Photosync to sharpen it.
@Denver9999999 Haven't tried but that's a great idea. Photoshop does have a way to do that using Stacking modes. You can go to File > Scripts > Load into Stack and then go to Layer > Smart Objects > Stack Mode > Mean or Median. Those are more for reducing noise but can sharpen the image as a result of less noise. Another software to try is PhotoAcute (http://www.photoacute.com/)
Just noticed that you posted to Photosynth: http://photosynth.net/view.aspx?cid=1b77eff0-b816-40bb-a131-a640cd31bce6
I'm not sure if you found the Photosynth Export plugin for Photoshop: http://research.microsoft.com/en-us/um/redmond/groups/ivm/PSPlugin/ ? This lets you use the workflow that you describe here and still upload to Photosynth.
Thanks for the tip Matt! That's a useful addon
Doesn't work for Mac :,(