

Turn any photo into a dot grid artwork with these Photoshop actions. You'll get great results with dots that change size. They get larger in brighter areas and smaller in darker areas. Free download available.
In this tutorial, I'll show you how to create a sunrise scene featuring a girl coming home. First, we'll build the base scene using two images of the sky and field. After that, we'll add the sign, house, model, and dog. Later, we'll create several adjustment layers, paint the light, hair, and some missing details. We'll add the birds to complete the final effect.
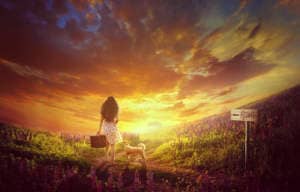
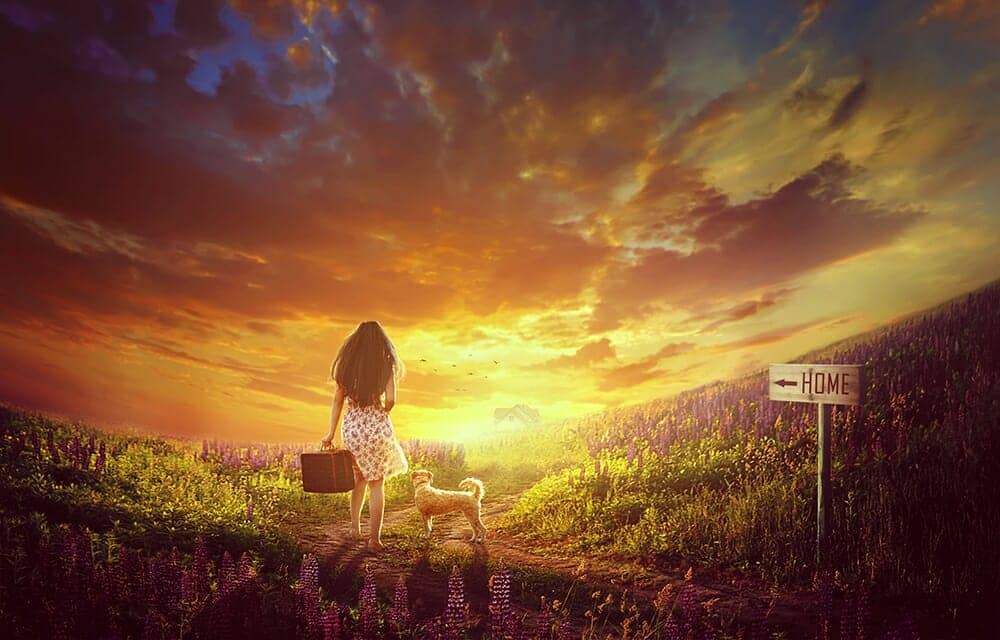
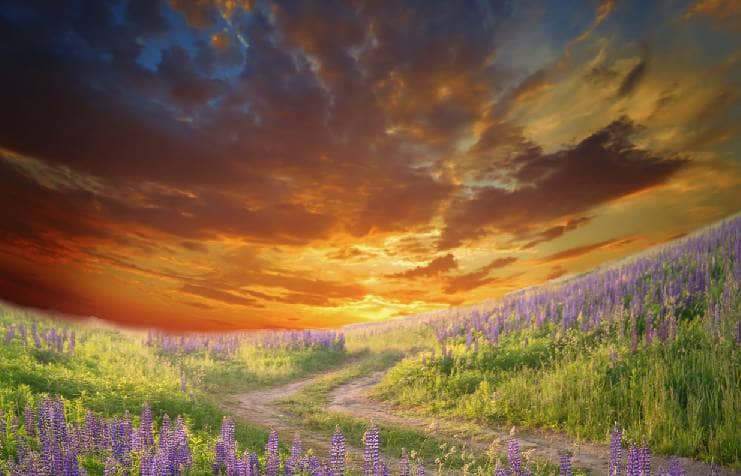
Preview of the Final Result
Tutorial Resources
Step 1
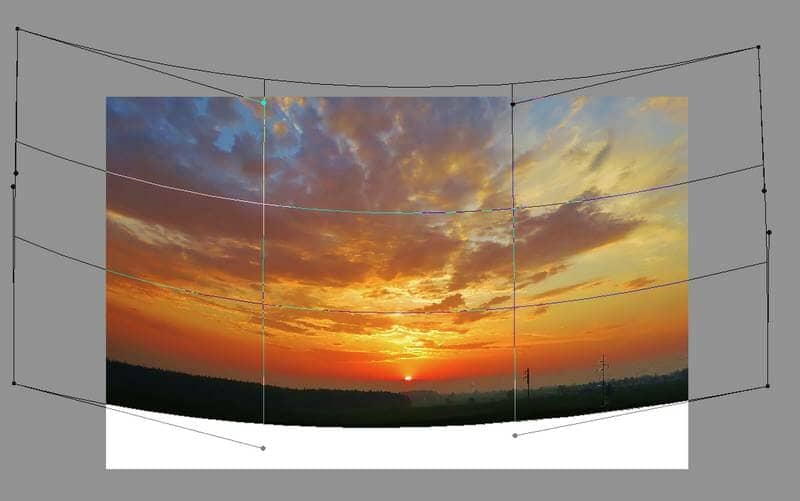
Create a new 2500x1600 px document in Photoshop and fill it with white. Open the sky image and drag this image into the white canvas using the Move Tool (V). Convert this layer to a Smart Object and use the Free Transform Tool (Ctrl+T) with the Warp mode to bend the form of the sky image as shown below:
Step 2
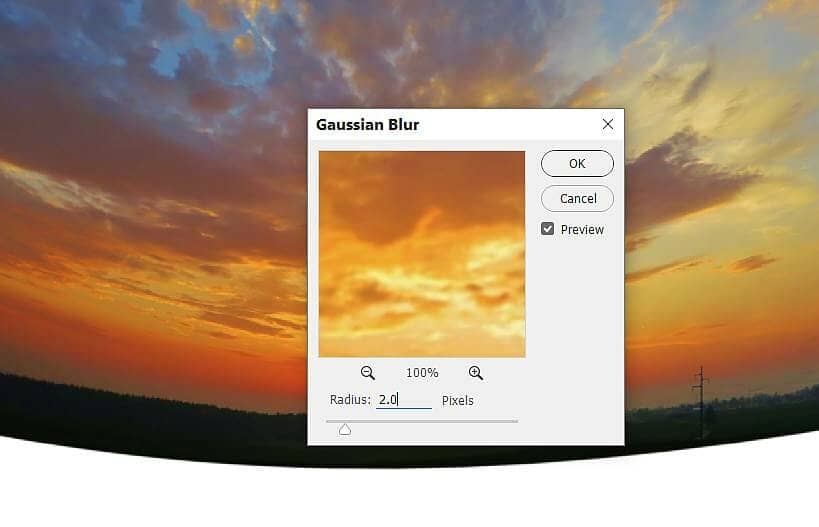
Go to Filter > Blur > Gaussian Blur and set the radius to 2 px.
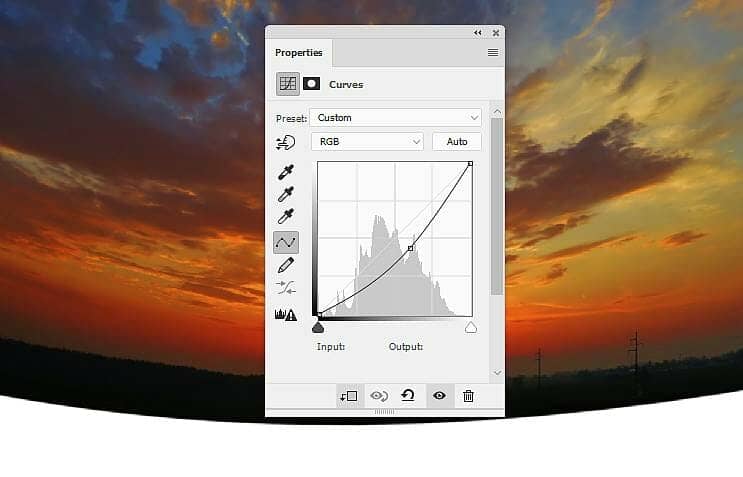
Step 3
Go to Layer > New Adjustment Layer > Curves and set it as Clipping Mask. Bring the lightness down and on this layer mask, activate the Brush Tool (B). Select a soft round one with black color and use this brush to erase the dark effect on the bottom middle of the sky.
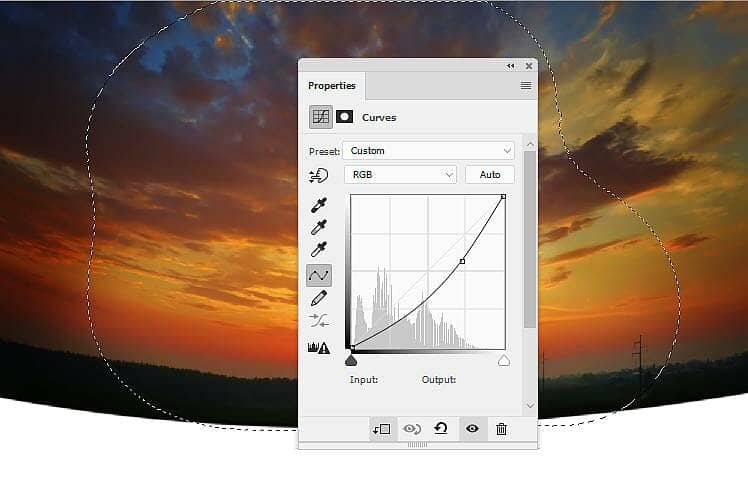
Step 4
Make another Curves adjustment layer to darken both sides of the sky more. On this layer mask, use a soft black brush to erase the rest so it won't be affected by this adjustment layer.
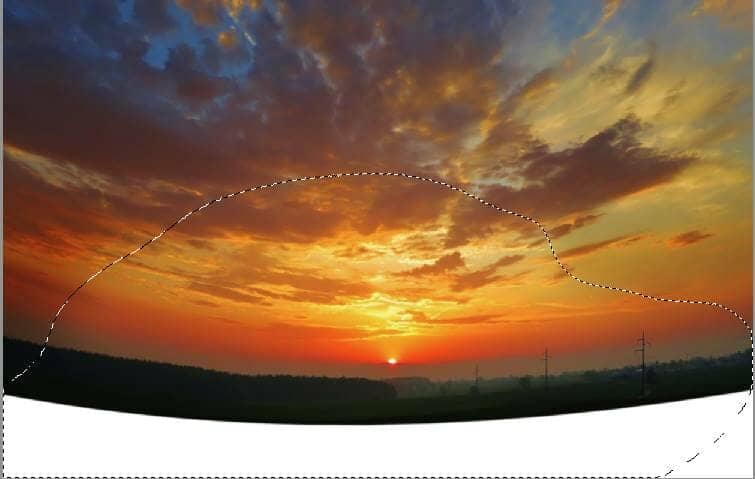
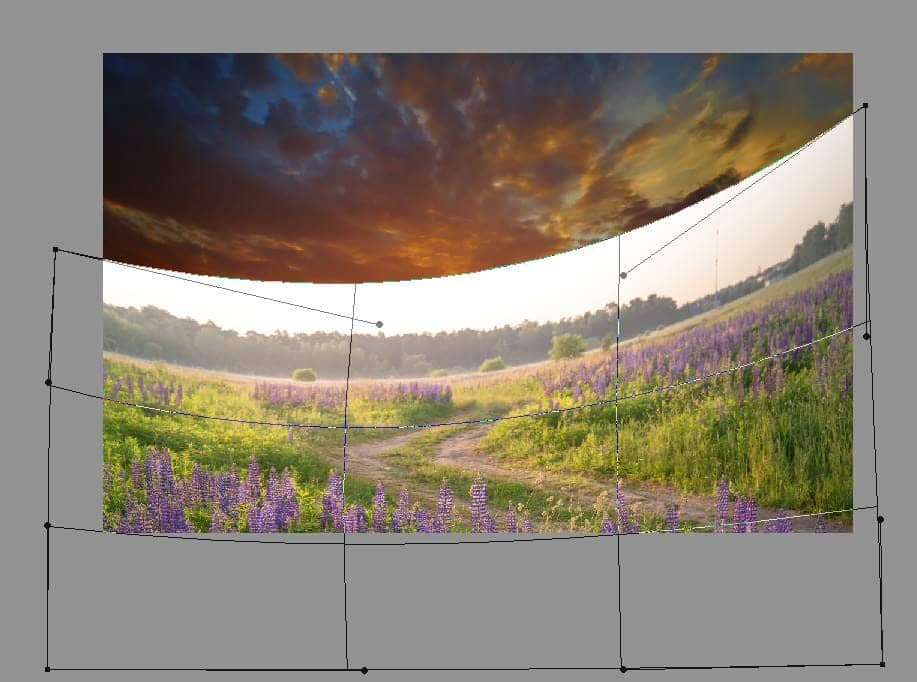
Step 5
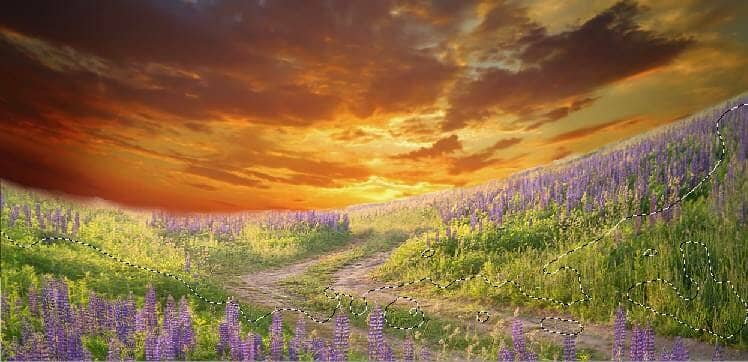
Open the field image and place it onto the lower part of the main canvas. Convert this layer to a Smart Object and use Ctrl+T with the Warp mode to bend the upper part of the field as shown below. Click the second icon at the bottom of the Layers panel to add a mask to this layer. On this layer mask, use a medium-hard black brush to erase the sky and bushes of this image.
Step 6
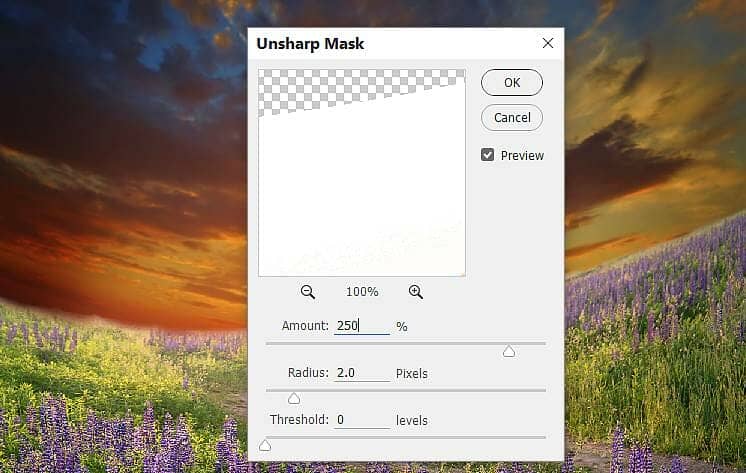
The background of the field looks blurred than the rest so go to Filter > Sharpen > Unsharp Mask and fill in the following settings. On this filter mask, use a soft black brush to erase some parts of the foreground and midground of the field so they won't become too sharp.
Step 7
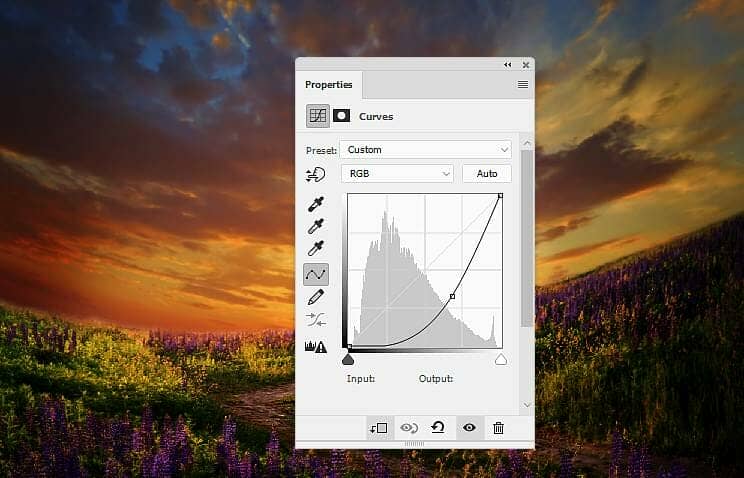
Make a Curves adjustment layer above the field (set as Clipping Mask) to darken the field.
Step 8
Create another Curves adjustment layer to darken the left side more. On this layer mask, paint on the rest to keep its lightness.