
Download Lightroom presets and LUTs, absolutely free. Use the presets to add creativity and style to your photos.
Click on somewhere near the letter 'I' and write the letter 'N'. Make sure that the 'caps-lock' is switched on.

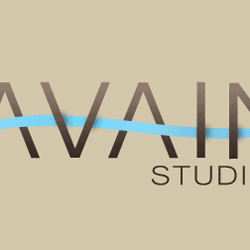
Step 4 – Align the text
Ok. Now we are going to perfectly align these letters within the 'Guides. Press the letter 'v' on the keyboard to select the 'Move' tool. On its 'Option Bar' click on the 'Auto Select Layer' option to turn it on. This is a cool feature which will let you select any element in your design without actually going to the layers palate. Just click on any visible element and as you drag the element will start to move.

Ok. Now using the 'Move' tool align all the elements within the 'Guides'.

Now they are within the 'Guides'. But look at the letter 'N'. It is a bit small in size when compared to the other letters in the design. Let's correct it. Click on the letter 'N'. Then press Ctrl+t on the keyboard to activate the transform option. A transform box appears around the letter 'N'. Use the Control point to change the width of the letter 'N'.

Press 'Enter' to apply the transform.Now the width of the letter 'N' is Ok.

Now let's arrange all the letter precisely within the 'Guides'. Select all the layers except the 'Layer 0'. You can use the Shift key to select more than one layer.

Then press Ctrl+t to activate the transform option. You can see a transform box appears around the letters. Use the right control point to move the letters to the right side.

Until it touches the right 'Vertical Guide'.

You can also make some minor adjustments like adjusting the space between each letter with the use of 'Move' tool and adjusting the width of letters using the 'transform' option. You can stop where every letter is in perfect harmony with each other. I made some minor changes too.

Ok now we have entered the main text and aligned it perfectly. In the next step we are going to add the sub text to our design.
Step 6 - Add the “studios” text
Ok now let us add the text 'studios' to the image. Make sure that the Caps-Lock is turned on. Select the 'Type' tool by pressing 't' on the keyboard, and on the 'Options bar' set the font family to 'Microsoft Yi Baiti', font size to 34.74 pt and anti aliasing method to 'smooth'.
3 comments on “AVIAN Studios Logo”
merama ben şaban konak
Merciii bcp ; thanks a lot (Y)
I think you made some parts harder for yourself then it needs to be. You always have the center tool and low tolerance magic wand. :)