


Turn any photo into a dot grid artwork with these Photoshop actions. You'll get great results with dots that change size. They get larger in brighter areas and smaller in darker areas. Free download available.
Preview of Final Results
This image was created to mimic the comic book fonts but in 3D. You will learn how to create this 3D effect by duplicating layers and by adding halftones to give it that comic feel. This tutorial was created with Photoshop CC.
Tutorial Resources
- Halftone Brushes DeviantArt - Gregkmk
- Komika Axis DaFont - Vigilante Typeface Corporation
Step 1
Open Photoshop and create a new document by clicking File > New. I made my document 2000 px by 2000 px (it doesn't matter the resolution since we're using pixels). I titled my document "Comic Book Text Effect".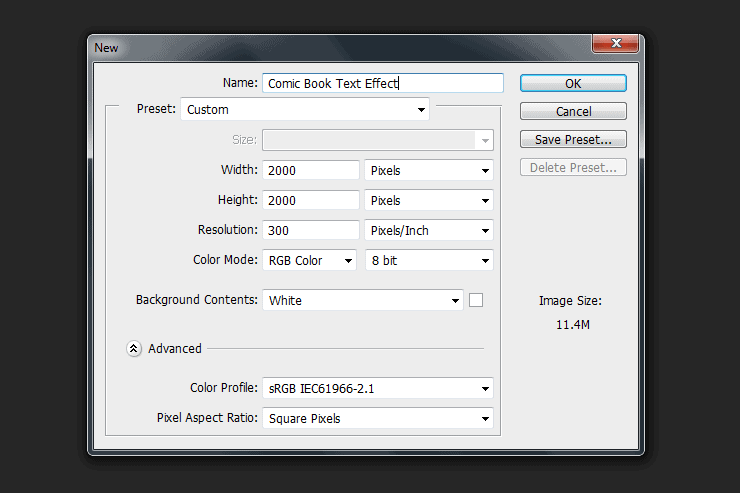
Step 2
Now it's time to add a gradient to your background. Double-click your background layer to bring up the layer style window and apply this setting.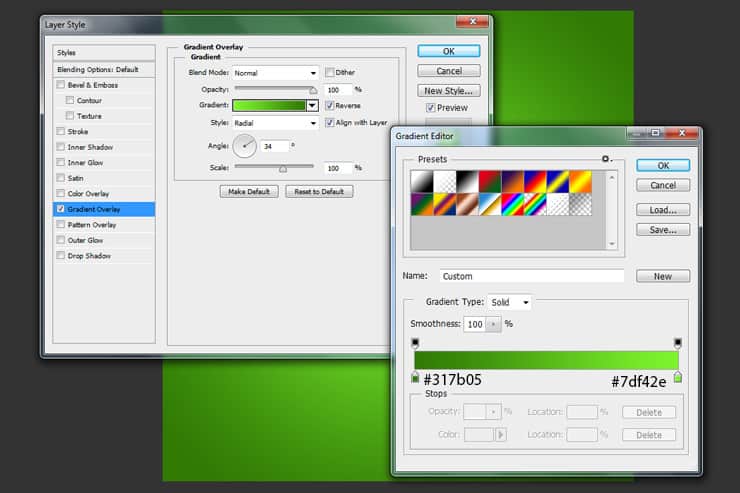
Step 3
Create a new layer. Fill it with any color and change the fill to 0%. Double-click this layer to bring up the layer style window and apply this pattern.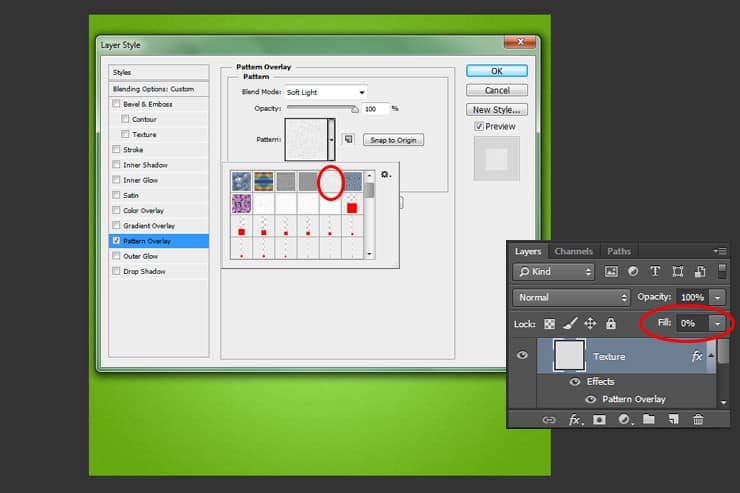
Step 4
Create a New Layer. Select the Brush tool (B) then set the brush size to 1957 pixels. You can use whatever color you want. Now place your halftone in the center of your document as shown in the image below. Also, change your layer to Luminosity with a Fill of 16%.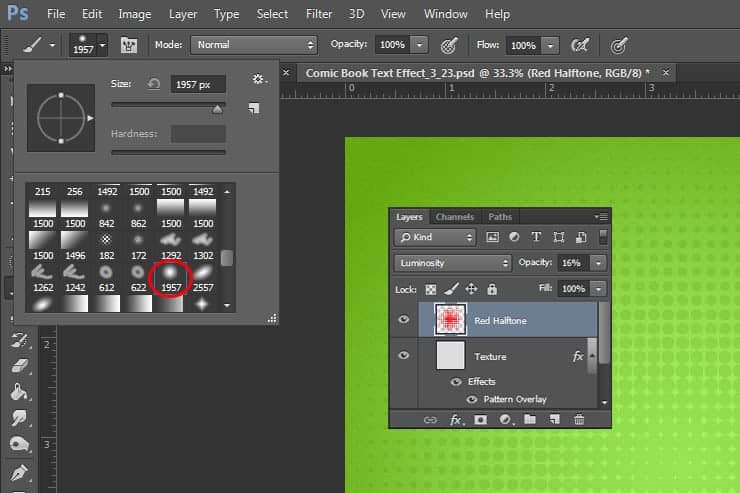
Step 5
Create a New Layer. Grab your Pen tool (P) and create a shape as shown in the image below.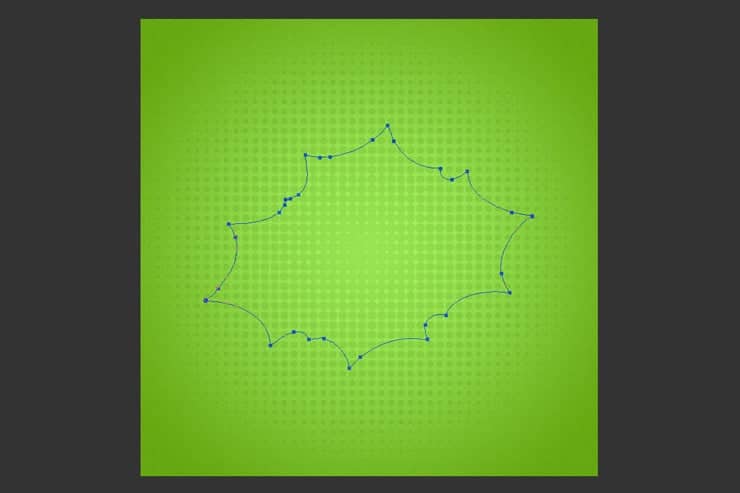
Step 6
Go to your Paths tab and right-click the path you just created and click Make Selection. Click 'ok'.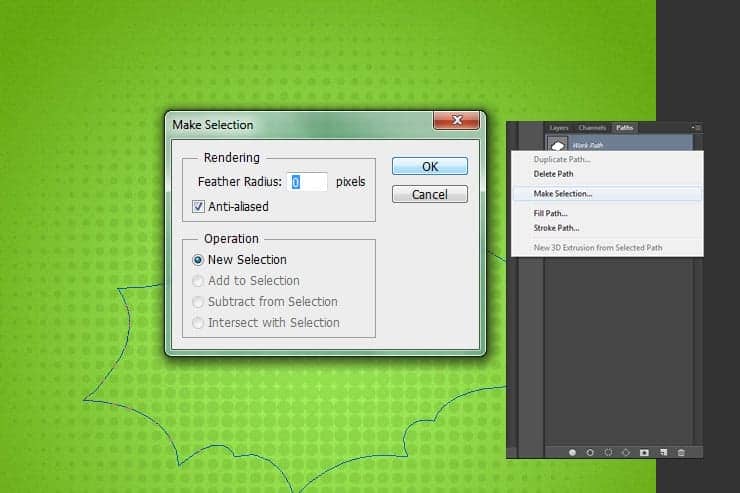
Step 7
Fill this selection with whatever color you want. Then double-click this layer to apply a Color Overlay and a Drop Shadow.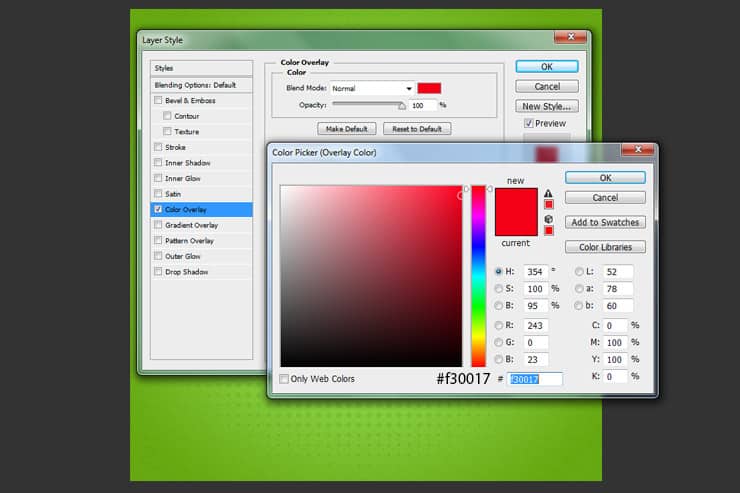
Step 8
Add Drop Shadow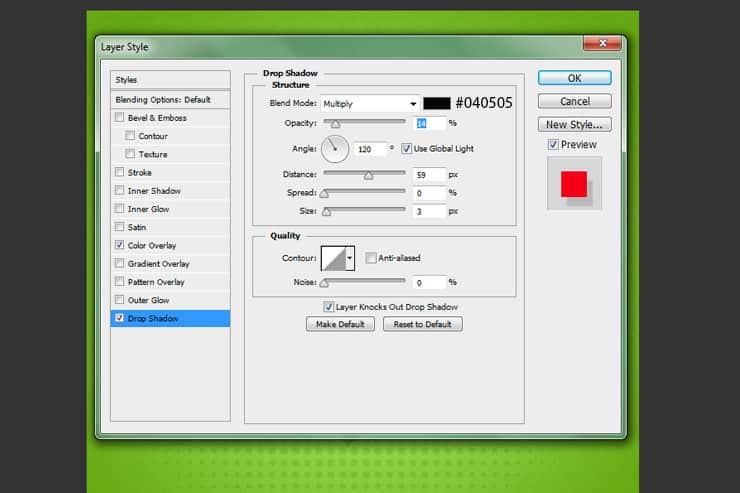
Step 9
Create a New Layer. Make a selection from your previous layer by clicking Ctrl and selecting the thumbnail image. Grab your Brush tool again and use the halftone brush and place it in your document as shown below. You can use whatever color you wish.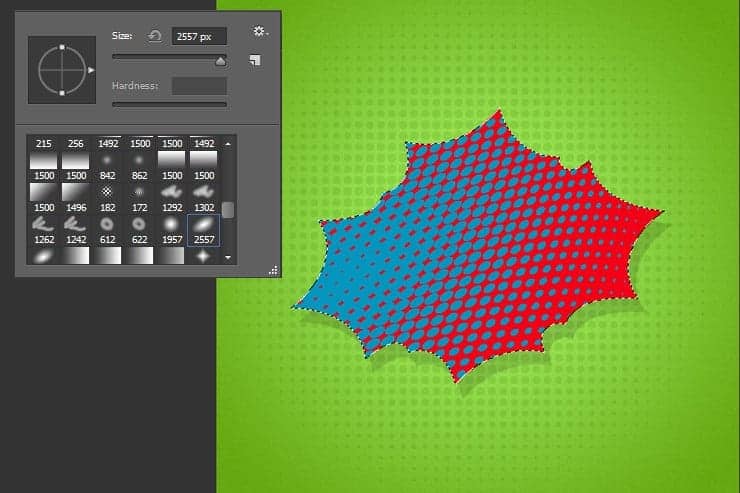
Step 10
Double-click this layer and add this Gradient Overlay. Make sure your Fill is at 0%.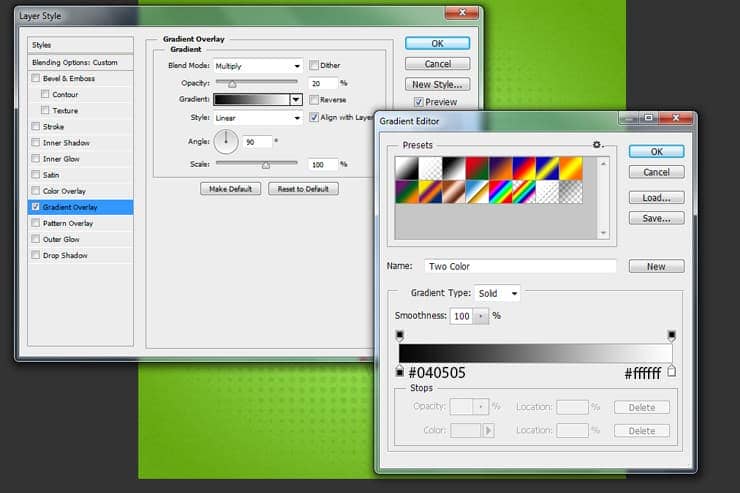
Step 11
Create a New Layer. Grap your pen tool and create a outline for the shape that we created. Make a selection from it and fill it with #000000. Place this layer underneath that shape layer.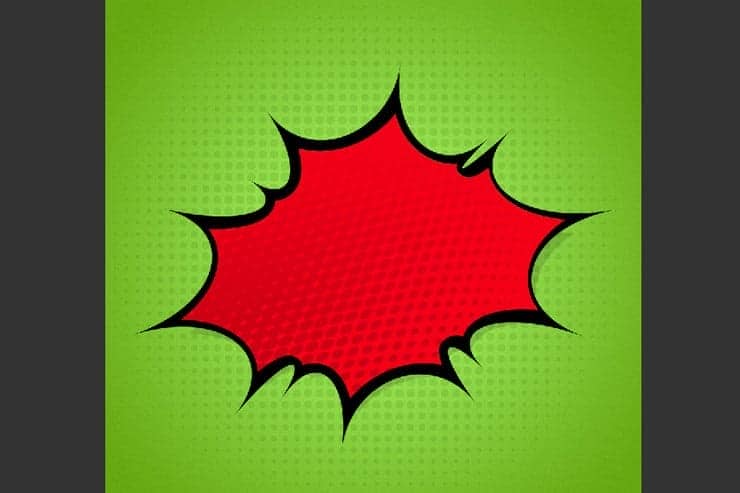
Step 12
Grab your type tool, I will be making the word "POW!" in this example but you can use whatever word you wish. I'm using Komika Axis with a 125.5 pt.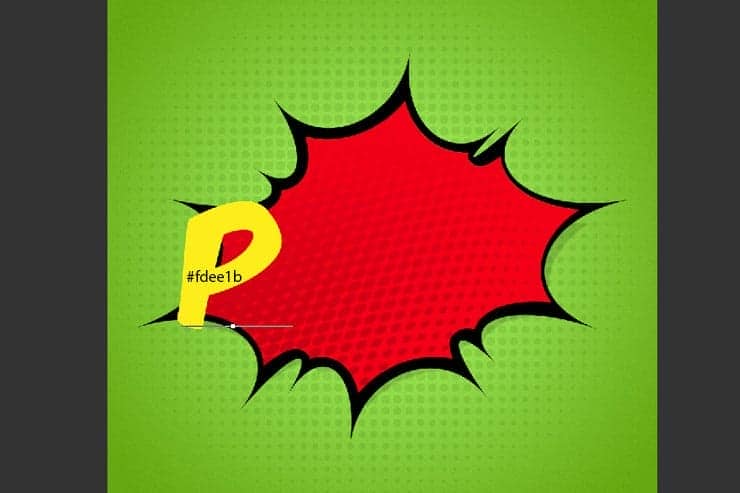
Step 13
Duplicate this layer and place it under the original "P" layer. We will use it later. Take your original "P" layer and add these layer styles.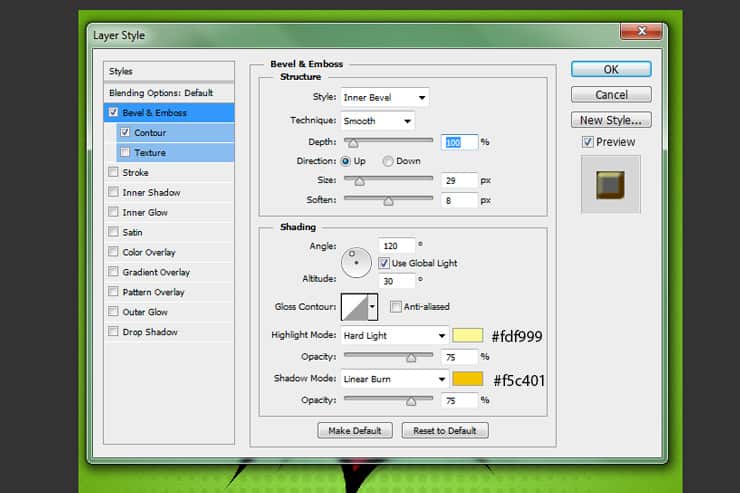
Step 14
Add Contour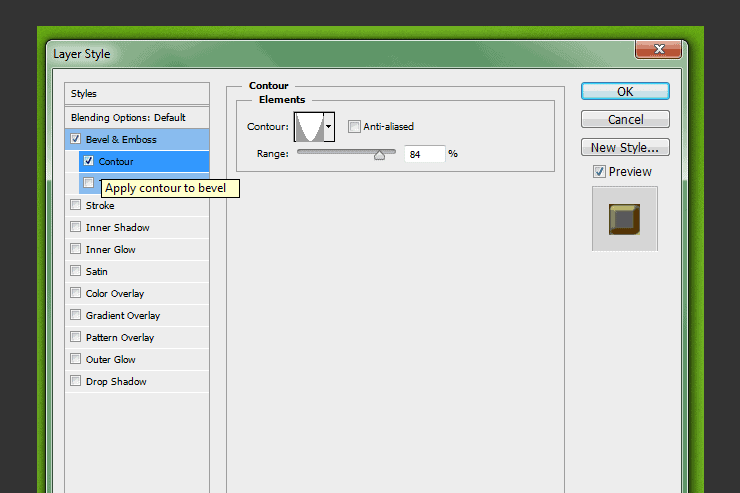
Step 15
Add Inner Glow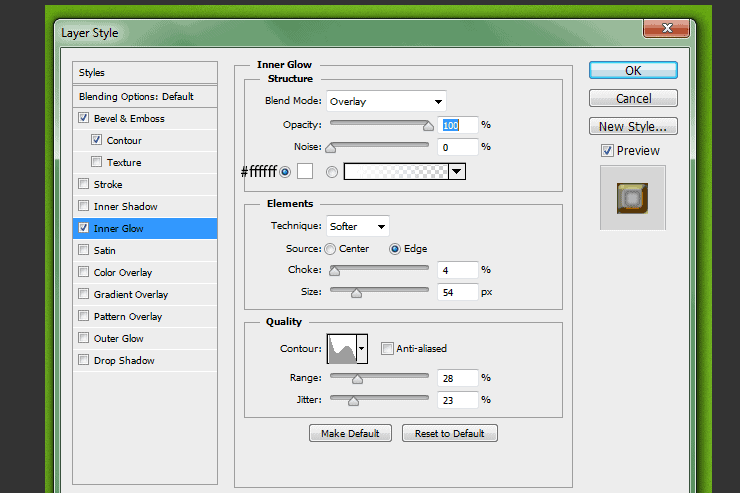
Step 16
Add Satin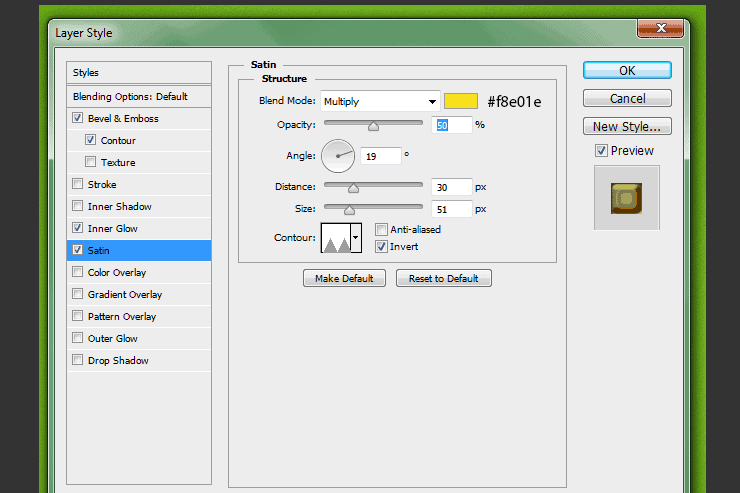
Step 17
Your "P" should look like this.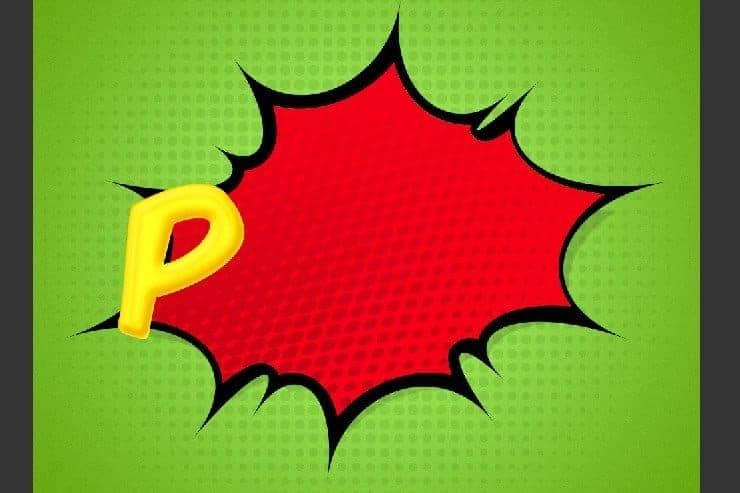
Step 18
Now remember that "P" we duplicated, select that layer. Using your arrow keys move this layer five times to the right and five times downward. Make sure your Move tool is selected.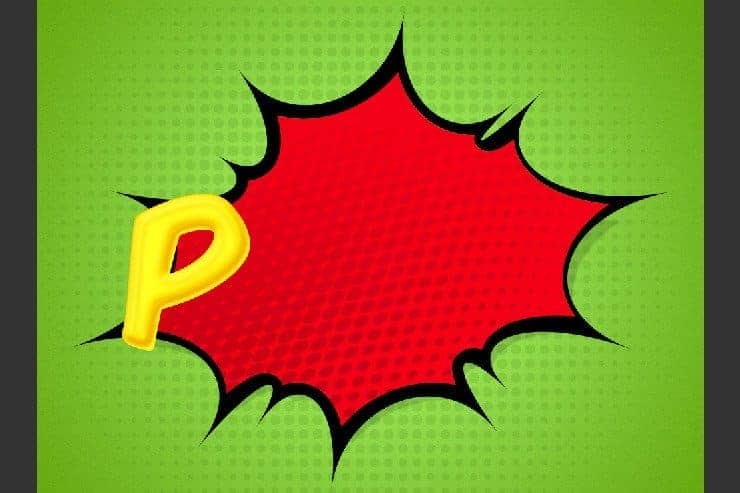
10 comments on “How to Create a Comic Book Text Effect in Photoshop”
great
excellent!
Non si vedono le immagini
Muito bom!!!
Obrigado por compartilhar
the images of this page is always broken when I enter in this particular page.....I tried many times but it always be same
Thanks for letting us know! The tutorial images have been fixed.
Great tutorial! Thank you for inspiring creativity! #YourMindisYourGreatestDesign
Can anyone help me understand the step 29??????
It is fantastic Ashlee. thank for your efforts
Nice tutorial, thank you!
Just a couple of suggestions:
1. Save Layer styles for the step 28 (I don't know, maybe it's just being assumed?), in order not to apply all the effects manually.
2. For the step 32, instead of repeating step 29 we could just save selection earlier and then load it.
Thank you, it was a very informative tutorial!