Make your artwork look like they're from an alternate universe. These Cyberpunk presets work with Photoshop (via the Camera Raw filter) and Lightroom. Download all 788 presets for 90% off.
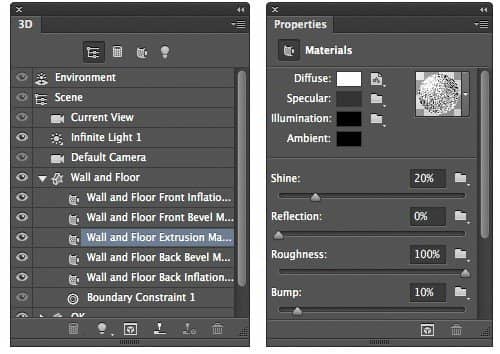
Step 13
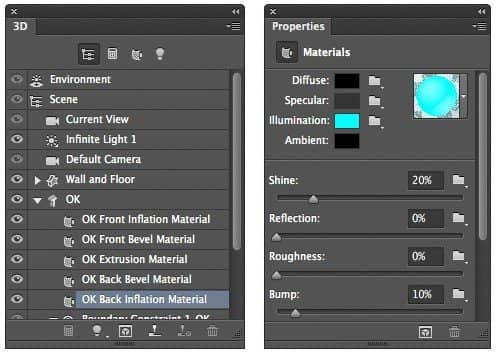
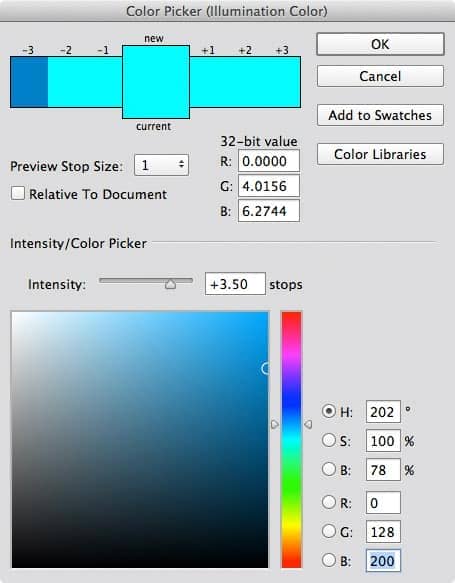
In the Window > 3D Panel, open the Material Properties for the Text Mesh and select the Back Inflation Material. Click on the Color box next to the Illumination property. The Color Picker dialog allows you to specify both the color and illumination intensity that a material emits. By varying both the color and hdr intensity values, materials can become self illuminating and appear to glow with light. Using the picker dialog box, set the illumination color using the following values : RGB Color values: R0 G128 B200 Intensity value: +3.5 stops
Step 14
As illumination properties are only calculated at render time, you won't notice any difference in your scene. Test the results in your scene using the 3D menu > Render command
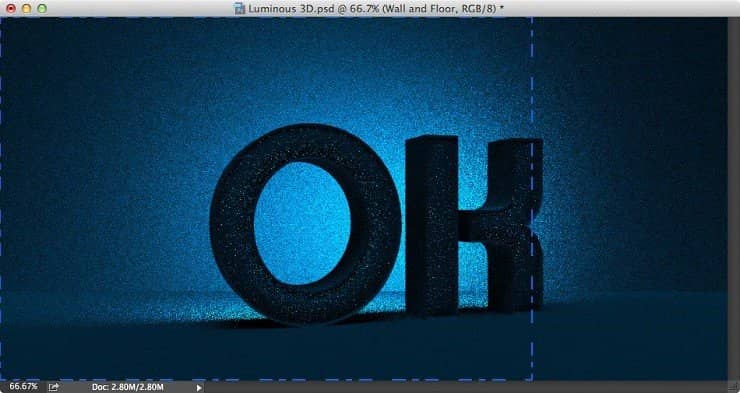
You may need to alter the illumination intensity value once you've previewed a test Render. This may depend on the amount of glow you want, and also the distance between the text and the background wall. Press the Escape key at any time to pause the render process and adjust the Intensity value for the Illumination Color value. Run another test Render from the 3D menu to check the results.
Step 15
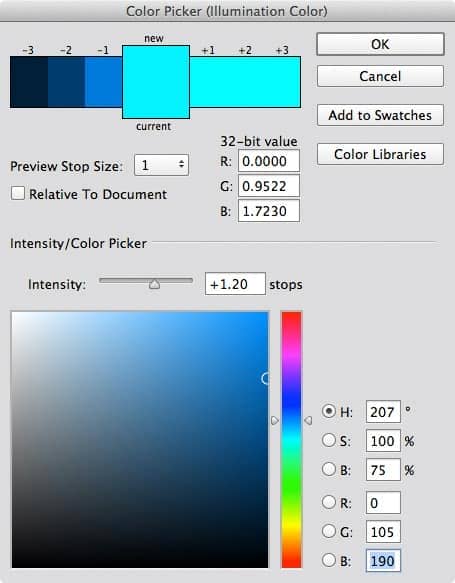
We'll now add some front illumination to our text by adjusting the other Materials. In the Scene list, select the Front Bevel Material. In the Window > Properties Panel, click the Illumination Color value and enter the following into the HDR Color Picker: Illumination Color: R0 G105 B190 Intensity: + 1.2 stops
![step-020[1] step-020[1]](https://cdn.photoshoptutorials.ws/wp-content/uploads/2014/10/step02011.jpg?strip=all&lossy=1&quality=70&webp=70&avif=70&w=1920&ssl=1)
Step 16
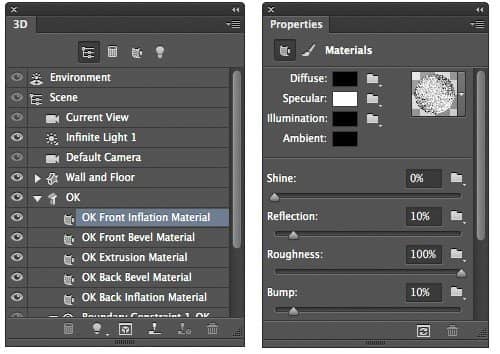
In the Scene list, select the Front Inflation Material and apply the following settings: Specular Color: R255 G 255 B255 Shine: 0% Reflection: 10% Roughness: 100%
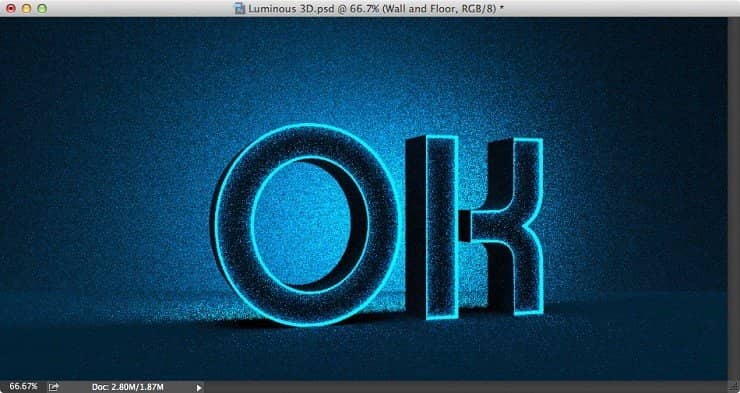
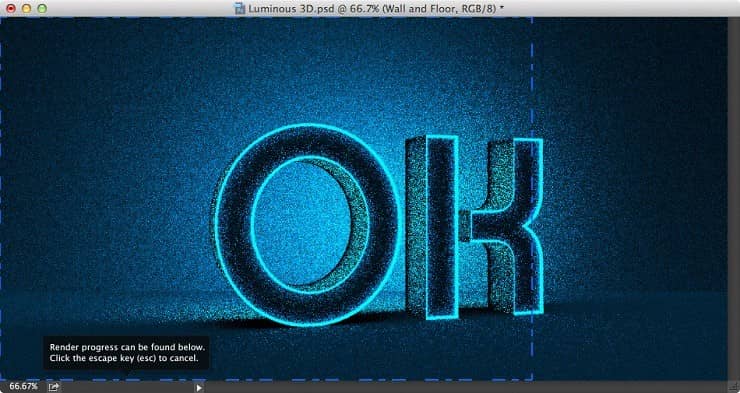
As before, the true effect of changing the Illumination Properties will not show in OpenGl display. Use the 3D Menu > Render command to preview the results in the scene:
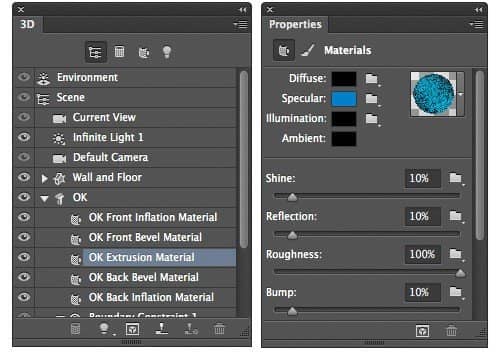
Finally, in the Scene List, select the Text Extrusion Material and apply the following values: Specular Color: R0 G150 B200 Shine: 10% Reflection: 10% Roughness: 100%
Step 18
Once you've applied the final Material Settings, it's time for the final Render. Save the file, then use the 3D menu > Render command to create the final image. Lighting scenes by reflection and use of increased Roughness values will require a longer final render time to achieve a good level of image quality. The example shown below was allowed to render for 58 mins to produce the finished image.


7 comments on “Create Luminous Text Using Photoshop 3D Layers”
you didn't explain how to even make those lines in step 3.
Those lines are created from the rectangle. You should already have a selection of the rectangle. Press UP and LEFT 3 times, and then Backspace/Delete and you should get the two lines.
i cant find the 3d menu
nice tutorial, but you need to be more clear, when i zoon in my text gets pixelated. from step 11 to 18 i´ve followed every steps but i didn´t get the same results, hope you help me
It's an OK tutorial, but you need to cover everything you do. In step 6 I had no idea how to the lighting. In step 5 you used centimeters you need to clear up for others
I can't get access to the page anymore
I found an issue with tutorial. In my color picker settings I cannot find the intensity options (I have photoshop 6.1.1). Help would be appreciated