Download Lightroom presets and LUTs, absolutely free. Use the presets to add creativity and style to your photos.
Learn how to create this wallpaper in Photoshop using 3D text from Illustrator and custom shapes and Photoshop brushes. You’ll learn how to place shadows under objects, create a focus point using repetition, and more.
Preview of Final Result

Rainbow Text Wallpaper Photoshop Tutorial
Step 1 - Create A New Document
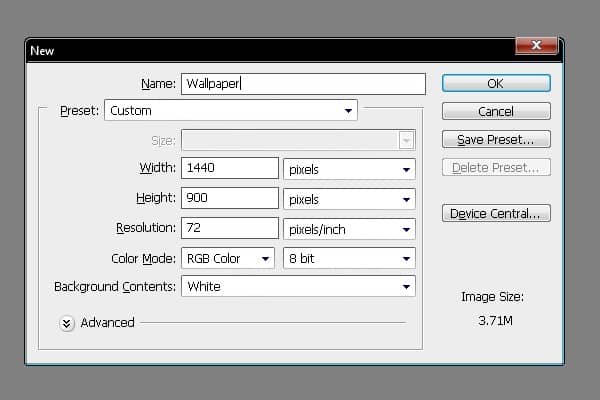
Choose File > New or press Ctrl/Command + N. The size of my wallpaper is 1440px (width) X 900px (height) but you can use any size you wish.
Step 2 - Filling the Background
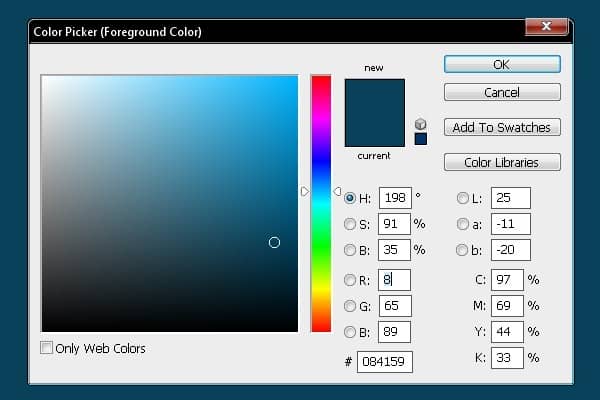
Grab the Gradient Tool, pick #084159 blue color and fill the background.
Step 3 - Placing Spot Light
Now you're going to add a spot light to the background. This effect creates focus on the main object. Select the Brush Tool (B) and choose the soft round brush. Set the Diameter on 300px. Pick some lighter blue color and paint a dot in the middle of the background. Result of this step can be seen bellow.

Step 4 - Creating 3D Text
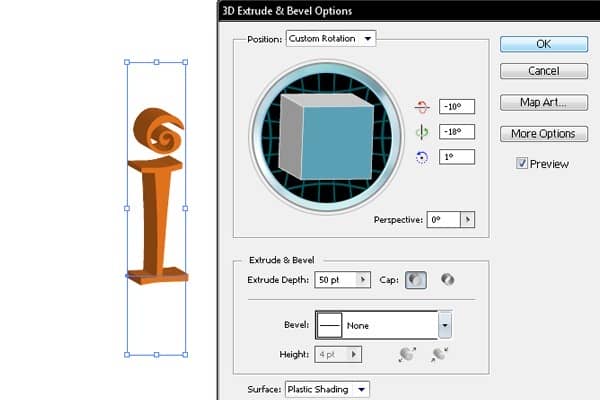
In this step you´ll create 3D text. To do that open Illustrator and follow the instructions bellow. Grab the Type Tool, select font Curlz MT (you can download it here) and type the letter "i". Change color of the letter on orange (#F57F20). Go to Menu > Effect > 3D > Extrude & Bevel. Follow the setting below.
Step 5 - Placing 3D Text in Photoshop
Copy the text from Illustrator and paste it to Photoshop. Select this new layer, right click on it and choose Rasterize Layer.

Step 6 - Changing Colors
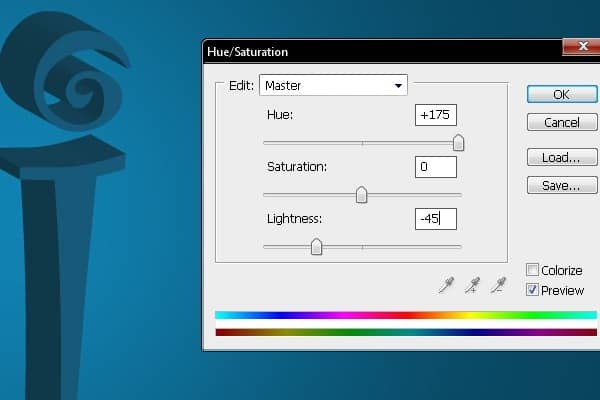
In this step you're going to change the text color to match with the background. You could change the color directly in Illustrator but you need to match the background color and the color of the letter. That is the reason to change it in Photoshop.
Step 7 - Creating Splash Effect
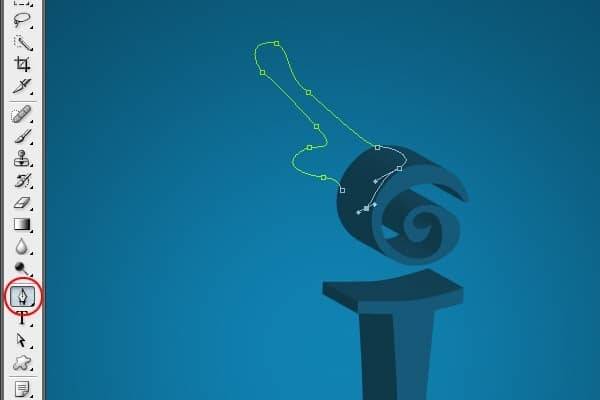
To add splash effect select the Pen Tool (P) and create a path similar to the one bellow.
Step 8 - Adding Color Fill To The Path
Once you´ve created the path, press Ctrl + Enter to make selection of it. Grab the Gradient Tool (G) and fill it with solid #005A75 light blue color.

Step 9 - Adding Highlights
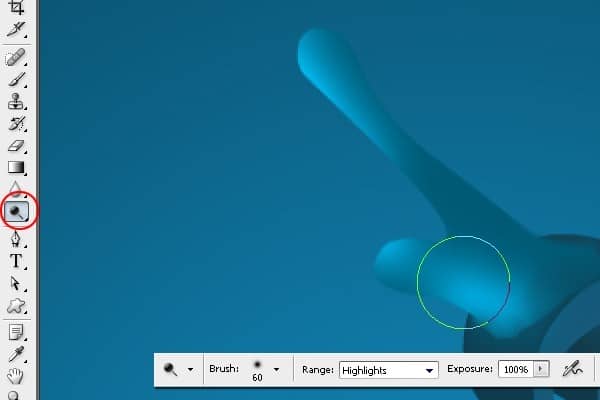
In this step you´ll add highlights to the shape. This effect creates glossy feel. Select the Dodge Tool (O) and highlight some areas similar as shown in the image bellow.
Step 10 -Adding Shadows
Once you´re done with the highlights you need to create shadows on the opposite side of the shape. Select the Burn Tool (O) and paint over the areas which should be darker.

