

Download Lightroom presets and LUTs, absolutely free. Use the presets to add creativity and style to your photos.
The best simulator for spacewalking is underwater - it allows full visuals and body movement in 3D. Virtual reality is good, too, and has some advantages, like full Station simulation, not just part. Like all simulators, they have parts that are wrong and misleading: an important thing to remember when preparing for reality. In this Photoshop tutorial, we will learn how to create an underwater City. First, we create an underwater scene, then add some fishes. For the last effect, we added a Camera Raw filter.
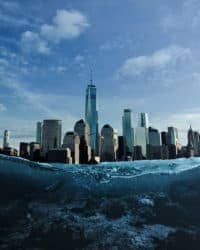
Preview of Final Image

Tutorial Resources
Step 1
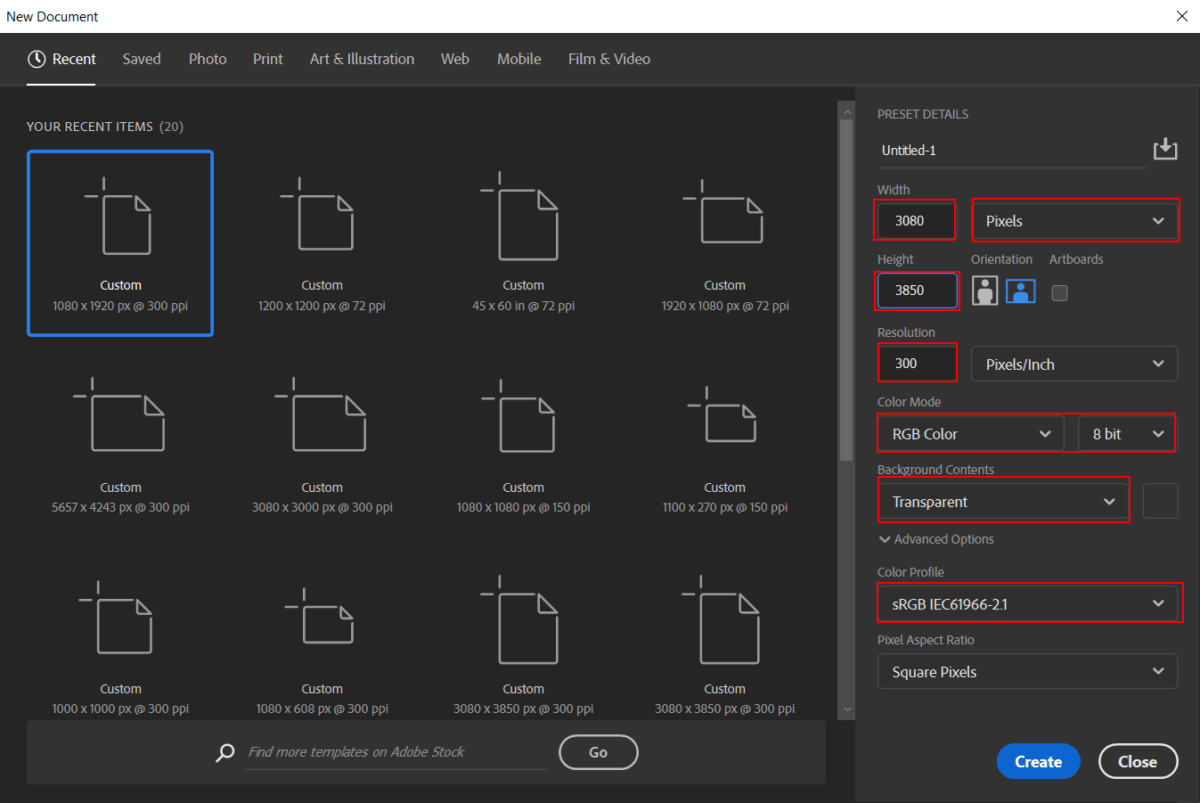
Now, let’s start by creating a new image file, go to the Menu bar and click File > New, and then input the following values on their respective fields
- Preset: Custom
- Width: 3080px
- Height: 3850px
- Resolution: 300px
- Color Mode: RGB Color 8 bit
- Background Contents: Transparent
Step 2
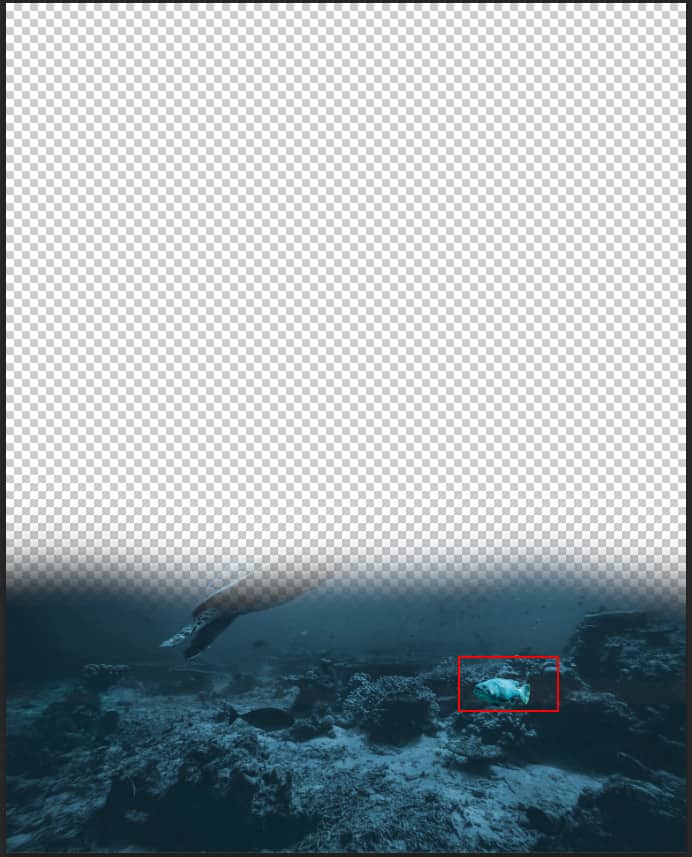
Now, place Underwater Bottom Go to File > Place and select Underwater. Then place it to our work canvas. Then position the image with the transform tool (Ctrl / Cmd + T). Hold Alt + Shift and rasterize like the image below. In Photoshop CC only hold Alt to rasterize all sides together.
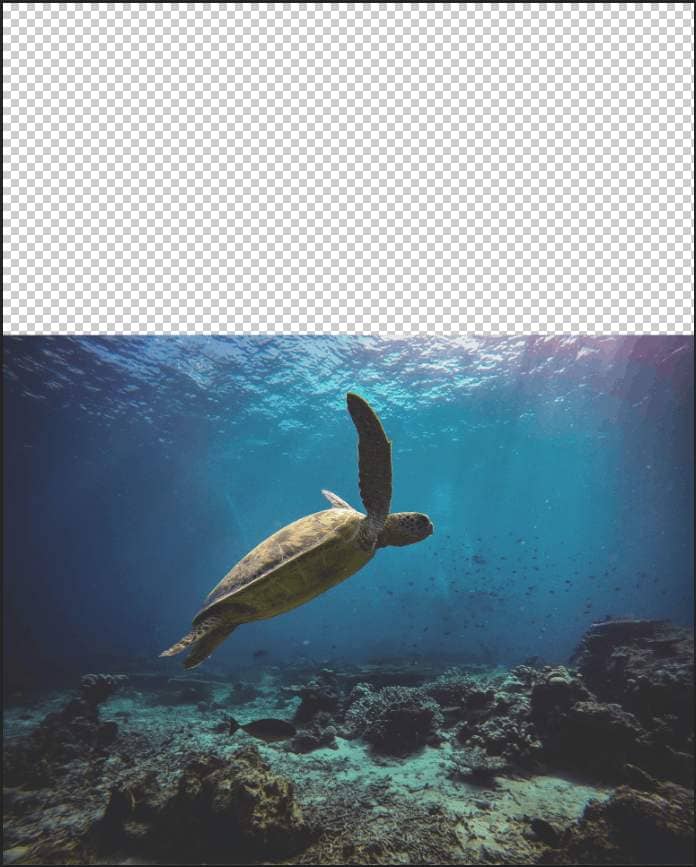
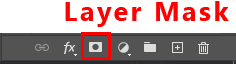
Then create layer mask and use Soft Round Brush tool with foreground color black and paint on top...

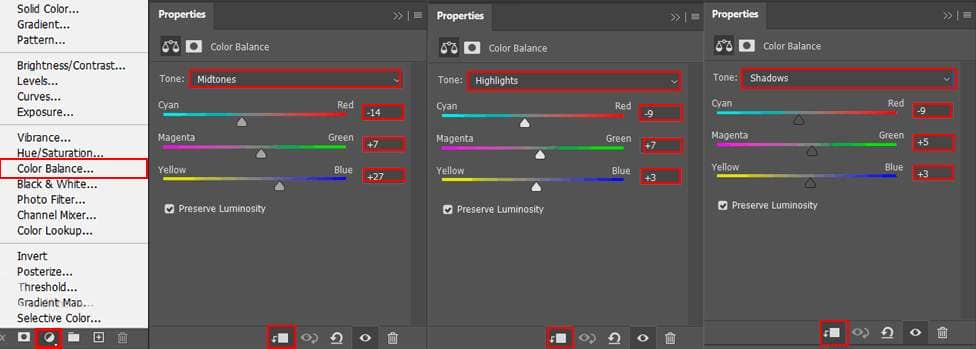
Step 3
Add Adjustment Layer "Color Balance"
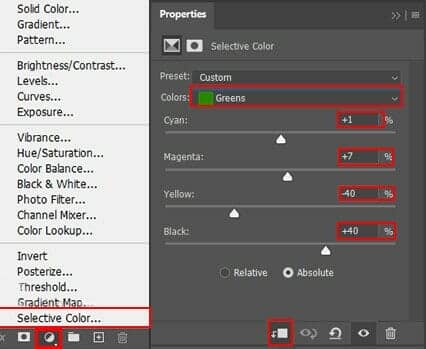
Step 4
Add Adjustment Layer "Selective Color"
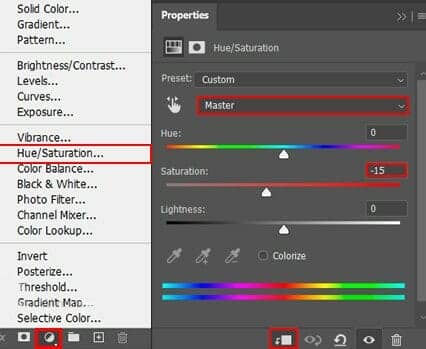
Step 5
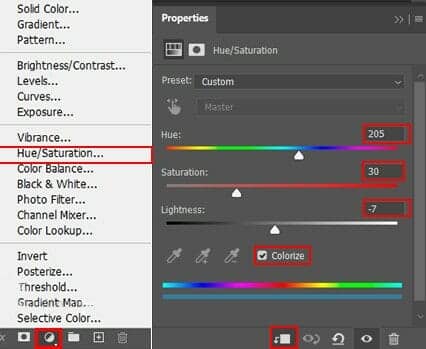
Add Adjustment Layer "Hue/Saturation"
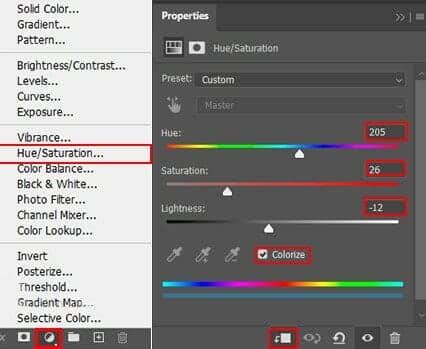
Step 6
Add Adjustment Layer "Hue/Saturation"
Step 7
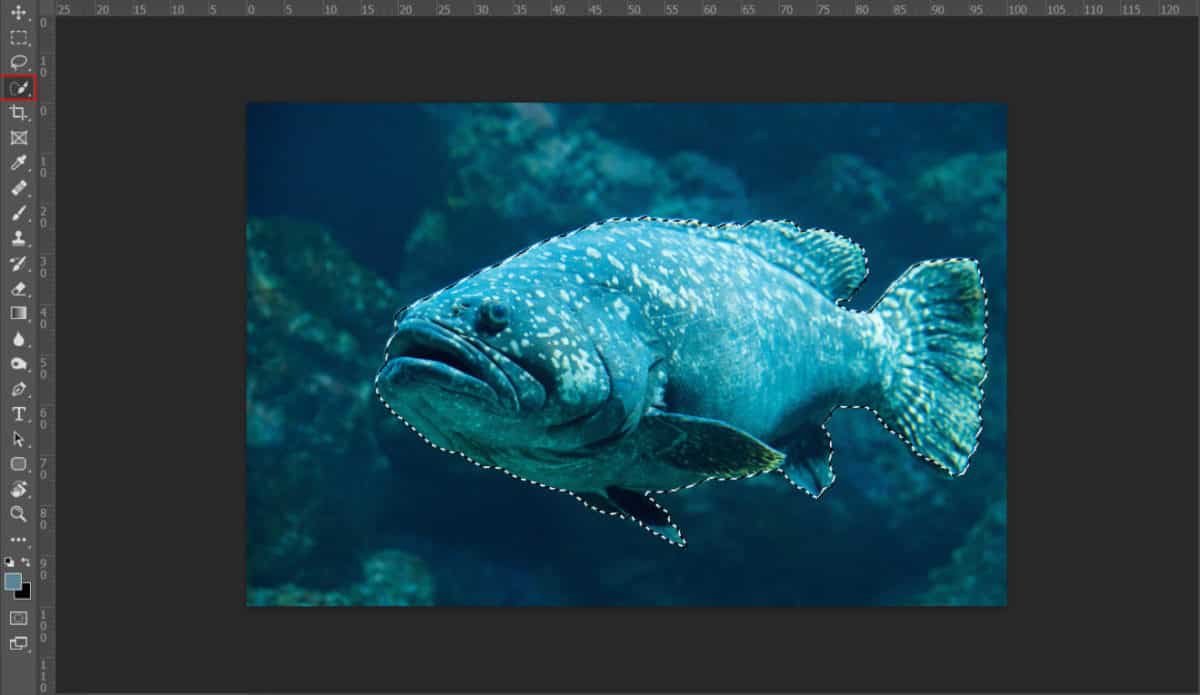
Next, Go to File > Open and select Fish. After you open the image, use Quick Selection Tool(W) and select fish. After the selection area has been created, simply copy (Ctrl / Cmd + C) and Paste (Ctrl / Cmd + V) it to our work canvas. Then position the image with the transform tool (Ctrl / Cmd + T). Hold Alt + Shift and resterize like image below. In Photoshop CC only hold Alt to resterize al sides together.
Step 8
Add Adjustment Layer "Hue/Saturation"
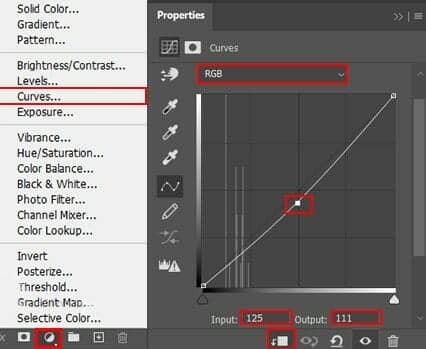
Step 9
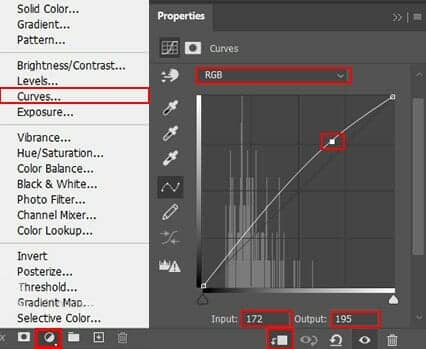
Add Adjustment Layer "Curves" and press Ctrl/Cmd + I to invert. Then use Brush Tool(B) Soft Round with foreground color white and paint on upper body of fish.
Step 10
Add Adjustment Layer "Curves" and press Ctrl/Cmd + I to invert. Then use Brush Tool(B) Soft Round with foreground color white and paint on lower body of fish.
Step 11
Next, Go to File > Open and select Fish 2. After you open the image, use Quick Selection Tool(W) and select fish. After the selection area has been created, simply copy (Ctrl / Cmd + C) and Paste (Ctrl / Cmd + V) it to our work canvas. Then position the image with the transform tool (Ctrl / Cmd + T). Hold Alt + Shift and resterize like image below. In Photoshop CC only hold Alt to resterize al sides together.