


Make skin look perfect in one-click with these AI-powered Photoshop actions.
Step 10
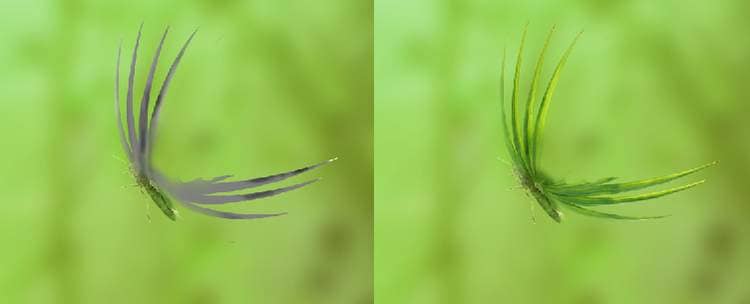
Open the leaves 1 image and move the leaves into the main canvas. Place it onto the butterfly and use Ctrl+Tto rotate it following the pose of the butterfly.
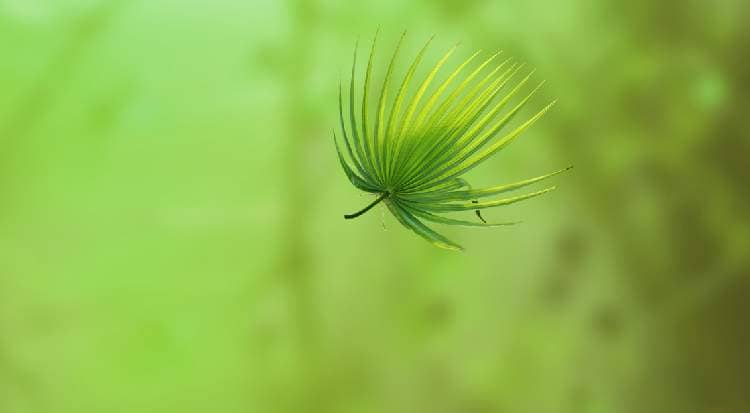
Add a mask to this layer to remove the leaves on the middle, leaving them visible on the top and bottom of the butterfly only.
Step 11
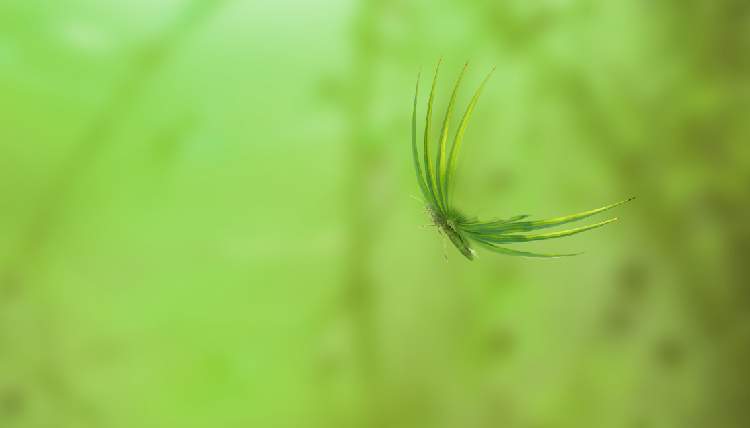
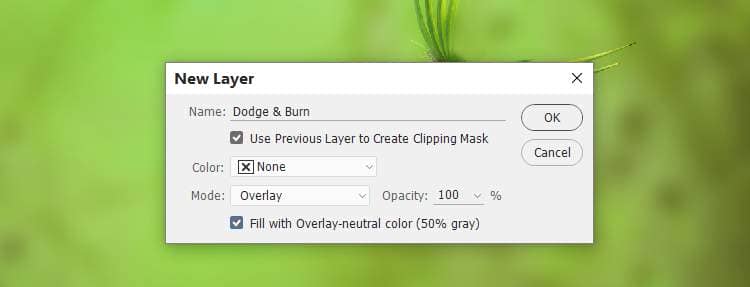
Make a new layer, change the mode to Overlay 100%and fill with 50%gray. Use the DodgeandBurn Tool (O)with Midtones Range, Exposure about 15-20%to refine the light and shadow on the leaves. You can see how I did it with Normal mode and the result with Overlaymode.
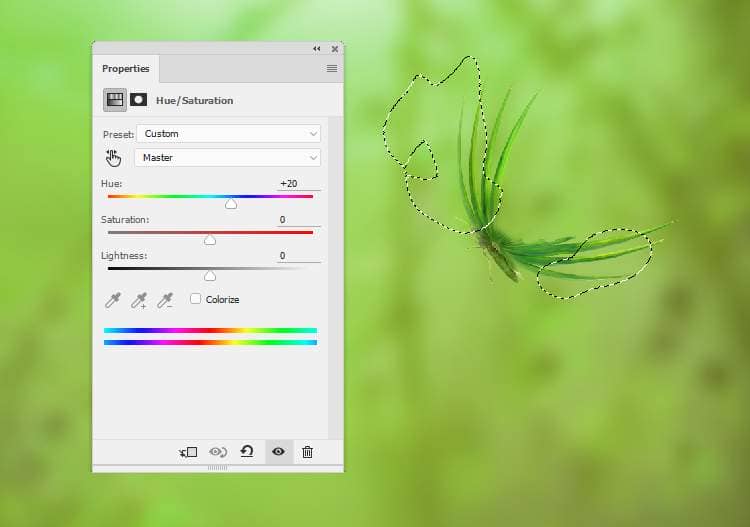
Step 12
Create a Hue/Saturation adjustment layer to make the leaves more green. On this layer mask, paint on some parts of the leaves to keep the yellow there.
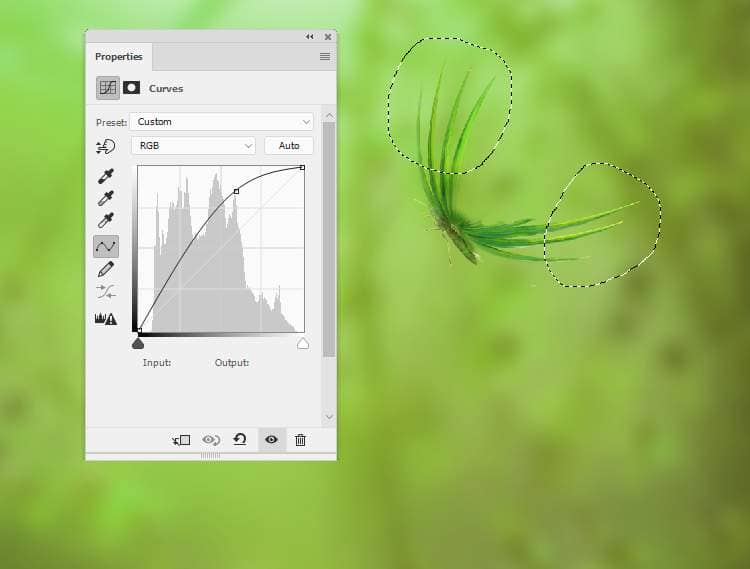
Step 13
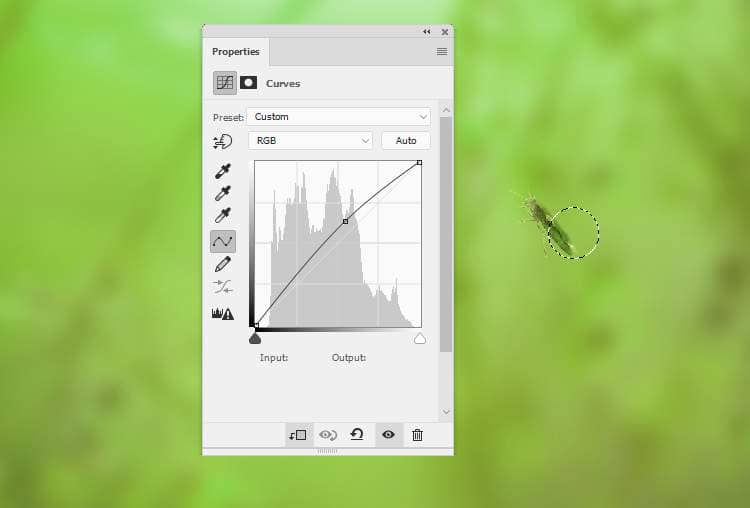
Make a Curvesadjustment layer to brighten the top of the leaves. Paint on the rest to keep its lightness.
Step 14
Isolate the flower and move it into our working document and place it in the area near the middle of the foreground .

Step 15
Make a Color Balanceadjustment layer (set as Clipping Mask) and change the Midtonessettings:

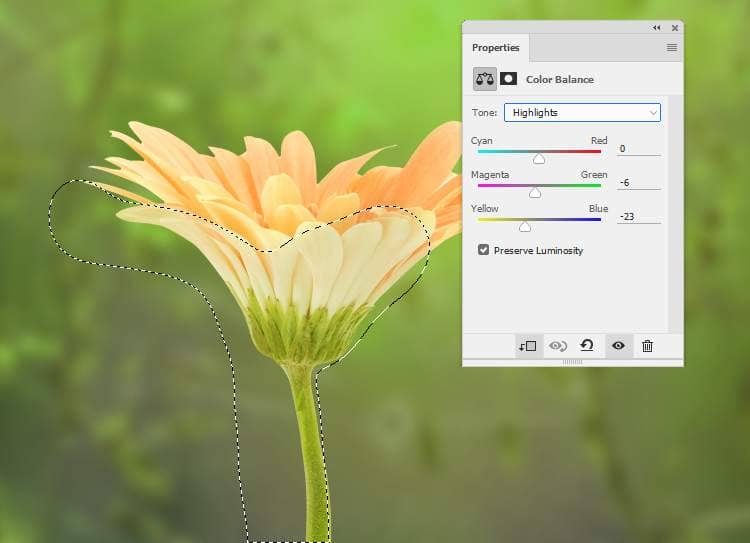
Create another Color Balanceadjustment layer and alter the Highlightsvalues. On this layer mask, use a soft black brush to erase the yellow light on the back of the flower to fit the main light source.
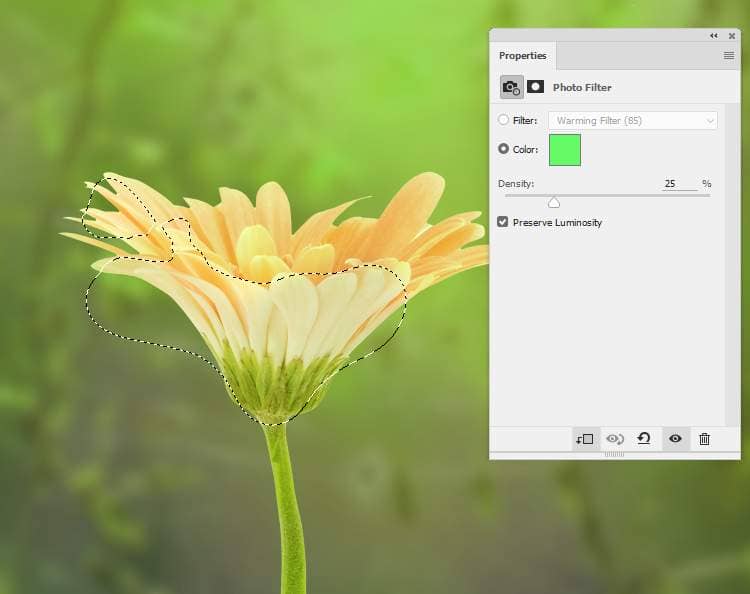
Step 16
Add a Photo Filteradjustment layer and pick the color #66fc63. On the layer mask, paint on the petals on the back and the left to remove the green light effect there.
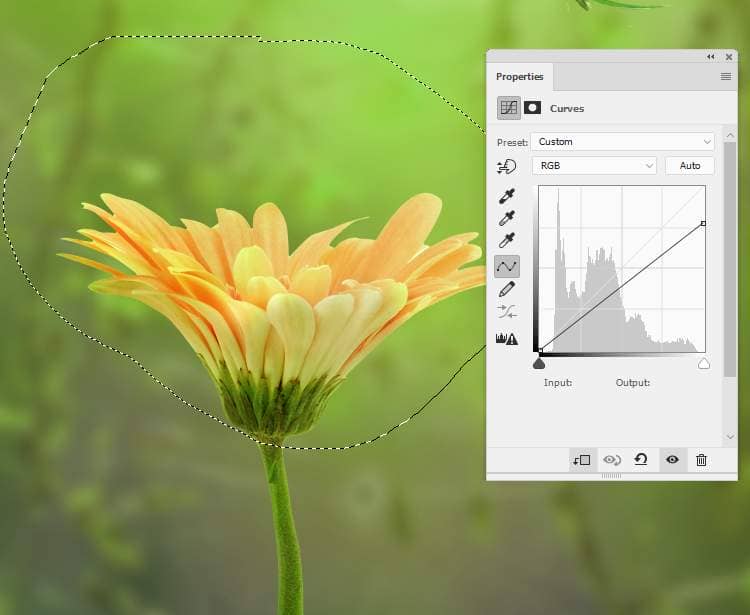
Step 17
Create a Curvesadjustment layer to darken the back of the flower. Paint on the rest to keep its lightness.

Step 18
Make another Curvesadjustment layer to make the stem of the flower a bit darker. Paint on the petals so they won't be affected by this adjustment layer.
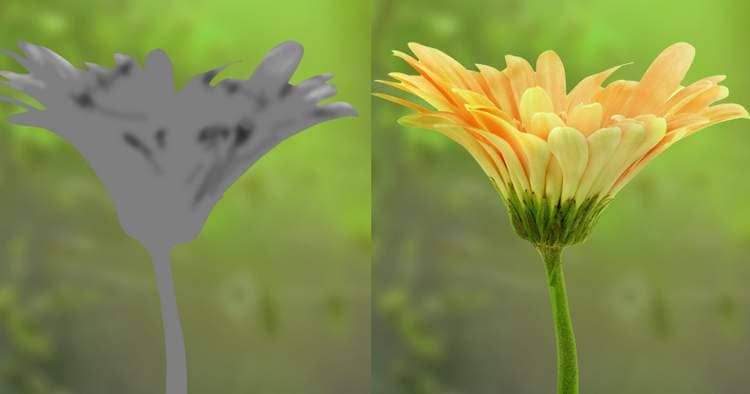
Step 19
Create a new layer, change the mode to Overlay 100%and fill with 50%gray. Use the Dodgeand Burn Toolto refine the light and shadow on the flower.

Step 19
Create a new layer, change the mode to Overlay 100%and fill with 50%gray. Use the Dodgeand Burn Toolto refine the light and shadow on the flower.
Step 20
Cut out the child and move her onto the flower and convert this layer to a Smart Object.
4 comments on “How to Create a Fantasy Fairy Scene Photo Manipulation with Adobe Photoshop”
Thanks very much!
wow great results
Neat image! Thank you!
WOW ist das schön, vielen Dank für das gut erklärte Tutorial.