


Luminar AI lets you turn your ideas into reality with powerful, intelligent AI. Download the photo editor and see how you can completely transform your photos in a few clicks.
Step 18
Then, click this layer with the right mouse button. Choose "Blending Options...". Choose "Color overlay", set #5f2409 color and change blending mode from Overlay to Screen.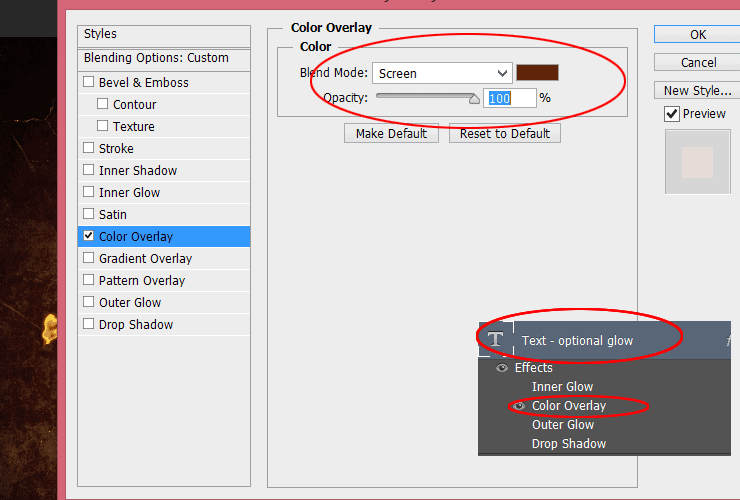
Step 19
Choose "Drop Shadow". Change the Structure blending mode to "Screen", set color to #ffa71c, change its size to 57%.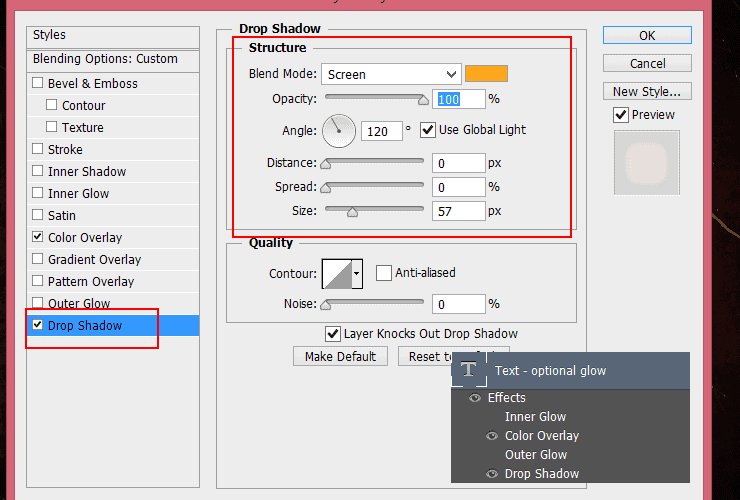
Step 20
Now it's the most boring part. You'll create a fiery shape. Place "Flames0027_1_M" to your file and transform it by using warp mode.
Step 21
Change the blending mode to Screen.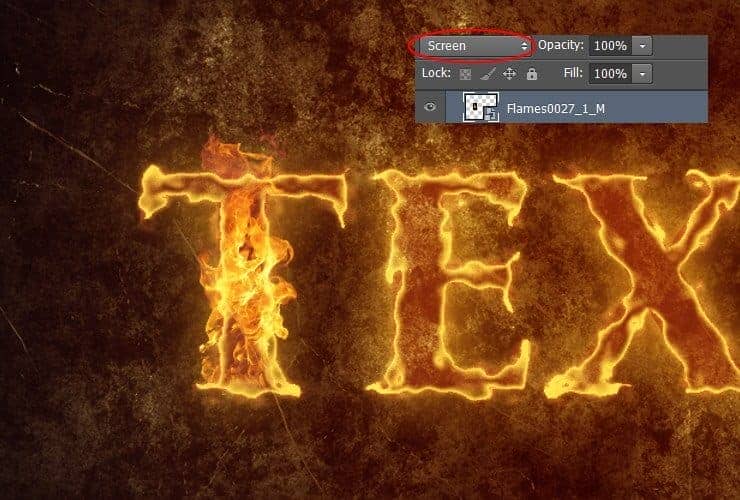
Step 22
Place "Flames0027_10_M" to your file. Use warp mode and change blending mode to "Lighter Color".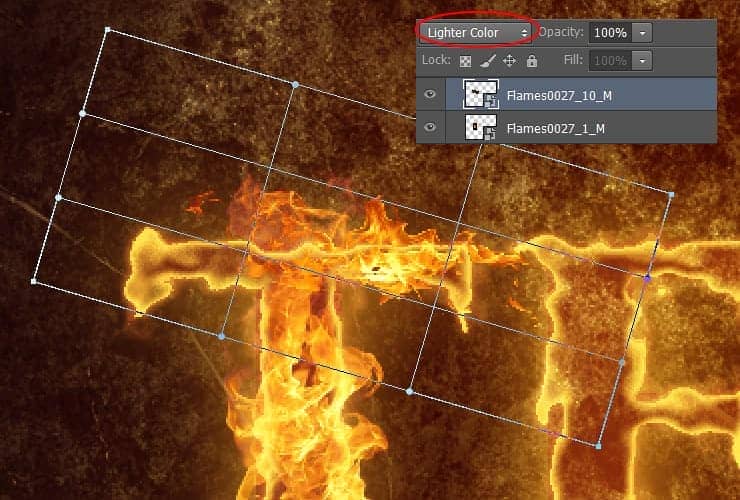
Step 23
lace "Flames0027_1_M", use warp mode and change blending mode to "Screen".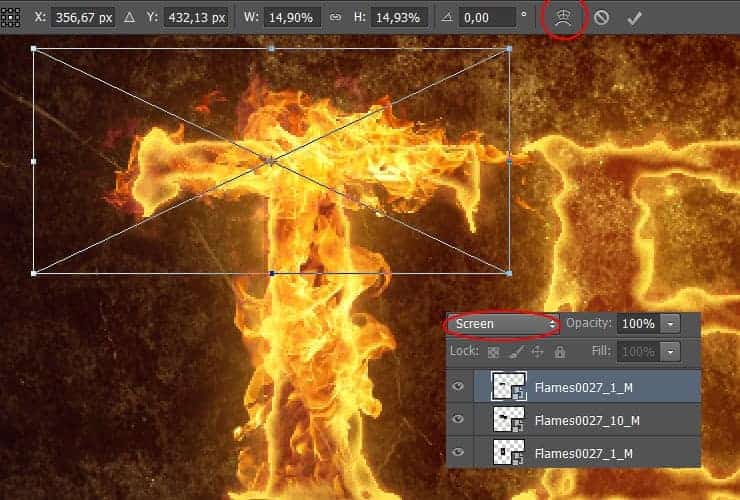
Step 24
Now "E" letter. Place "Flames0027_1_M", apply transform and change blending mode to "Screen".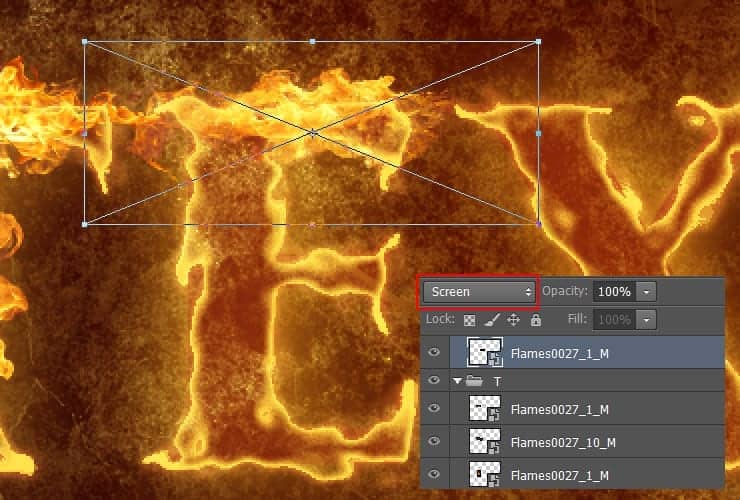
Step 25
Duplicate this layer and transform (Ctrl+ T) it.
Step 26
Place "Flames0027_10_M" to your file. Use warp mode and change blending mode to "Screen".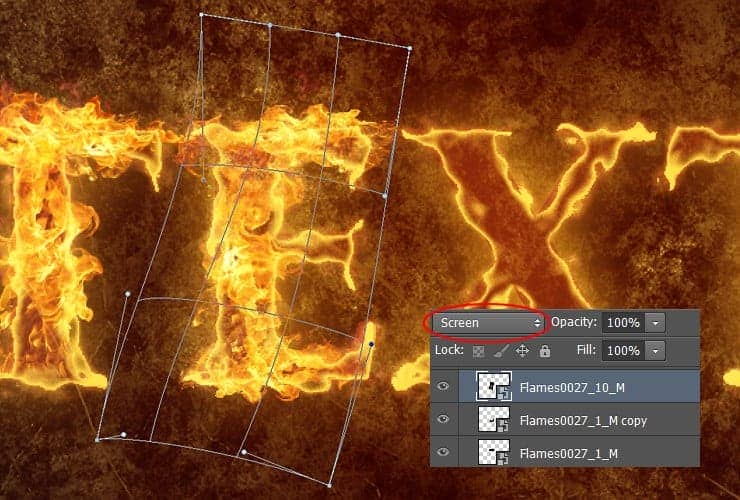
Step 27
Place "Flames0027_12_M" to your file. Transform (Ctrl+ T) itand change blending mode to "Screen".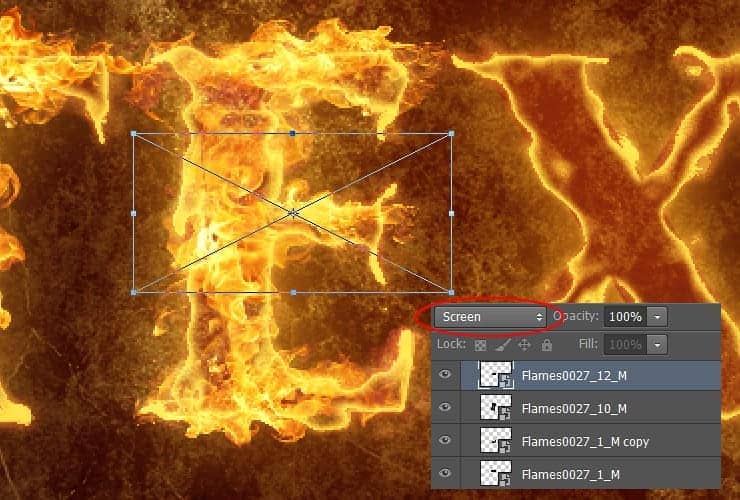
Step 28
Now "X" letter. Place "Flames0027_12_M" to your file. Use warp mode and change blending mode to "Screen".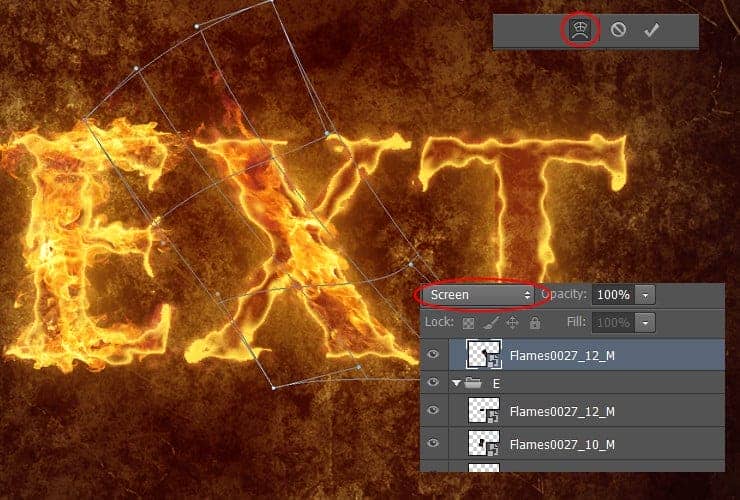
Step 29
Place "Flames0027_1_M", use warp mode and change blending mode to "Screen".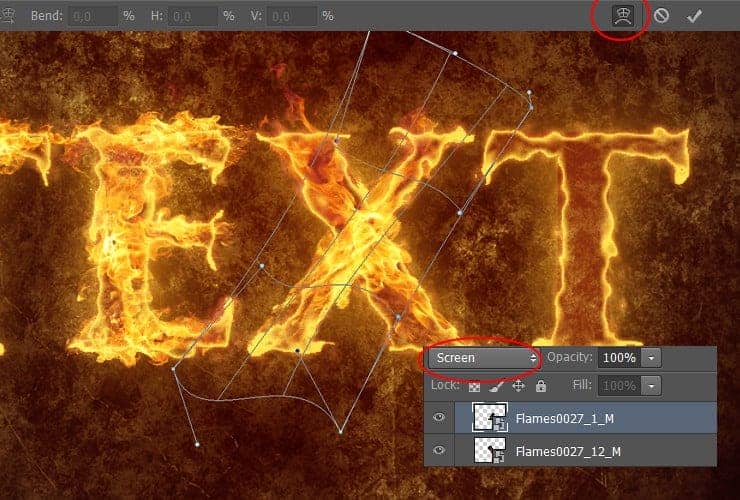
Step 30
Duplicate fiery layers with "T" letter. Select layers by holding down Ctrl (Windows) or Command (Mac OS). Drag it and dropto the Create a New Layer button. Drag duplicated layers to the top.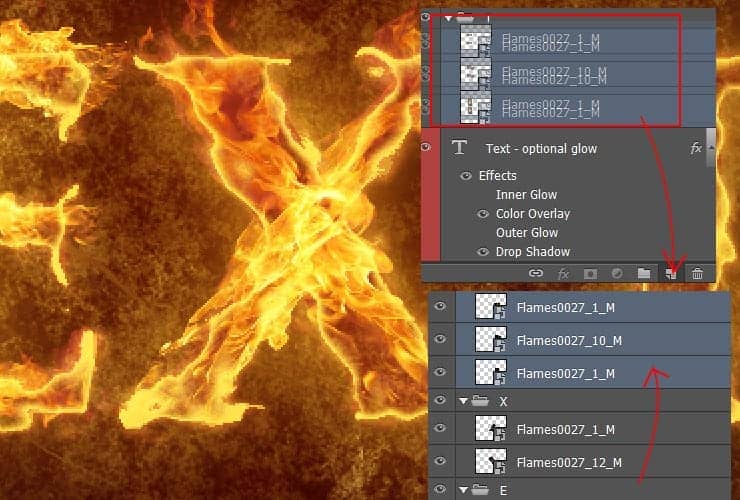
Step 31
Transform layers (ctrl+T). Youare done! :)
Final Results

Download the PSD
Fiery Text Effect.zipTutorial by msRiotte

16 comments on “Create a Simple Fiery Text Effect in Photoshop”
this tutorial is so fire
Twist
For the enthusiast's graphics designer, you share the very sophisticated tutorial. Every graphics design needs to know how to create simple text effect with Photoshop. I think your tutorial will help to improve skills as a professional artist. I believe that it would be very helpful, at least for me!
Now choose Filter > Filter gallery… >. Choose Distort > Glass. Set Distortion to 6, Smoothness to 8. Use “Frosted” texture.
Very cool text effect. thank you for sharing!
Exactly what I was looking for, thanks for sharing this!
kudos
This tutorial could not have come at a better time. This type of effect is perfect for my latest blog!
I must be doing it wrong because every time I get to the create smart object part I can't do it. Bummer.
thanks your post
Thank you. Your documents very good, too. Hope you'll have more for us
wow thank you ! this is really nifty..
Amateur stuff.
That's the point. A lot of us /are/ amateurs. We have to start somewhere
Kevin Rice, I'm sure you already know how to do this.
Hermoso