
Learn how to create a see-through water horse in Photoshop! The techniques we will use are fairly simple but I do my best to explain them in detail so you can use them on your future projects.
Preview of Final Results

Tutorial Resources
- Water Splash 1
- Water Splash 2
- Water Splash 3
- Water Splash 4
- Water Splash 5
- Water Splash 6
- Water Splash 7
- Horse
Step 1
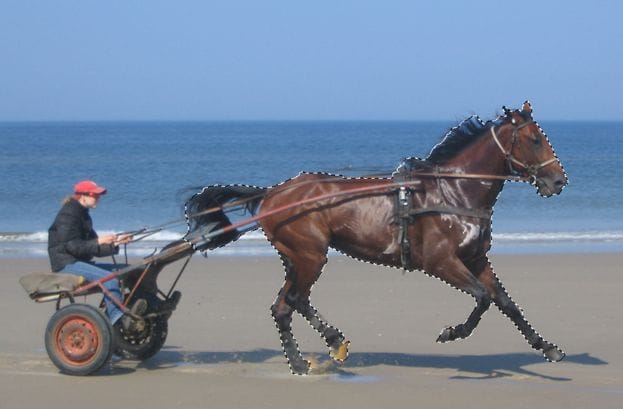
So, how do we transform a normal horse into a water horse? Well, first let’s open the image “Horse”. It is a very nice photo, full of dynamism and movement, almost begging for a cool photo manipulation. If you followed my previous tutorials on photoshoptutorials.ws you probably know how to make a fire horse and an ice horse so this should give yet another horse transformation solution.

Step 2
The first thing we should do it is to get rid of the horse and replace him with the background. Use the Lasso Tool (L) or the Quick Selection Tool to make a rough selection of the horse.
Step 3
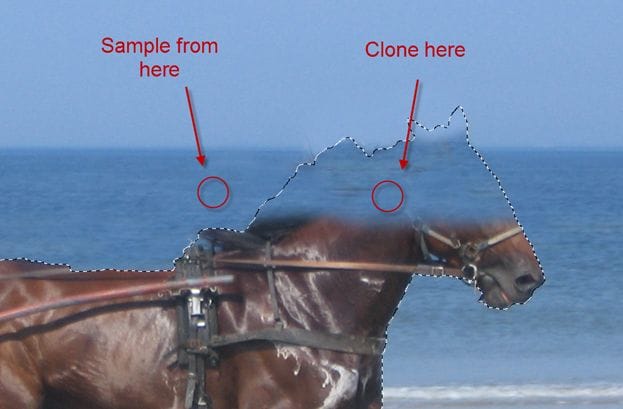
Now that we have a selection let’s select the Clone Stamp tool and start cloning from outside the selection and painting inside. Try to keep the sampling and cloning on the same line (don’t sample from the sky and clone way down where the sea should be). You can see in the image below that I replaced the head of the horse with the sea and the sky. To sample with the Clone Stamp tool Alt-click on the desired location.
Step 4
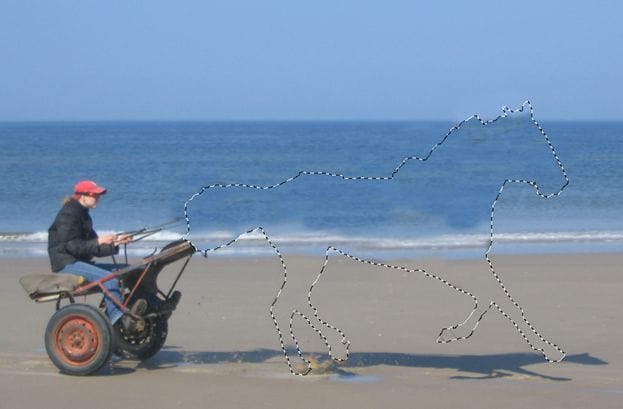
In the image below notice how I finished cloning and sampling the horse. The results are not perfect but I decided not to invest too much time because this area will be partially visible anyway. Now it is a good time to save the selection of the horse because we will make good use of it in a next step. To save a selection choose Select > Save Selection and write a name.
Step 5
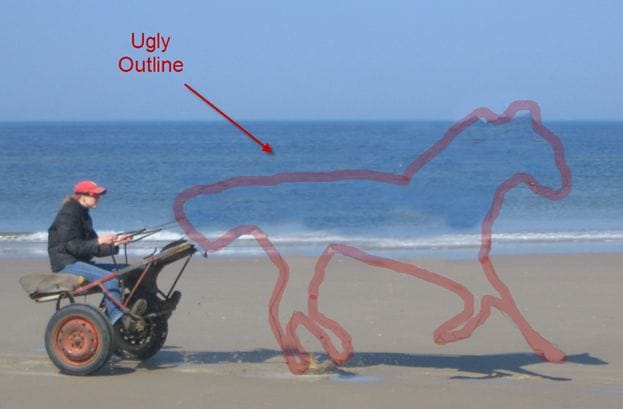
Press Ctrl + D to deselect. Notice that we have a dark, ugly line contouring the horse. Get rid of it by selecting the Clone Stamp tool again and carefully sample and clone. Take it slow, don’t hurry and if you made a mistake it is better to go a step back (Ctrl + Z or Ctrl + Alt + Z for multiple steps) then try and work over it.
Step 6
Remember that I told you to save the selection of the horse in step 4? Now it’s time to use it. Load the selection by choosing Select > Load Selection and from the drop down menu select the name you used to save it in step 4.
18 responses to “How to Create an Awesome See-Through Water Horse in Photoshop”
-

How make seethrough clothes on people? In Photoshop CC
-
Edit > Content-Aware Remove. Enable AI option. Viola clothes removed.
-
-
Valuable Post
-
yep
-
Now that’s some amazing, funny and beautiful work, loving it!
-
Awesome. Very thankful! Learned much more than creating a beautiful image. Finding water splashes for my own image forced me to learn curves, color balance, and other PS tools by following your instructions. Just awesome, cut down my learning curve greatly.
Just transitioning from PSE to CS6, thank you again. -
o meu muito obrigado, por estares ai desse lado passando essas técnicas e ensinando.podes crer que já aprendi muito..
continua, teu trabalho esta espectacular……. -
so nice thank you
-
Please dont be so rude
-
-
yes
-
so… nice i really like it thanks adrian
-
hi
-
-
I don’t get this desgin. It doesnt work/make sense
-
very nice and i’d really like to make this, but I think you posted one link of the stock images twice. I also can’t seem to get the ‘watery’ effect on the splashes I plaste on the horse. Could it be because i’m working in Photoshop Cs 3? thanks!
-
I dont get it…
-
me eithaaaaaaa
-
-
so nice ♥♥♥♥♥
-
Very cool effect but the shadows are too fake. And it would look better on a different photo
Leave a Reply