Luminar AI lets you turn your ideas into reality with powerful, intelligent AI. Download the photo editor and see how you can completely transform your photos in a few clicks.
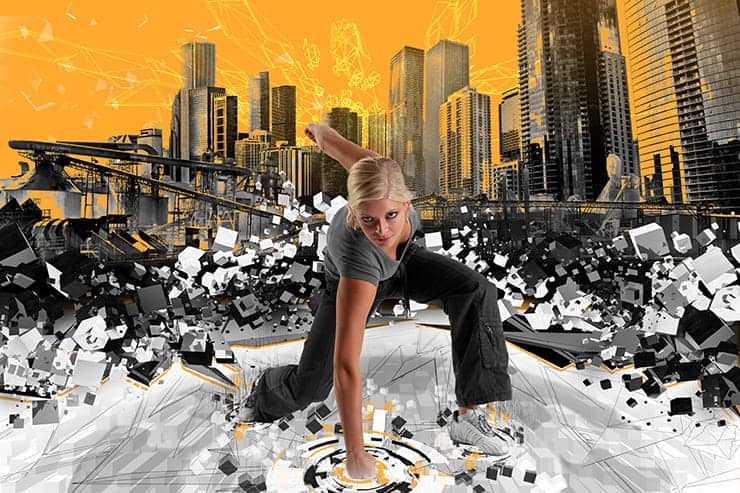
The world is rapidly changing. So maybe you also want to change it up a bit? I invite you to dive into the world of amazing and surreal photo manipulation "Inception". This work shows a piece of the digital world. Possible future world. You will learn how to create an abstract composition, interesting techniques and effects, working with a variety of instruments and much more! This tutorial will help you improve your skills and open your creative vision!
At the beginning of this work is all quite simple, work with color, and places of the model. The model must be added at the beginning, because it is the central object. Adding a city and imposing on it effects. In part with cubes you will need a little patience, because you will do a lot to transform them. In the final steps we will add effects and a little paint. You need attentiveness, diligence and good humor as possible, any version of Photoshop. I created this picture in Adobe Photoshop 2014.
Tutorial Resources
- Skyscrapers - Random-Acts-Stock
- Small skyscrapers - in StockProject,by thesmallwonder
- Factory Panorama - EveLivesey
- Factory - EveLivesey
- C4d Pack - TomSimo
- Cubes Pack - Outof4mmo (Alternative)
- Model - comicReference
- High Tech Brushes - ardcor
Step 1
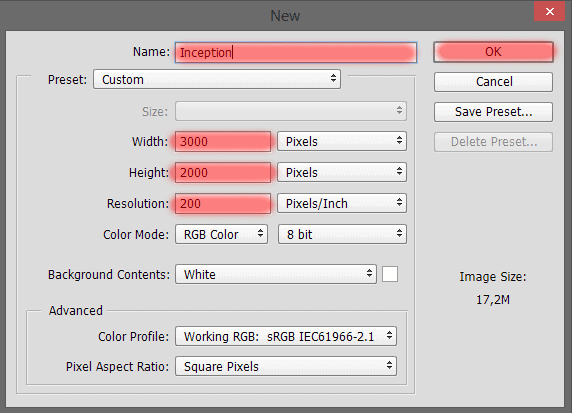
Open Photoshop. Create a new document. Go to File > New or the short key Cmd /Ctrl+ N. A blank document with size of 3000 pixels wide and 2000 pixels high, resolution 200 Pixels/Inch. I named the document "Inception".
Step 2
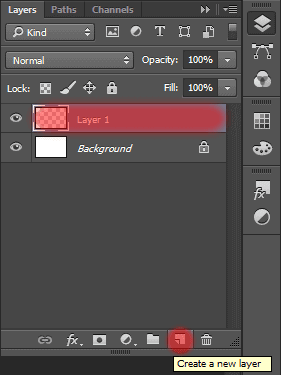
Create a new layer (Cmd /Ctrl+ Shift + N or use icon on Layers panel).
Step 3
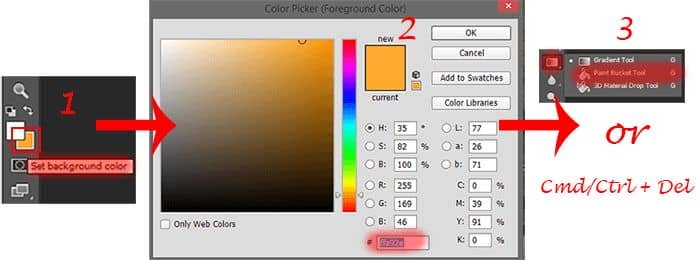
Fill this layer orange color #ffa92e. To do this, select Background color to #ffa92e and press Cmd/Ctrl + Del (you can use Paint Bucket Tool (G) or what is convenient for you).
Step 4
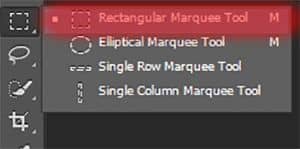
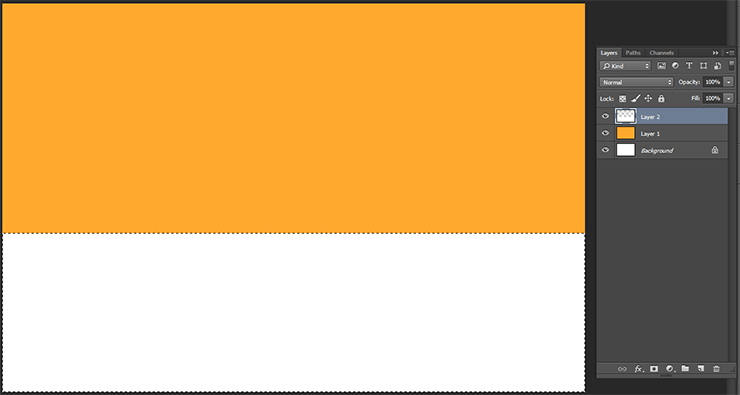
Again create a new layer (Cmd /Ctrl+ Shift + N or use icon on Layers panel). Use Rectangular Marquee Tool (M) and select the area in the bottom of the workspace (from 15.95 cm and down to the bottom). Change Background color to white (X) and fill selection (Cmd/Ctrl + Del). To deselect press Cmd/Ctrl + D.
Step 5
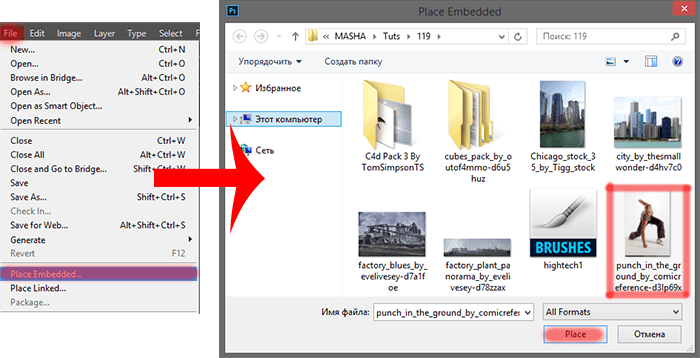
Add a model. Go to File > Place (Place Embedded...) and in your folder with the downloaded resources, select the file "punch_in_the_ground_by_comicreference-d3lp69x".
Step 6
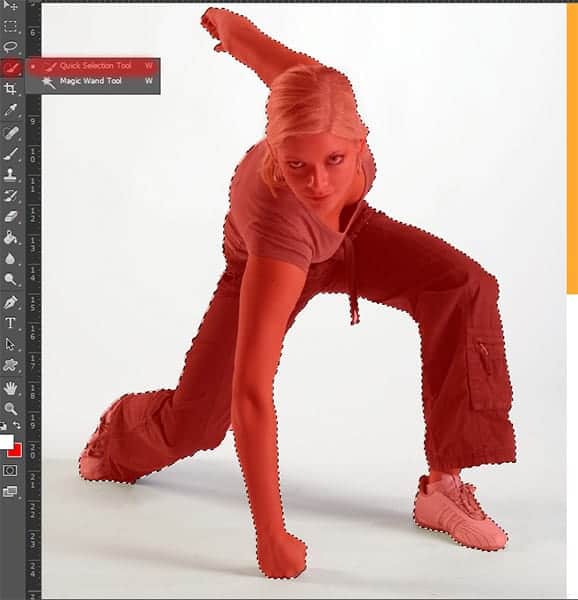
Use the Quick Selection Tool (W) on toolbar to select a Model. Be careful, because some parts on sneakers cannot be selected.
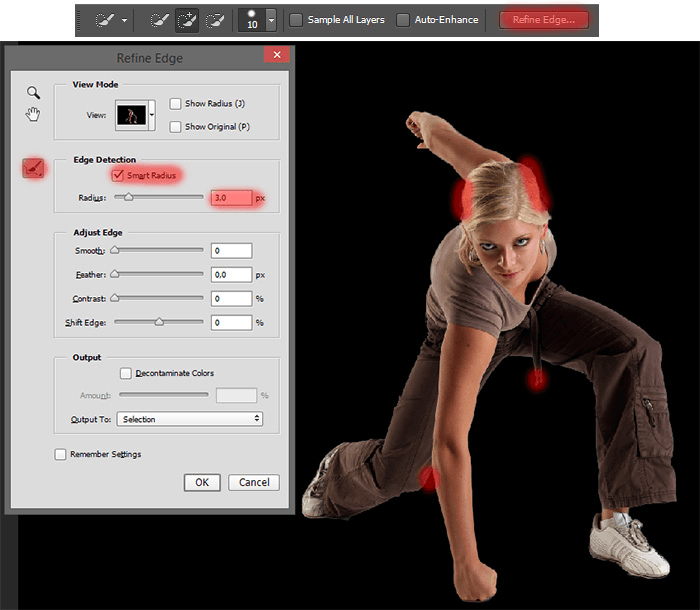
Go to Refine Edge. Change View to "On Black". Be sure to check the box on the Smart Radius, set Radius: 3.0px, use brush in this window to remove white parts, like shown in the image. When you finish, click Ok.
Step 7
Use the Puppet Warp (Edit > Puppet Warp), slightly to straighten a hand of model. Put on each joint of a hand one point (shoulder - elbow - wrist). Gently pull on the point on elbow to the right that a hand straightened slightly (do not pull hard!). In my opinion it will look more realistic.
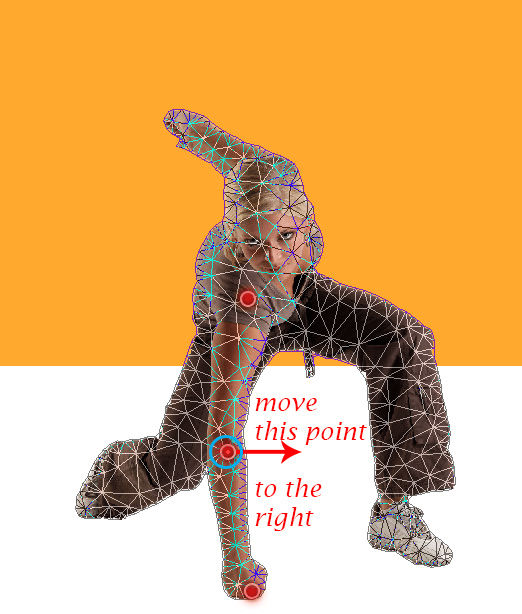
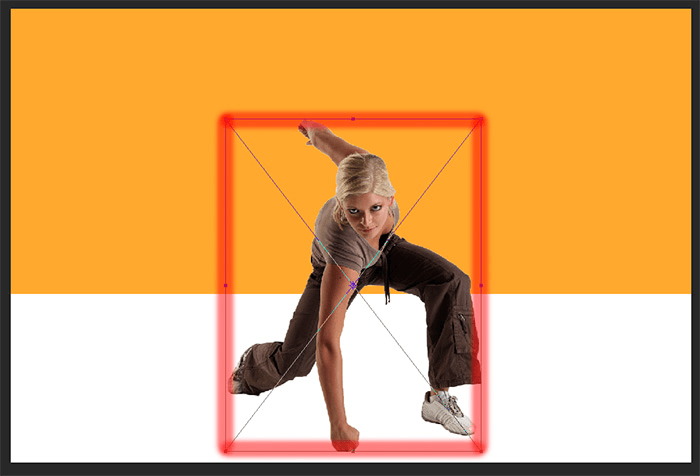
Now we need to slightly reduce the size of the model, so that we have more working space and that it looked realistic. Use the Free Transform tool (Ctrl/Cmd+ T or Edit > Free Transform) to resize a model, like shown in the image below. To transform the model proportionally, hold down Shift + Option/Alt.

Step 8
Now I decided to repaint her clothes, so she looked in harmony with the environment and in the future it does not distract us. To do this, I added to the layer with the model adjustment layer "Black & White". Go to Layer > New Adjustment Layer > Black & White... or click on Adjustment Layers icon on Layers panel and in list, select "Black & White".

15 comments on “Create an Illusory World with Abstract Composition in Photoshop”
you have done greatly well. welldone
please accept my request
u didnt finish the tutorial, i would be happy if u finsh up the tutorial
soo many broken images, can u fix it, thanks for making this tutorial bytheway
Hello! Thanks for your concern. It is already fixed now.
many images are broken. can you fix it.
Thanks for the awareness. It's now fixed.
BUT GIRL IMAGE IS NOT PREFECT U HAVE GIVE REFLECTION OR DROP SHADOW
Thank you very much for your comment, but you can see at least one light source here? I have not. This digital world. This picture does not assumes the presence of light, but if you want you can add it to your liking.
I can't get the sneaker to be part of the selection for Step 6 when using the 'Quick Selection" tool, it always cuts a big piece off :I
This is an interesting tutorial though it would be great if i could get it done :)
Never mind if got this :<
Hi Michael! This happens if you use a large "Spacing" value. On the Tools settings, next to the Tools mode, there is an icon with the size and kind of brush. Click on it and reduce "Spacing" value to 1%. As an alternative method, you can use a Pen Tool (P), make path and selection from it (right click > Make Selection > Feather Radius - 0px) and add a layer mask (icon on bottom of Layer panel or go to Layer > Layer Mask > Reveal Selection) to the layer to remove background. If you have any more questions, feel free to write me and I will answer to you.
super
As far as technology, how is it that you can use CS6 on Windows 8? I always have graphics issues.
Hi John! It's simple, I use Adobe Photoshop СС 2014 on Windows 8.1. If you have any questions in repeating my tutorial, be sure to write to me and I will help you. I tried to write a tutorial available for CS and CC versions.
There is no other artists for the tutorials?
Jenny Le, Santosh Rao tutorials like theirs could be great for the site.