
Make your artwork look like they're from an alternate universe. These Cyberpunk presets work with Photoshop (via the Camera Raw filter) and Lightroom. Download all 788 presets for 90% off.
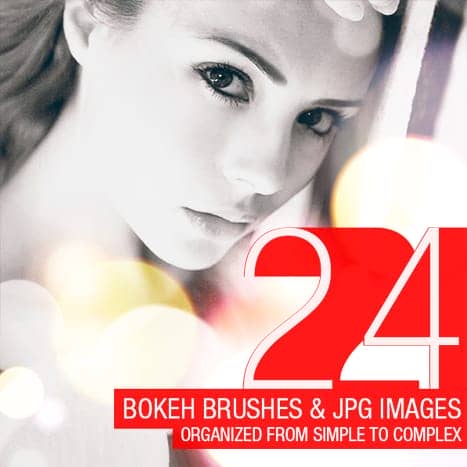
Easily add bokeh to your photos with these free Bokeh Photoshop brushes! These high-res brushes are available in sizes up to 5000px for Photoshop CS6 users and 2500px for CS5 and lower. Download this set of 24 bokeh Photoshop brushes courtesy of SparkleStock.
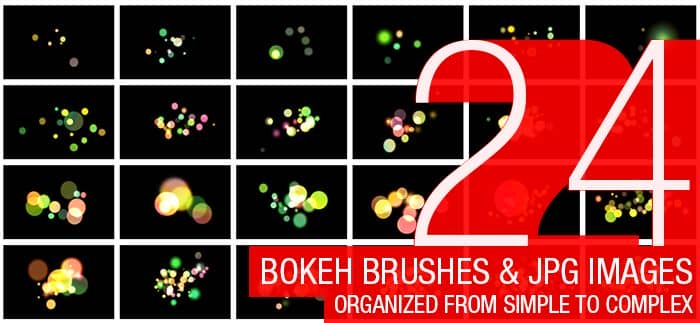
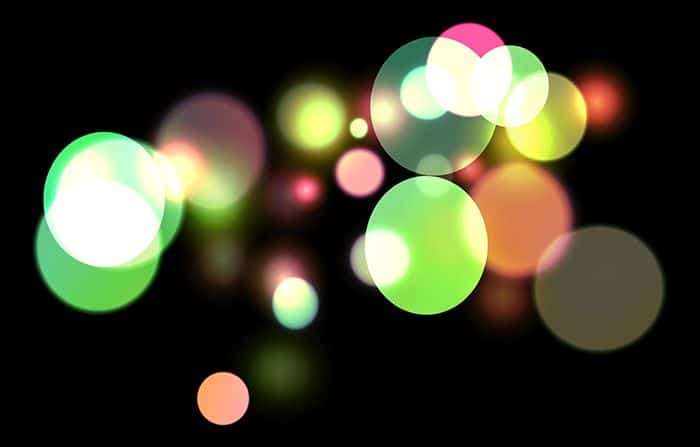
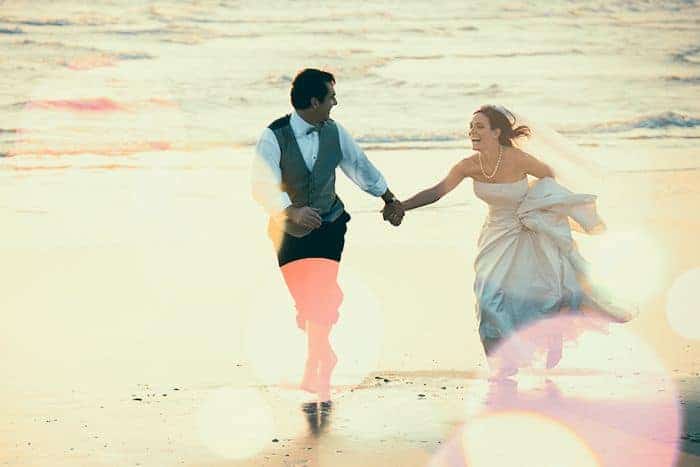
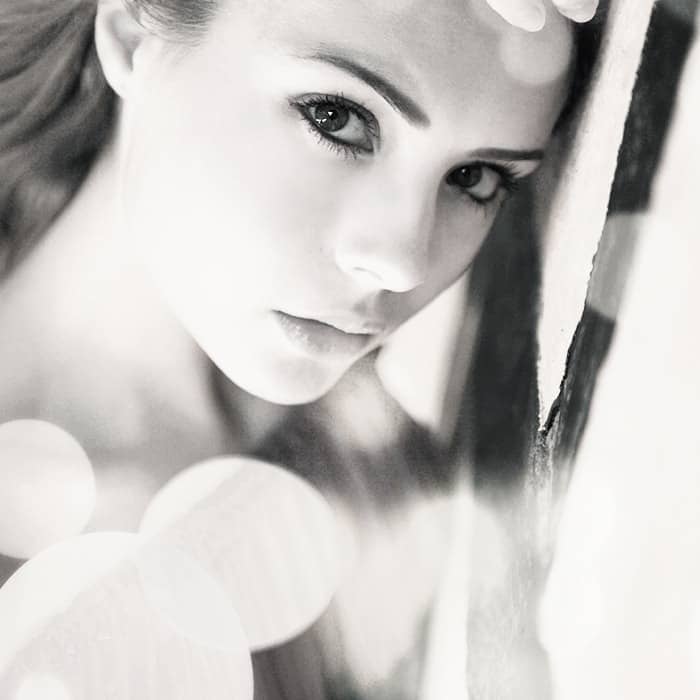
Bokeh Brushes Preview and Examples

Download Bokeh Brushes
Pro Version
- 25 Lightroom Presets
- 25 Skin Tone Protected Presets
- 25 LUTs (3dl, cube, look, mga, png)
- 25 Skin Tone Protected LUTs (3dl, cube, look, mga, png)
- 25 Capture One Profiles
25 comments on “Freebie: 24 Abstract Bokeh Brushes”
These brushes are exactly what I was looking for. Thank you very much!
Thank you!!
thanks a million.
anyway is this free for even commercial usage?
FYI, the link at SparkleStock for the 180 Abstract Bokeh Brushes doesn't exist
Thanks for the tip Pat! Link has been fixed
Thanks for sharing this nice post.
thank you
Great Job. Thanks For Share This.
thank you. these are great brushes!
THANKYOU!!
it's very nice
wow!
oh my god super tnQ so tnx
cant download either ...
I just tried it and the download seems to be working. Right-click on the link and choose save as and see if that works. The direct link to the file is https://www.photoshoptutorials.ws/downloads/abr/24%20Abstract%20Bokeh%20Brushes.zip
I am a beginner, so it must be from where I should start .....????
;) wow so simpel
Cormamin ... use the brush in white then choose a simple brush and "color" mode for the brush or "vivid " and choose the color you want and go over the bokeh brushed area to add the color .
I have Photoshop CS6, and can't seem to make these come in in different hues like the pictures show; is there a way to make them come in in multiple colors without using a ton of layers?
i have elements 9 , there are many ways to get the effect but here is one ... use the brush in white then choose a simple brush and "color" mode for the brush or "vivid " and choose the color you want and go over the bokeh brushed area to add the color. i suggest using a new layer for the bokeh brush .
you guys you very creative i wanna be like you
thank you so much it's so cool.
Thank you soo much!! Amazing work!!
Need help... I use elements 7, And everytime I use this brush, it comes on the color I select(black or white), Is there any way to make it so that U just click and it comes in multiple colors?? Because I am really bad in coloring those spots!
Bad news is that you can't do what you want to do. Good news is that it's pretty easy to do without using the brushes. Just place a JPG bokeh image into your artwork then change the blending mode to Screen or Linear Dodge
Thanks so much!
Thank You