
Make skin look perfect in one-click with these AI-powered Photoshop actions.
In this tutorial, I’ll show you how to create a dark and mysterious landscape using a range of photo manipulation techniques. You’ll learn how to combine different stock photos into a cohesive scene, create a misty atmosphere, adjust color, work with lighting, and more.
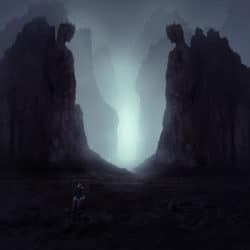
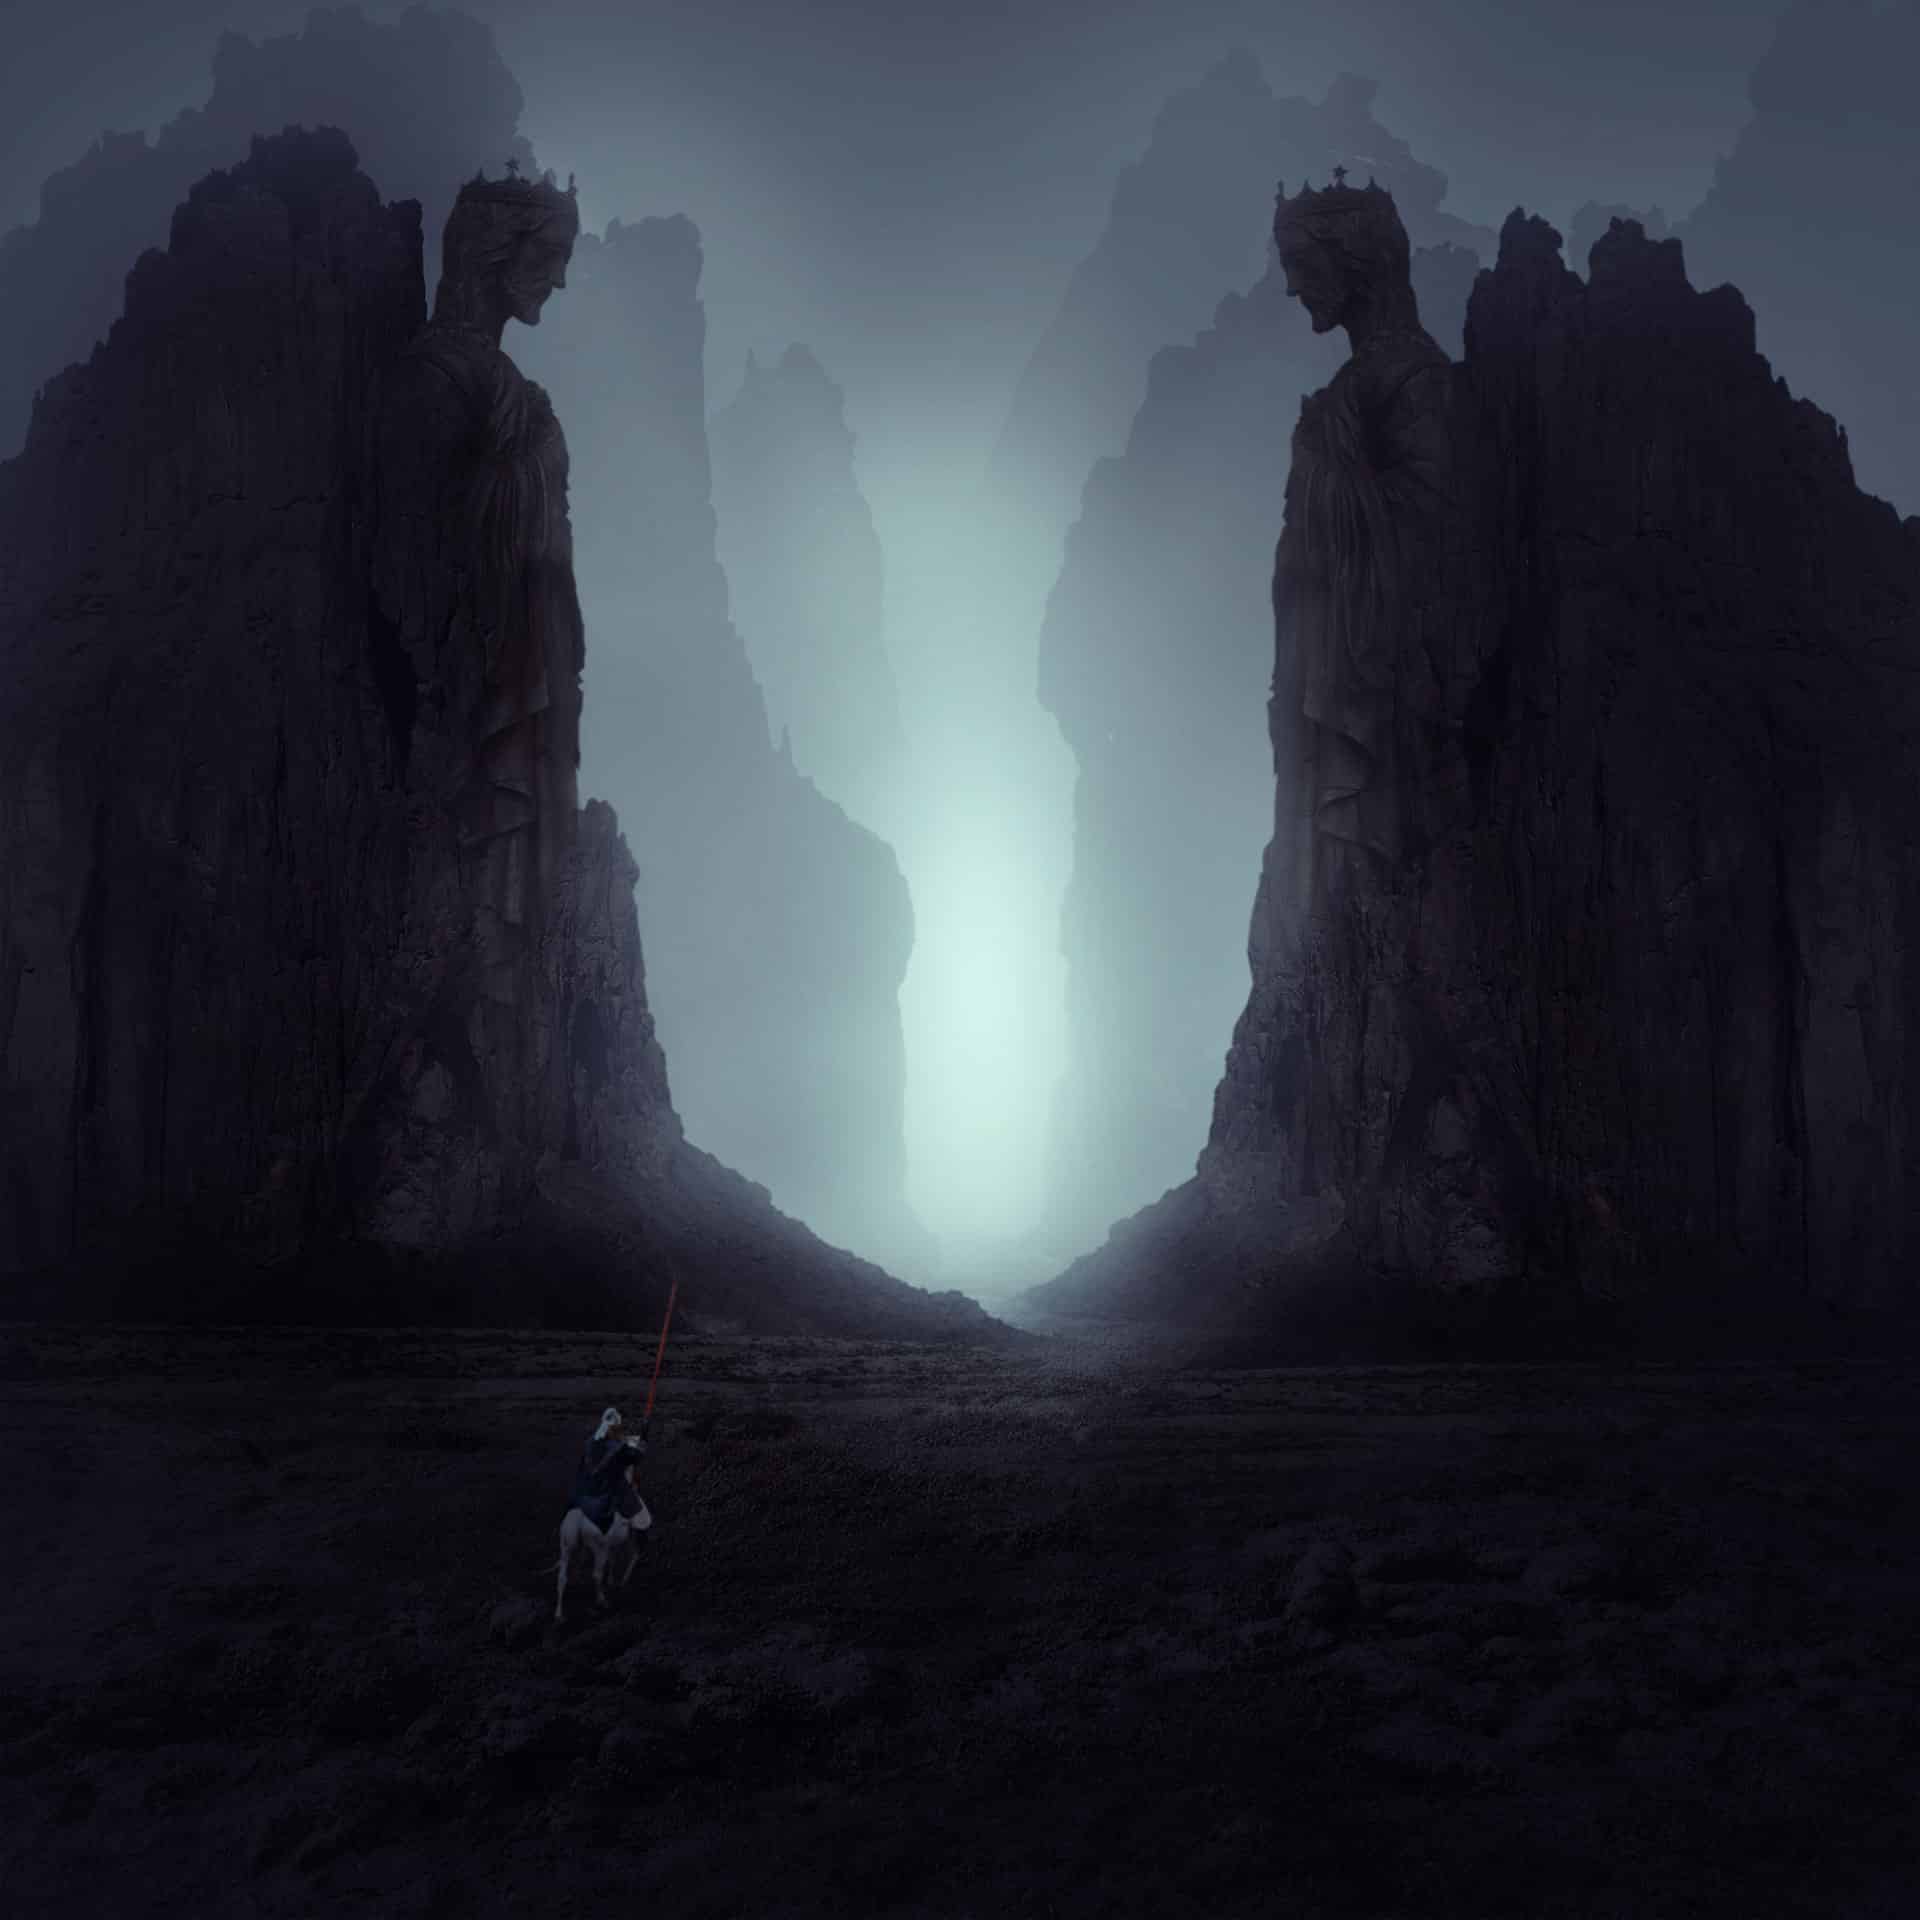
What you’ll be creating
We’ll start this tutorial by creating a rocky scene using a landscape and some rock images. We’ll also vary the rock opacity to generate a depth of field. Later we’ll add the statue and knight and blend them using adjustment layers, masking, and brush. Then we’ll create the misty atmosphere using a color fill layer. Finally, we’ll adjust color, refine the contrast, and enhance the lighting effect. You’ll need Photoshop CS2 or newer to follow this tutorial.
Tutorial Resources
Step 1
Create a new document in Photoshop with the following settings:

Step 2
Open the landscape image. Use the Move Tool (V) to drag it into our white canvas and place it, as shown below:

Click the second icon at the bottom of the Layers Panel to add a mask to this layer. Use a basic, soft brush with black color to erase the sky and the rock and leave only the ground visible:

Step 3
I used an adjustment layer with Clipping Mask to reduce the ground saturation. Go to Layer > New Adjustment Layer > Hue/Saturation:


Step 4
I used Color Balance to add some red to the ground:

Step 5
I used a Curves adjustment layer to darken the ground:

Step 6
Move the rock 1 image to the right side of the scene using the Move Tool.

Remove its background using a layer mask:

Duplicate this layer and flip it horizontally using Edit > Transform > Flip Horizontal. Move it to the left:

Step 7
Make all the rock layers selected and press Cmd/Ctrl+G to create a group for them. Change this group mode from Pass Through to Normal 100%. Make a Hue/Saturation adjustment layer on the top of the rock ones to desaturate them:

Step 8
I used Curves to darken the rocks:

Step 9
Place the rocks 2 images behind the rock 1 ones and lower its opacity to 50%. Set this layer under the rocks 1 group.

Use a layer mask to remove the hard edges and the rock on the right side:
15 comments on “Create a Dark and Mysterious Landscape Matte Painting with Photoshop”
Awesome !!
LOVE that you used The Golden Circle; I was stationed in Iceland for a year, I've actually been there!
can anyone give me free download link of photoshop??
the neverending story
Tom Lambell-Brown
(photoshop tutorial) Click. Drag. Done.
this tutorial helps me a lot .. thank u <3
Who else loves this ?
Me!!
Nice tutorial.
Thanks to share this tutorial
Jenny, thanks once again for sharing your amazing vision. I have several of your tutorials and they are just fabulous. Best wishes for continued success!
Superbe magnifique ambiance
I like ??
Yes! :)
I like that