
Make ordinary photo dramatic and interesting. Follow this Photoshop tutorial to learn how to create a soft morning glow effect with just two layers.
Before and After Morning Glow Photoshop Tutorial
Morning Glow Photoshop Tutorial
Step 1: Open an image
First, open a photo into Photoshop. To do this, open the File menu and select Open. If you do not have a photo to work on, you may download the photo used in this tutorial and open it into Photoshop.

Step 2: Create a new layer
Press the Create a new layer button in the Layers pallet. Then change the blending mode of Layer 1 to Screen.

Step 3: Add a Gradient
First, set the foreground color to white. You can do this quickly by pressing d and then x.
Now select the Gradient tool from the toolbar on the left. Select the radial gradient option (default is linear). Drag a line from one point to another to create a glow. You may undo and retry until you get the glow that looks natural in the photo.


Step 4: Add a Photo Filter
Now we’re going to add a Photo Filter adjustment layer. To do this, go to Layer> New Adjustment Layer> Photo Filter. Use the default settings but set the density to 100%.

Step 5: Change the blending mode
Change the blending mode to Overlay and reduce the opacity if desired.

Final Results
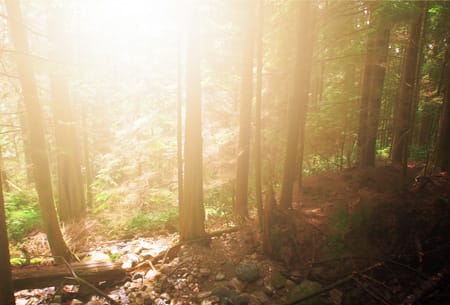
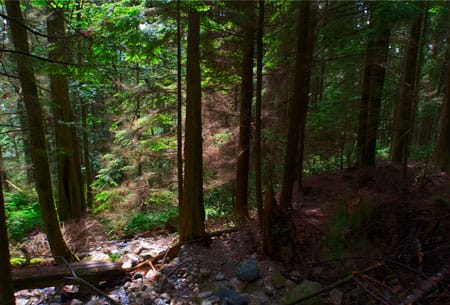
Original Photo
Morning Glow Photoshop Effect

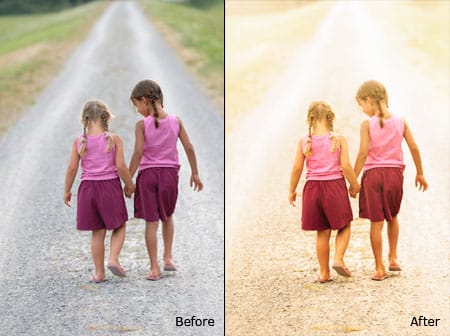
More Examples


2 responses to “Morning Glow”
-

Stop doing this. It looks awful.
-
Thanks you, very simple effect but looks awesome!
Leave a Reply