Make skin look perfect in one-click with these AI-powered Photoshop actions.
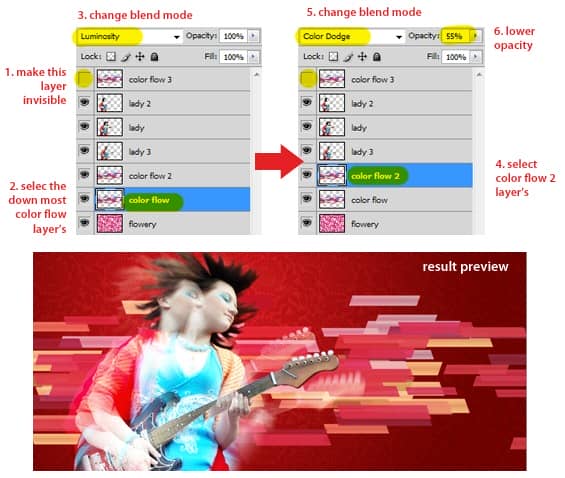
Still in the same layer, go to Filter > Blur > Motion Blur menu. Set Angle to 0 and Distance: 500 px. Click OK to apply the motion blur filter.
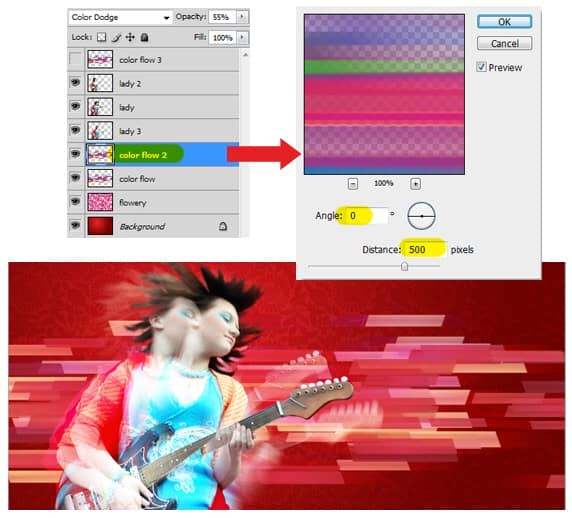
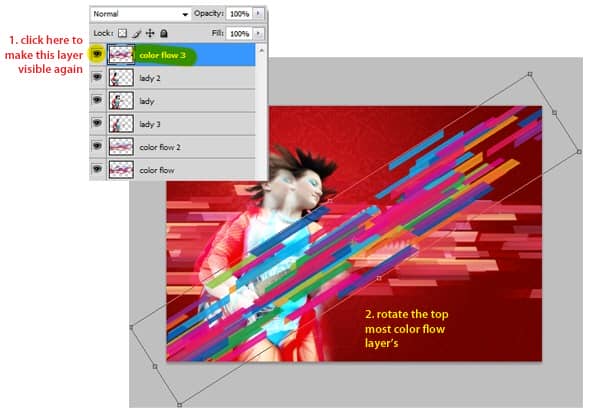
Unhide color flow 3 layer, then press Ctrl+T to call free transform command. Rotate the color flow so it appears diagonally. Hit Enter to apply rotation.
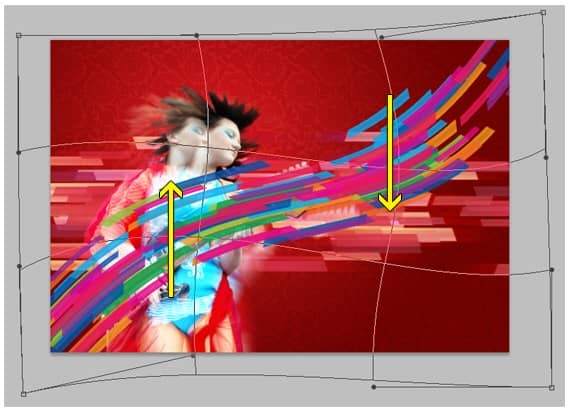
Now go to Edit > Transform > Warp. Manipulate the shape of color flow using warp control point, just follow the yellow arrow in the screenshot below.
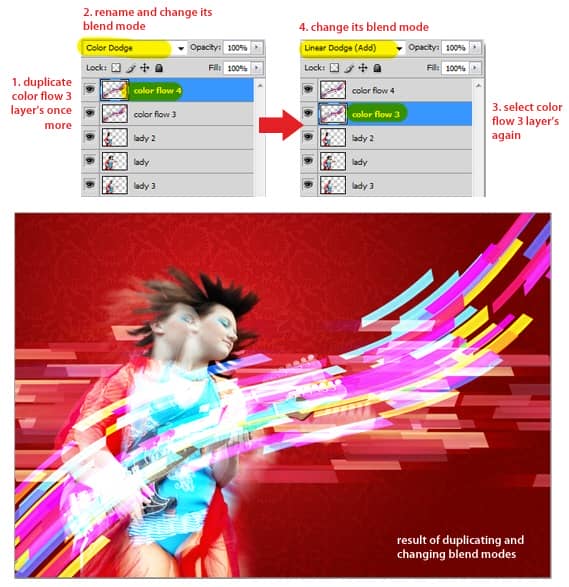
Duplicate color flow layer (press Ctrl+J), then rename it and change its blend mode to Color Dodge. Go back and select color flow 3 layer, now change its blend mode to Linear Dodge (Add).
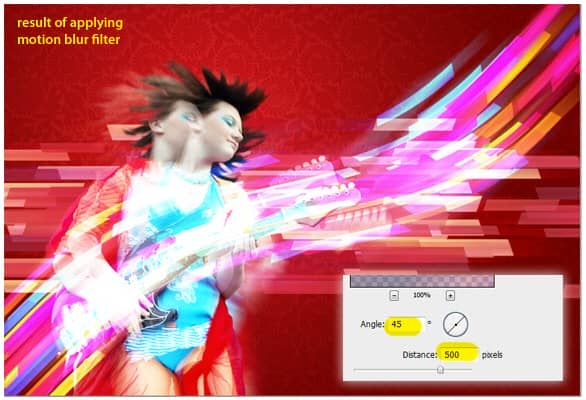
Still in the same layer, go to Filter > Blur > Motion Blur menu. Set Angle to 45 degree and Distance: 500px. Click OK to apply motion blur filter.
Step 7 - Adding Sparkle and Glowing Brush
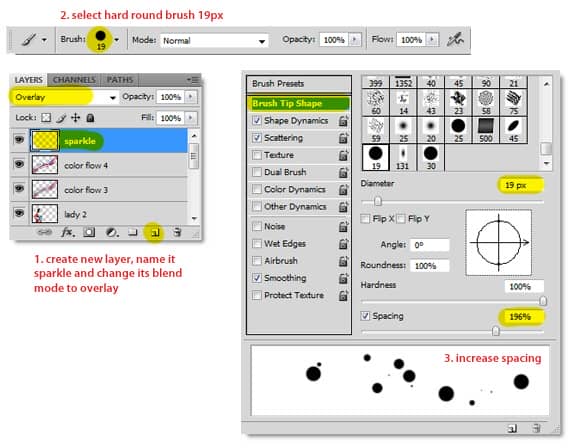
This step will teach you how to create the sparkle brush, first you need to create new layer on the very top layer. Name it sparkle and select blend mode: Overlay, this is the layer we'll use to draw the sparkle effect. Pick soft round Brush tool (I picked 19px) then hit F5 to show the brushes panel. In Brush Tip Shape section, increase Spacing to 196%.
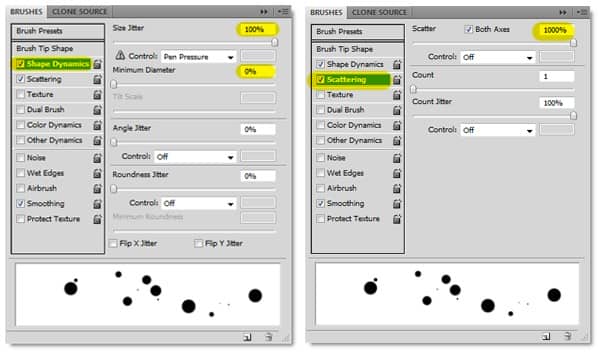
Click on Shape Dynamics, set Size Jitter: 100% and Minimum Diameter: 0%. Click on Scattering, increase Scatter to maximum ( 1000% ). Set Count: 1 and Count Jitter: 100%. Before you use the sparkle brush, you may want to save it as a tool preset just like the previous grey flow brush.
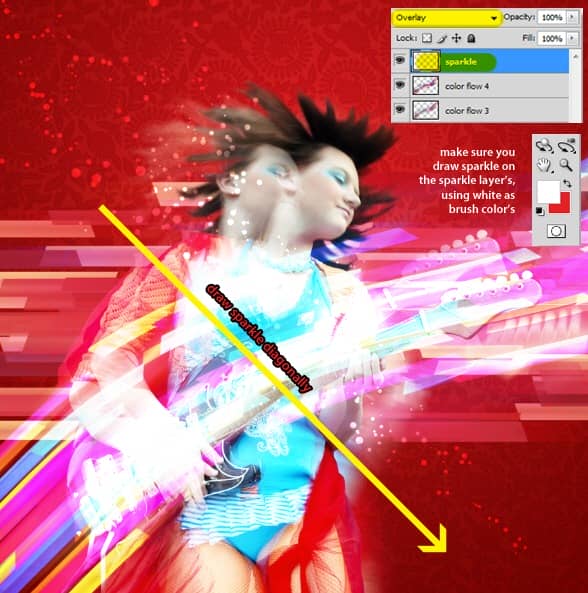
Make sure you're on sparkle layer and white is selected as brush color. Now start creating sparkle effect with the sparkle brush.
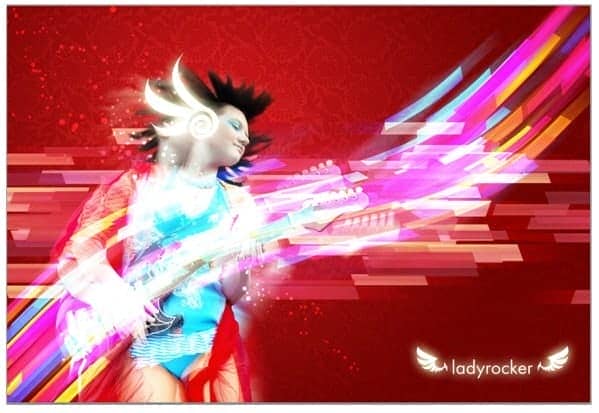
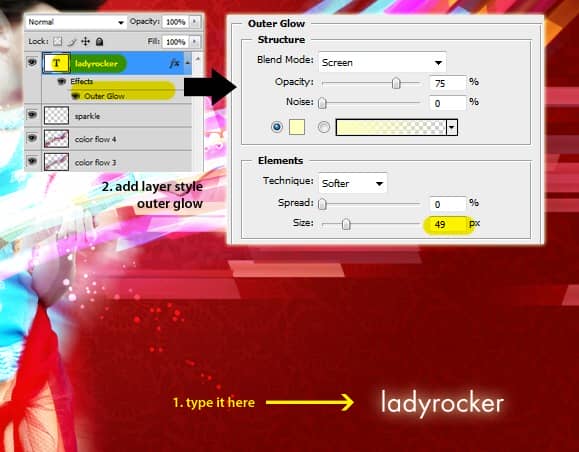
Using Horizontal Type tool, add white colored text "ladyrocker". You can use whatever font you like, my font name is Fusion with 20pt size. Add Outer Glow layer style to the text layer and increase the glow Size to 49 px or higher.
Create another new layer on top. Use Brush tool to load another custom brush which is named random vector brush. As you can see below, I've highlighted three brush shape we are going to use.
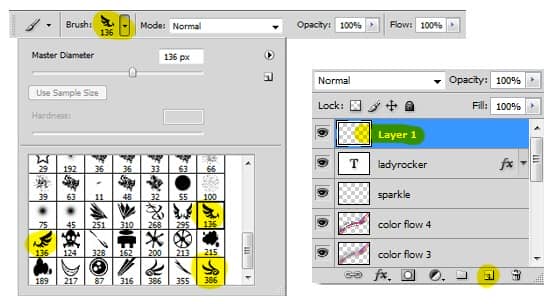
Grab wing brushes from the brush preset picker (highlighted in the previous screenshot step). And the last is add a Outer Glow layer style to the new layer so the wings will appears glowing. And now you're done! don't forget to Save your work :) I think this is fun, and i hope you can learn something new here. Next time, try with your own stock.
