Turn any photo into a dot grid artwork with these Photoshop actions. You'll get great results with dots that change size. They get larger in brighter areas and smaller in darker areas. Free download available.
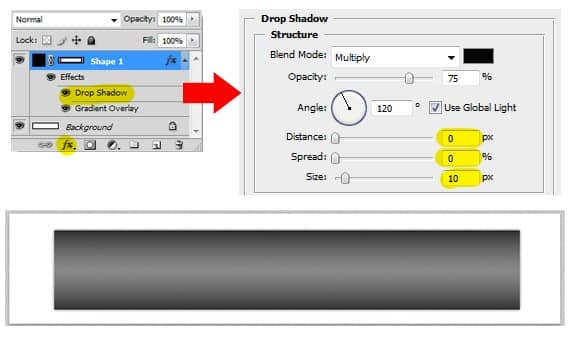
Still on the same layer, add Drop Shadow layer style. Set 0 for Distance and Spread, then increase Size to 10px. The drop shadow is subtle, but it's there.
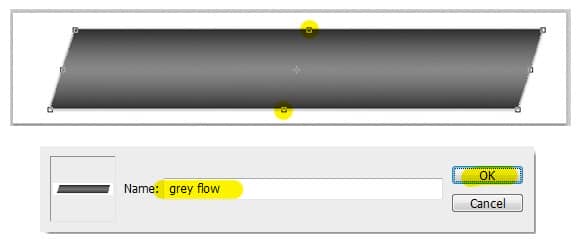
Now we need to skew this rectangle. Go to Edit > Transform > Skew to do this work (make sure you drag on one of the highlighted control points). Hit Enter to apply skew transformation. Go to Edit > Define Brush Preset menu to save this document as a new brush preset. Name this new brush as you like (mine is grey flow).
Step 5 - Adjust Brush Setting for Color Flow Brush Effect
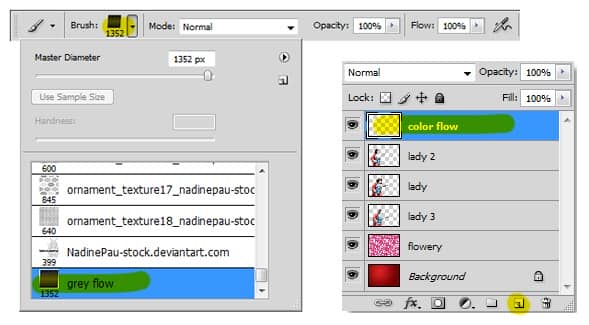
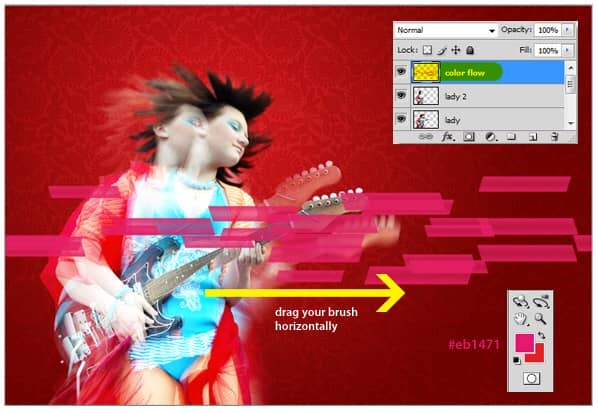
Back to lady rocker window, create a new layer called color flow. Make sure you place it on top of all layer. Activate Brush tool and see the brush preset picker. You should see now the grey flow brush is in the bottom list. Select the grey flow brush.
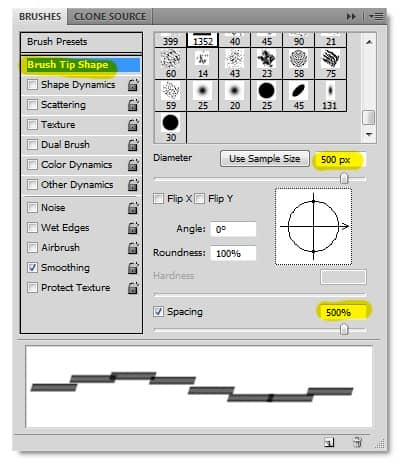
Hit F5 to show the Brushes panel. In the Brush Tip Shape section, increase Spacing to 500% and reduce diameter to 500px.
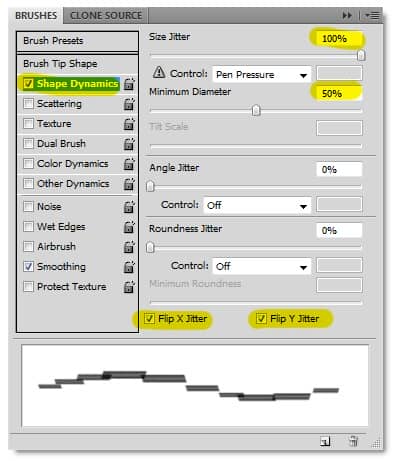
Click on Shape dynamics, maximize Size Jitter value to 100% and Increase minimum diameter to 50%.
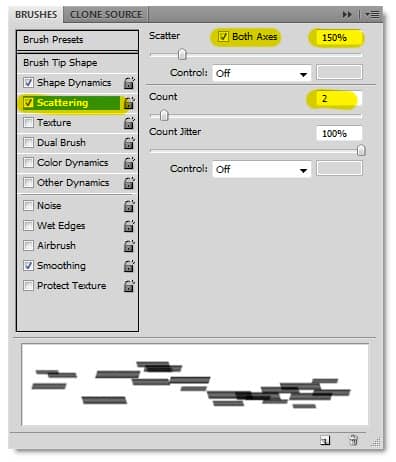
Now go to Scattering section, increase Scatter value to 150% and Count to 2. Make sure the Both Axes option is checked.
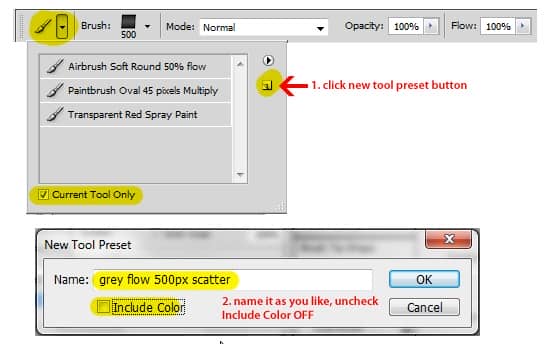
You may want to save this setting as Brush preset, so you can call this setting anytime you need it. Click on the tool preset picker, usually the Current tool only is checked so you can only see the list of preset for the current active tool. Now click on the new tool preset button, name this preset as you like and uncheck Include color option. Click OK to save the preset.
Step 6 - Creating Color Flow Effect
Select pink/magenta as your brush color, then drag horizontally to draw the color flow effect.
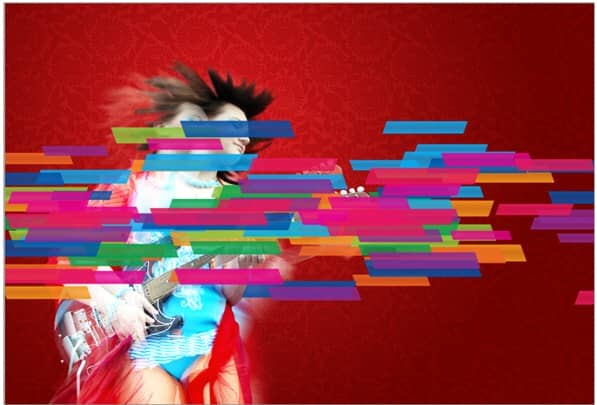
Continue creating color flow effect using combination of different colors. As you can see here, I'm using blue, green, yellow and purple.
Duplicate color flow layer's twice, so you need to press Ctrl+J as much as twice. Rename the layers to color flow 2 and color flow 3. When you finish renaming, drag down two color flow layers as you can see in the screenshot below.
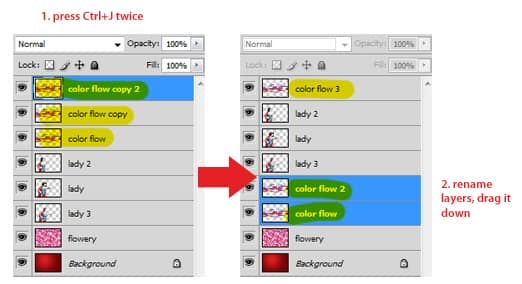
Click off color flow 3 layer visible button to hide it. Change color flow layer blend mode to Luminosity. Select color flow 2 layer, change blend mode to Color Dodge and reduce the opacity to 55%. You may get confused by this (I hope you don't), so make sure you follow the screenshot below correctly.
