Photoshop CC 2025 introduces the Remove tool, a superior alternative to older methods of object removal, such as the Healing Brush or Generative Fill with an empty prompt. This tool simplifies the process, offering users more control and efficiency in editing unwanted elements from their images.
Step 1: Open Your Photo
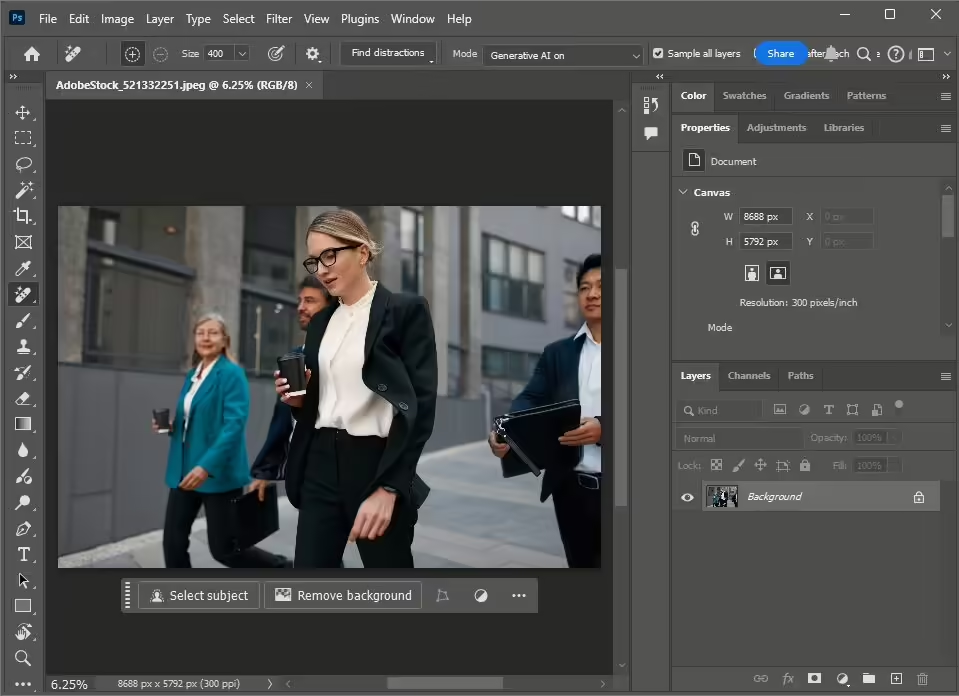
Start by opening a photo that has elements you want to remove, like wires or people. For this tutorial, we’ll use an image with several people in the background.
Step 2: Select the Remove Tool
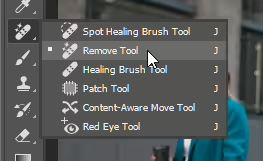
Locate the Remove tool in the toolbar. If you’re new to Photoshop, you can find the toolbar on the left side of your screen. Click and hold the bandage icon to reveal the menu, then select the new Remove tool.
Step 3: Create a New Layer
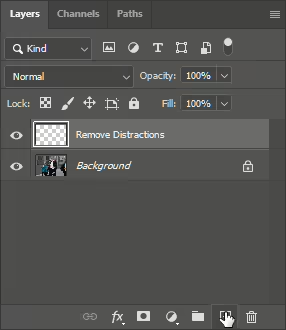
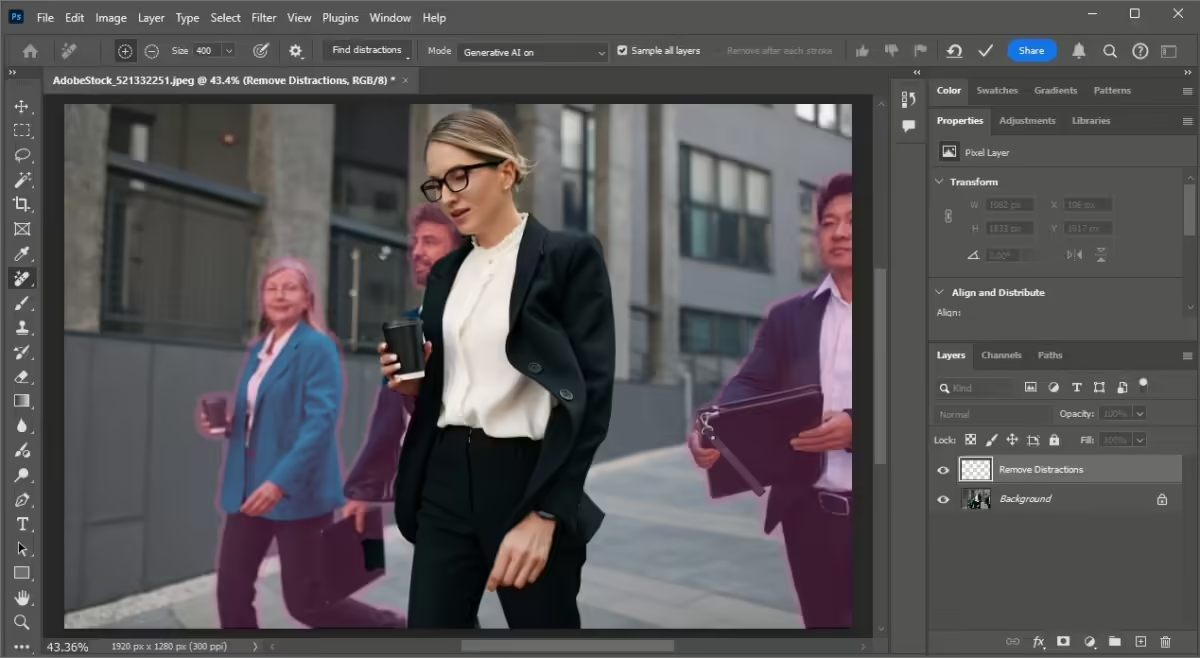
For nondestructive editing, create a new layer (Layer > New Layer). Name this layer “Remove Distractions.” This way, you can easily discard the changes if needed. While you can edit directly on the original layer, using a separate one is safer.
Step 4: Enable “Sample All Layers”
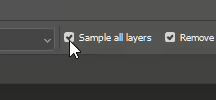
Since your new layer is empty, make sure to enable the “Sample All Layers” option in the toolbar. This allows the tool to detect objects across all layers.
Step 5: Use the “Find Distractions” Feature
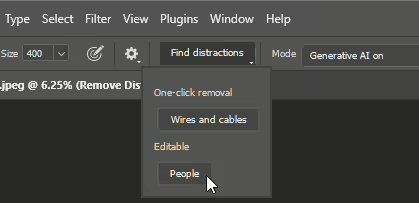
In the options bar, click “Find Distractions.” Choose what you want to remove—either Wires & Cables or People. Selecting Wires and Cables will remove them immediately. Selecting People will highlight them in purple for review and further editing.
Step 6: Choose Generative AI
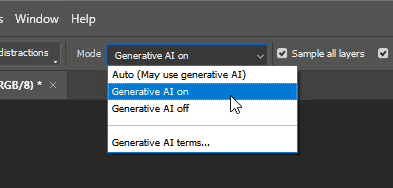
Decide whether to use Generative AI from the dropdown menu. AI usually provides better results but you can turn it off if you are low on Generative credits; a credit system Photoshop uses to track the amount of AI processing you use.
If everything looks good, click the checkmark to apply the changes.
Step 7: Final Touches
After processing, your photo should be free of distractions. If there are any areas that need further work, simply paint over them with the Remove tool for regeneration.
Before you paint, it is helpful to turn off the “Remove after each stroke” option. With this off, you can paint over the areas that you’d like to remove in multiple strokes, rather than one.

Quick brush tips
- Press [ to decrease the brush size
- Press ] to increase the brush size
- Hold alt/option while painting to remove areas from your selection
For my image, you’ll notice that there’s an extra arm in there. Paint over the areas that you would like to remove then click on the checkmark icon in the options bar to remove it.

The extra arm has been removed but the jacket needs to be refined more.

The results aren’t perfect, but it’s getting close.

After one more refinement, the removal looks great.

Final Results
And that’s it! You’ve successfully removed unwanted features from your photo, keeping the focus on your main subject. Here’s how the image looks before and after using the Remove tool.
PS: Because we did this on a separate layer, you can simply toggle the layer visibility to preview the effect.


FAQ
Does the Remove tool work on Smart Objects?
No, you need to rasterize smart objects before using it. Alternatively, follow this tutorial by creating a new layer and using “Sample All Layers.”
How does this compare with the Generative Fill tool?
The Remove tool is more predictable for object removal. The Generative Fill tool might replace objects with other elements, whereas the Remove tool focuses only on removal. However, note that the Remove tool applies changes directly to the layer, unlike Generative Fill, which allows prompt modifications anytime.
2 responses to “How to Use the New “Remove Tool” in Photoshop CC 2025”
-
I don’t see the remove tool in mine
-
Make sure you’ve updated to Photoshop CC 2025.
-


Leave a Reply