Designing good looking clean and functional Web layouts is an essential part of a Web Designers life. In this tutorial we are going to create a clean and professional Web layout in Photoshop from scratch. Along the way you can learn useful methods to create designs. So get started!
Preview of Final Results

Create a Professional Web Layout Photoshop Tutorial
Resources
Function Icon Set – wefunction.com(Alternative)- Twitter Icons – iconeden.com
- Bebas Font – dafont.com
Step 1 : Mockup
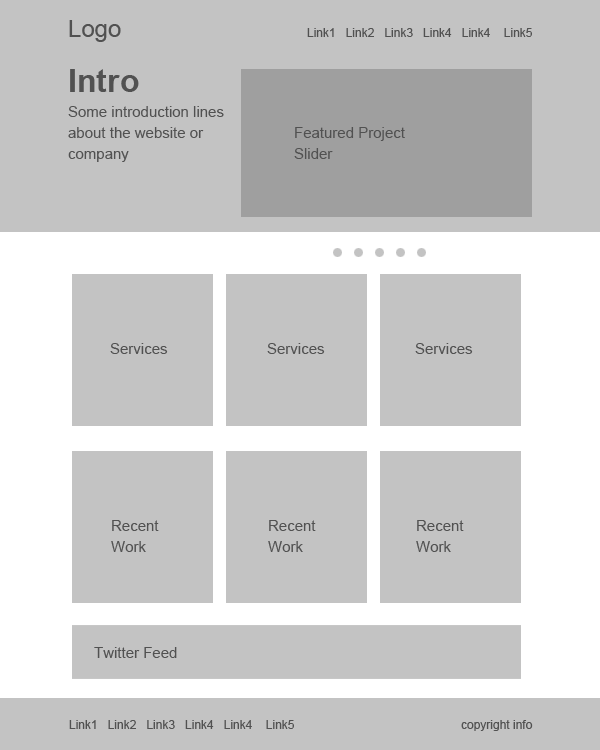
Before we start designing, we need to plan out the requirements, looks and the functionality. Then we need to fit these ideas into a layout to execute them visually. Mockups and wire frames are greatly useful to create layouts with lot of flexibility. It is a best practice and highly encouraged in the Industry.
I put the below one together using only grey tones. That way we eliminate color from the scene at this point. So that we can concentrate on the layout as a whole and avoid messing up with colors. That gives much freedom to quickly alter and rearrange things. A mockup can be as detailed as you want. For this purpose I am going with the below one. Just briefly defining the layout and what goes where.
Step 2 : Set up the Canvas
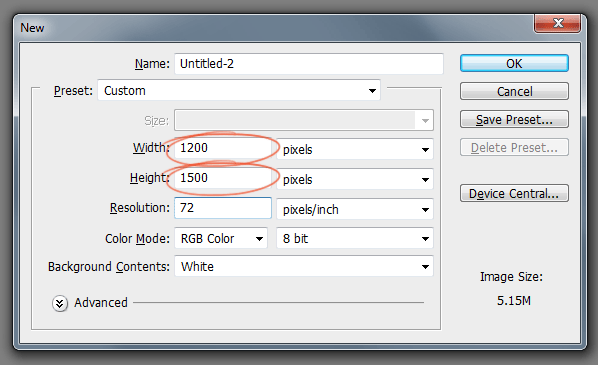
So we have a blue print for our layout. Let’s actually put the design together! We are going to create a 960 pixel wide layout. Create a new document at 1200 x 1500.
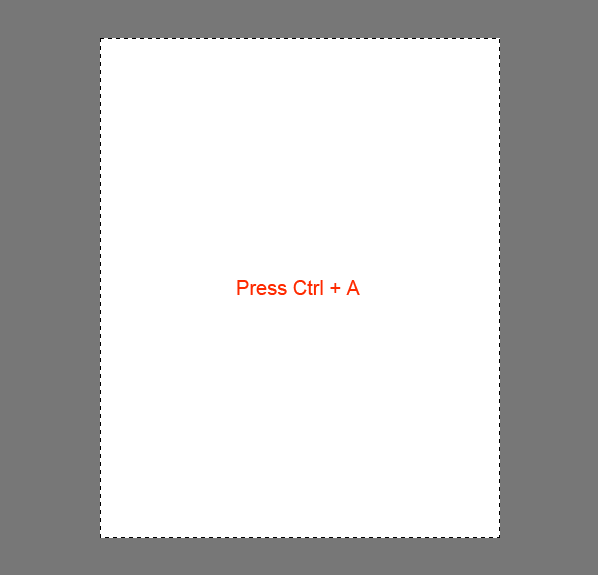
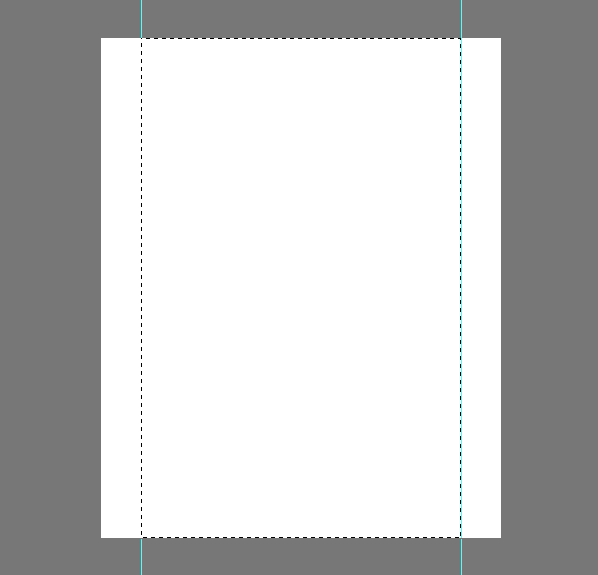
This is a 960 pixel wide layout, so we need define the work area by adding guidelines. Press Ctrl+A to select the entire document.
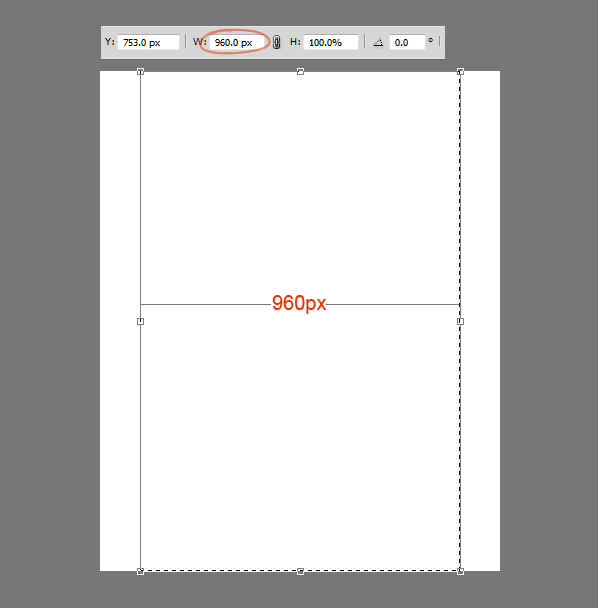
Go to Select > Transform Selection. Shrink the selection down to 960 pixels wide. That is the work area of the layout.
Add guide lines to the selection.
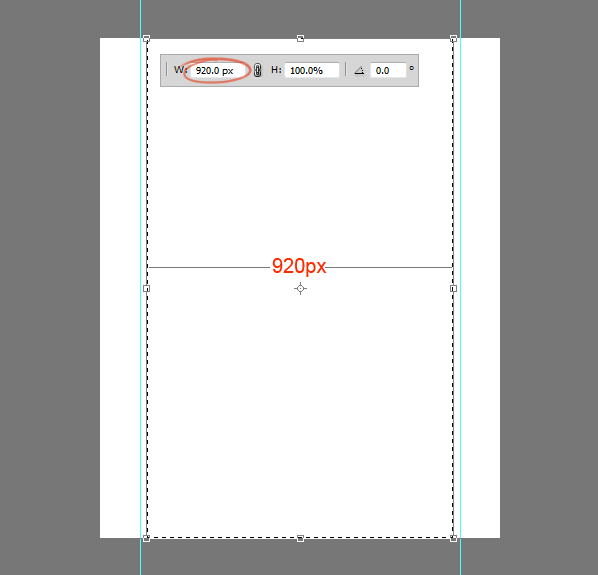
We need to create some padding between the border and the content that we will add later! With the selection active again choose Transform Selection. Resize the selection to 920 pixels wide. That means 20 pixels of padding each side totaling 40 pixels of padding.
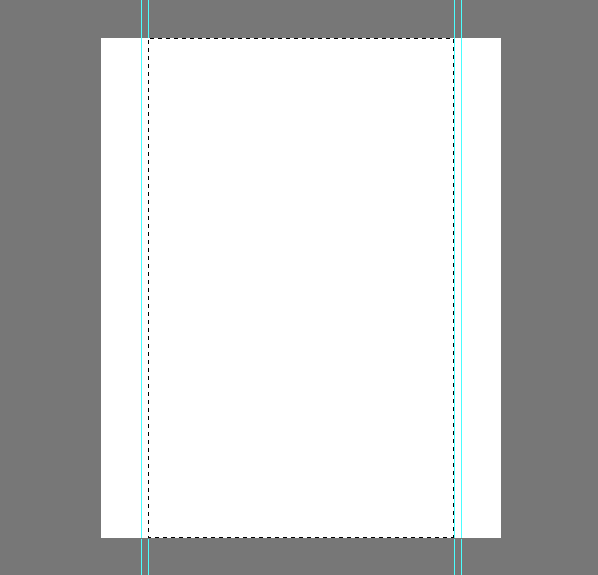
Add guides to the selection.
Step 3 : Create the Header
Let’s create the header of the layout! Make a selection that is 465 pixels in height.
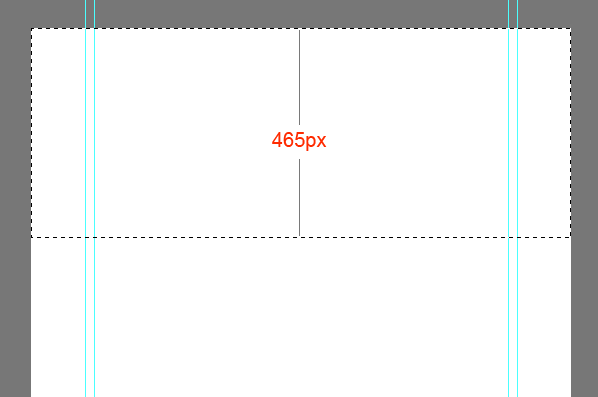
Fill the selection with a gray value first and later use the Layer Styles to add colors and gradients. Follow this throughout the design to maintain a visual hierarchy.
Add Gradient to the header. Double click on the layer thumbnail. Select Gradient Overlay. Create the below 2 color gradient. Use the settings.
122 responses to “How to Create a Professional Web Layout in Photoshop”
-
these steps are written like garbage. No explanation, WRONG screen shots or NO screen shots. 5 hours in and I still cant do finish the 2nd page. There should be a vid on this. Pencil gradient layer doesn’t work instruction are 100% useless, Patter doesnt didnt work not only that when I go to delete it It delete a full layer that I had to do again. This “beginner” training is NOT beginner level.
-
What step are you stuck on?
-
Photoshop Tutorials Staff, we were all sent here from a class assignment. Anon doesn’t understand anything and is venting.
-
-
Tutorial Low key difficult
-
Excellent tutorial for beginners.
-
Computer science engineering
-
It’s not a button.
You click OK to close the gradient settings.
Then click and drag left to right on the document to draw the gradient.
-
This is a well-written and very useful article. Thank you for sharing!
-
the initial dimension change to width of 920 pixels, doesn’t seem correct.
-
I am confused about applying the gradient mask. I cannot find the panel that is shown under where it says “apply the above gradient”
-
me too
-
-
Useful tutorial
-
Hi Dear
It was a wonderful tutorial that I have seen on the web . I tried to copy the entire process but I faced a problem in maintaining the proportions of the type size. your size set for the logotype with size 40 is so big in my Photoshop that I discard the Idea of keeping same size and I used the font size according to my assumption.
I used 14 pt to maintain the size of the logo type to fit on the top . I reduced the size of the “Home” to “Contact”, means navigation bar to only 4 pt to look good.
Now would you please help me in explaining how did it happen and what is wrong with this size ?
I will be really thankful to your for your co-operation
-
Go to Image > Image Size and make sure that your document is 72dpi. Here’s an explanation: https://www.photoshoptutorials.ws/photoshop-tutorials/font-big-small-photoshop/
-
-
Good evening, finally I got a tutorial about photo manipulation in photshop, this tutorial is very good for me and people who visit this website, thank you for the tutorial, stay safe and keep it healthy.
-
Thank you for the article. You explained it well, very detailed at each stage of the stages, I might be a little layman with Photoshop. but this article made me looks more skilled. the best is the results have been provided.
I hope you make a new tutorial with themes that may be more different and different concepts. thank you -
Nice tutorial Thank you
-
Hi, im a beginner at photoshop. And i’m stuck at making highlight line at step 3. I can’t change the line color to gradient. It keep the color i choose before i draw the line
-
Sorry I don’t quite understand which part you’re stuck on. Can you elaborate on what you’re doing?
-
Hello, you can fix that by ading a mask to the layer itself.
Make sure that you click on the gradient tool(G) then go to the layers panel and choose the line layer and add a mask to it. then click on mask and apply the gradient with same colors in the tutorial above.
It will very helpfull for you to understand how mask works, so i reccomand you learn a bit about it,
Goodluck.
-
-
good job
-
The tutorial is very great
Thanks
But how can we add the HTML an links -
thank you!!
-
This tutorial is great for using photoshop.
-
Thanks! A tutorial how to get html css code for this template would be great!
-
There are so many free theses out there for web layouts, I am not even sure I would spend the time it takes to create my own :)
-
Thank you! Great lesson! Very informative!
-
Wow, its really amazing what you did. Great tutorial, I like to us the information for my future website designs.
-
its awesome, thank you!
-
Hi,
I understand this is a design tutorial…but is there a tutorial for turning the design into an actual website with the coding and stuff?
-
No step for how to add guidelines,for selection !!!
-
This tutorial is really nice…Can anyone tell me how to convert these psd files to codings….and run it on my browser……………….?
-
I’m really lost with this step “Blend the pattern smoothly into the header. Add a Layer Mask to the pattern layer. Pick a soft brush and paint with a large soft brush. Pick #ffffff for brush color. Reduce the brush Opacity to about 60% and paint. If you find it too strong then adjust the layer opacity individually.” … is there another tutorial I should look at to understand layer masks? Thanks!
-
Some technical change or creative steps can improve the design than what are shown here as tutorial. I believe tutorial are just an example or way, if someone can walk well maintaining that way and look around the road, the learner can make something more appealing design. BTW…this was help thought. Thanks :)
-
This is a great tutorial indeed on creating professional and eye catching website layout. Thank you for sharing.
-
thanks for this tutorial
-
I’m so late to your post but the post is really immortal. I enjoy your post. Thanks
-
great tutorial
-
I was unable to use the colors but i have achieve the procedure with
differents colors -
This is my first designing, it came so well. thank you for such tutorial.
-
Great job! thanks
-
Awesome tutorial! Thank you so much for all your hard work and effort. ;)
-
how to add guides lines to website
-
how to make a slide show in photoshop
-
Thanks Too You my dear im done my templete
-
good tutorial
-
use full my work ides thanks bro
-
awesome tutorial
-
in fact, u hav done a gud research on web design, u did a gud job. weldone, can we have the video tutorial?
-
this is great tutorial for me, thanks for sharing…
-
Hi!
Very nice tutorial, But I think managing layers in website making is also very difficult, would have been much better if you mention about them………..but seriously Guy, this is very GOOD. helped me a lot, Thank you soooo Much………..
-
Great tutorial.
-
can u please tell me the about the guide line how to add guideline according to the transformation selection
-
I’m glad I found this. I don’t want to sit through 2 and a half hours of someone explaining this stuff and having to keep pausing and rewinding when I can just look at each step as I go.
-
I’m sorry, but this is SO CONFUSING. I have almost 0% knowledge in Photoshop, and I keep getting lost. It’s like you skipped a LOT of minor steps & assumed that folks already know all the menus/options in Photoshop. It takes me 30+ minutes for EVERY STEP, because I have to figure out ALL menu options/exact steps for everything.
And now I’m stuck at the Transform (Ctrl+T) part, and the section directly after it (where you press V to move it):
1. You never said how large our selection area should be (200px? 50px?).
2. I transformed it, and now at the bottom there’s an ugly gap matching my background color.
3. ALL of my Align buttons are grayed out…meaning I can’t center my “highlight”. At all.
…Someone, anyone, PLEASE HELP!!! Thank you in advance.
-
AGREED this thing is a JOKE, there is nothing to help you through each step. It only says do this and the screen shots are 100% useless, NOTHING like what I have. 5 hours just to skip 1/2 the steps because things dont work.
-
-
Hi it will be great if your comments at any step were more simple.
-
thank you this is really good i didnt think it would accually work in 3 easy steps thank you.
:)……. -
this is ally good to do i didnt know i accually get my work done in 3 steps thank you
:) -
awsme……….pls. send some more tips
-
Really nice and useful tutorial. Really this is the best tutorial about making web template that I read. I will try this with my next projects. Thank you Niranth.
-
this is really an awesome tutorial. I learn a lot. thank you for sharing this with us.
-
Nice to See Amazing Work…
-
cool
-
Really gr8 tutorial…thank you.
-
Good & Very Helpfull.
-
This is really a good stuff. Also can you explain to slice the layout and make it as HTML and CSS that would be more helpful !!
Thanks, Pal
-
Great job :) But how to finalize it in Dreamweaver? :/
-
Thanks it helps me ……
-
Any idea how to make changes in HTML? BTW nice tutorial :D
-
Brilliant tutorial, really clear instructions, thank you for your generosity.
-
This website is undoubtedly the best for photoshop I’ve seen yet…. But how can I add html and stuff?
-
How to add guide line ?? :(
-
Great Tutorial.
Would you pleae let me know now what is next step with this tutorial
Thanks in advance.
jd
-
Awesome, Thanku
-
Thank you so much for the tutorial.
-
I followed your tutorial and helped me a lot to create my first Website design on photoshop. Awesome tutorial on photoshop.
-
thanks alot i complete my own tempelate thanks alot
-
A thank you note from bottom of my heart.
I am from india and loved your tutorial .
-
Plz koi ye batae second step kese solve hoga me yaha phans gaya ho help me fast wairing 960 wali line samaj nahi aa rahi
(plz splve my problem, i am not understand 2 setp how can i do 960 px lines)
-
Saaf mention kiya hai pehle ctrl+a se canvas select karna hai .
Then Go to Select > Transform Selection. Shrink the selection down to 960 pixels wide.
Easy hai ;)
-
-
how about coding part after creating this staff??? how to put links and other functions??
-
how to creat this websit…..?
-
thank you for this tutorial! it helped a lot! i love it XD
-
what is this nonsense…
-
Great job.
-
Can u tell me how to link this all.
ths is frontin only na
plz tell me link of tutorial from where i can link all this
through photoshop. -
Thanks buddy for teach those.
but i have a couple of questions,
1. How we add this layouts in to the Joomla
2. How add the Links for those icons.?please feel free time email to me the answer that would be very great full
-
How to insert a photo to make it background for the layout of the magazine??????????
-
yes it is worth…!
-
Please explain “Add Guidelines”. Thx!
-
gud
-
Wow… I have so much to learn. Thank you for this inspiring article with the beautiful examples of clean website design. I particularly like Caava Design. The cutout showing the background through it is inspired! Not to mention the other details like the moving arrows and graphics upon scrolling. Gisele, you obviously have a great eye for design. Result
-
Nice Photoshop tutorial, easy to follow!
-
Wawwawaw.. that’s great work Man , but i need the second part where we slice it into a webpage man
-
nice tutorial……
-
vince, agree.
Nice picture, no more. What to do next? Useless lesson. Designers for designers in isolation from the real development.
draw car? is not enough, need build to drive.
-
Your efforts is matchless, please send more work and send me your new work. Thanks.
-
very helpful…..thanks a lot
-
Hi, It’s a very good tutorial. Can you make a tutorial for converting this PSD template to HTML/CSS ? If so, I thank you very much !
-
hello, this is an awesome tutorial i made one by own thanks ^^
-
thank you.
-
like this i think it will help me alot
-
nice
-
no…..just no!!!
-
It’s Awesome.
But I don’t understand one line.
So please if anybody understand this link please reply.“STEP : 4: Now create a simple checker pattern and apply to the header. Pick the Pencil Tool, set the brush size to 2 pixels and add two dots that are touching each others corners. Turn off the background and select the dots. Choose Edit > Define Pattern.”
Please create an img and show how did you crate pattern.
Waiting for help.Thank You #
-
how to put it into html code ?
-
So what is the process and transferring this layout to dream weaver and act as spectacular as it looks? If you can email at [email protected] or on here I’d greatly appreciate it.
-
I was redirected to this post from a html slicing tutorial of this psd layout. Can some one pls post the link of that html code?
-
This is one the best tutorials on layout for the web I’ve seen. There are sooooo many poor quality tutorials out there. This is one of the good ones, well done!!
-
this is really a great tutorial,really thanks ! wonderful job
-
-
this is just for the image, how about the coding part??
-
it’s adesining tutorial
-
-
Awesome … Thanks ;)
-
Great tutorial. :)
-
cool tutorial!
-
Hi..
Thank you for making the only actual tutorial that I’ve been able to find. Other ‘tutorials’ haven’a actually explained how to do things, but you did so, very clearly…-
Yes…..of course
-
-
im sorry for asking..
how to put links and html stuff?
-
All work u have to do in dreamviewer, u can apply templates on the web, by dreamviewer,
-
-
this is just awesome thank you soo much :)
-
wow! that’s a great tutorial,really thanks ! great job


Leave a Reply