Make your artwork look like they're from an alternate universe. These Cyberpunk presets work with Photoshop (via the Camera Raw filter) and Lightroom. Download all 788 presets for 90% off.
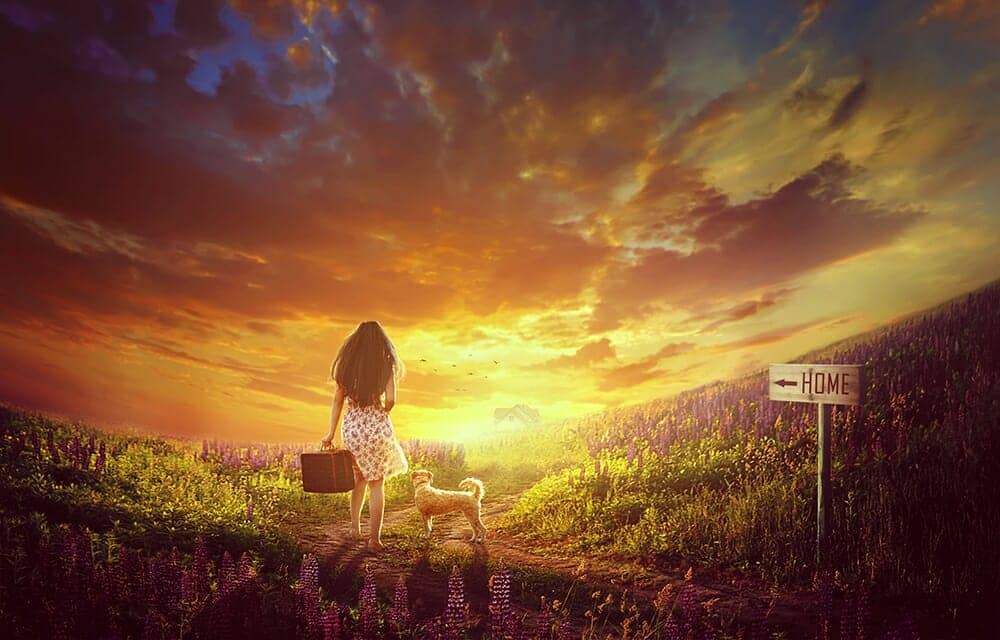
In this tutorial, I'll show you how to create a sunrise scene featuring a girl coming home. First, we'll build the base scene using two images of the sky and field. After that, we'll add the sign, house, model, and dog. Later, we'll create several adjustment layers, paint the light, hair, and some missing details. We'll add the birds to complete the final effect.
Preview of the Final Result
Tutorial Resources
Step 1
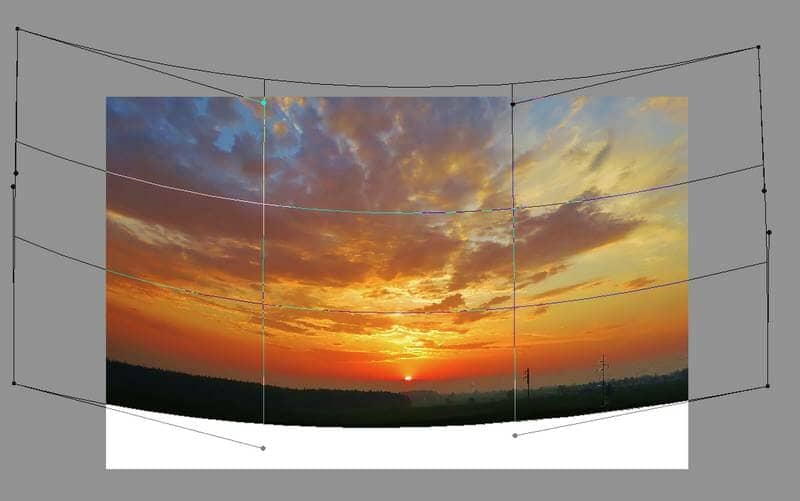
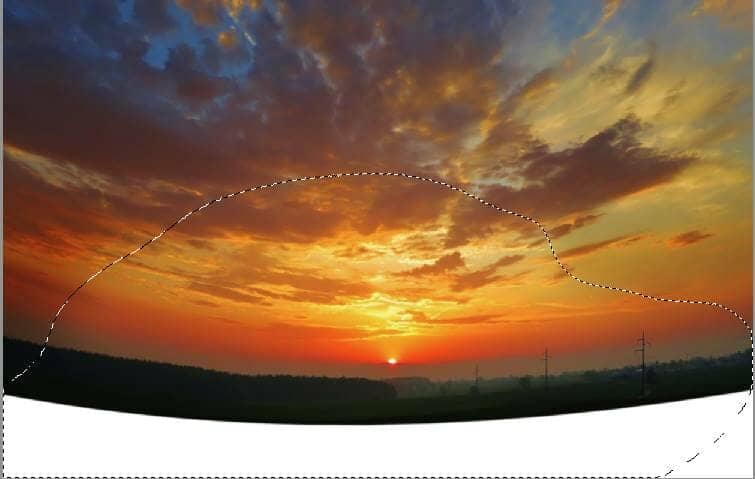
Create a new 2500x1600 px document in Photoshop and fill it with white. Open the sky image and drag this image into the white canvas using the Move Tool (V). Convert this layer to a Smart Object and use the Free Transform Tool (Ctrl+T) with the Warp mode to bend the form of the sky image as shown below:
Step 2
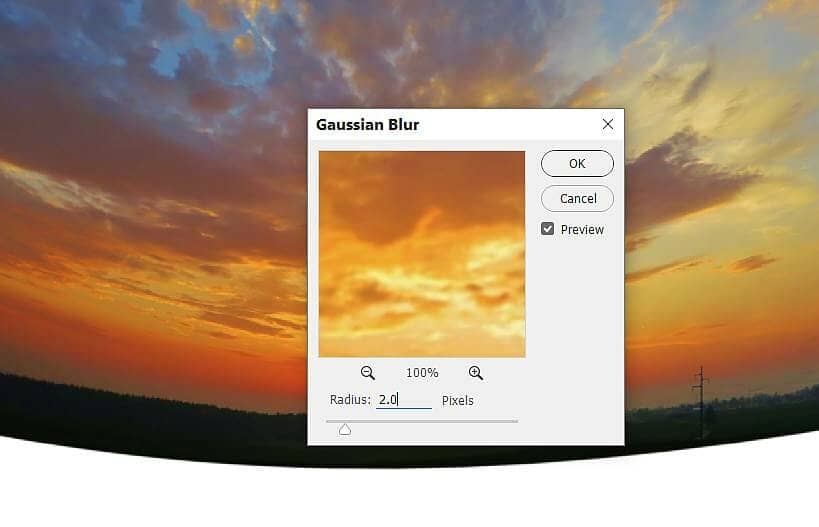
Go to Filter > Blur > Gaussian Blur and set the radius to 2 px.
Step 3
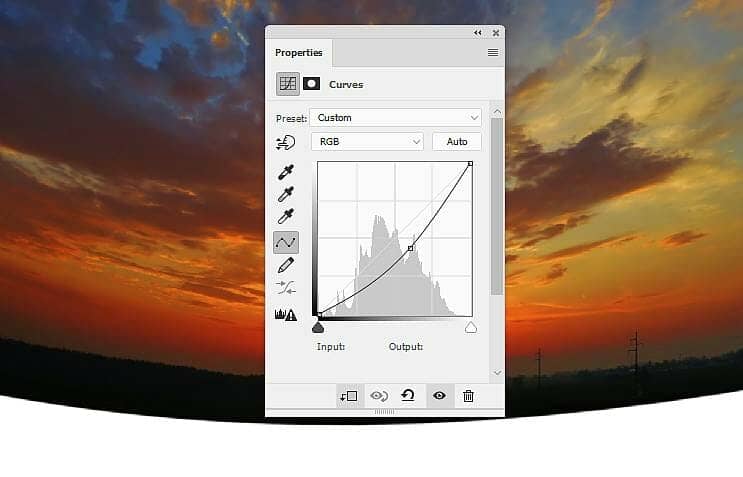
Go to Layer > New Adjustment Layer > Curves and set it as Clipping Mask. Bring the lightness down and on this layer mask, activate the Brush Tool (B). Select a soft round one with black color and use this brush to erase the dark effect on the bottom middle of the sky.
Step 4
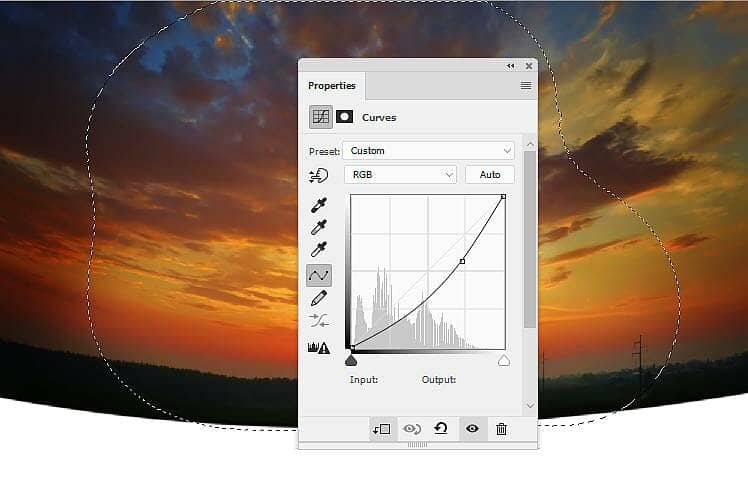
Make another Curves adjustment layer to darken both sides of the sky more. On this layer mask, use a soft black brush to erase the rest so it won't be affected by this adjustment layer.
Step 5
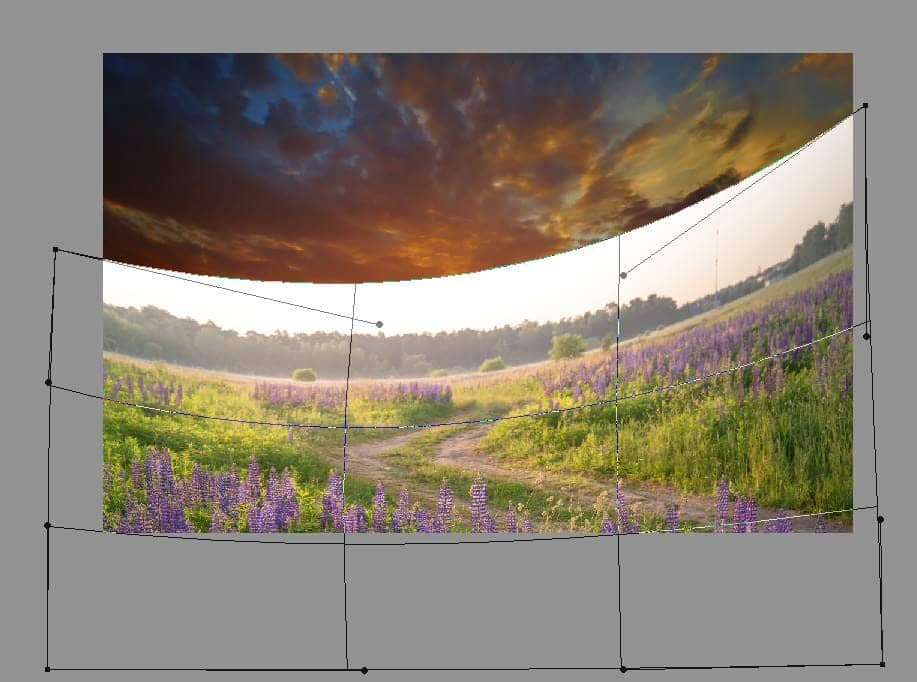
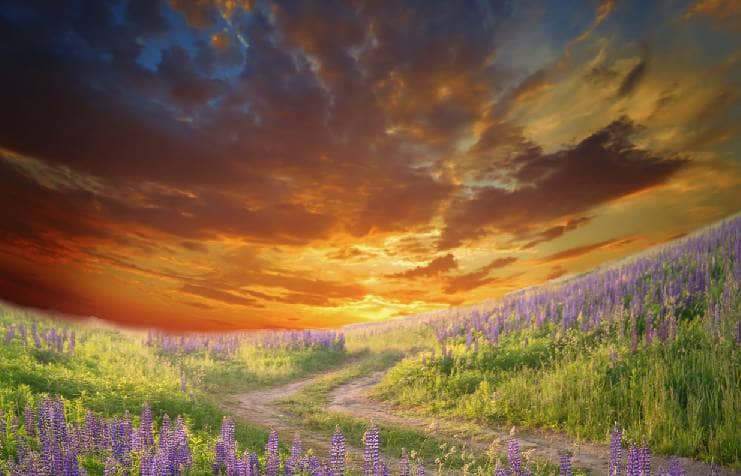
Open the field image and place it onto the lower part of the main canvas. Convert this layer to a Smart Object and use Ctrl+T with the Warp mode to bend the upper part of the field as shown below. Click the second icon at the bottom of the Layers panel to add a mask to this layer. On this layer mask, use a medium-hard black brush to erase the sky and bushes of this image.
Step 6
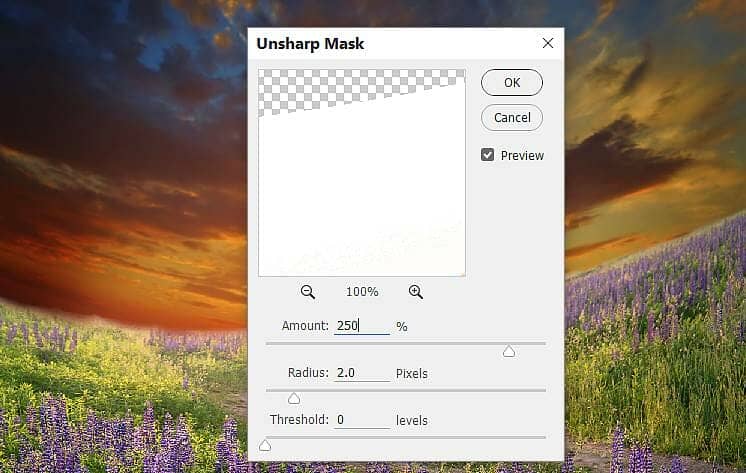
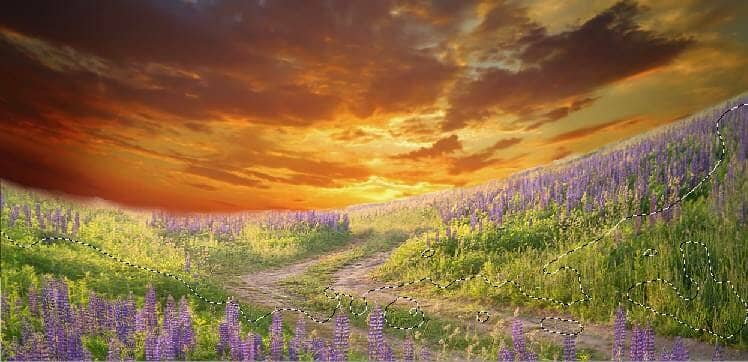
The background of the field looks blurred than the rest so go to Filter > Sharpen > Unsharp Mask and fill in the following settings. On this filter mask, use a soft black brush to erase some parts of the foreground and midground of the field so they won't become too sharp.
Step 7
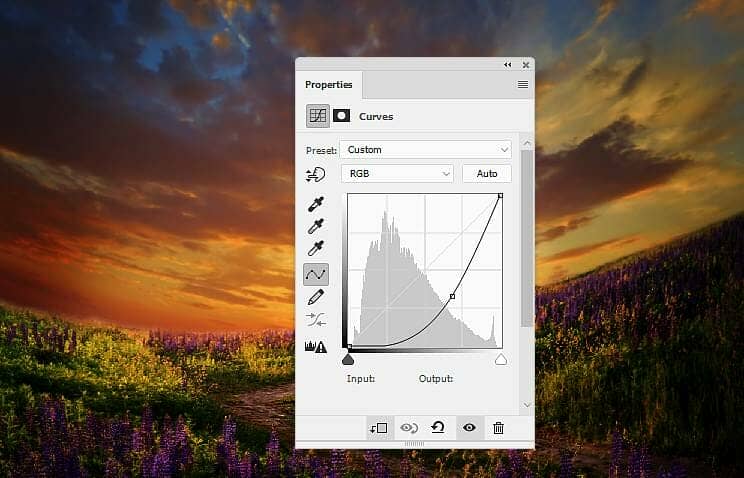
Make a Curves adjustment layer above the field (set as Clipping Mask) to darken the field.
Step 8
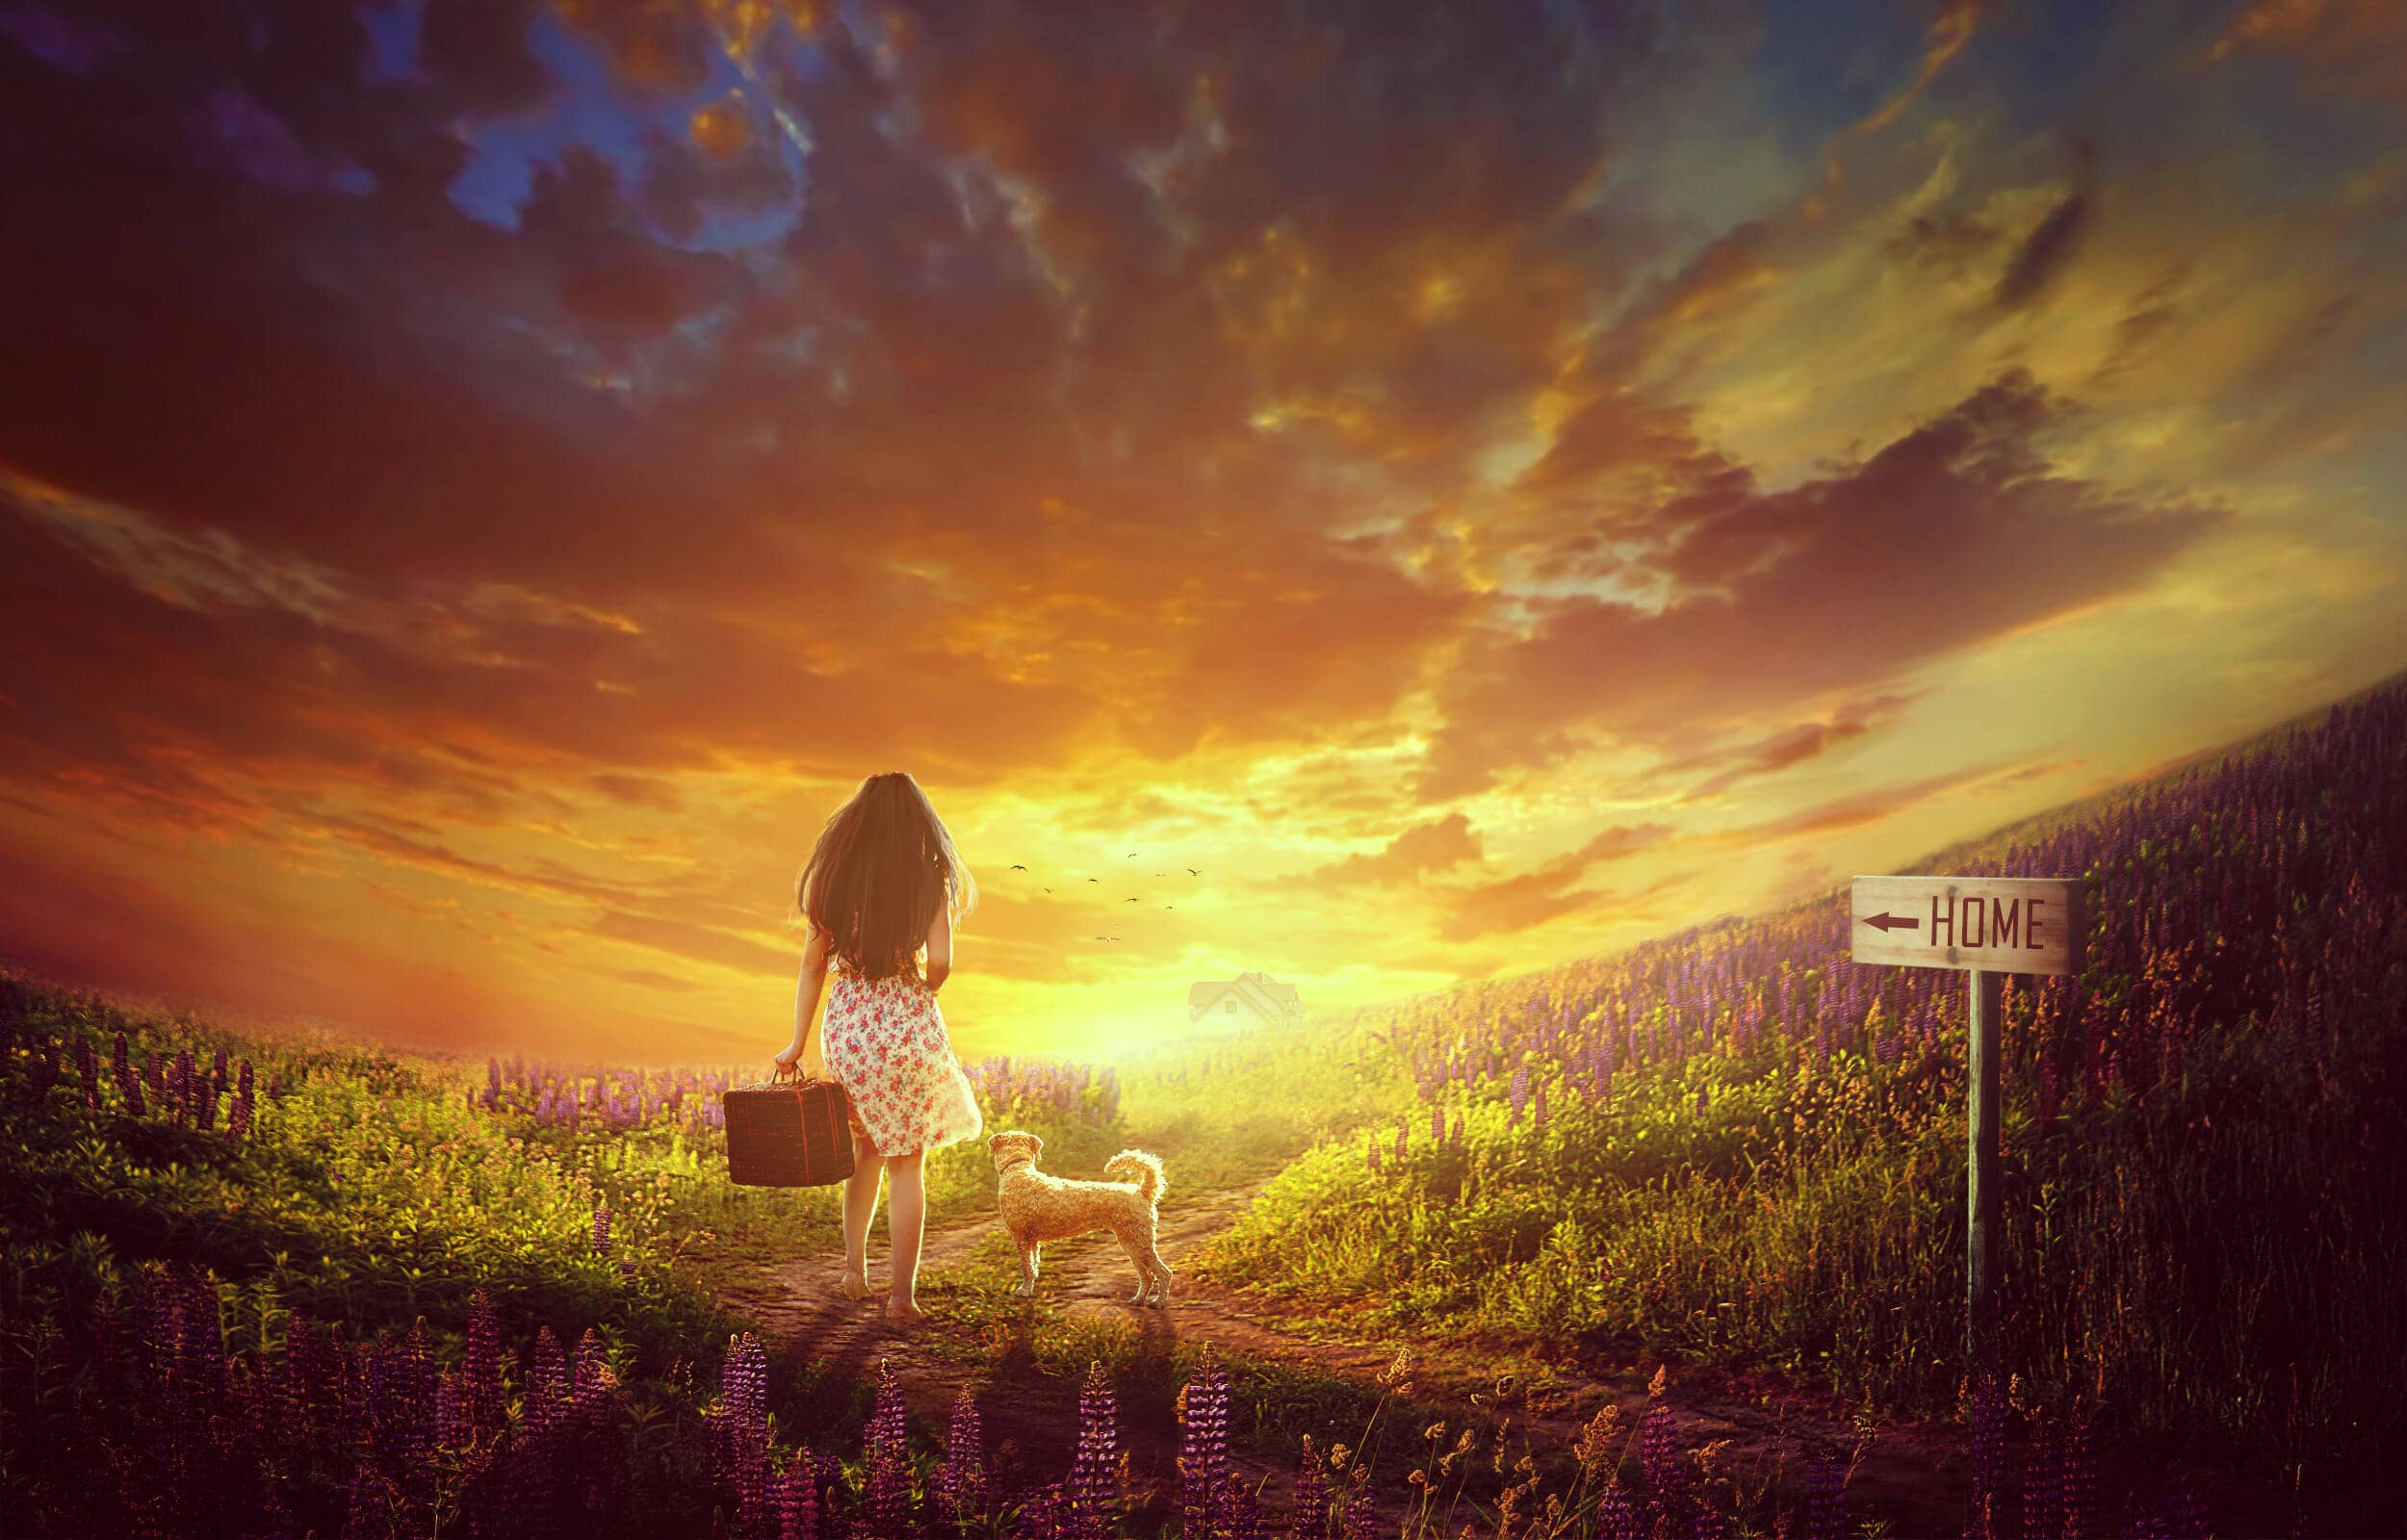
Create another Curves adjustment layer to darken the left side more. On this layer mask, paint on the rest to keep its lightness.
Step 9
Open the sign image and use the Polygonal Lasso Tool (L) to select the stick part of the sign to add to the right corner of the field.

Step 10
Create a Curves adjustment layer (set as Clipping Mask) to darken the stick. On this layer mask, use a hard black brush to erase the front of the stick as it gets light from the background.

Step 11
Add a Color Balance adjustment layer to change the color and light of the stick :


Step 12
Cut out the board of the sign to add to the top of the stick. Use Ctrl+T to distort the board a bit to fit the direction of the light.

Step 13
Create a new layer (set as Clipping Mask) and activate the Clone Tool (S). Use this tool to remove the text and symbol on the board.

Step 14
Make a Curves adjustment layer to darken the shadow side of the board. On this layer mask, use a soft black brush to erase the rest to reveal the lightness there.

Add another Curves adjustment layer to brighten the front of the board more. On this layer mask, paint on the shadow side so it won't be brightened by this adjustment layer.

Step 15
Create a new layer on top of the layers and hit T to activate the Text Tool. Choose Agency FB font with the color #190203 to type the letters HOME on the right of the board.

Step 16
Make a new layer and select the Custom Shape Tool (U). Choose the Arrow 9 and draw an arrow on the left of the board with the same color ( #190203). Flip it horizontally (Edit > Transform > Flip Horizontal) and use Ctrl+T to rotate it a bit to fit the direction of the light on the background.


Step 17
Open the house image and isolate the house only to add to the middle of the background. Add a mask to this layer to blend the bottom of the house with the field.


Step 18
Create a Curves adjustment layer to reduce the contrast and increase the dreamy effect on the house.

Step 19
Cut out the model and place her in the middle of the ground. Convert this layer to a Smart Object and go to Edit > Puppet Warp. Use the pins on the right feet to lift up the left toe a bit . The aim is to trim the back of the sole.


Step 20
Add a mask to this layer and use a hard black brush to erase the right foot and shoe to make it look like a low heels one.

Step 21
Create a new layer (set as Clipping Mask) and use the Clone Tool to remove the blades on the feet and add more details to the right bottom of the dress.

Step 22
Make a Hue/Saturation adjustment layer and change the Saturation settings:

Step 23
Add another Hue/Saturation adjustment layer to desaturate the left leg as it's a bit redder than the rest of the skin. The selected areas show where to paint on the layer mask.

Step 24
Make a Curves adjustment layer to darken the model. On this layer mask, use a soft brush with the opacity about 10% to reduce the dark effect on the back of the legs.

Step 25
Create a new layer , change the mode to Overlay 100% and fill with 50% gray. Activate the Dodge and Burn Tool (O) with Midtones Range, Exposure about 10-20% to refine the light and shadow on the model. You can see how I did it with Normal mode and the result with Overlay mode.


Step 26
Make a new layer and use a small brush with the color #f6ffd0 to paint highlights on the contour of the model.

Step 27
Create a new layer below the model's one and use a small brush with the color #070404 to remove the bright detail behind the model.

Step 28
Add a new layer and hold the Ctrl key while clicking the thumbnail of the model layer to load her selection. Fill this selection with the color #070404 and flip vertically. Convert this layer to a Smart Object and move the shadow below the model's feet. Use Ctrl+T to change the form of the shadow to fit the direction of the light:


Step 29
Lower the opacity of this layer to 70% and use the Puppet Warp to tweak the shadow to fit the terrain behind the model. Apply a Gaussian Blur of 3 px to this layer.


Step 30
Add a mask to this layer and use a hard black brush to erase the unwanted details in the front of the right foot and the flowers on the right part behind the model .

Step 31
Cut out the dog and place him beside the right of the model. Make a shadow for him as done with the model (without applying the Puppet Warp).


Step 32
Create a Curves adjustment layer to darken the dog. On this layer mask , use a soft black brush with the opacity about 15% and 30% to reduce the dark effect on his legs.

Step 33
Make a new layer on top of the layers and use a soft brush with the color #f8e1b9 to paint on the horizon, field and the dog and the model. Change this layer mode to Soft Light 100%.


Step 34
Create a new layer and use the same brush with the opacity about 30% to paint on the sky's horizon, house and the right of the scene to give them some dreamy light.

Step 35
Make a new layer and use a soft white brush with the opacity about 40% to paint some highlights for the sky's horizon.

Step 36
Add a new layer and use a soft brush with the color #291b01 to paint on the middle of the canvas. Change this layer mode to Linear Dodge 100% and use a layer mask to erase the light effect on both sides, leaving the effect visible around the house, model and dog mostly.


Step 37
Create a new layer and use a soft brush with the color #ffc863 to paint more yellow light in the middle of the scene. Change this layer mode to Soft Light 100%.


Step 38
Make a new layer and use a soft brush with the color #fc9c06 and the opacity about 20% to paint more dreamy light for the ground. Change this layer mode to Hard Light 100%.


Step 39
Create a Color Fill layer on top of the layers and pick the color #230c01. Alter this layer mode to Exclusion 100%.

Step 40
Add another Color Fill layer and pick the color #480871. Change this layer mode to Difference 20% and on this layer mask, use a soft black brush to erase the color effect on the top left and the middle of the scene.


Step 41
Create a Color Balance adjustment layer and change the Midtones and Highlights values. On this layer mask, use a soft black brush with the opacity about 5% to reduce the color effect on the sky a little and increase the brush's opacity to 20% to erase the highlight on the horizon.


Step 42
Add a Levels adjustment layer to increase the contrast of the whole scene.

Step 43
Make a Hue/Saturation adjustment layer to change the color of the purple flowers a bit.

Step 44
Create a new layer and use a small brush with the color #b44525 to paint more details for the suitcase.

Step 45
Make three layers and use a small brush with the colors #7c4524, #9a5c38 and #f6ffd0 to paint more hair for the model's head.

Step 46
Open the birds image and isolate them from the background using the Magic Wand Tool (W). Take different birds to add to the middle of the horizon (you can duplicate them and use Ctrl+T to resize them to add to the different positions).

Step 47
Select all of the bird layers and hit Ctrl+G to make a group for them. Change the group's mode to Normal 100% and use a Color Balance adjustment layer to change the color of the birds.


Step 48
Add a Curves adjustment layer to increase the visibility of the birds a bit.

Final Result