Create This Dark Matte Landscape Composite in Photoshop

Create This Dark Matte Landscape Composite in Photoshop

In this tutorial, I'll show you how you can create a dark, misty and ominous scene of a dark mountains by combining different stock images. We'll create a misty scene of mountains and light from afar. You'll also practice some essential manipulation, blending and lighting techniques.

What you'll be creating

You will be creating dark landscape matte painting. I have used Photoshop version CC 2014 to create this work but you can use any version from CS onwards will be fine as well.

final-results

Tutorial Resources

Step 1

Create a new document by selecting File > New. Set the setting as shown in the image below. You can also choose your own document size but make sure it should be wider enough to cover the mountains image.

Step-001

Step 2

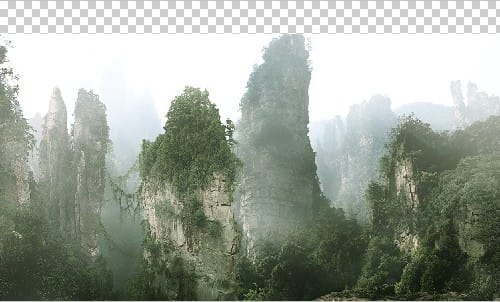
Now place the mountains image by selecting File > Place Embedded. I have scaled it little bit because I don't want the bottom part of the mountains. You can scale it as you want but remember we don't need the bottom parts.

Step-002

Step 3

Add a layer mask to the mountains by selecting the second button of layer panel at bottom right side. Now activate the Gradient Tool by pressing (G) on the keyboard and choose a linear black/white gradient then holding the shift key apply the gradient vertically on the layer mask of mountains layer. Here are the results.

Step-003

Step 4

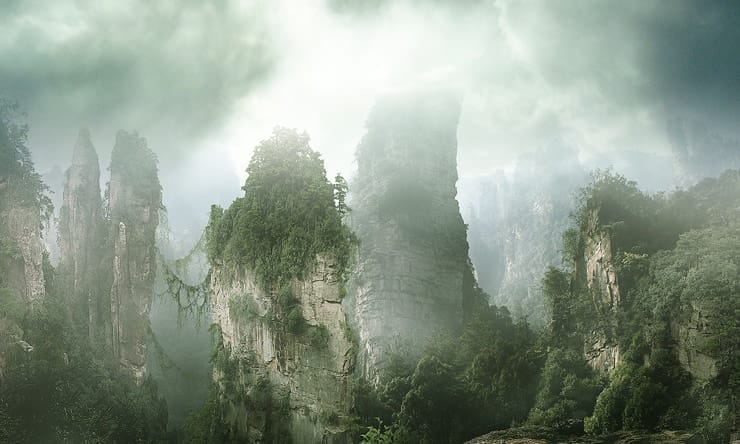
Now place the sky image below the mountains layer. Scale the sky using Free Transform tool by pressing (CTRL + T) on keyboard so it can cover the entire mountains. Here are the results.
Step-004

Step 5

To brighten the sky little I have added a Curves adjustment layer to the sky by clicking on the third button of layer panel (See the image below). Set the setting as shown in the image below.

Step-005

Step 6

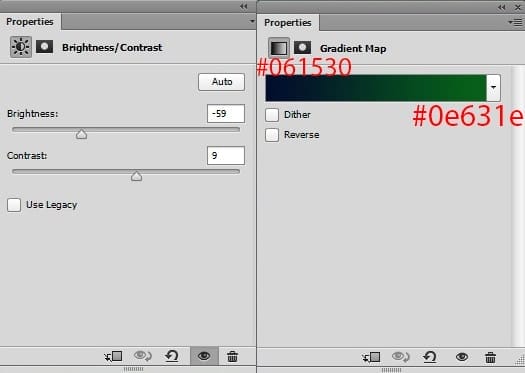
Now, back to the mountains layer then add a Brightness/Contrast and Gradient Map adjustment layer to the entire scene. Set the values as shown in the image.
Step-006

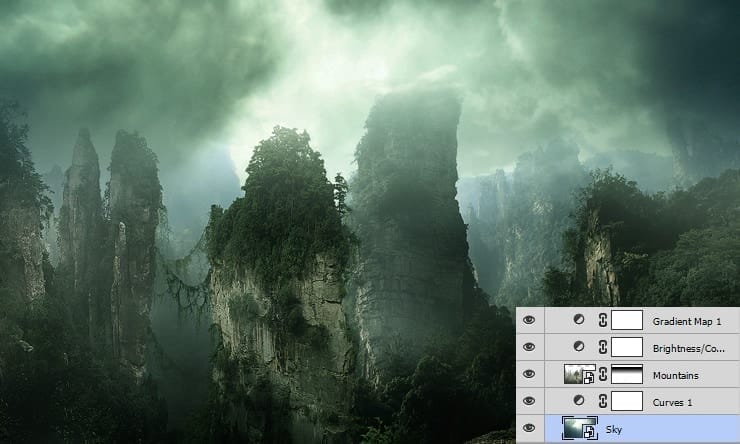
Change the blend mode of gradient map to soft light and reduce the opacity to 55%. Here are the results
Step-006a

Step 7

Continue colouring by applying Color Balance adjustment layer to the entire scene.

Step-007

Here are the results.

Step-007a

Step 8

Reduce the brightness of scene using a Brigthness/Contrast adjusment layer.

Step-008

Step 9

Now add the waterfall image to the scene. Place it as shown in the image below.

Step-009

Step 10

Using a layer mask with soft round basic black brush hide the unwanted part of waterfall to blend it properly to the scene. Here are the results. Note that this is a perfect example when you have proper stock images and it usually takes 1-2 minutes to blend the image to the scene. So, choosing the right stock gives you more realistic results and sometime even better.

Step-010

Step 11

Now, we have blended the image to the scene but it's colors are still not matching as well as the overall image. Here the comes the job for adjustments layer to adjust the image with existing scene. So, add a Hue/Saturation image to the waterfall as clipping mask because we don't want to affect all the layer.step-011

Step 12

Continue blending the waterfall by applying a Brightness/Contrast and Photo Filter adjustment layer.

step-012

Here are the results.

step-012a

Step 13

Add a Color Balance adjusments layer to the scene. See the image for setting.

step-013

Result should be similar to this.

step-013a

Step 14

Load the birds brush in Photoshop. Paint some birds using the bird brushes. I have used the 2500 pixels to paint the birds.

step-014

Step 15

Create a new layer to make light source and name it 'Light'. Grab the brush tool by pressing (B) on the keyboard and set the opacity and flow to 100%. Change your foreground color to #163d65 and paint a big stroke as shown in the image below.

step-015

Change the blend of light source layer to Linear Dodge and reduce the opacity to 34%. Here are the results. I also painted some lights on top corners.

step-015a

Step 16

Extract the crow using your favourite selection tool and place it to the main document. I also applied a Gaussian Blur filter to the crow by selecting Filter > Blur > Gaussian Blur with the 1.2 radius. Feel free to place the crow anywhere in the document.

step-016

Step 17

Add a Brightness/Contrast and Photo Filter adjustments layer to the crow.

step-017

You can see the result below.

step-017a

Step 18

Add a Color Balance adjustment layer to the crow.

step-018

Here are the results.

step-018a

Step 19

Now, we'll create fog. To do this, create a new layer and grab the brush tool with opacity and flow to 30%. Change your foreground color to #b5b9bd and paint as shown in the image below.

step-019

Add a layer mask to the fog layer. Now, apply a cloud filter to fog layer mask by selecting Filter > Render > Clouds to create fog. Here are the results. You can also see the results on layer mask. Before applying a Cloud filter please make sure that Foreground/Background color set to black/white and fog layer mask is selected. You can set your foreground and background color to default by simply pressing (D) on the keyboard.

step-019a

Step 20

Add Hue/Saturation adjustment layer to the fog layer as shown in the image below.

step-020

Here are the results.

step-020a

Step 21

Duplicate the fog layer(including Hue/Saturation) by pressing (CTRL + J) on the keyboard and scale it so it can cover the entire document. Here are the results. That will make the whole scene foogy and misty.

step-021

Step 22

Now everything is set and we can proceed to the 'Final Adjustments'. So, add a Gradient Map and Photo Filter adjustment layer to the scene.

step-022

Change the blend mode of Gradient Map adjustment layer to soft light and reduce the opacity to 65%. Here are the results.

step-022a

Step 23

Continue finalizing the scene with Color Balance adjustment layer.

step-023

Here are the results.

step-023a

Step 24

Add a Curves adjustment layer and set the setting as shown in the image below.

step-024

Here are the results.

step-024a

Step 25

Finally, add a Brightness/Contrast adjustments layer to the scene.

step-025

Here are the results. Congratulation! you have create a dark matte painting in Photoshop!!!

step-025a

Final Results

final-results

Download the PSD

[vc_column width="1/1" el_position="first last"] [vc_cta_button title="Download" href="https://downloads.photoshoptutorials.ws/Dark.zip" color="btn" size="btn-large" icon="none" target="_self" position="cta_align_right" call_text="Dark.zip | 88.5 MB" width="1/1" el_position="first last"] [/vc_column]

Tutorial by Bunty Pundir

profile

Thanks for following the tutorial. Hope you have learned something new today. I am an artist from New Delhi, India. You can view my other artworks on Facebook, Behance andDeviantart.

- Bunny

Create Dot Grid Art in 1 Click
Sponsored

Turn any photo into a dot grid artwork with these Photoshop actions. You'll get great results with dots that change size. They get larger in brighter areas and smaller in darker areas. Free download available.

16 comments on “Create This Dark Matte Landscape Composite in Photoshop”

  1. Hi everyone apologies for broken stock images links.
    I just checked the mountains image link, stock provider has removed it from DA (I don't know why). Crow is from freeimages.com and they just upgraded their website with new design and all the id of images has been changed.
    New link for crow is here http://www.freeimages.com/photo/crows-1336759

    You can also download psd file for mountains image.

Leave a Reply

Your email address will not be published. Required fields are marked *

cross