Step 9
Open the sign image and use the Polygonal Lasso Tool (L) to select the stick part of the sign to add to the right corner of the field.

Step 10
Create a Curves adjustment layer (set as Clipping Mask) to darken the stick. On this layer mask, use a hard black brush to erase the front of the stick as it gets light from the background.

Step 11
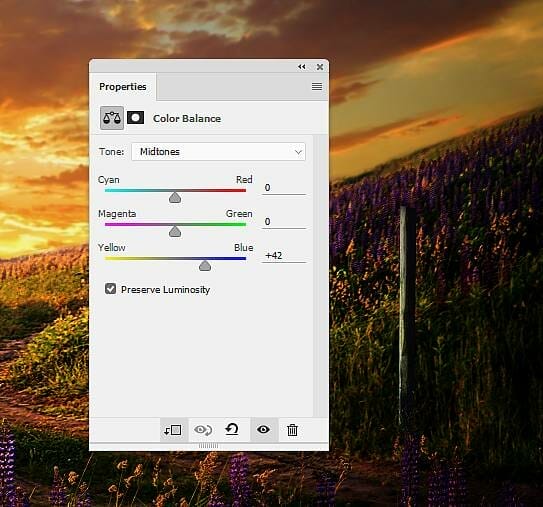
Add a Color Balance adjustment layer to change the color and light of the stick :


Step 12
Cut out the board of the sign to add to the top of the stick. Use Ctrl+T to distort the board a bit to fit the direction of the light.

Step 13
Create a new layer (set as Clipping Mask) and activate the Clone Tool (S). Use this tool to remove the text and symbol on the board.

Step 14
Make a Curves adjustment layer to darken the shadow side of the board. On this layer mask, use a soft black brush to erase the rest to reveal the lightness there.

Add another Curves adjustment layer to brighten the front of the board more. On this layer mask, paint on the shadow side so it won’t be brightened by this adjustment layer.

Step 15
Create a new layer on top of the layers and hit T to activate the Text Tool. Choose Agency FB font with the color #190203 to type the letters HOME on the right of the board.

Step 16
Make a new layer and select the Custom Shape Tool (U). Choose the Arrow 9 and draw an arrow on the left of the board with the same color ( #190203). Flip it horizontally (Edit > Transform > Flip Horizontal) and use Ctrl+T to rotate it a bit to fit the direction of the light on the background.


Step 17
Open the house image and isolate the house only to add to the middle of the background. Add a mask to this layer to blend the bottom of the house with the field.


Step 18
Create a Curves adjustment layer to reduce the contrast and increase the dreamy effect on the house.

Step 19
Cut out the model and place her in the middle of the ground. Convert this layer to a Smart Object and go to Edit > Puppet Warp. Use the pins on the right feet to lift up the left toe a bit . The aim is to trim the back of the sole.


Leave a Reply