Make your artwork look like they're from an alternate universe. These Cyberpunk presets work with Photoshop (via the Camera Raw filter) and Lightroom. Download all 788 presets for 90% off.
Brighten dark areas of a photo like a fill-flash. This effect burns bright areas and dodges dark areas to make photos look closer to what we naturally see with our own eyes.
Contrast Mask
The first step is to create a contrast mask. This is basically just a grayscale layer that'll define where the image needs dodging or burning.
Step 1
Open a photo you would like to edit. Or, you may use the photo used in this tutorial (from iStockPhoto).

Step 2
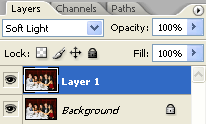
Duplicate the layer (Layer> Duplicate Layer or Ctrl+J) and change the blending mode of the new layer to Soft Light.

Step 3
With the top layer selected, Invert (Image> Adjustments> Invert or Ctrl+I). You should immediately notice the details revealed.

Step 4
The color seems to have desaturated a little bit. To fix this, simply desaturate the top layer (Image> Adjustments> Desaturate or Shift+Ctrl+U).

Layer Mask
We need to add a layer mask so that we can filter the effect so that it's only affecting the dark areas and not the bright areas of the image.
Step 5
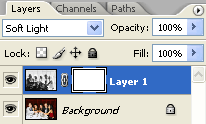
Add a layer mask (Layer> Add Layer Mask> Reveal All).

Step 6
Make sure the layer mask is activated. The thumbnail of the layer mask in the layers window should have a white border around it. If it doesn't, click on the thumbnail to activate the layer mask.
Step 7
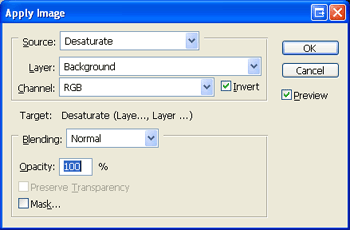
With the layer mask selected, open the Apply Image tool (Image> Apply Image) and apply these settings:
- Layer: Background
- Channel: RGB
- Invert: Checked
- Blending: Normal
- Opacity: 100%

Step 8
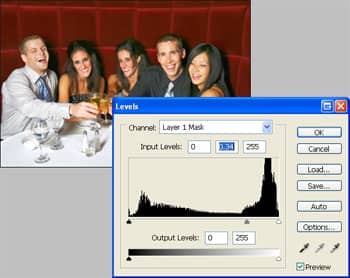
With the layer mask still selected, open the Levels tool (Image> Adjustments> Levels or Ctrl+L). In the Levels tool, drag the middle input slider towards the left to increase the effect or towards the right to reduce the effect.

Sharpening
This part is just an additional trick that'll help sharpen the image with this effect. This part is optional.
Step 9
Click on the thumbnail of the top layer to activate (not its layer mask). Use the Gassian Blur filter (Filter> Blur> Gaussian Blur) and apply a very small blur. Using a larger blur will sharpen the image more but halos may appear if you use a setting too large.

Final Results
Rollover the image below to see the before and after effect


2 comments on “Digital Flash”
Very helpful.Thanks
Ohhh my gosh! This tip was 1 of the BIGGEST TIPS I've ever benefited from!!!! SPEECHLESS
You guys are freaking AWESOME!!