“Europe began as the relatively empty, uncivilized Wild West of Asia; then the Western Hemisphere became the Wild West of Europe. Now the sun has set in our West and risen once more in the East.” In this Photoshop Tutorial we will learn how to create a Scenery Photomanipulation. First, we added desert, sky and ground. After than blended together with adjustment layer. Next, added horse and birds. For the final touch added Camera Raw Filter.
Preview of Final Image

Tutorial Resources
Step 1
Now, let’s start by creating a new image file, go to the Menu bar and click File > New, and then input the following values on their respective fields
- Preset: Custom
- Width: 3080px
- Height: 3080px
- Resolution: 300px
- Color Mode: RGB Color 8 bit
- Background Contents: Transparent

Step 2
Now, place Background (Desert) Go to File > Place and select Desert. Then place it to our work canvas and position the image with the transform tool (Ctrl / Cmd + T). Hold Alt + Shift and rasterize like the image below. In Photoshop CC only hold Alt to rasterize all sides together.


Step 3
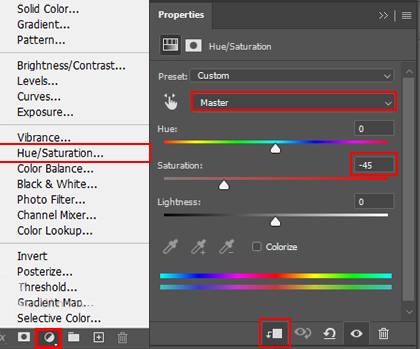
Add Adjustment Layer “Hue/Saturation”
Step 4
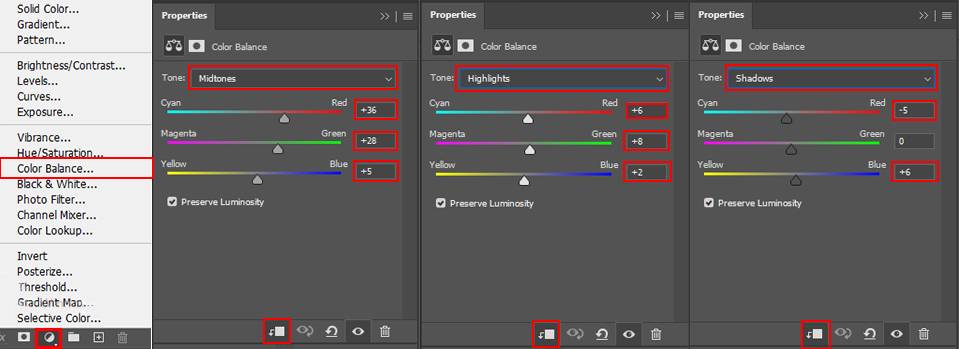
Add Adjustment Layer “Color Balance”
Step 5
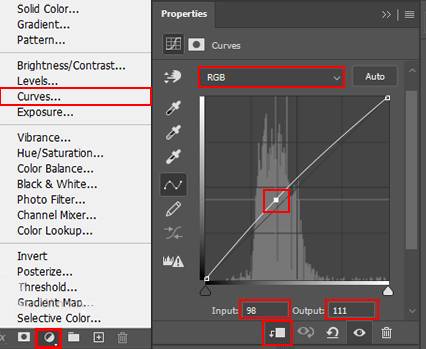
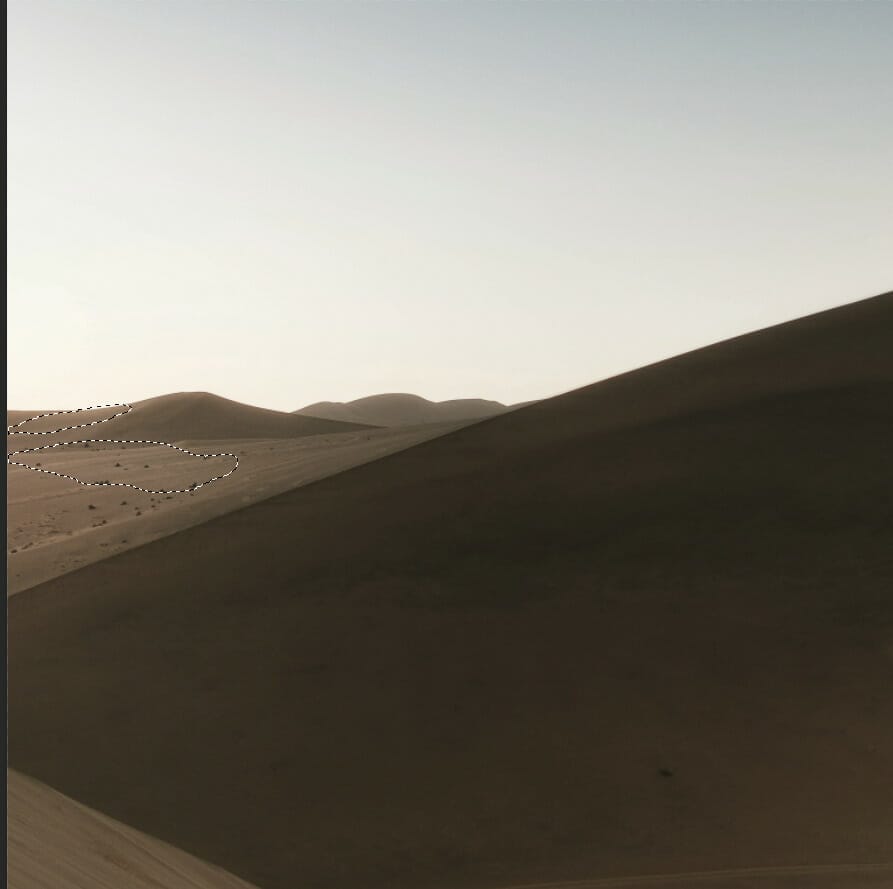
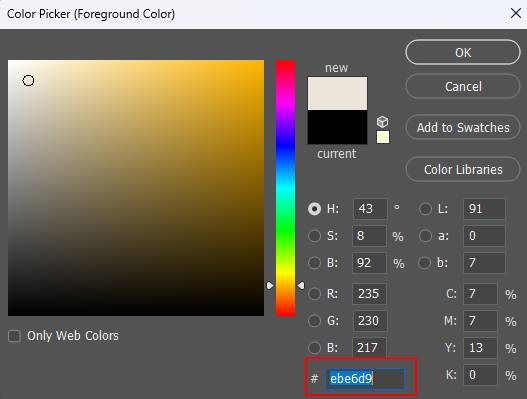
Add Adjustment Layer “Curves” and press Ctrl/Cmd + I to invert and use Brush Tool(B) Soft Round with foreground color white and paint the highlight parts.
Step 6
Create a new layer and change blend mode to Soft Light, then use a Brush Tool(B) Soft Round with foreground color white. Then paint the center area. Opacity reduce to 35%.

Step 7
Next, we will open clouds. After you open the image, use Rectangular Marquee Tool(M).

After the selection area has been created, simply copy (Ctrl / Cmd + C) and Paste (Ctrl / Cmd + V) it to our work canvas. Then position the image with the transform tool (Ctrl / Cmd + T). Hold Alt + Shift and resterize like image below. In Photoshop CC only hold Alt to resterize al sides together.
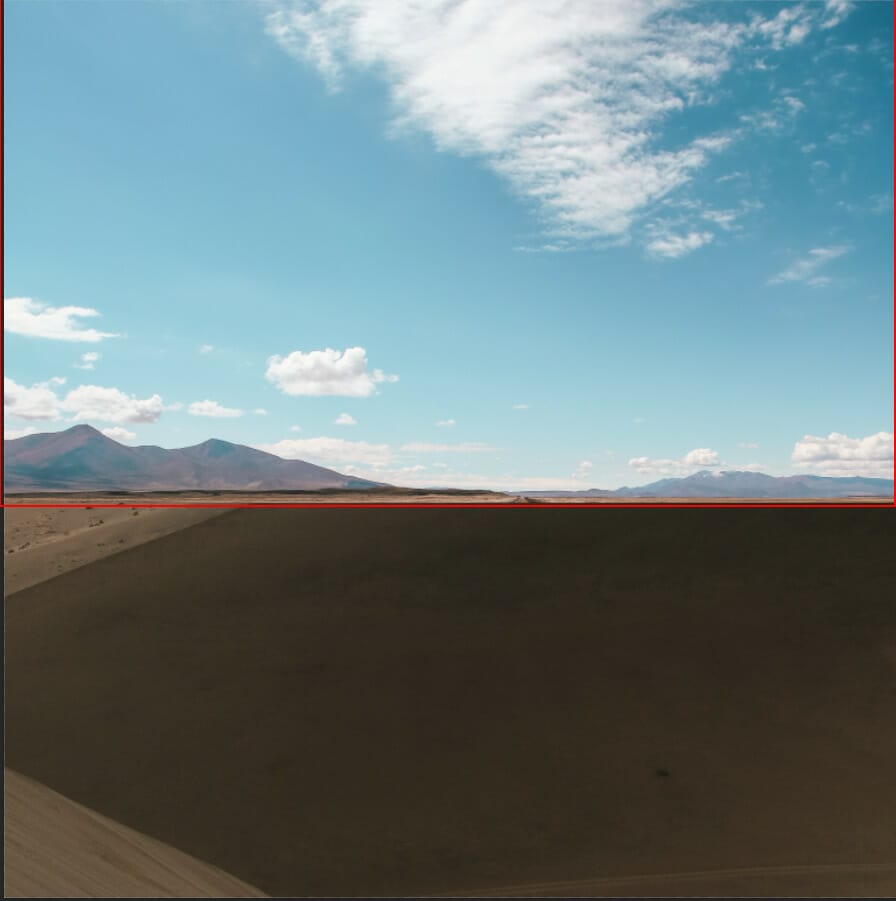
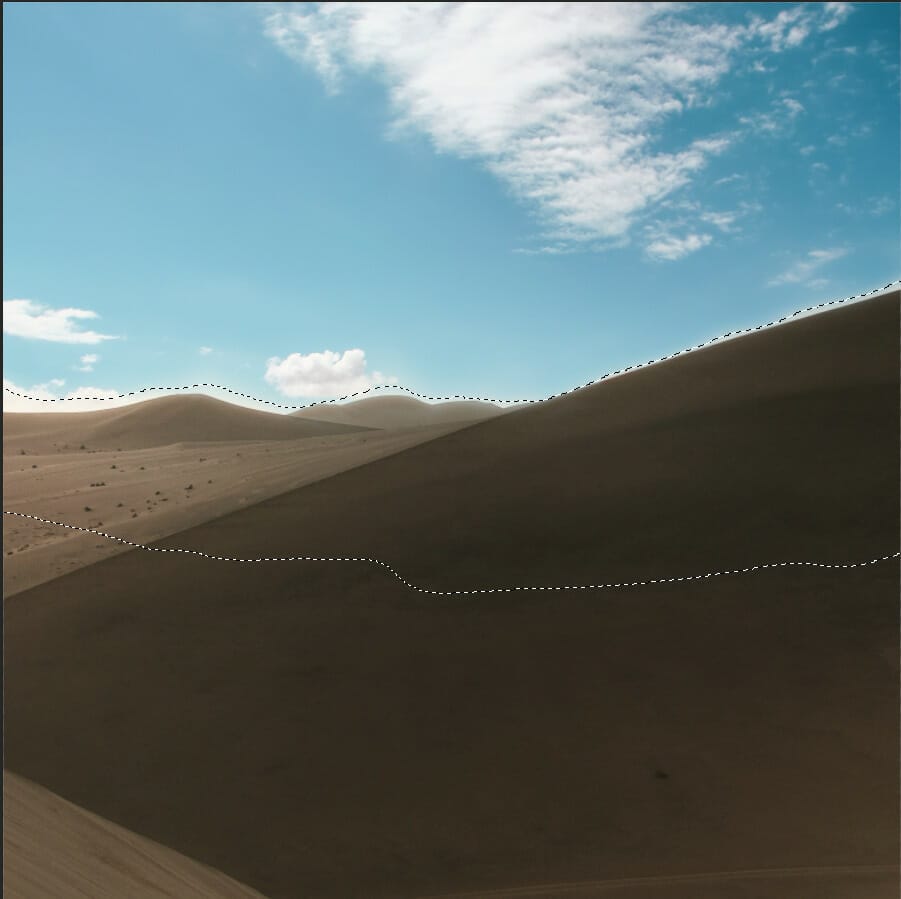
Now create a layer mask and with a soft round brush tool delete mountains on the bottom.

Step 8
Add Adjustment Layer “Color Balance”

Step 9
Next, place Moon Go to File > Place and select Moon. Then place it to our work canvas and position the image with the transform tool (Ctrl / Cmd + T). Hold Alt + Shift and rasterize like the image below. In Photoshop CC only hold Alt to rasterize all sides together.


Leave a Reply