Make your artwork look like they're from an alternate universe. These Cyberpunk presets work with Photoshop (via the Camera Raw filter) and Lightroom. Download all 788 presets for 90% off.

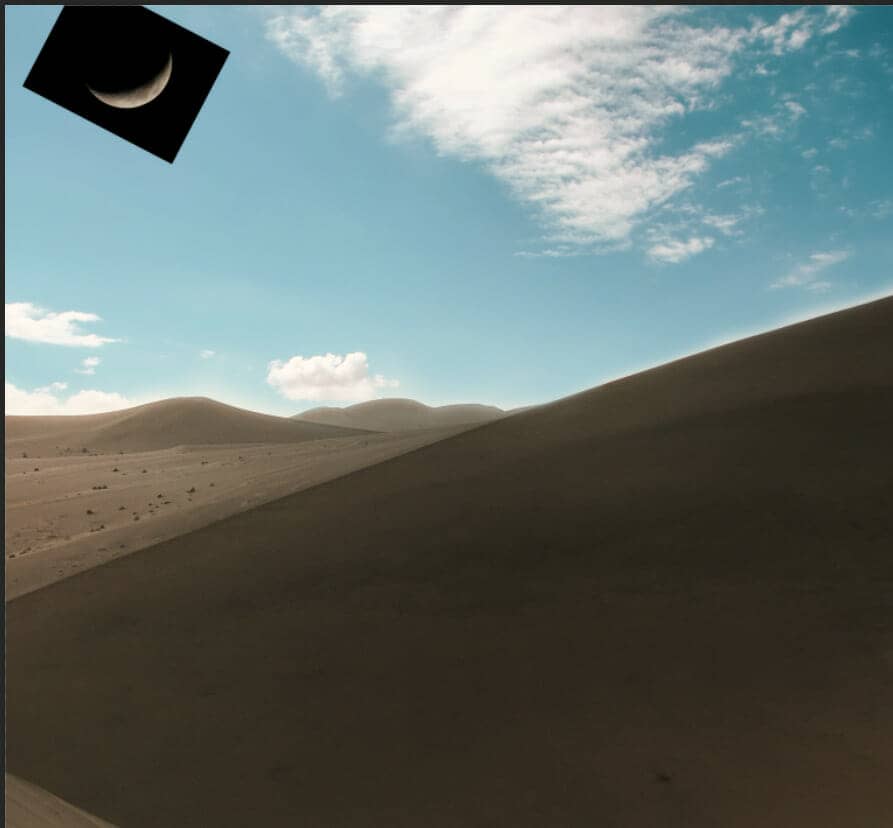
Blend mode change to Screen and Opacity set to 25%.

Step 10
Next, place Ground Go to File > Place and select Ground. Then place it to our work canvas and position the image with the transform tool (Ctrl / Cmd + T). Hold Alt + Shift and rasterize like the image below. In Photoshop CC only hold Alt to rasterize all sides together.

Now use Quick Selection Tool(W) and select ground, after than click on layer mask.


Step 11
Add Adjustment Layer "Curves"

Step 12
Add Adjustment Layer "Black and White"

Step 13
Add Adjustment Layer "Color Balance"

Step 14
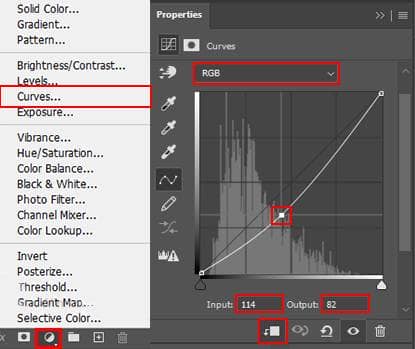
Add Adjustment Layer "Curves" and press Ctrl/Cmd + I to invert and use Brush Tool(B) Soft Round with foreground color white and paint the dark parts.

Step 15
Add Adjustment Layer "Curves" and press Ctrl/Cmd + I to invert and use Brush Tool(B) Soft Round with foreground color white and paint the highlight parts.


Step16
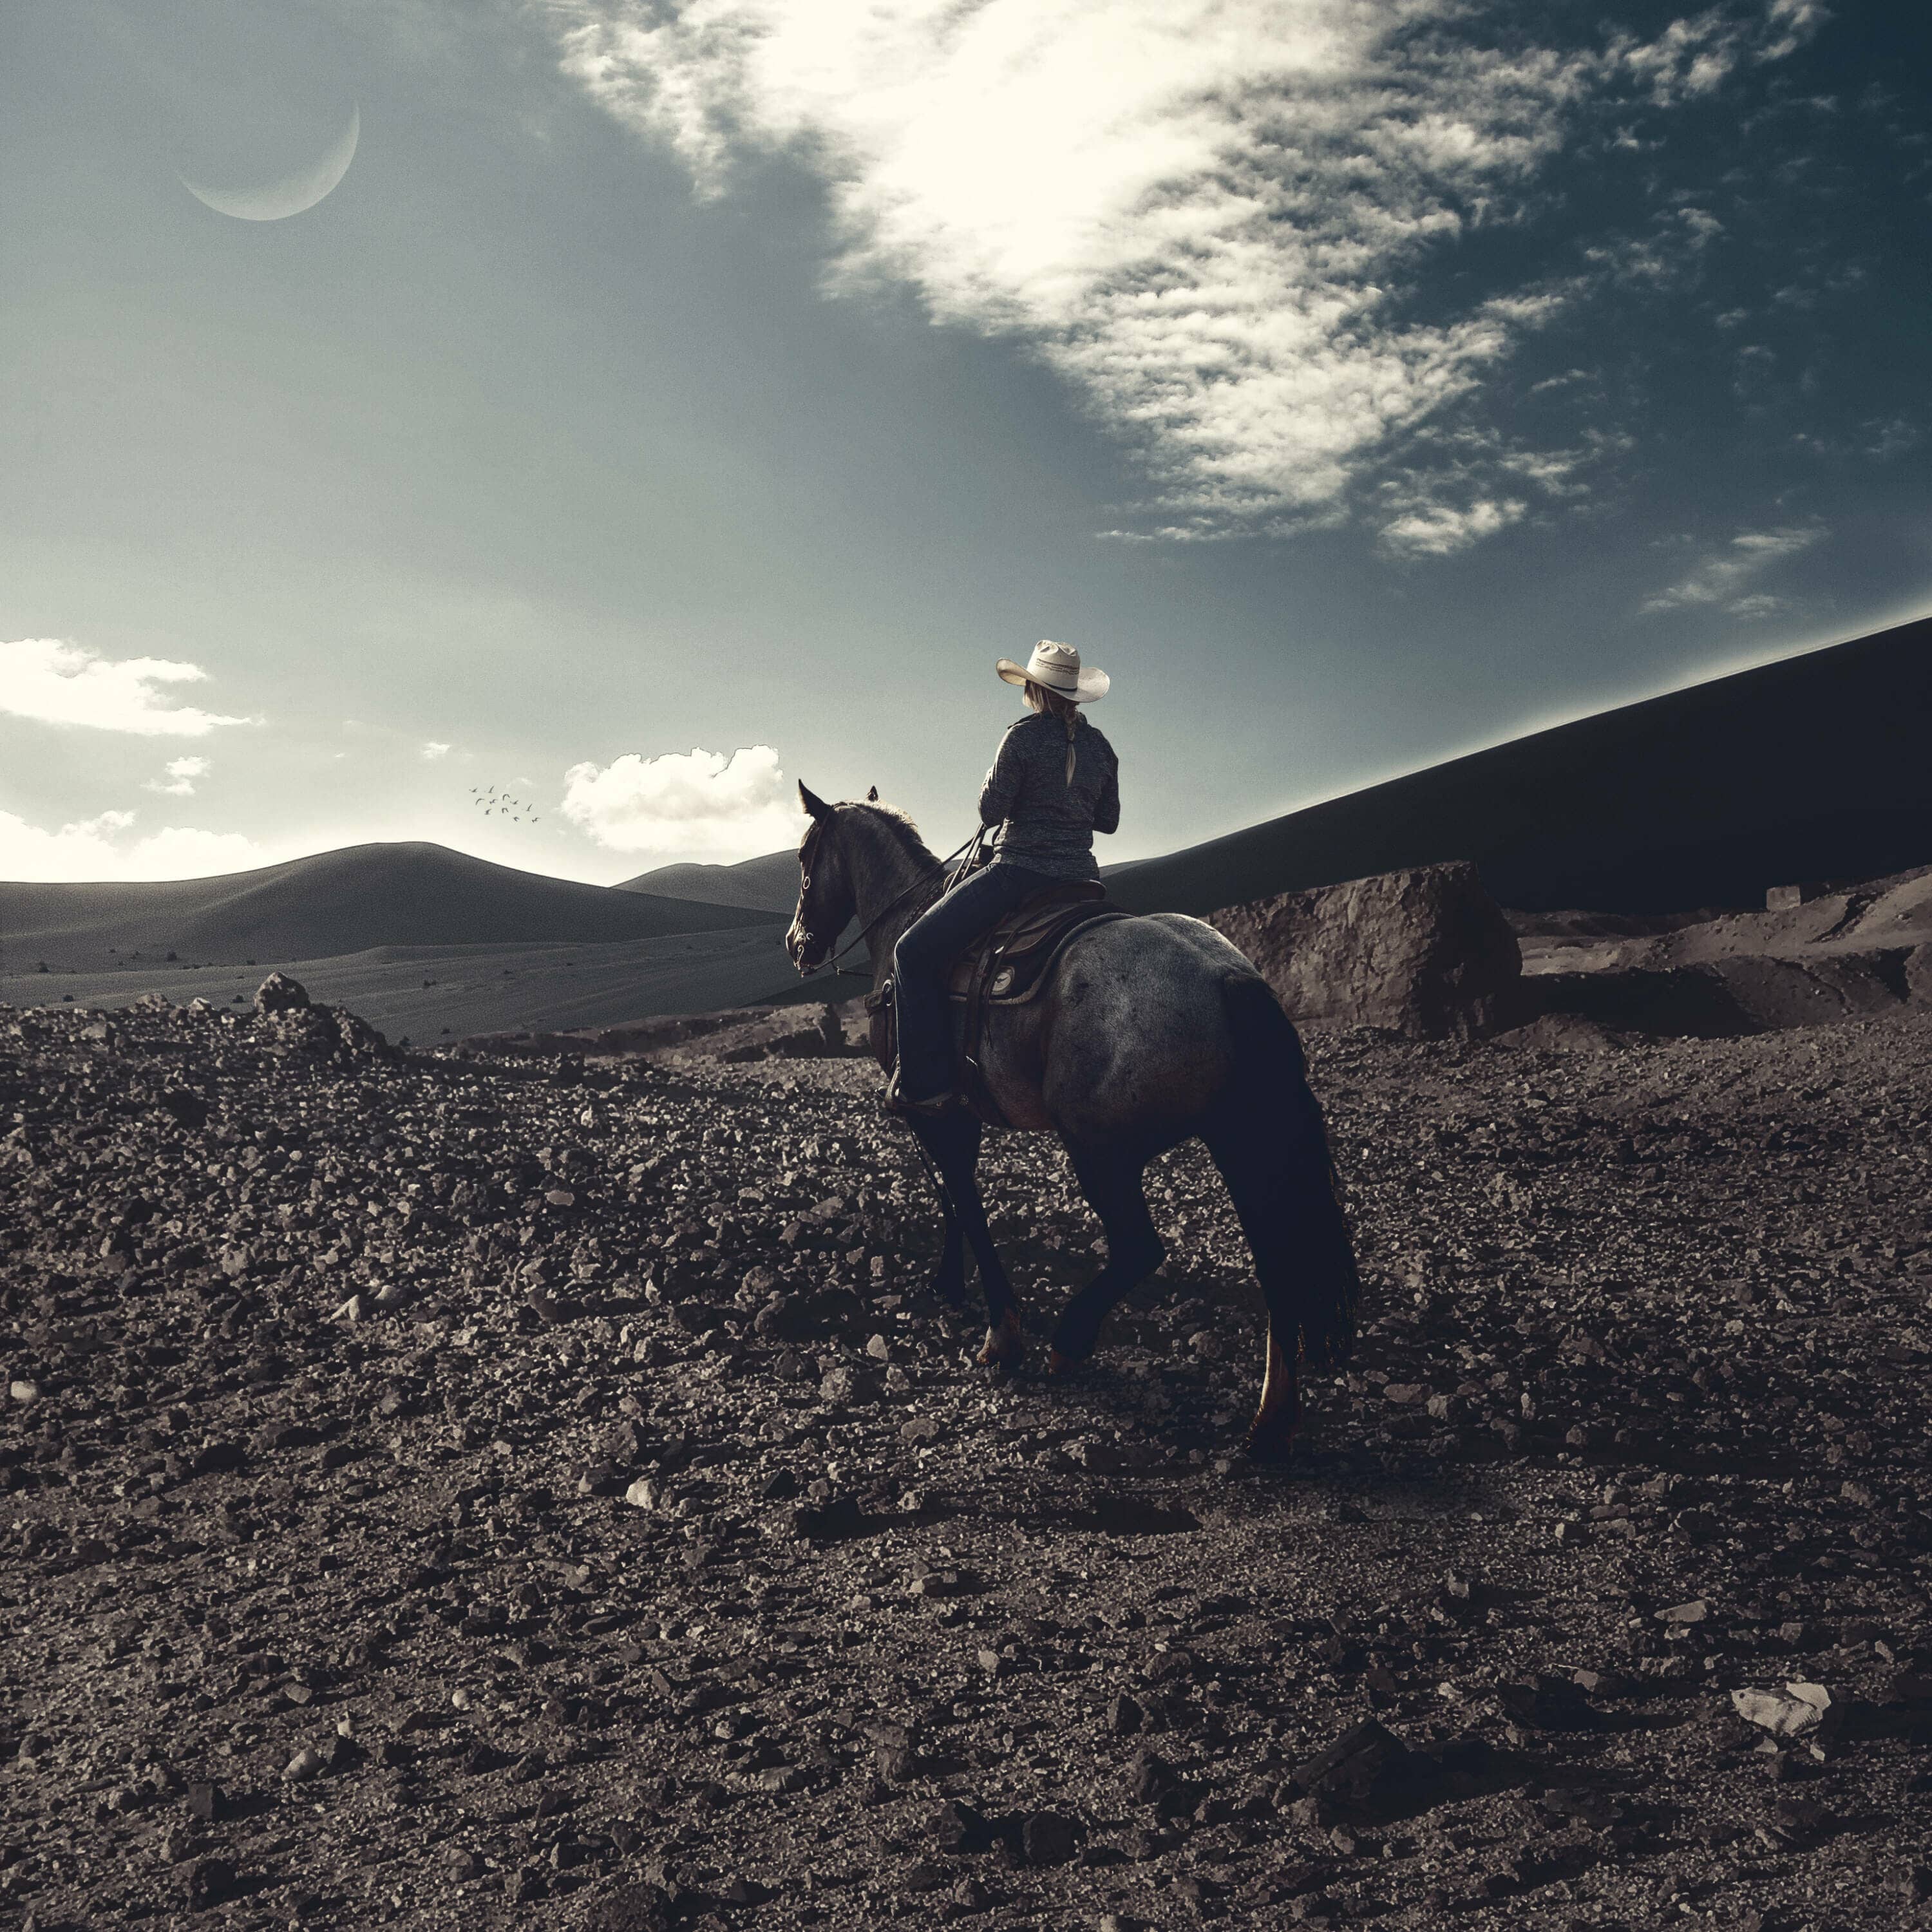
Open another photo Go to File > Open and select Horse. After you open the image, use Quick Selection Tool(W) and select. After the selection area has been created, simply copy (Ctrl / Cmd + C) and Paste (Ctrl / Cmd + V) it to our work canvas. Then position the image with the transform tool (Ctrl / Cmd + T). Hold Alt + Shift and resterize like image below. In Photoshop CC only hold Alt to resterize al sides together.


Step 17
Create a new layer under horse layer and name it Shadow. Blend mode change to Multiply and opacity set to 70%.
Now let's paint shadow. Use a soft round brush tool (B) with the foreground color black. The flow of brush set to 10% and let's start painting.


Step 18
Select Horse layer and add Adjustment Layer "Curves" and press Ctrl/Cmd + I to invert and use Brush Tool(B) Soft Round with foreground color white and paint the highlight parts.


Step 19
Add Adjustment Layer "Brightness/Contrast"

Step 20
Add Adjustment Layer "Color Balance"
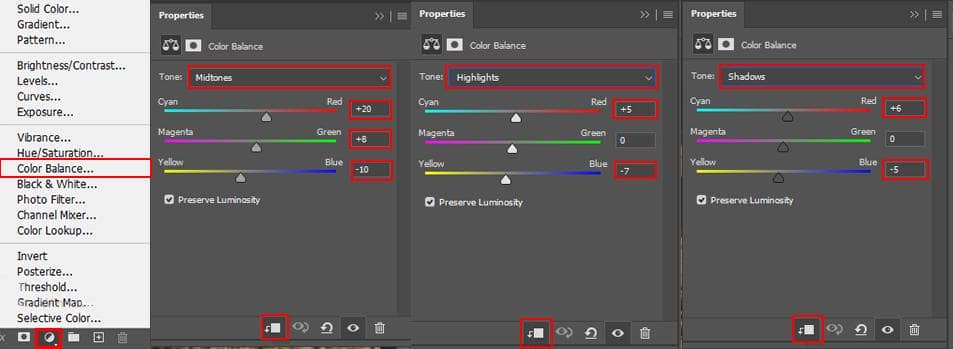
Step 21
Add Adjustment Layer "Exposure" and press Ctrl/Cmd + I to invert and use Brush Tool(B) Soft Round with foreground color white and paint the highlight parts.
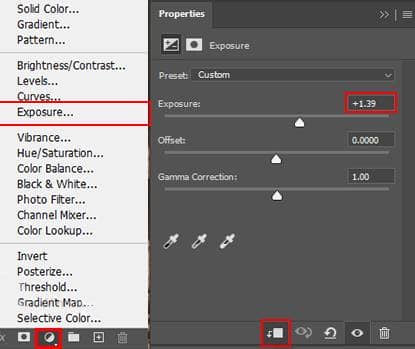
Step 22
Go to File > Open and select Birds, then hold Ctrl/Cmd and click on the layer and after the selection area has been created, simply copy (Ctrl / Cmd + C) and Paste (Ctrl / Cmd + V) it to our work canvas. Then position the image with the transform tool (Ctrl / Cmd + T). Hold Alt + Shift and resterize like the image below. In Photoshop CC only hold Alt to resterize al sides together.
