Make your artwork look like they're from an alternate universe. These Cyberpunk presets work with Photoshop (via the Camera Raw filter) and Lightroom. Download all 788 presets for 90% off.
In this quick tip tutorial you will learn how to create a powerful emotional effect for your photos. By reading this tutorial you will be able to convert an ordinary looking photo into a beautifully striking one in 10 minutes or less.
What you'll be creating
Quick-tip tutorial in 9 easy steps. Time to complete: 10 minutes. You will need Photoshop CS5 or newer to follow this tutorial.

Tutorial Resources
Step 1
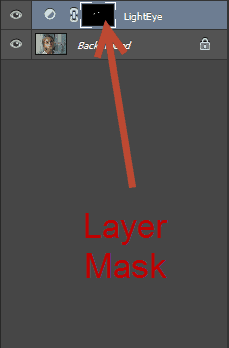
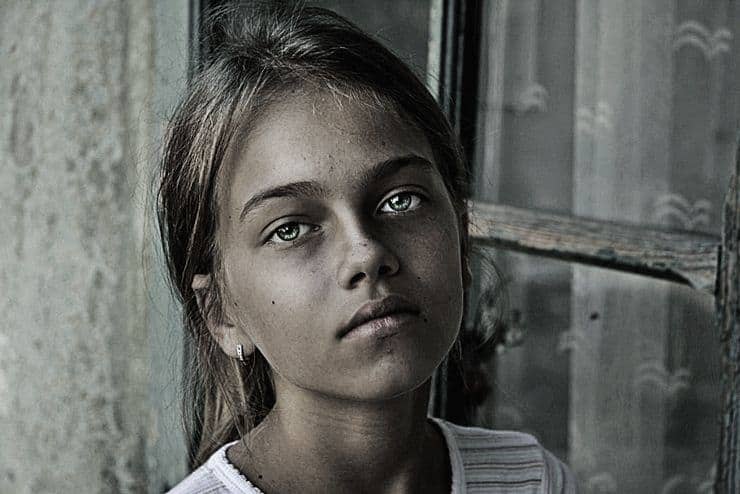
Create a Curves Adjustment layer (Layer > New Adjustment Layer > Curves) then set the blending mode to Screen. Press D to set the colors to default. Click on the layer mask of the curves layer and press Ctrl + Backspace to fill the mask with black. With a round soft white brush paint over the eyes (make sure you have clicked the layer mask before painting). If the eyes are too bright lower the opacity (in this specific case I lowered the Opacity to 55%).


Step 2
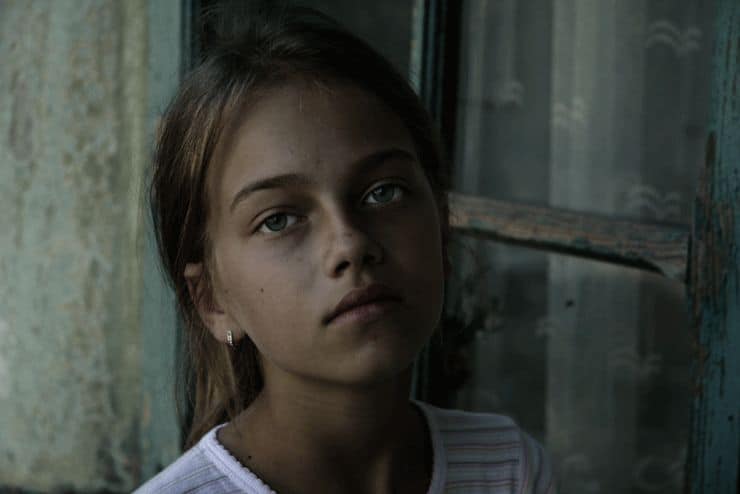
Create a Black & White Adjustment layer (Layer > New Adjustment Layer > Black & White) and set the blending mode to Multiply.
Step 3
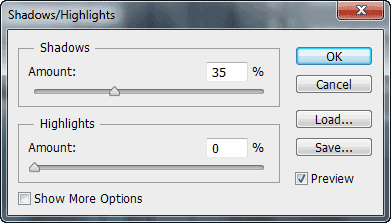
Press Ctrl + Shift + Alt + E to create a new layer from all the visible layers. Go to Image > Adjustments > Shadows/Highlights and play with the sliders in order to lighten the image a little bit. Drag the Highlights slider all the way to the left and drag the Shadows slider to the right until the image is a little bit lighter than before.

Step 4
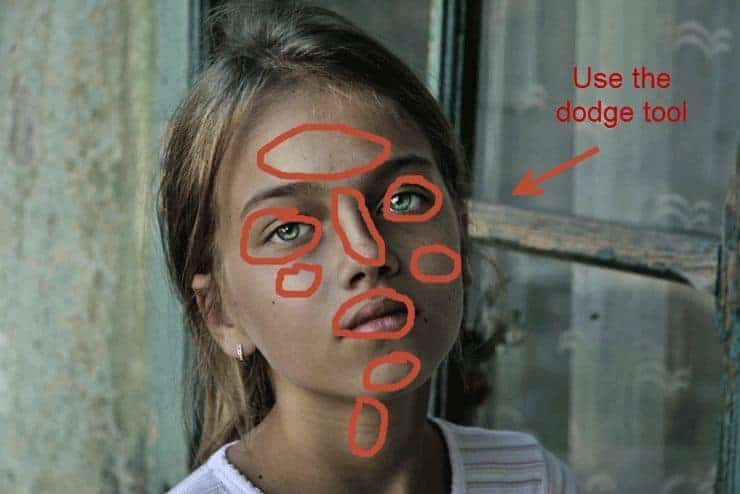
Press Ctrl + Shift + Alt + E to create a new layer from all the visible layers. Select the Dodge Tool (leave the default settings – Range: Midtones, Exposure: 50%) and paint over the following parts: eyes and especially the irises, tip of the nose, cheekbones, forehead, lips, tip of the chin, neck.
Step 5
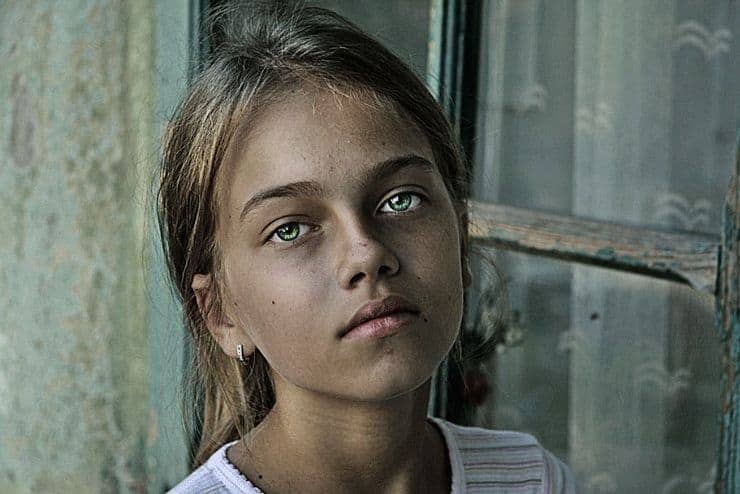
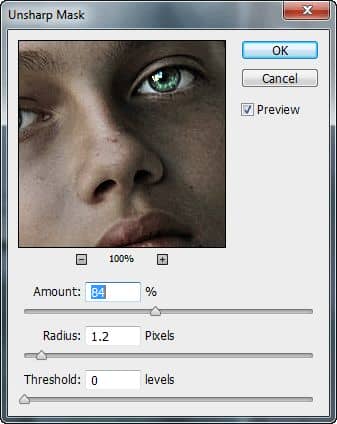
Press Ctrl + Shift + Alt + E to create a new layer from all the visible layers. Go to Filter > Sharpen > Unsharp Mask. Use a 1-2px radius and 50-100% Amount to sharpen the image. Try to achieve a fairly mild sharpen effect – too much will make it look bad. You can also lower the Opacity to lower the effect.
Step 6
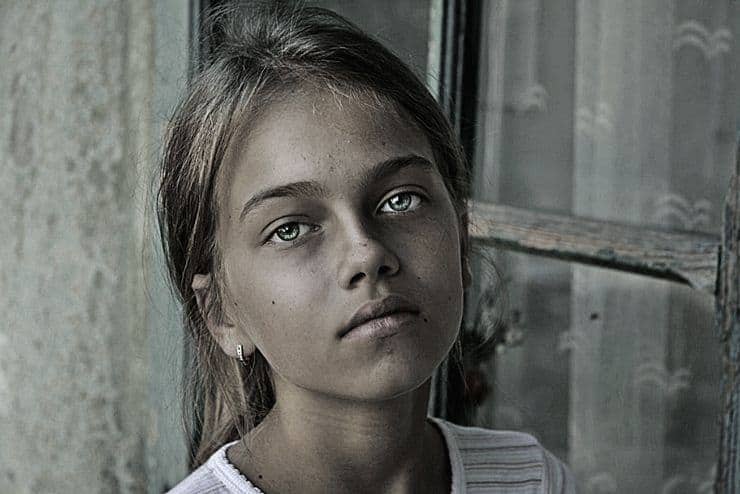
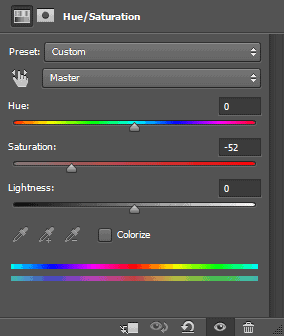
Create a Hue/Saturation Adjustment layer (Layer > New Adjustment Layer > Hue/Saturation). Drag the slider to the left until the image is fairly desaturated.
Step 7
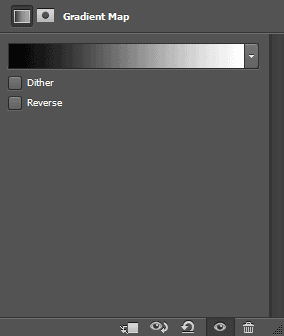
Create a Gradient Map Adjustment layer (Layer > New Adjustment Layer > Gradient Map) with the default settings (black and white). Set the blending mode to Soft light. This will increase the contrast.
Step 8
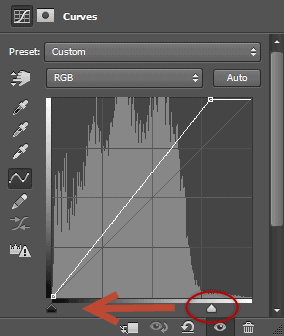
Create a Curves Adjustment Layer (Layer > New Adjustment Layer > Curves). Drag the right slider to the left in order to boost the highlights.

Step 9
This step is optional, follow it only if you want to add a little artistic effect.
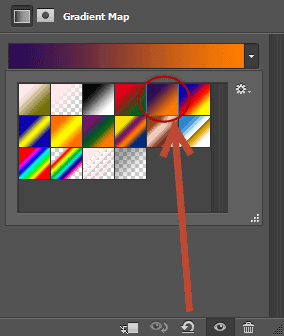
Create a Gradient Map Adjustment Layer and choose one of the colored presets. Set the blending mode to Soft Light and lower the Opacity if the effect is too strong.
![final-results[1] final-results[1]](https://cdn.photoshoptutorials.ws/wp-content/uploads/2014/08/finalresults1-1.jpg?strip=all&lossy=1&quality=70&webp=70&avif=70&w=1920&ssl=1)
Below you can see some before and after comparison photos.
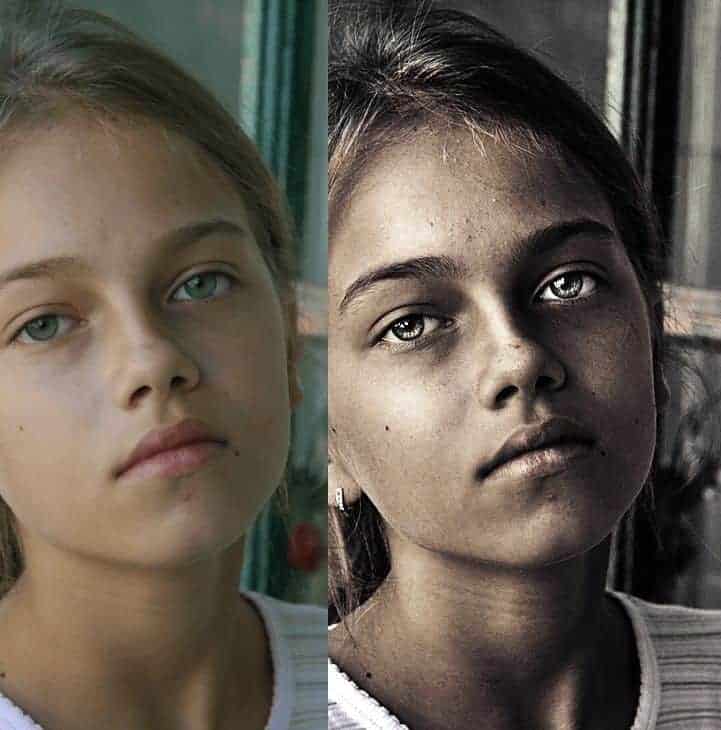
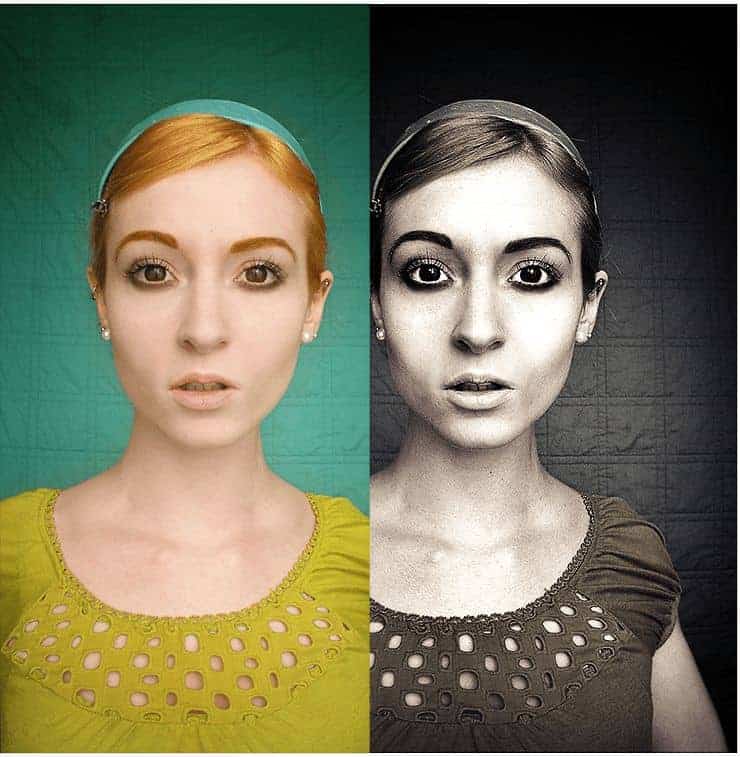
Final Results
![final-results[2] final-results[2]](https://cdn.photoshoptutorials.ws/wp-content/uploads/2014/08/finalresults2-1.jpg?strip=all&lossy=1&quality=70&webp=70&avif=70&w=1920&ssl=1)
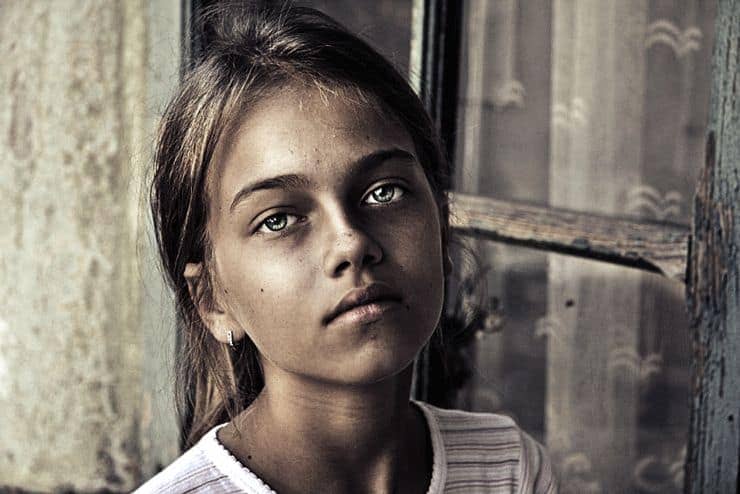

 Thank you for following this quick-tip tutorial. I hope you learned something useful. You can find me at fantmayo.deviantart.com.

46 comments on “Create a Powerful Emotional Effect for Your Portraits in 9 Easy Steps”
Photography judges would be amazed by this effect........ 15 years ago
Thanks Adrian for sharing this awesome tutorial. I really appreciate it!
I like it but you have completely changed the person on the image...it isn't her anymore
VERY GOOD
yeah exactly I followed your instructions in this tutorial and I got god level powerful and emotional photo I want to send you my work but don't know how??
Awesome Work
The eyes are WAY too bright
Thanks for this tutorial :D
Perfect tutorial. Thank you so much. :)
Cool effect
It's a bad habit to use "apply image", it's a destructive workflow. Merge layers to smart objects and dublicate and apply effects on those for a non-destructive work flow. Other than that, great tutorial on how to get a grasp on "proper" effects (i.e. curves vs brightness/contrast etc)
where are the steps of this tut???(((
where are the steps of this tut?(((
It's really nice and very important way to make photos as the desired looking, whatever is it I like this post as a designer, I appreciate you, thanks.
your photo looks good, as for mine these steps made me look like a mental case. Thanks for the tutorial
Great tutorial. In just 10 easy steps you are seeing a completely different image. Bravo!
Nice job really worked on an image of mine. Much appreciated.
does anyone know who the original image belongs to?
Thank you, awasome!
Hello,
it's great & very helpful for Photoshop image editor. Thanks
Thanks , great tutorial
nice work dude
Tks. keep on good work
I just skimmed through but yes, dodge is clearly used in step 4, as illustrated.
is dodge and burn in any of d steps
do dodge and burn in any of d steps
Thanks for this tutorial :D
Awesome Post. Lighting is most beautiful. Thanks for the Post.
(y) :D
Ok. I am just in the beginning and honestly it doesn't do anything. I am really a beginner and don't know exactly what all mean, that's why I am trying to find step by step tutorials. What does your first step do?
you need to go to Adobe and start with their tutorials first
Command + Option + Shift + E
For those on a Mac
Can't get why to ruin such a beautiful picture, such a nice face. What you made is just something one would not recognize because it is so boring.
Boring? Honey, based on your comments you personify boring.
It is just a tutorial...
its to make the picture more emotional. the original photo was just so boring, now look at it
awesome!
Thank you for this, it's a stunning effect! I found it also useful to work a little with the saturation mask to make her green eyes pop a little more.
Thanks for this tutorial about how to make people look homeless
LOL i salute you
HAHHAHAHAHA
Best comment of the post! xD
LOOOOL
you rock xDD
dustin speaks the truth
Loooool