
Whales have become newly symbolic of real values in a world environment of which man is newly aware. Whales live in families, they play in the moonlight, they talk to one another, and they care for one another in distress. They are awesome and mysterious. In their cold, wet, and forbidding world they are complete and successful. They deserve to be saved, not as potential meatballs, but as a source of encouragement to mankind. In this Photoshop tutorial, we will learn how to create an underwater scene. First, we create an underwater scene then add a Whale and blended it with Adjustment layers. Next, add boats and also blend them with an Adjustment layer. Next added Sharks and Turtle and finally use Camera Raw Filter.
Preview of Final Image

Tutorial Resources
Step 1
Now, let’s start by creating a new image file, go to the Menu bar and click File > New, and then input the following values on their respective fields
- Preset: Custom
- Width: 3580px
- Height: 4475px
- Resolution: 300px
- Color Mode: RGB Color 8 bit
- Background Contents: Transparent

Step 2
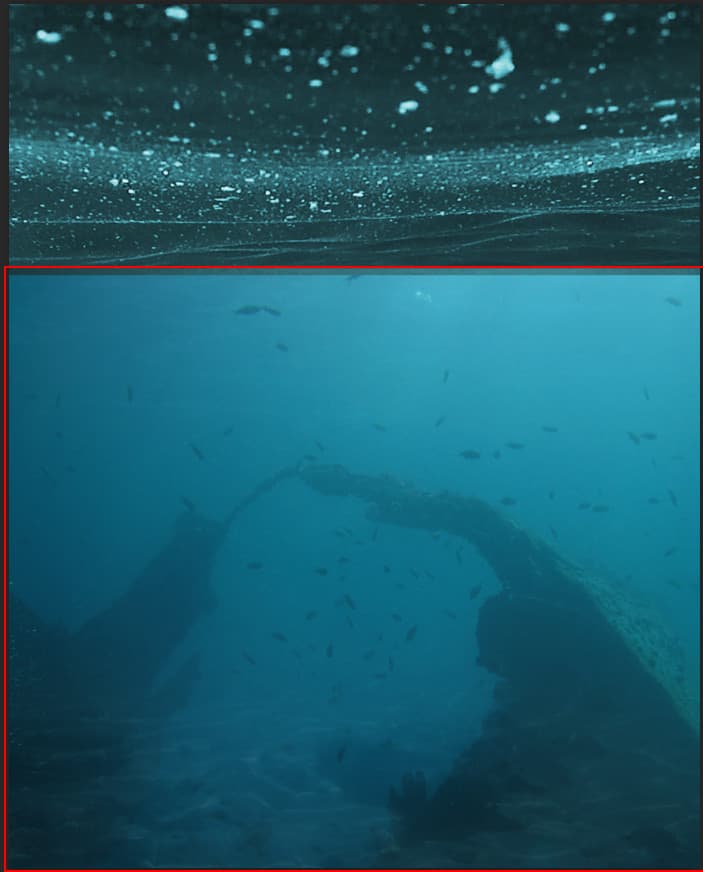
Now, place underwater photo Go to File > Place and select Underwater 1. Then place it to our work canvas. Then position the image with the transform tool (Ctrl / Cmd + T). Hold Alt + Shift and rasterize like the image below. In Photoshop CC only hold Alt to rasterize all sides together. Blend mode change to Overlay.


Step 3
Next, place another photo Go to Filte > Place and select Underwater 2 photo. Then place it to our work canvas, position the image with the transform tool (Ctrl / Cmd + T). Hold Alt + Shift and rasterize like the image below. In Photoshop CC only hold Alt to rasterize all sides together. Blend mode change to Overlay.


Step 4
Add Adjustment Layer “Hue/Saturation”

Step 5
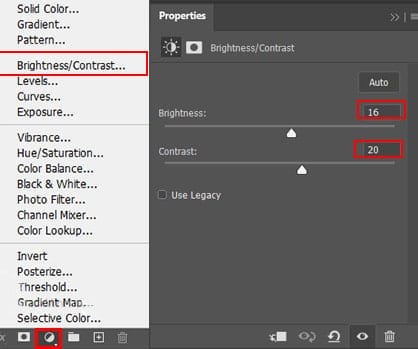
Add Adjustment Layer “Brightness/Saturation”
Step 6
Go to File > Place and select Underwater 3 photo. Then place it to our work canvas, position the image with the transform tool (Ctrl / Cmd + T). Hold Alt + Shift and rasterize like the image below. In Photoshop CC only hold Alt to rasterize all sides together. Blend mode change to Soft Light with Opacity 80%.

Step 7
Next we will openWhale. After you open the image, use Quick Selection Tool(W) and start selecting the animal. After the selection area has been created, simply copy (Ctrl / Cmd + C) and Paste (Ctrl / Cmd + V) it to our work canvas. Then position the image with the transform tool (Ctrl / Cmd + T). Hold Alt + Shift and resterize like image below. In Photoshop CC only hold Alt to resterize al sides together. Blend mode change to Soft Light.
Leave a Reply