Make your artwork look like they're from an alternate universe. These Cyberpunk presets work with Photoshop (via the Camera Raw filter) and Lightroom. Download all 788 presets for 90% off.
Step 17
Next let’s create the sign in the back. Place the first piece in the back and add some curves to lighten it. Write the word Nowhere and clip it on the sign’s layer.
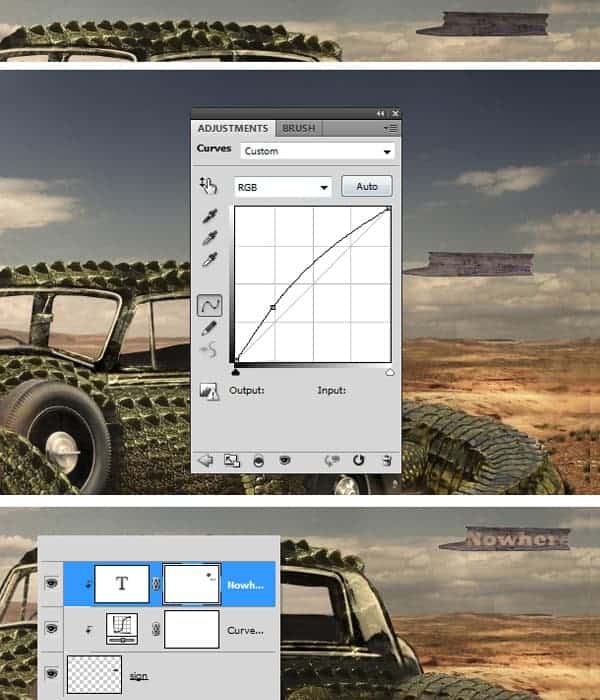
AOpen the second piece of the sign and place it under the first piece layer. Merge the two layers and duplicate the new layer. Flip it vertically and distort it so it will look like in the image below. Set the layer’s opacity to about 10%.
Step 18
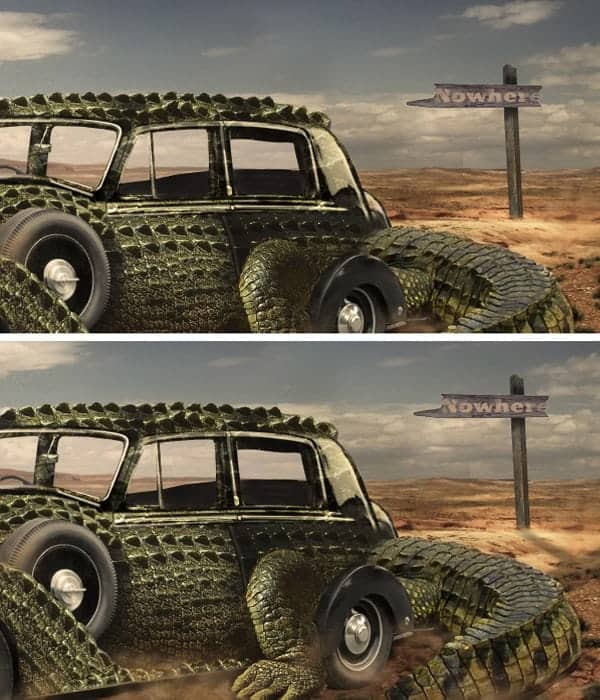
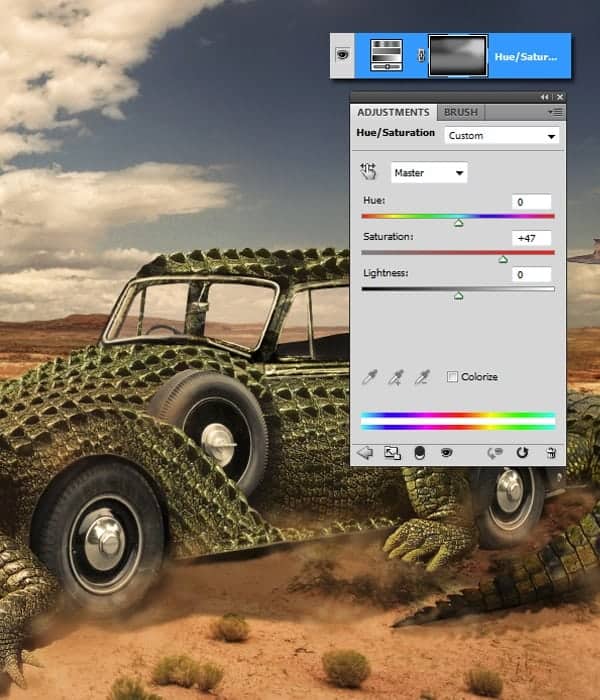
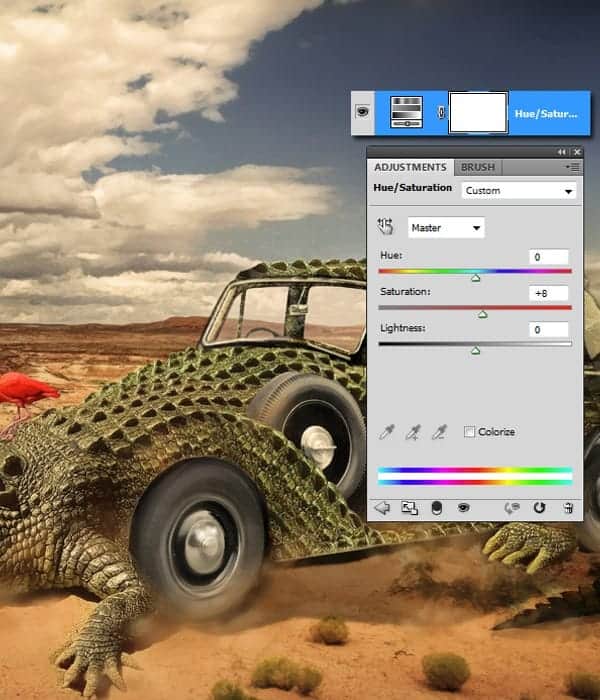
Go to the Adjustment layers- Hue Saturation. Set the saturation to +47. Hide on the layer’s mask some parts , as you see in the image.
Step 19
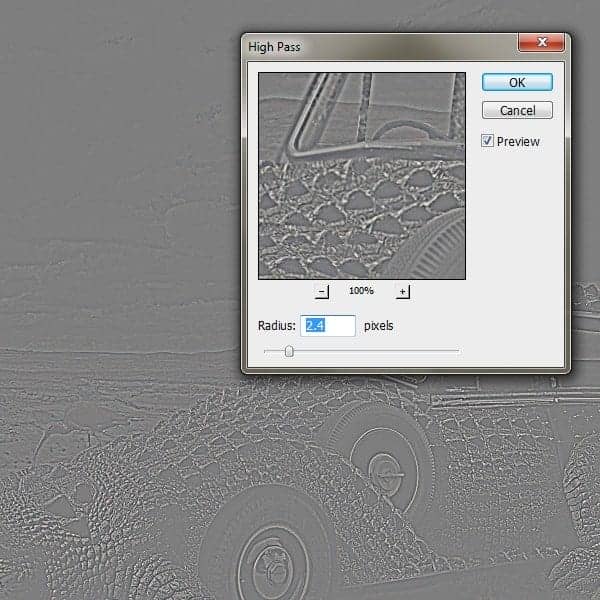
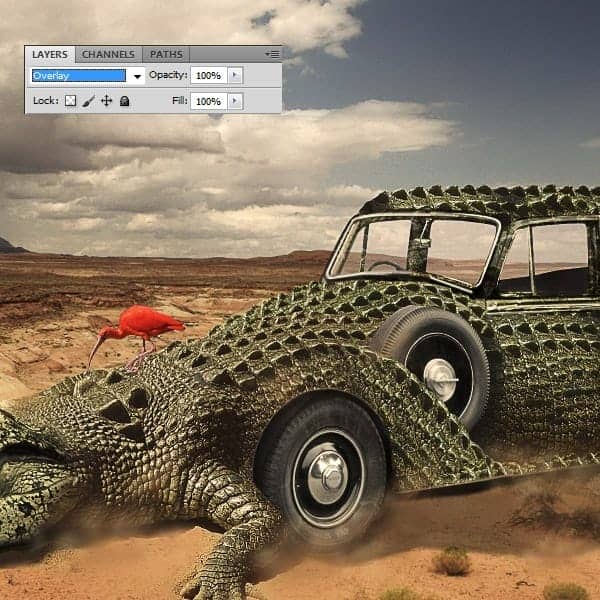
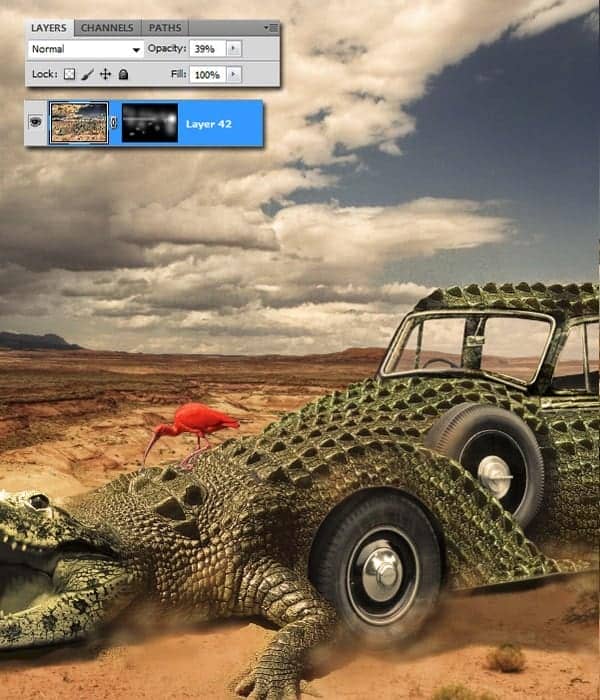
Use the Lucis Art plug-in one more time ( Filter-High Pass, for those who don’t have it). Use it only on the sign, on the crocodile’s texture and the sky. Set the layer’s opacity to 39%.
Step 20
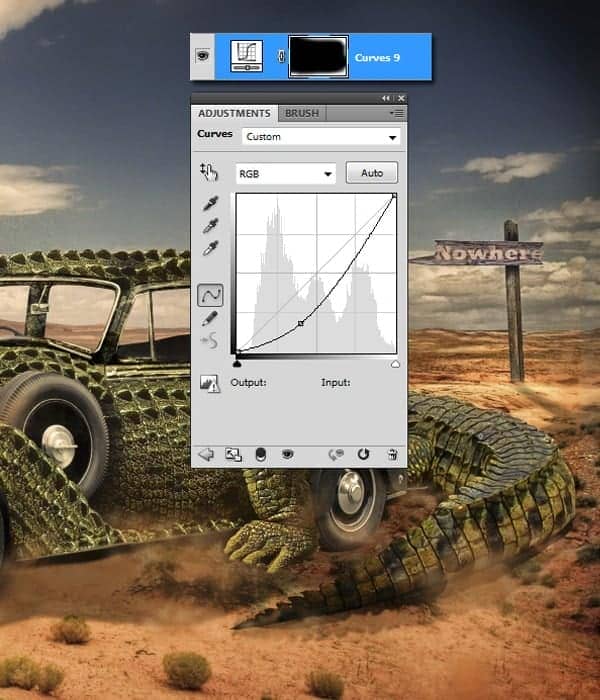
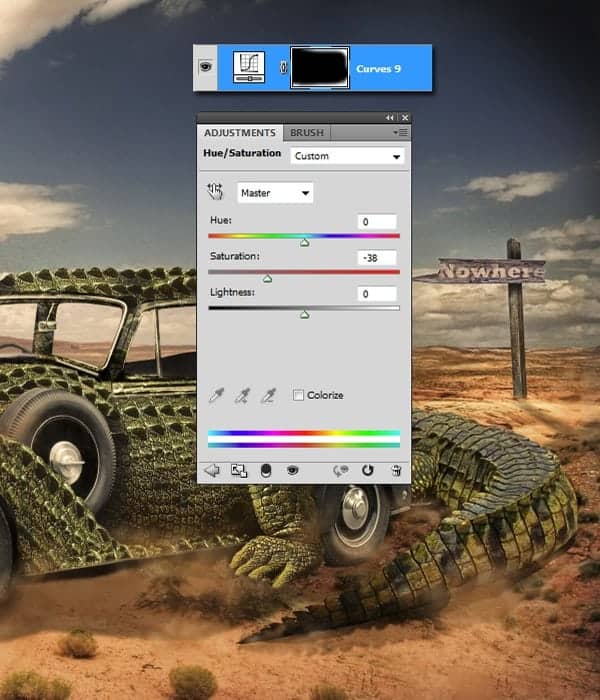
Go to the Adjustment layers- Curves to add some shadows into the corners. Do the same with Hue-Saturation. Use the same mask on both layers.
Step 21
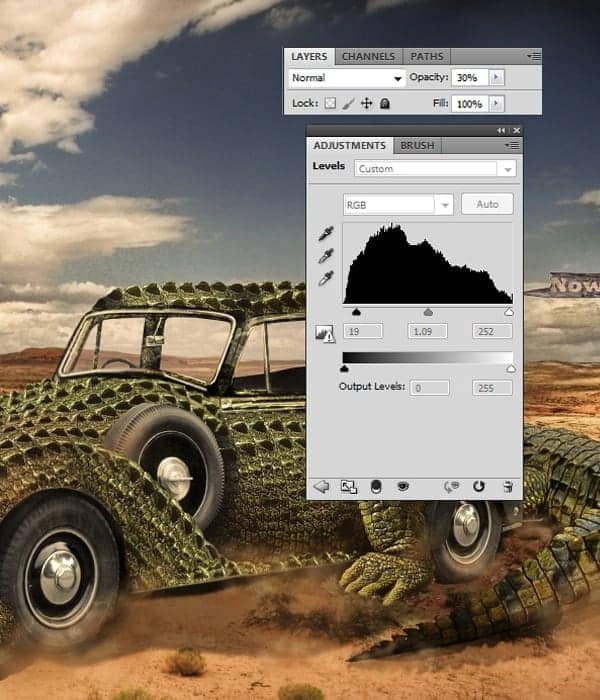
Go to the Adjustment layers-Levels (opacity 30%)
Step 22
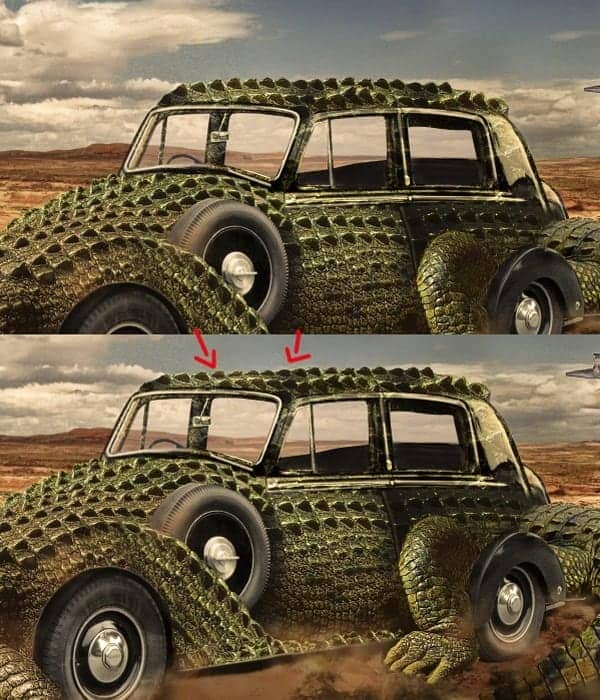
Go to Filters – Liquify and fix the roof top because it’s bit to high and the perspective it’s not right.
Step 23
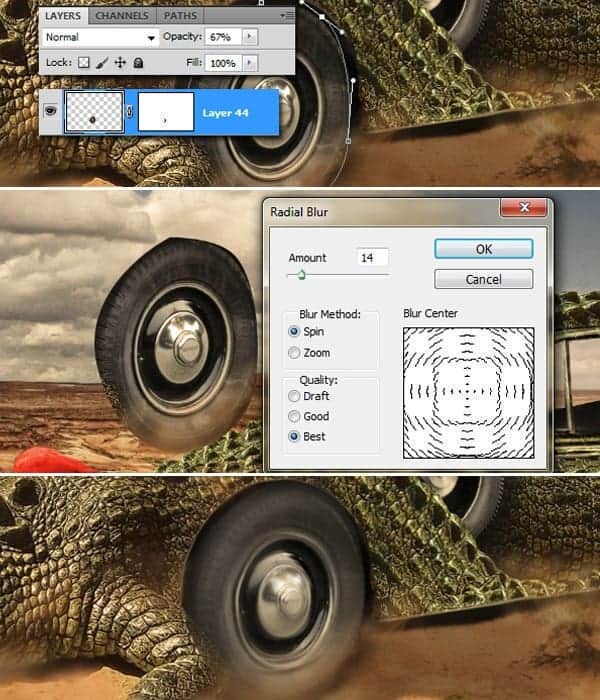
In this step we will make the wheels look like they are spinning. Cut out the wheel. Go to Filters-Blur-Radial blur. Place it on top of the car’s wheel. Do the same with the back wheel.
Step 24
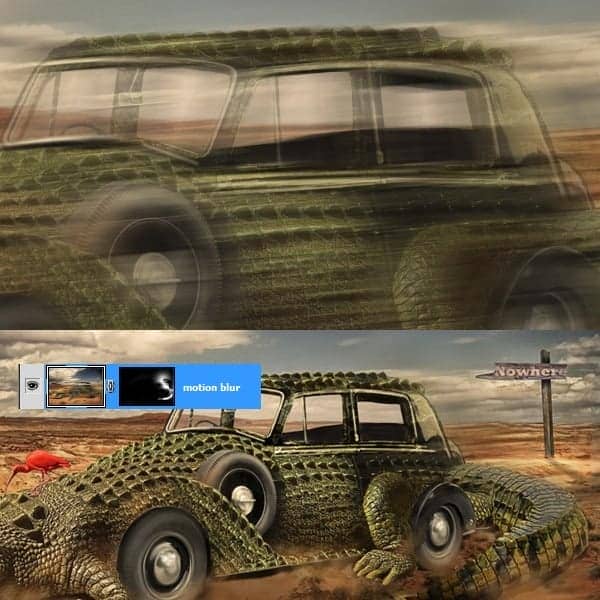
Create a visible stamp. Go to Filters- Blur-Motion blur (set the amount to 50 and the angle to 10). This filter will be used at the back of the car so it will look like the car is moving.
Step 25
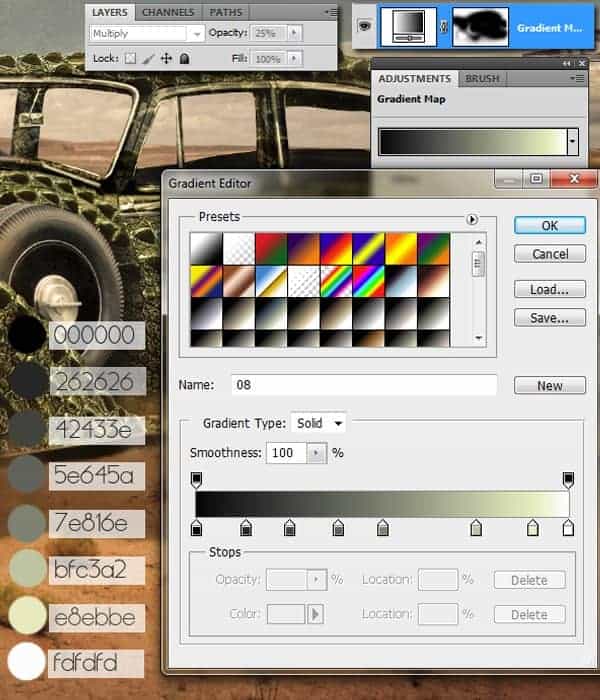
Go to the Adjustment Layers-Gradient map. You have the presets below.
Step 26
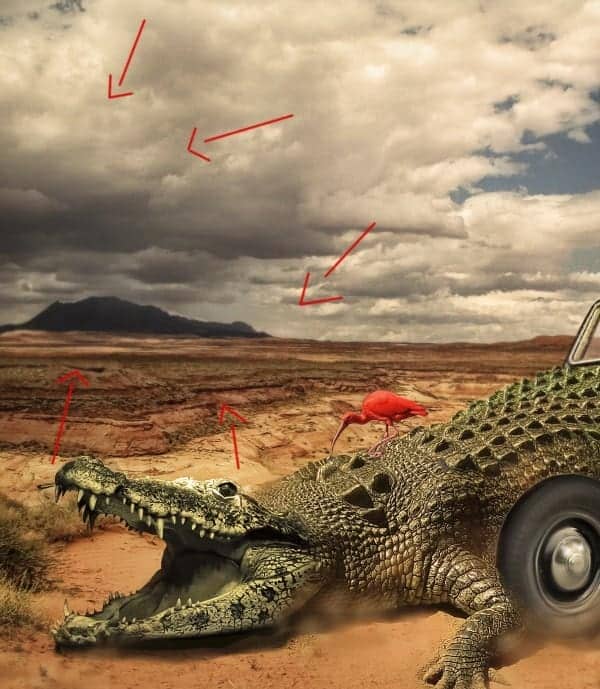
Blur the mountains in the back. Use the blur tool or go to Filters-Gaussian blur.
Step 27
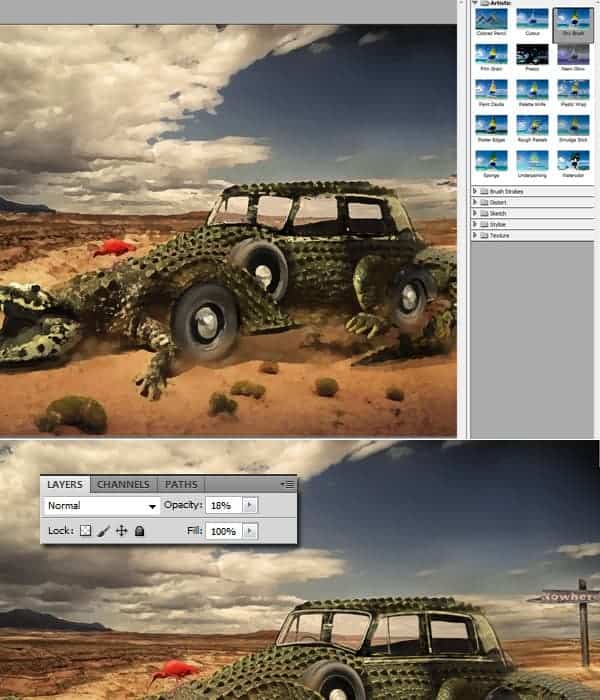
Create a visible stamp and go to Filter-Filter Gallery –Dry Brush. Use the basic Photoshop presets. Set the layer’s opacity to 18%.
Step 28
Go to the Adjustment Layers-Curves.
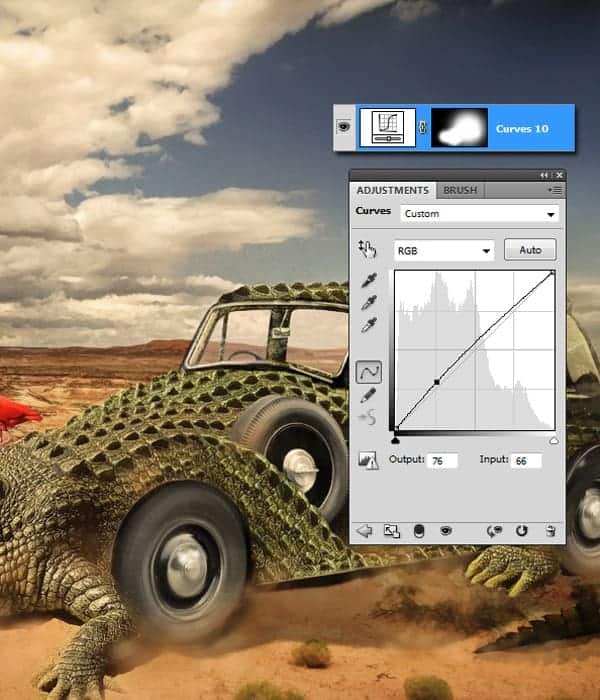
Adjustment Layers- Hue Saturation, for a final touch and we are done!
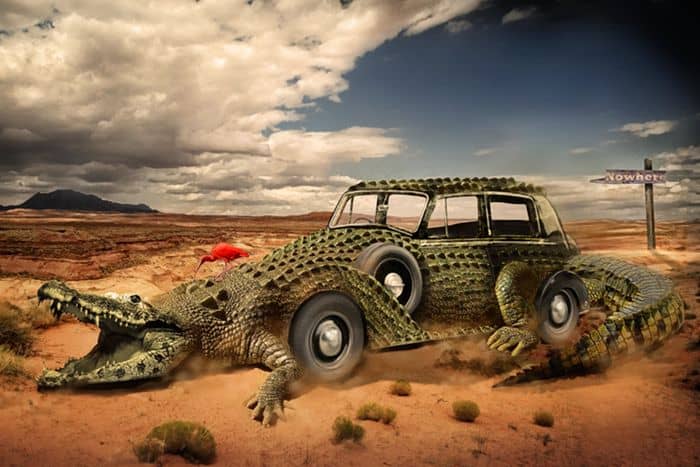
Final Results



27 comments on “Combine a Crocodile with a Car to Create an Exotic Crocomobile”
7/10
so if you actaully look at its teeth, you can easily tell its an alligator, butt yall wouldnt know
boo
bruh
wow
Loredana…i love You :x
This tutorial is very interesting and helpful for the learner to understand everything very quickly. I loved this work. Great job.
uuuuhh how big is the file you start on it doesnt say
nice
The information which is given in this tutorial that will helpful for the learner to understand each and every thing easily.
I like the idea of this tutorial, it’s very creative and the result looks great.
Keep it up!
good job..
Please where can i download photoshop tutorial videos?
very nice tutorial...........
think you very mash for your tutorial :)
Loredana...i love You :x
lol
Very Nice! Tutorial. Can U send me your email ID or Chat ID
for further support & help in PS
Please................
Thanks from Bangladesh
Nice Tutorial. can u send me ur mail ID or chat id for further help in PS
Please!!!!!!!!!
looks awesome! I'll try to do my version this weekend.
What on earth is this supposed to be its not surreal its just stupid. What a waste of time. Surprised that this was even considered to be a credible tutorial.Absolute pants!
ur sad
are you like ok at home? its a crocomobile what's not to love
This is a very interesting tutorial on creating the worlds only car, with a crocadile exterior. Good read.
How about making a tut on how to combine a bat with a car? :P
i see what you did there!:D
dangerous the girl is so dangerous. Thanks for the detailed tutorial.