

Step 24
Add those Adjustments as clipping mask to the last Smart Object File.

Step 25
Create New Layer Above Tiger Layer and use soft brush (Size:200px/Hardness:0%/Opacity:50%) with color #3575bb and paint around the Tiger Layer, And Another Layer behind the Tiger Stock with same color and paint in the center of the Tiger Layer. and change Blending Mood for both of them to Screen.

Step 26
Create New Group and name it “Textures”and Place “Texture 1”. and change blending mood to soft light with Opacity:50% and Fill:80% as it shown.

Step 27
Add “Texture 2” with those Properties (Blending Mood:Soft Light / Opacity:70% / Fill:75%) And Add Layer Mask to eras where the “Tiger Layer” exist, then add “Texture 3” with Those Properties (Blending Mood:Soft Light / Opacity:50% / Fill:85%), Then Add “Texture 4” with Those Properties (Blending Mood:Soft Light / Opacity:70% / Fill:75%), then add “Texture 5” with Those Properties (Blending Mood:Overlay / Opacity:40% / Fill:75%), Finally Add “Texture 6” with Those Properties (Blending Mood:Soft Light / Opacity:40% / Fill:100%) as it shown.

Step 28
Create an Black & White Adjustment as Clipping Mask To each one of Textures “Texture2” “Texture3” “Texture4” “Texture5” “Texture6” As it shown.

Step 29
Now Create New Group and name It “Effects” and in it create those adjustments and focus on Blending Mood, Opacity and Fill.


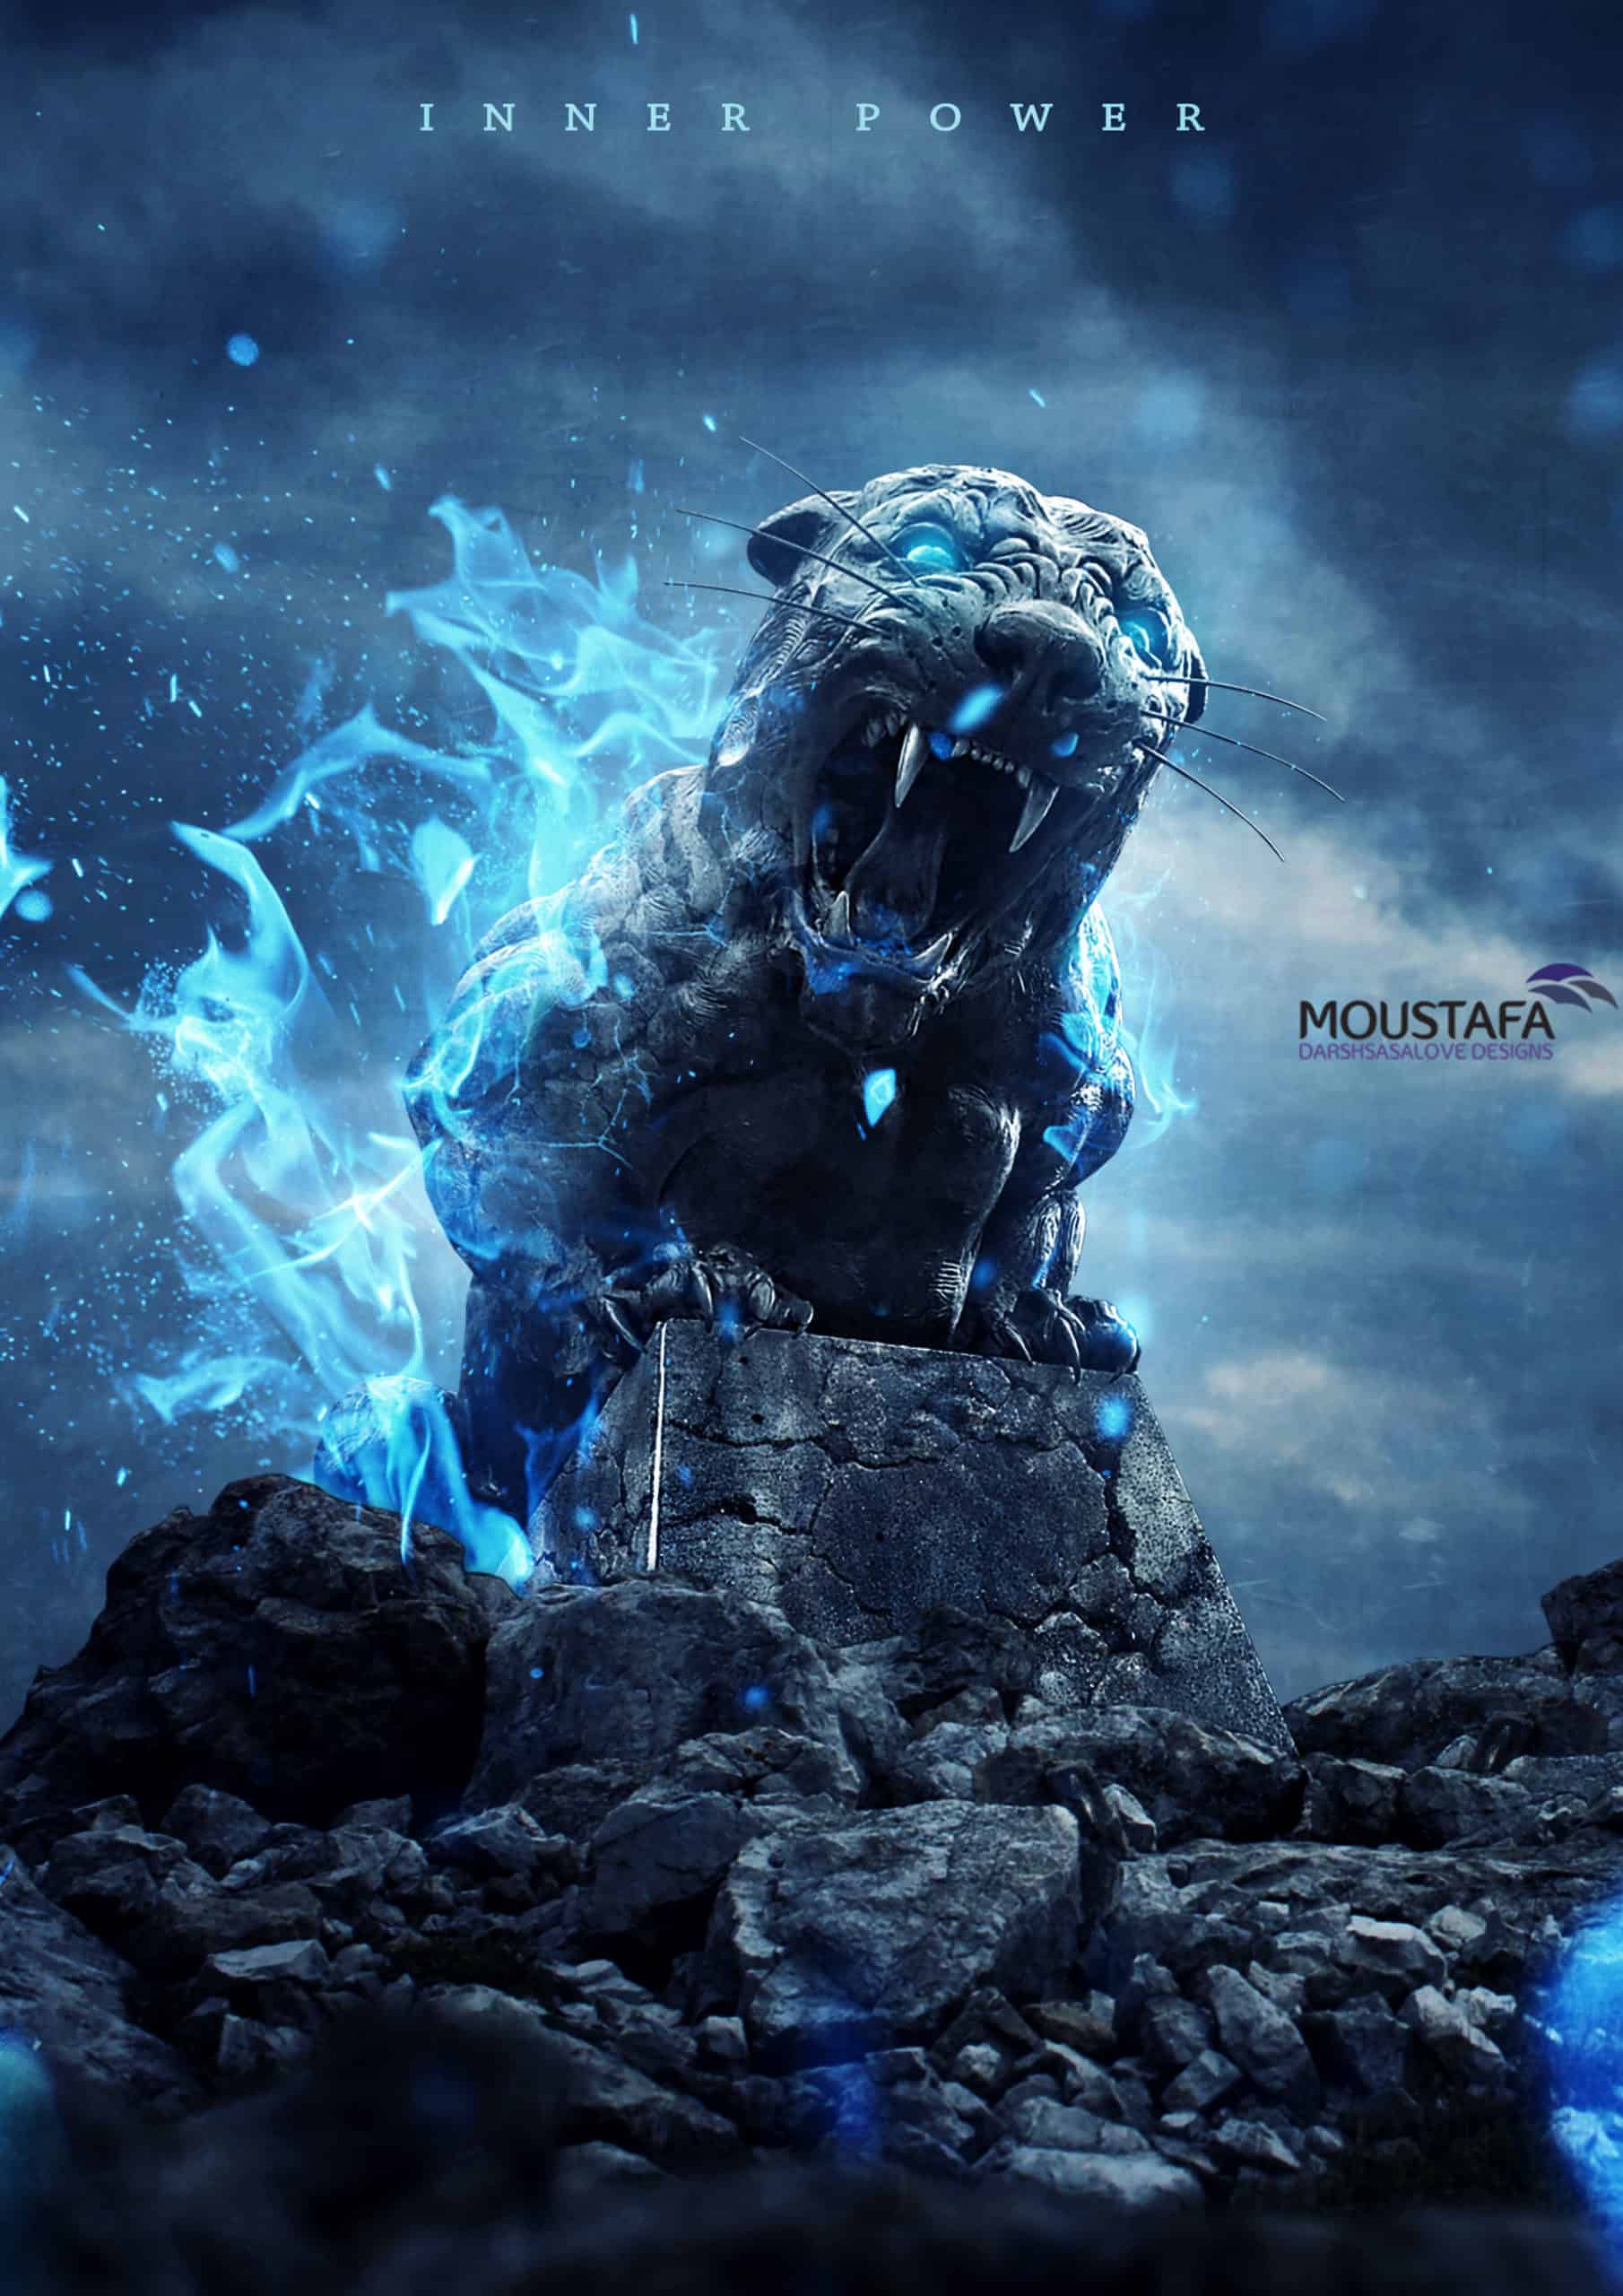
Final Results
Download the PSD
Tutorial by Moustafa Sharaf El-Din

Thank you for following the tutorial. I hope it’s useful for you and hope you learn today something that gonna help on your projects i’m Moustafa Sharaf El-Din from Egypt and if you wanna contact with me like my Page.
– Moustafa Sharaf El-Din
33 responses to “How to Create an Intense Composite of a Stone Tiger with Blue Flames”
-

Step 12 has broken image
-
nevermind didnt see second page
-
unfinished tutorial
-
end product looks great, but it’s a very difficult tut to follow and after downloading the psd file have noticed that there is a fair bit in there that isn’t even mentioned in the above. A lot of it is very confusing … and I have been using photoshop for a very long time.
-
Yeah I too admit with above saying. It is like you are hiding things. You know some things are filled bye me by my like common sense this should be like this. So Please this project was awesome it conducted more easily
-
I agree. Since I have a lot of experience with Photoshop, I was able to do this. There could be more detailed instructions, however.
-
-
Great tut
-
I got lost when you arrive to those gradient layers it doesn’t seem to do
nothing on the overall maybe it is ”over doing” to get the same results. I have to redo it because I don’t see how I will be able to bring it back the right way. -
Nice tut and all but you need to explain more in details in some specific areas especially for people who has NEVER used Photoshop before.
-
Nice tut and all but you need to explain more in detail for some specific areas in your steps especially for people who has NEVER used Photoshop before.
-
Nice tut but you gotta be more specific in explaining for your steps…
-
THANKS!! Great tut!
-
Thanks a lot! My cousin has a photo studio, and he always finds a creativity. yesterday i sent this tutorial’s link to them, and today he called me and said the tutorials are awesome.
Keep it good work!!!!
-
I would love to do this one, but the links are HORRIBLE. When you click on them they don’t go to the specific pic. If you suck it up and decide to dig around and find them, you have no idea what you are looking for because there isn’t even an example pic for each link. I’ve had the tabs open since the original post above, but can’t do anything with it because it’s an impossible task.
-
This tutorial is atrocious. The steps are simple enough, but so poorly written that many of them do not make sense. It’s often very unclear which tool or layer or effect the user is working with. Can’t believe I wasted so many hours on this.
-
imossible to download it
-
Thanks bros
-
Vincee Echezona
-
Just Awesome tutorial thanks for share ,,,,,,,,,,,
-
Really great technique just clear cut tutorial thank for share this …..
-
i can’t download the .PSD file
renew link please,,-
http://downloads.photoshoptutorials.ws/Inner%20Power.rar
replace .zip by .rar and there you go
-
-
It’s my results http://j-p-g.net/if/2015/08/13/0102963001439466615.jpg
THANKS . Thank you for this delightful lesson. Avtor has unrivaled chustvom colors and plays all the colors like the great magician . I admire him-
Hi, Irina…I saw ur work, did u know about masking in photoshop..??
-
-
I`m stuck on step 16. How do I adjust the layer??? Can someone plz be so kind to explain it to me?
-
Hey, I was stuck as well, but the adjustments are the ones that are next to properties just below colour and swatches
Hope that helps
-
-
Hey everyone I`m stuck on Step 16! I`ve selected the stone BUT what is meant with the selection or how do I set up the shown adjustments? It would be very kind of you if someone could help me with a hint! I know I`m a sort of a ps-n00b, but everyone is at some point a bl00dy beginner.
Best regards
d4n -
Lots of links show something other when i click
-
There was a time that this site really provided wonderful tutorials.
Now this does not happen anymore.
-
merci
-
this looks interesting, thanks!
-
(y)
-
awesome
Leave a Reply