Turn any photo into a dot grid artwork with these Photoshop actions. You'll get great results with dots that change size. They get larger in brighter areas and smaller in darker areas. Free download available.

Step 29
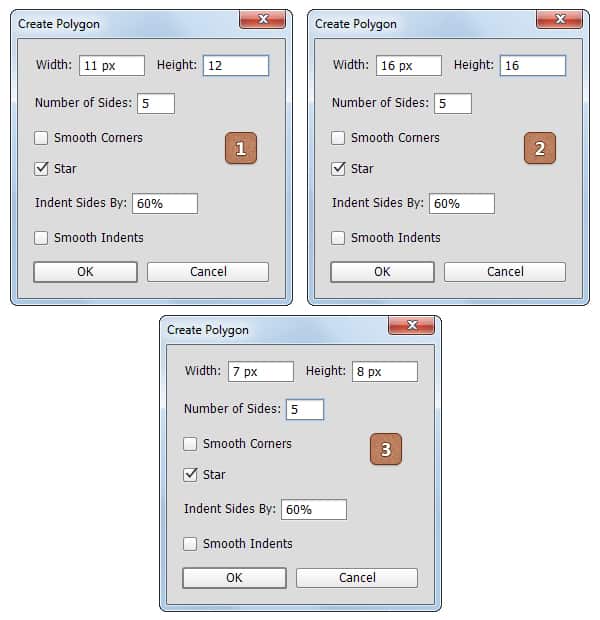
Select the Polygon Tool and click on your canvas to open the Create Polygon window.
Enter the settings shown in the top, left window (in the following image) and click the OK button to create your first star vector shape.
Using the same tool, follow the settings shown in the other two windows and create another two star shapes.
Concentrate on the Layers panel, select all your star vector shapes and go to Paste Layer Style.


Final Results
Here is how it should look.

Tutorial by Razvan Gabriel

I hope you've enjoyed this tutorial and you can apply these techniques in your future projects. Thank you for reading this tutorial ! See my portfolio here: MySketch.net
- Razvan Gabriel


8 comments on “Create a Set of Weather Icons in Adobe Photoshop”
Thank you Razvan. Nice and clear tutorial. Although I think you should have made it higher-res to begin with since you are using layer styles. Also a lighter background would look better. But nonetheless it is a good tutorial.
Cool!!!
gr8 m8 i r8 it 8/8
Thank U
Very easy tutorial.
Nice work
Great job.. if you were a preschooler
Very good tutorial!!!
Nice tutorial, well done.
NICE!!!