Create a Leatherback Book Icon in Photoshop

Create a Leatherback Book Icon in Photoshop

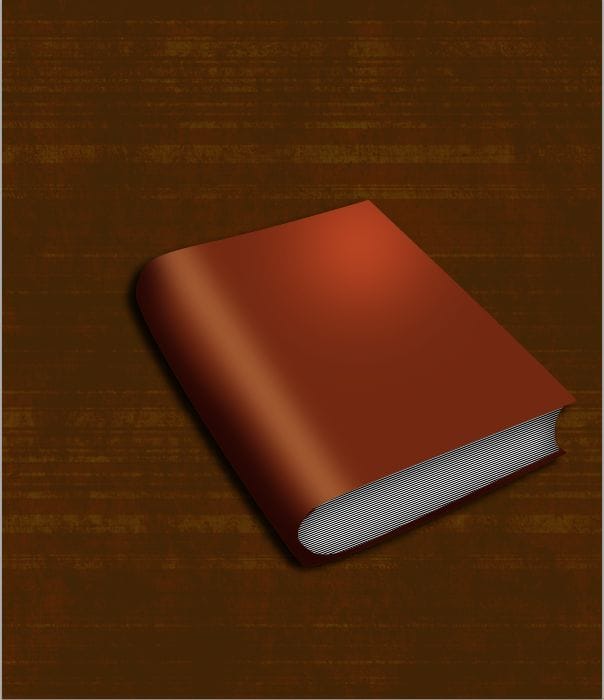
Learn how to create this leatherback book design in Photoshop. This tutorial will show you how to draw a book and apply textures and layer styles.


Preview of Final Results

final-results

Download the PSD

Leatherbook.zip | 2.29 MB

Download from Website


Create a Leatherback Book Icon in Photoshop


Resources


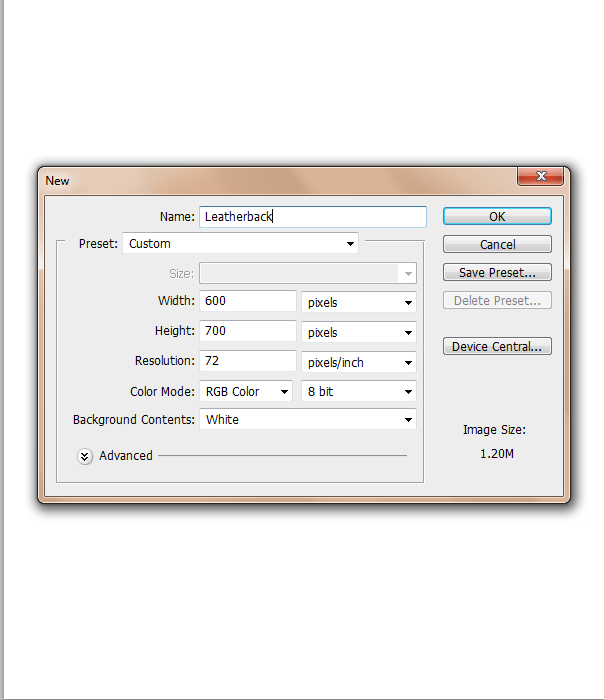
Step 1 New Document

Open up Photoshop and create a new document
step-001

Step 2

On the background layer fill it in with #412405 using the paint brush tool.

step-002

Step 3

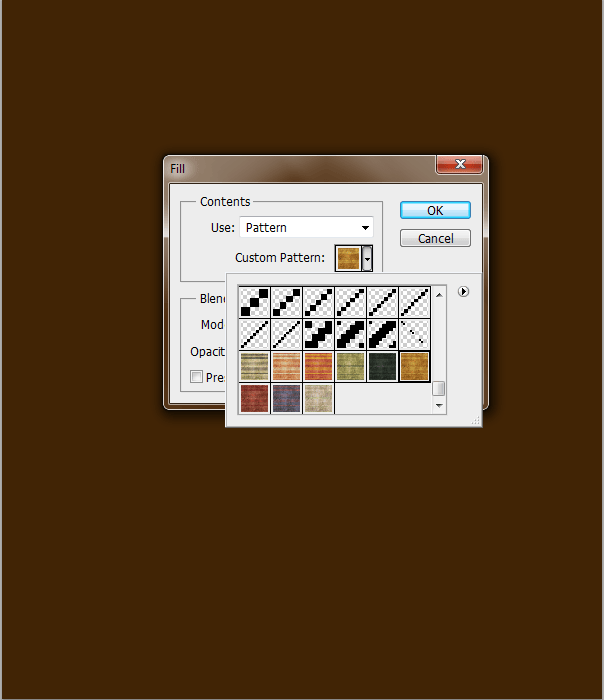
Create a new layer then Edit>Fill and select your pattern
step-003

Step 4

Change this layer to Pin Light with an Opacity of 24%

step-004

Step 5

Create a new layer and name it 'book' then grab your pen tool and make the shape of a book

step-005

Step 6

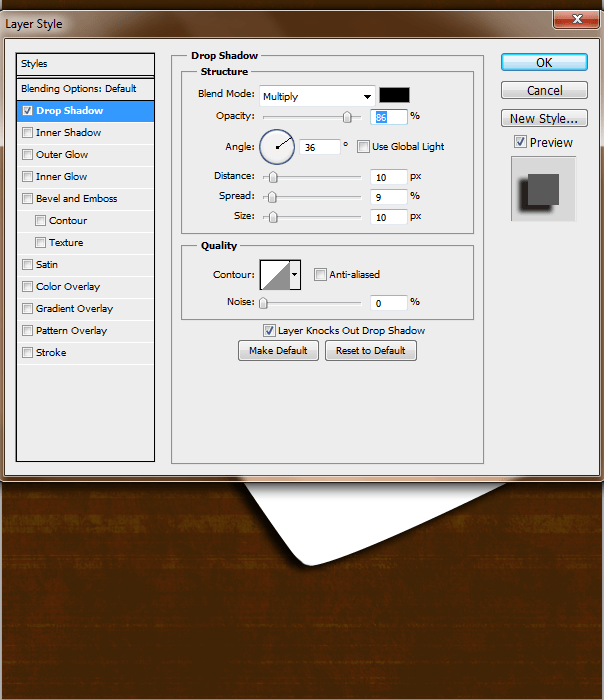
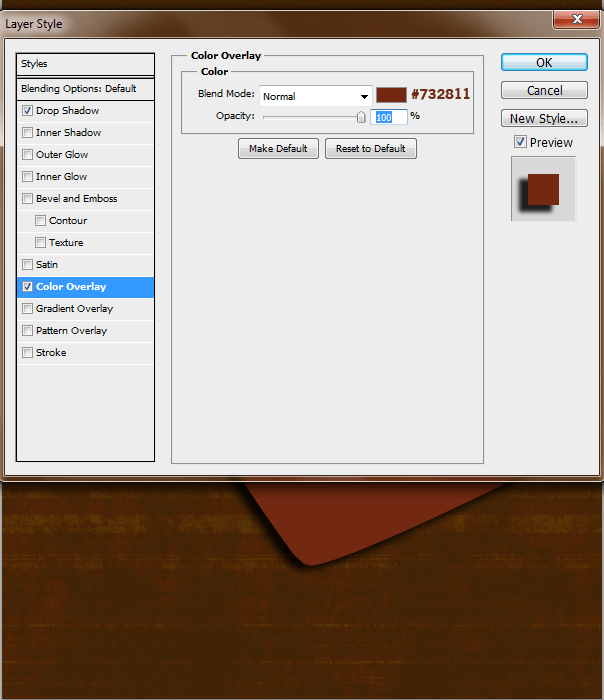
Add these layer styles

step-006
step-006a

Step 7

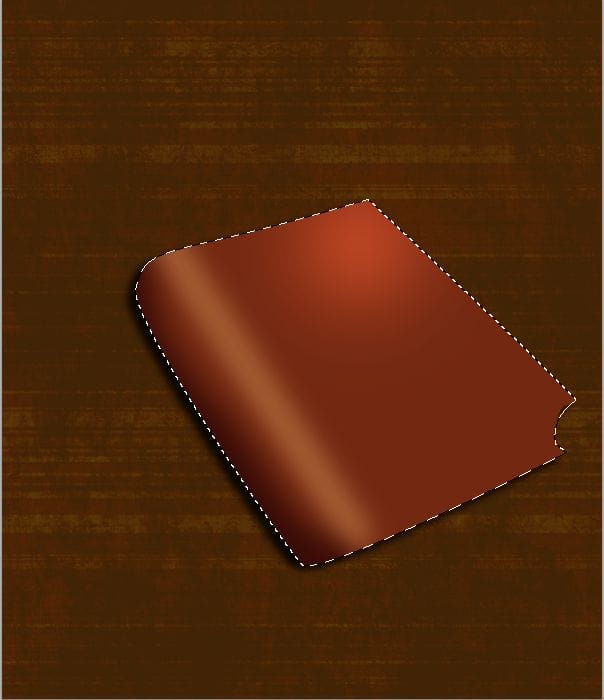
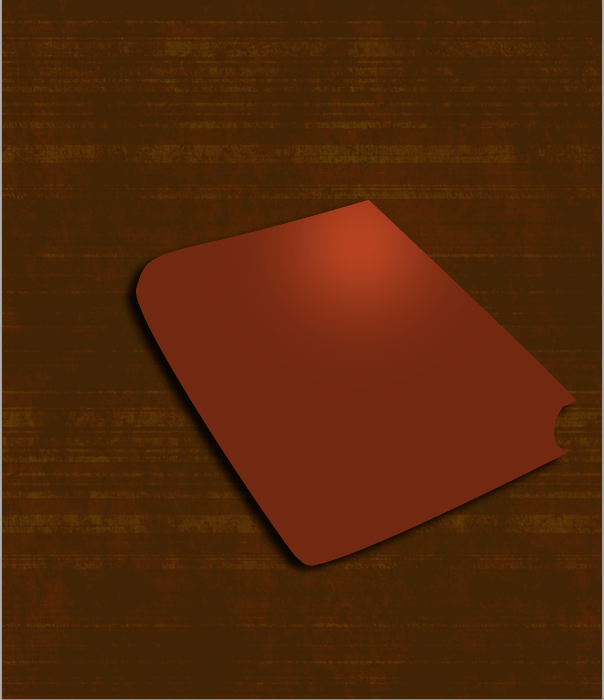
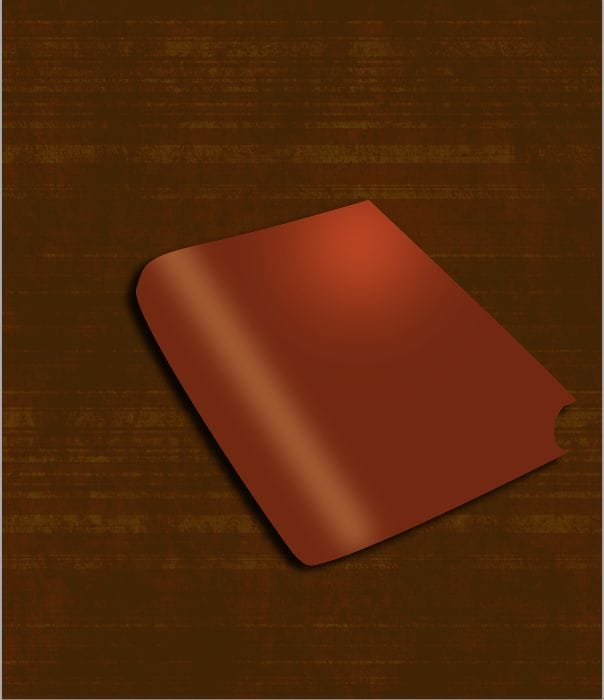
Now we add a highlight to this book, create a new layer and name it 'shine'. Grab your 172 px soft round brush paint brush tool #b74322 and place it on the corner of your book
step-007

Step 8

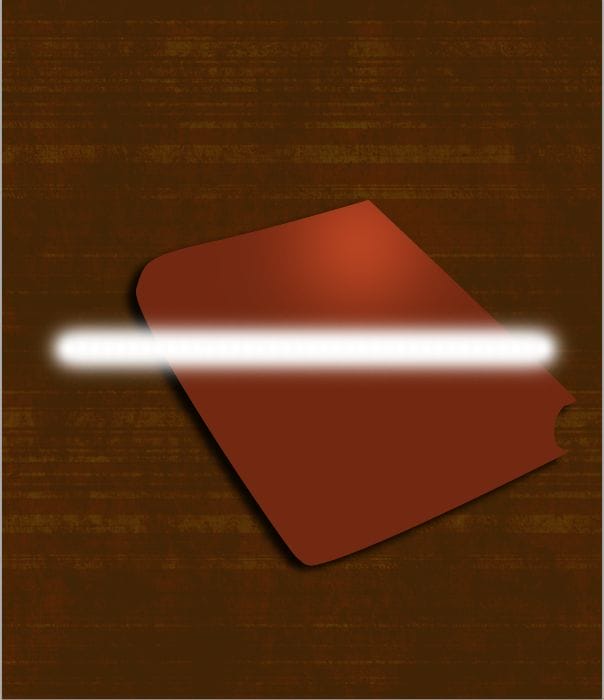
Now we will add some shine to the spine of the book. Create a new layer and grab a 51 px soft round brush (#FFFFFF). Now while holding down the shift key, make a line across your image. Holding the shift key keeps the brush in a straight line.
step-008

Step 9

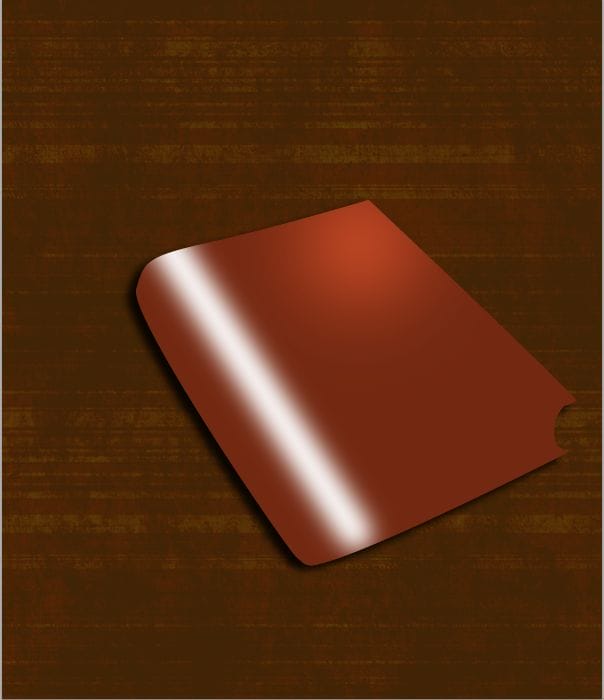
Now Edit>Free Transform and turn it so that it lines up with the angle of the book, erase away any parts that go beyond the book.
step-009

Step 10

Change this layer to Soft Light with an Opacity of 85%
step-0010

Step 11 Shadow

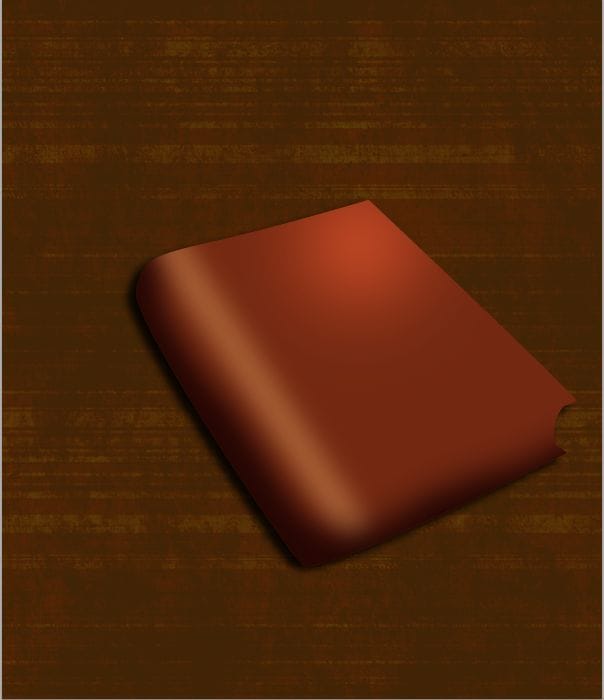
Create a new layer and name it 'shadow' and with a 95px soft round brush #3b0d06 paint along the edges of the edges. I like to create a selection around the book so that I don't have to worry about erasing, to do this hold down the 'shift' key and click the image box on the 'book' layer

step-0011

Step 12

Now add some more shadow but use a darker color #310c05
step-0012


Step 13 Pages

Create a new layer and name it 'pages' and grab your pen tool and make this shape and fill it with #ffffff

step-0013

Step 14

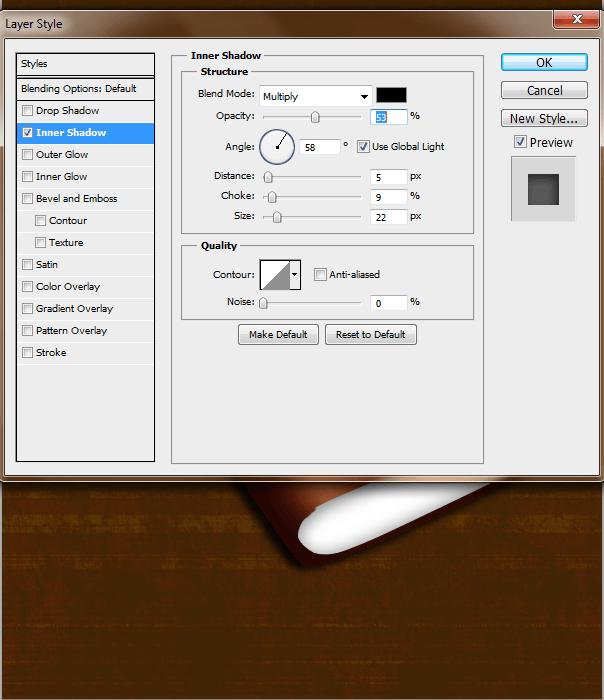
Add Inner Shadow

step-0014

Step 15

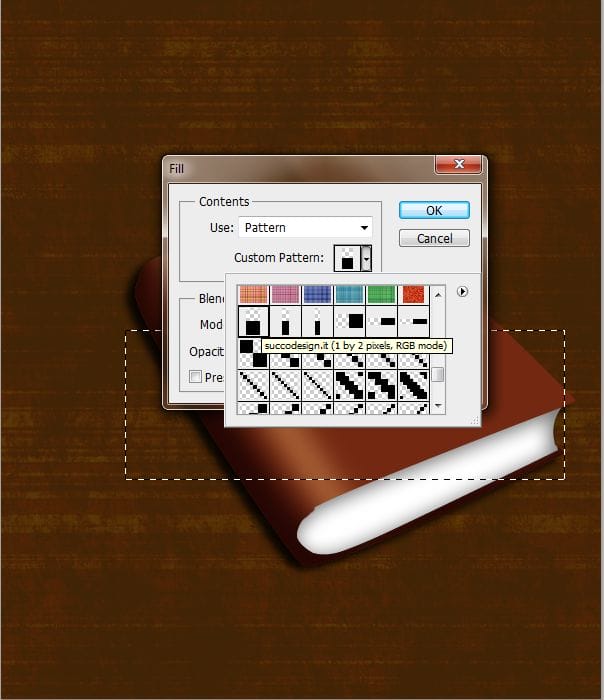
Create a New layer and grab your rectangular marquee tool and make a box on your canvas and fill it with the stripe pattern. Edit>Fill>Pattern
step-0015

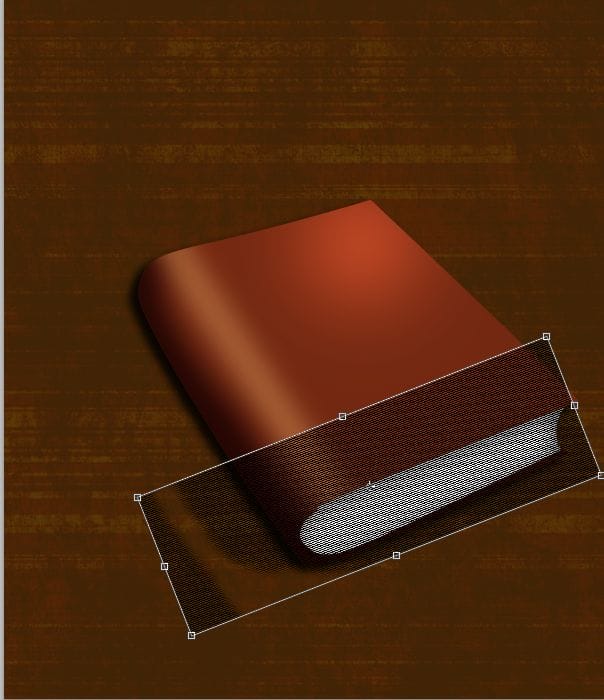
Step 16

Edit>Free Transform and line it up so that it is at the same angle of your 'page' layer.

step-0016

Step 17

Delete the unnecessary areas

step-0017

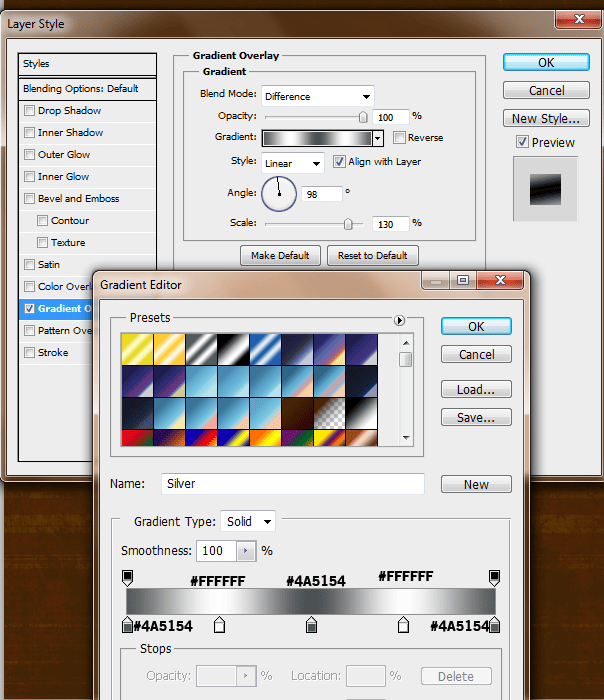
Step 18

Add a Gradient Overlay

step-0018

Step 19

Duplicate this layer but change the settings. First change the layer's Opacity to 38% and then change the Gradient Overlay.

step-0019

Step 20 Ribbon

Create a new layer and name it 'ribbon' and with your pen tool create the shape of a ribbon. Duplicate this layer

step-0020

Step 21

Add these layer styles to the first layer

step-0021
step-0021a

Step 22

On the second Ribbon layer beneath the first layer change the Opacity to 49% and change the Color Overlay

step-0022

Step 23

Apply a Gaussian Blur

step-0023

Step 24

Create a new layer and make a selection of your 'page' layer and apply a stroke

step-0024


Step 25

Erase some parts of the line and apply a Gaussian Blur

step-0025

Step 26

Create another layer and apply another stroke. Make a selection from the 'book' layer

step-0026

Step 27

Grab your pen tool and make sure that your paint brush tool is set to #ffffff 7px soft round brush and make markings on the spine of the book

step-0027

Step 28

Change the Opacity of this layer to 9%

step-0028

Step 29

Create a new layer and make some more markings but this time make sure your paint brush tool is set to 7px #421209

step-0029

Step 30

Change this layer to Multiply with an Opacity of 76%

step-0030

Step 31

Open up your texture and line up your texture, erase the outer parts

step-0031

Step 32

Change this layer to Multiply

step-0032

Step 33

Grab your Custom shape tool and make this shape

step-0033

Step 34

Rotate it so that it lines up with the book. Change this layer to Soft Light with an Opacity of 64%

step-0034

Step 35

Add these layer styles

step-0035
step-0035a

Step 36

Grab your pen tool and make the strap, the color I used to fill it is #732811

step-0036

Step 37

Create a new layer and apply the leather texture again to this strap. Change the layer to Multiply

step-0037


Step 38

Apply a Drop Shadow

step-0038

Step 39

Duplicate this layer but make the Drop shadow invisible by clicking the 'eye' on the duplicated layer

step-0039

Step 40

Grab a soft round brush #240603 and paint along the edges of the strap on a new layer

step-0040

Step 41

Change this layer to Soft Light with an Opacity of 48%

step-0041

Step 42

Create a new layer and grab your pen tool and make a smaller strap

step-0042

Step 43

Add these layer styles

step-0043
step-0043a
step-0043b

Step 44

Create a new layer and add the leather texture and change it to Linear Burn

step-0044

Step 45

Grab your paint brush tool and add some shadow around the smaller strap #a16a49. Change this layer to Multiply

step-0045

Step 46

Create a new layer and with a 23 px soft round brush make another line. I'm using the color #2c0d05

step-0046

Step 47

Edit>Free Transform and align it along the spine of the book and change this layer to Soft Light. Erase any parts that are not needed.

step-0047

Step 48

Create a new layer and name it 'lock' and grab your pen tool and make this shape.

step-0048

Step 49

Add these layer styles

step-0049
step-0049a
step-0049b
step-0049c
step-0049e


Step 50

Make a selection of the lock and contract it 5px. Select>Modify>Contract

step-0050

Step 51

Add a stroke. Edit>Stroke

step-0051

Step 52

Add these layer styles

step-0052
step-0052a
step-0052b

Step 53

Create a New layer and with your pen tool make the key hole

step-0053

Step 54

Add these layer styles

step-0054
step-0054a
step-0054b
step-0054c
step-0054d

Step 55

Grab a 9px hard round brush #000000 and place it beneath the key hole

step-0055

Step 56

Add these layer styles

step-0056
step-0056a
step-0056b
step-0056c
step-0056d


Step 57

Duplicate this notche layer and place it above the key hole.

step-0057

Step 58

Select all the layers that pertain to your Leatherback book and place it in a group by dragging all the selected layers to the folder icon. Duplicate this layer and place it beneath your original book. Apply a layer mask and erase the bottom. On the duplicated book group find your ribbon and ribbon shadow layer and turn them vertical. Edit>Free Transform> Flip Vertical

step-0058

Step 59

Create a new layer and grab the Rectangular Marquee Tool and make a rectangle on the left side of the canvas, fill it with #000000

step-0059

Step 60

Change this layer to Soft Light

step-0060

Step 61

Create a new layer and with a soft round paint brush place it at the top of your canvas #ffffff

step-0061

Step 62

Change this layer to soft light

step-0062

Step 63

Grab your type tool and type out whatever you want it to say. I'm using the word "Book Fair", the font I'm using 'Champagne & Limousines'

step-0063

Step 64

Add these layer styles

step-0064
step-0064a
step-0064b
step-0064c
step-0064d
step-0064e

Final Results

final-results[1]

Download the PSD

Leatherbook.zip | 2.29 MB

Download from Website


Authors Comment

profileI hope you enjoyed it!

- Ashlee

Luminar: AI Photo Editing
Sponsored

Luminar AI lets you turn your ideas into reality with powerful, intelligent AI. Download the photo editor and see how you can completely transform your photos in a few clicks.

4 comments on “Create a Leatherback Book Icon in Photoshop”

  1. After I complete a step 16 I can't delete unescesary areas, they just fade out, but don't delete, HELP!

Leave a Reply

Your email address will not be published. Required fields are marked *

cross