Make skin look perfect in one-click with these AI-powered Photoshop actions.
Step 55
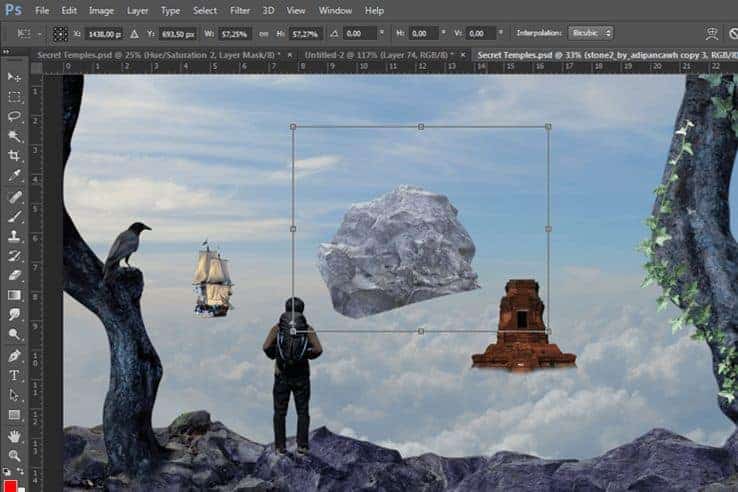
Use transform tool (Ctrl/Cmd+T) to put the stone like as shown image below. then use brush tool to mask bottom part of the stone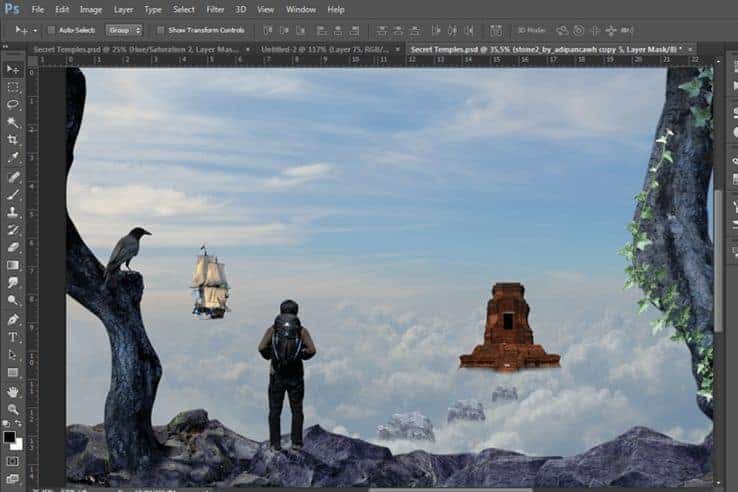
Step 56
Create a new Levels adjustment layer (Layer > New Adjustment Layer > Levels), set the parameters like as shown image below, and Create Clipping Mask. (do in each layers of stone)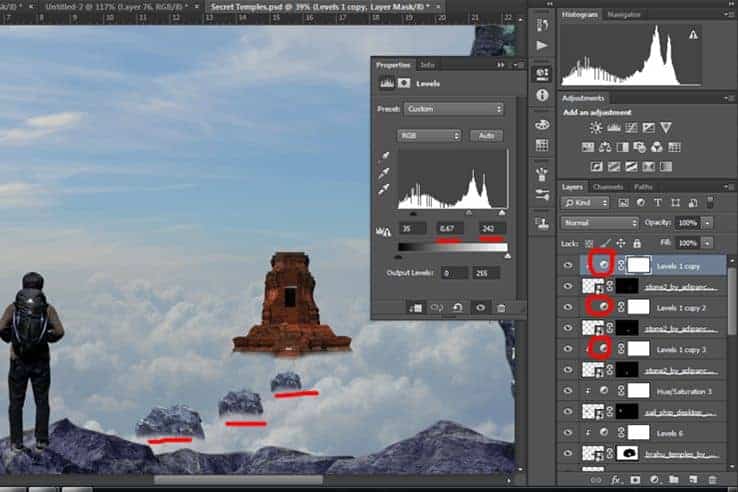
Step 57
Now, we manage the layers, create some group layers to differentiate each category, in this time I make "Climber & Crow" , "Ship" , and "Stone"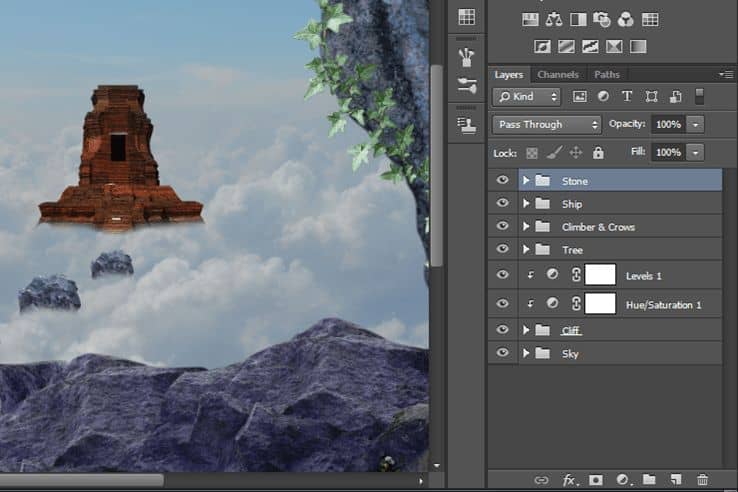
Step 58
Create new layer by clicking "new layer icon" in the bottom of panel layer, then name this layer "Fog"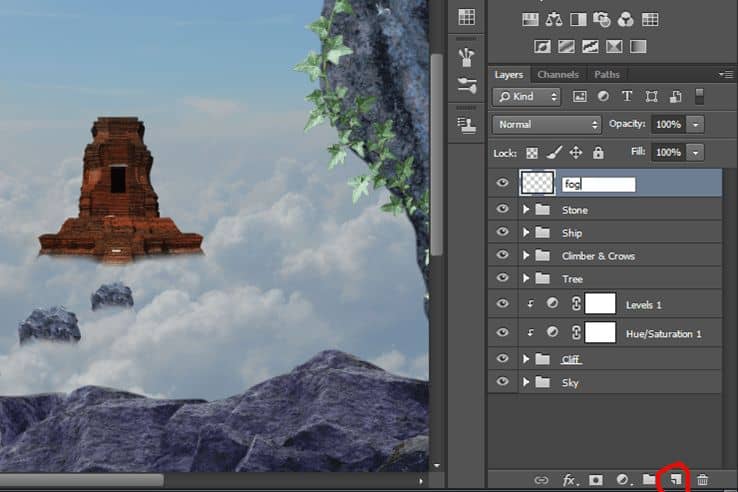
Step 59
With White color on foreground Use Cloud Brush tool (B) then set the brush to soft, size to 50 pixels, opacity 80%.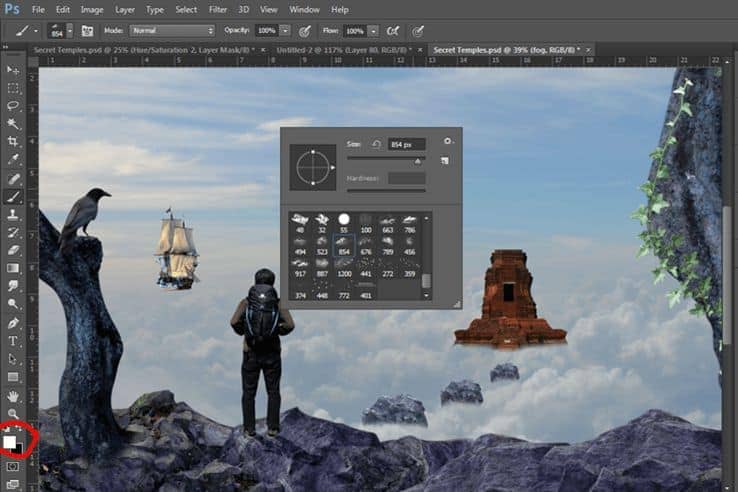
Step 60
Paint over the bottom part of stone, ship, and temple like as shown in the image below.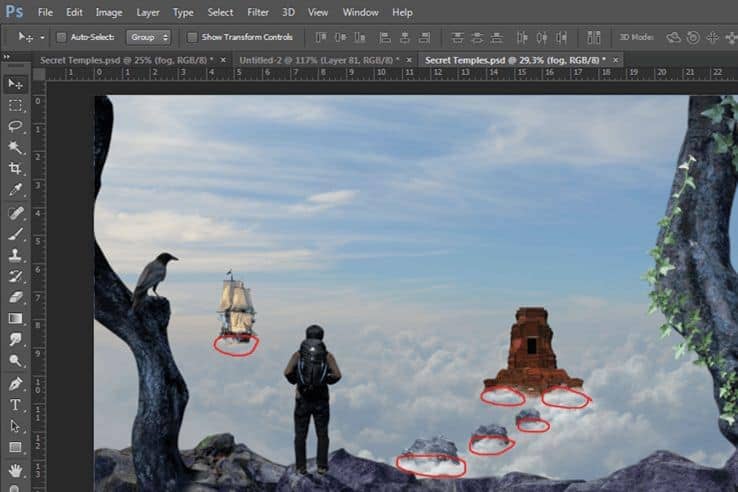
Step 61
After we combine all each image, Now we make a final retouch. Create a new Black & White adjustment layer (Layer > New Adjustment Layer > Black & White), set the parameters like as shown image below. theh set the opacity into 27.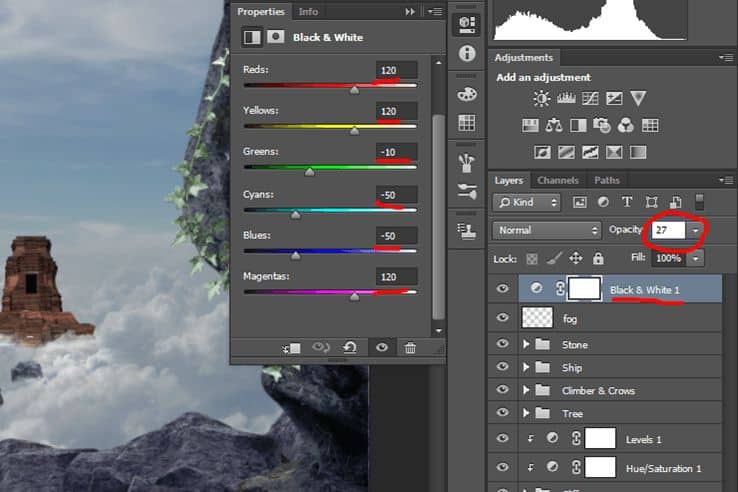
Step 62
Create a new Gradient map adjustment layer (Layer > New Adjustment Layer > Gradient map), set the parameters like as shown image below.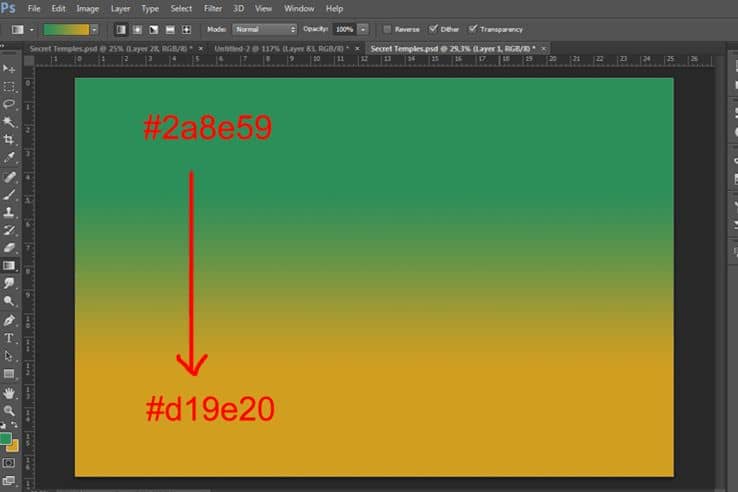
Step 63
Then set the opacity into 40 and blending option into soft light.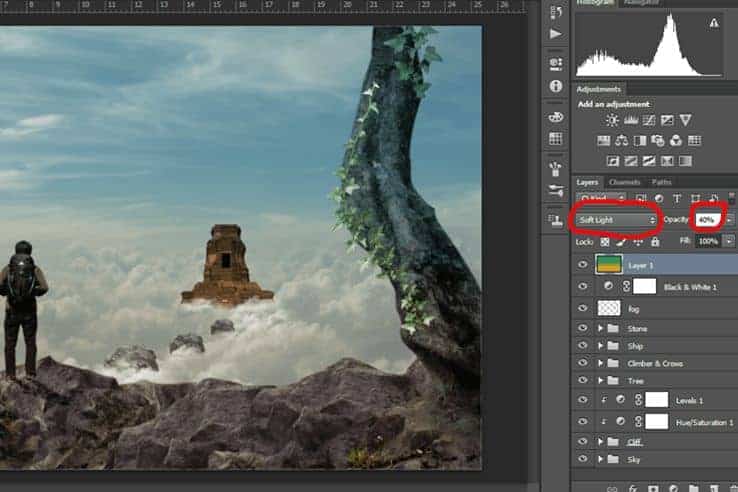
Step 64
Create new layer and give the color like as shown image below.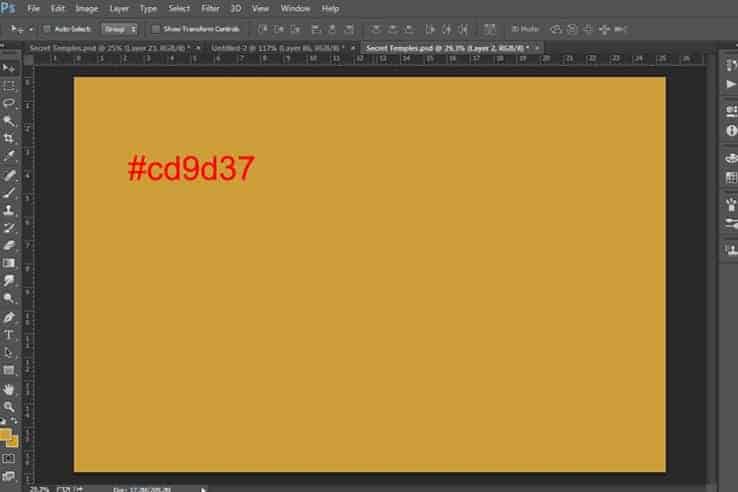
Step 65
Change blending option into Soft Light and opacity into 30%.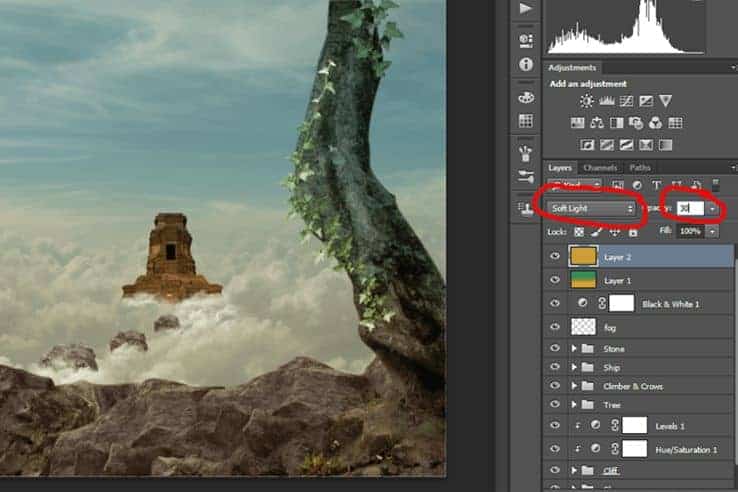
Step 66
Create a new Brightness/Contrast layer (Layer > New Adjustment Layer > Brightness/Contrast), set the parameters like as shown image below.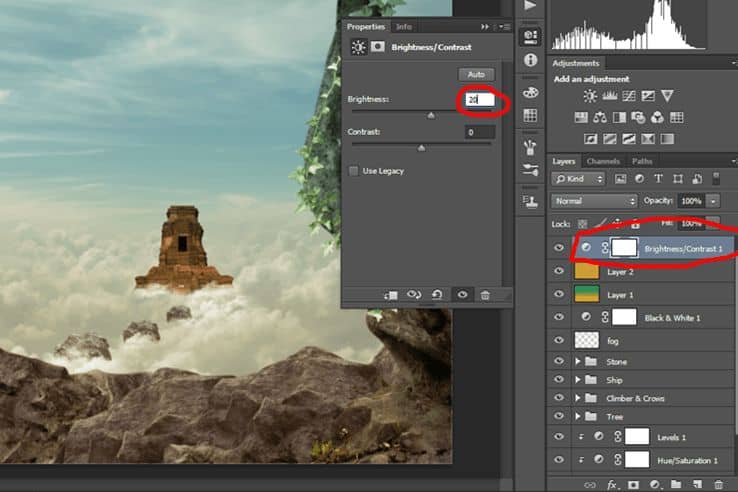
Step 67
Create a new Selective Color layer (Layer > New Adjustment Layer > Selective Color), set the parameters like as shown image below. then change opacity into 50%.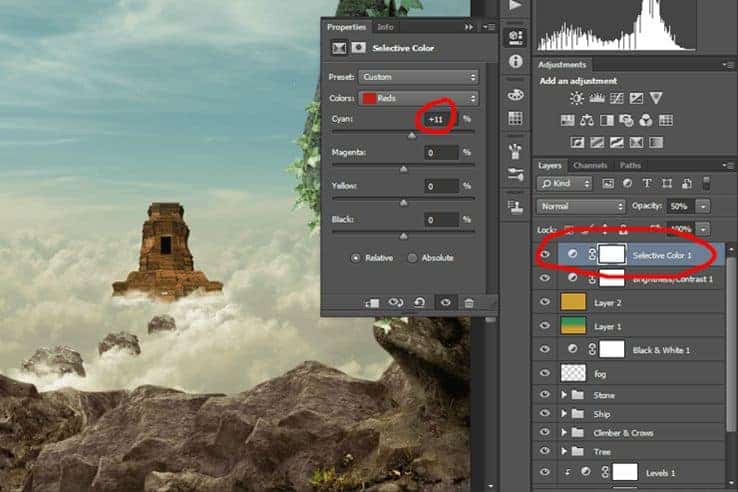
Step 68
Create a new Levels adjustment layer (Layer > New Adjustment Layer > Levels), set the parameters like as shown image below. Then mask it like as shown image below. so that center part of the image is more lighter.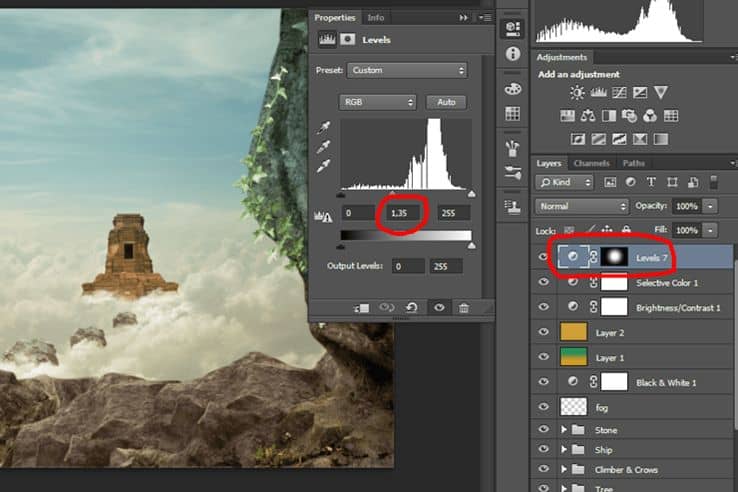
Step 69
Create a new Levels adjustment layer (Layer > New Adjustment Layer > Levels), set the parameters like as shown image below. Then mask it like as shown image below. so that edge of the image is more Darker.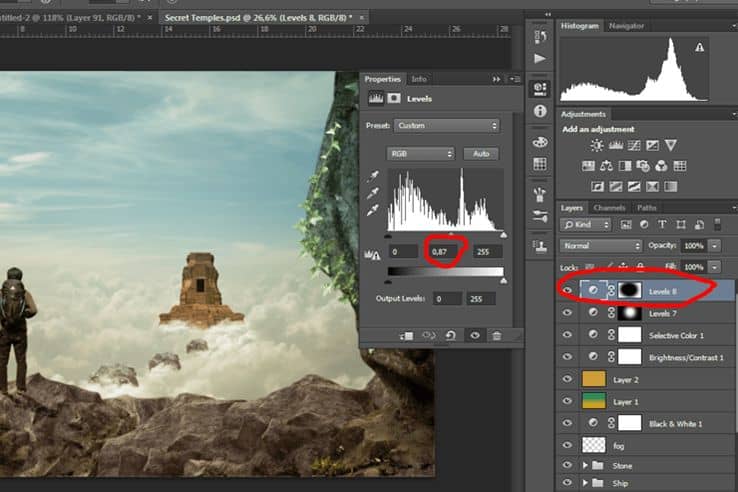
Step 70
Create a new Black & White adjustment layer (Layer > New Adjustment Layer > Black & White), set the parameters like as shown image below. then set the opacity into 25.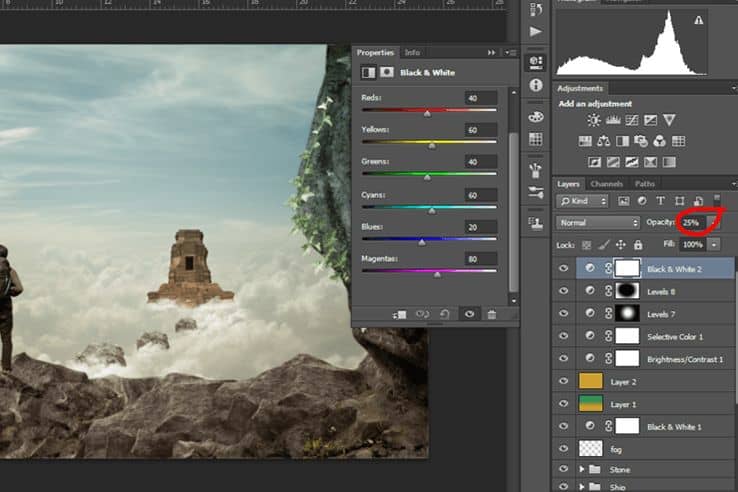
Step 71
Create a new Photo Filter adjustment layer (Layer > New Adjustment Layer > Photo Filter), set the parameters like as shown image below.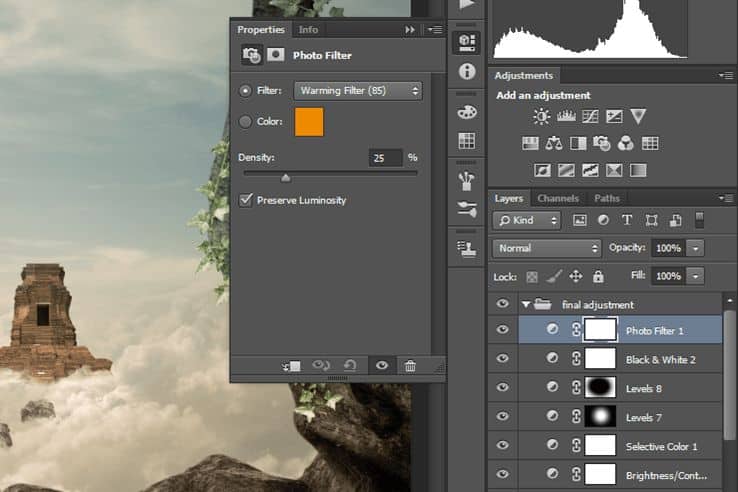
Step 72
Select all the layers we created so far by clicking in the first one, holding Shift, and then clicking on the last one. Then, drag all of them to that little folder in the layers panel, which will create a new group with all of them. You could also select them and use the shortcut Ctrl/Cmd+G. Name this new group "Final Adjustment".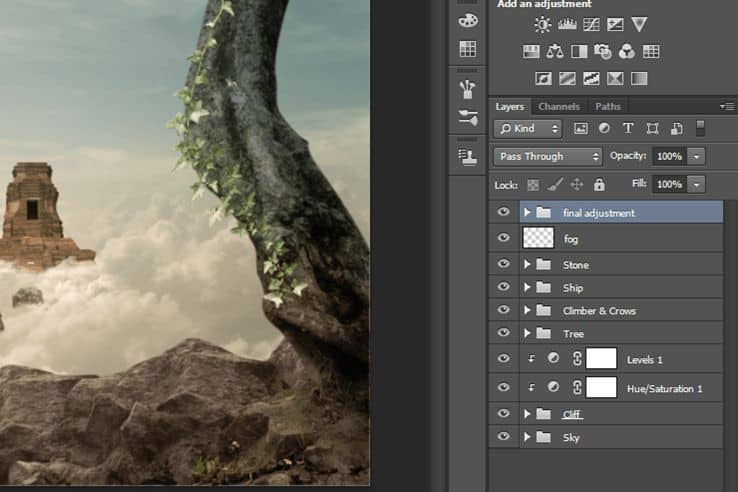
Step 73
The last step is make a lens flare so that image will look more dramatic. create new layer and give the black color.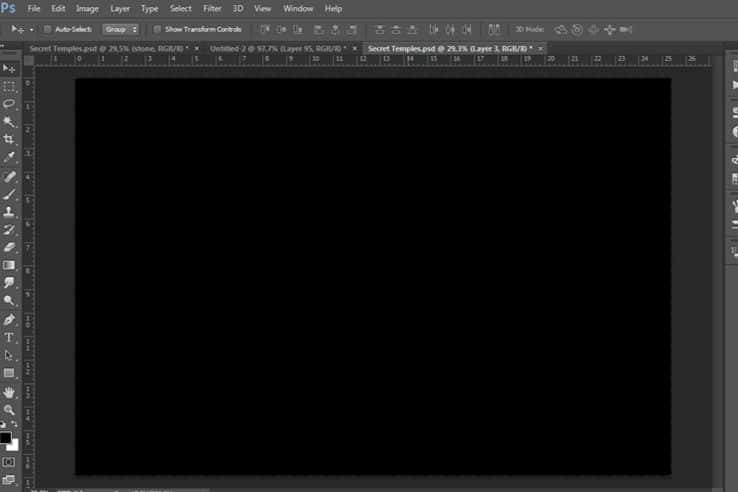
Step 74
Goto Filter - Render - Lens flare.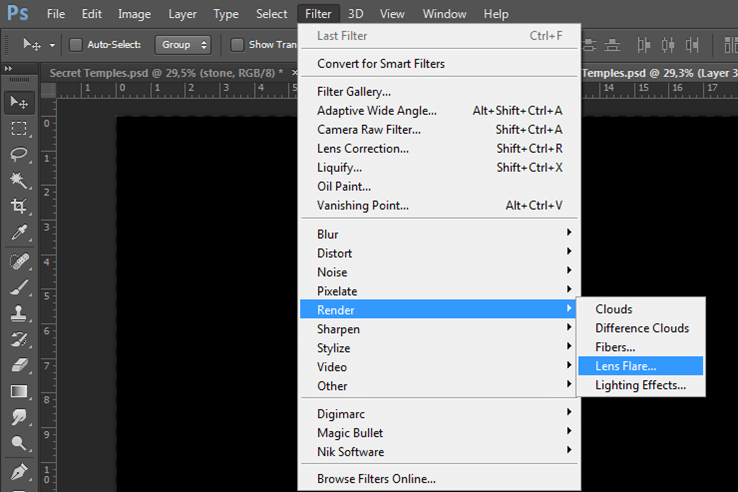
Step 75
Set the brightness to 40% and choose lens type 50-300mm zoom.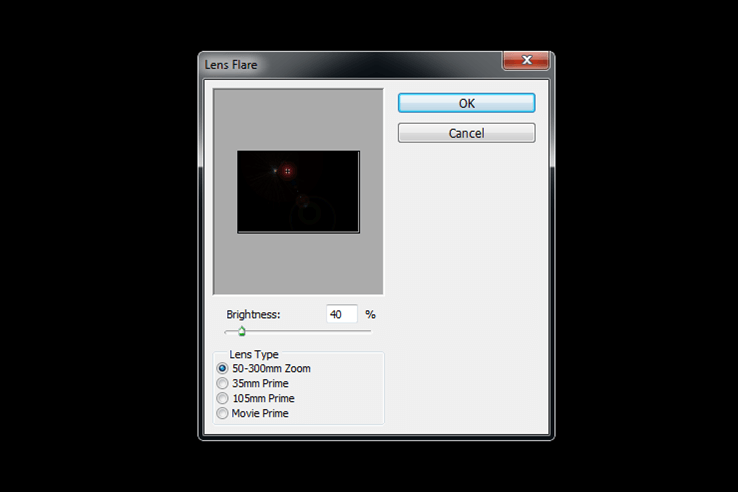

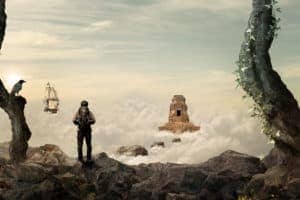

14 comments on “How to Create This Stunningly Surreal Artwork of a Secret Temple Above the Sky”
Cool tutorial! Instructions are easy to follow. Good job
most helpful post.thanks for sharing.
Great work...!
Awesome resources.Huge collection.Great job.Very useful post.
Awesome tutorial! I'm going to print the final result, frame it and gift it to a friend ^^
I couldn't help but notice there are many grammatical errors and such. If you want, I could rewrite your tutorial with correct grammar and syntax and make it "cleaner".
Forgot the tutorials are only bought and posted on the site.
I am sure the people behind the site can proof read tutorial and correct it themselves, so please do so. Or at least let me do it, it really is a pity a good tutorial to be hindered by a language barrier.
ni buatan orang Indonesia ya??
This is so amazing!!!!
that flying boat reminds me of final fantasy ^_^
Great tutorial. Your website is main learning source for me. We search the web every week and compile some really good tutorials out there for our readers. So, we have feature it
how did u clip the 'clipper' ?
AMAZING!!!
idea's ok, just doesn't do it for me !!!
This is a really neat tutorial. The puppet warp on the vines is very clever but I would make it wrap around the tree. The boat and tower have too much contrast and objects that are far away should have some haze to it. Pretend that you are on a mountain and looking far away..... everything fades away in the haze if they are far enough.