Download Lightroom presets and LUTs, absolutely free. Use the presets to add creativity and style to your photos.
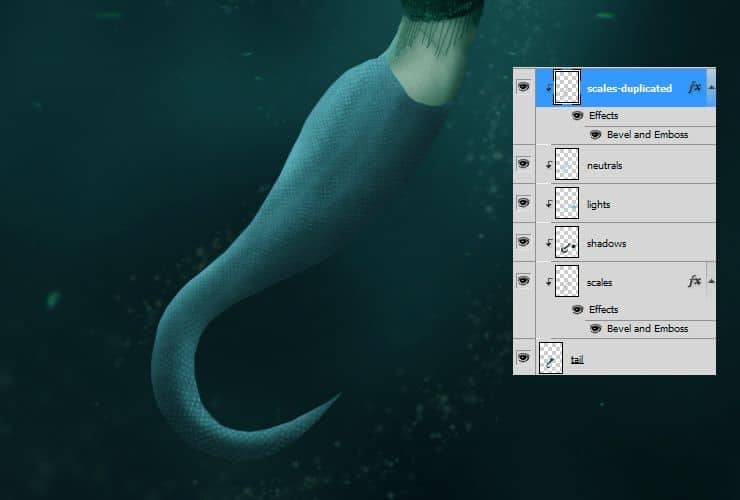
Step 32
Back below layer with tail. Place "Fish" stock to your file. Transform it as is shown.
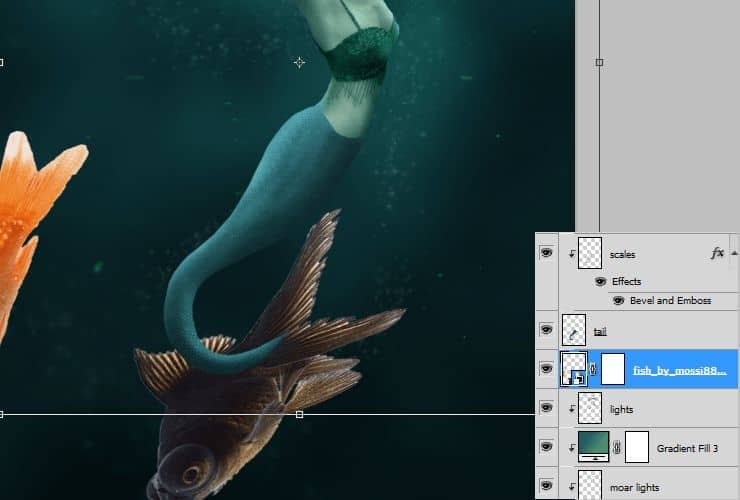
Step 33
Mask tail. Erase second fish and unnecessary parts of first fish. Leave only fin. On the edges of flipper, use hard brush. Soft brush will be good for center of tail.
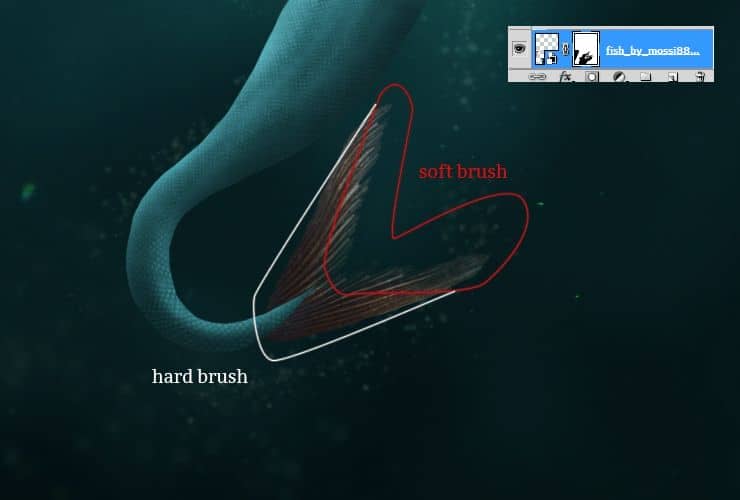
Step 34
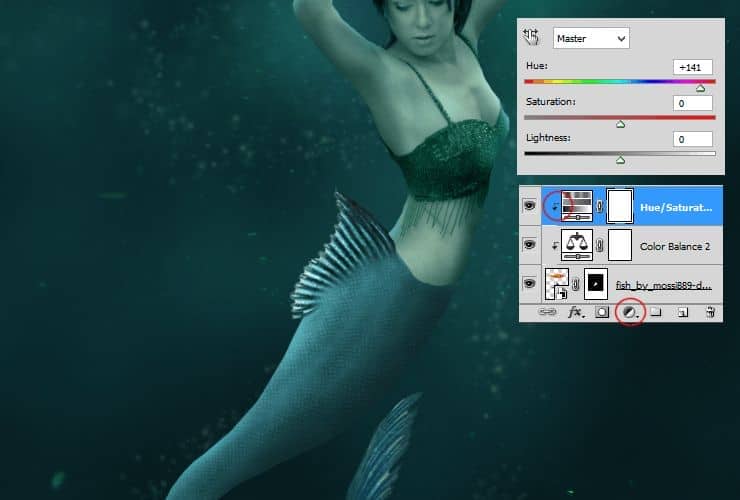
Colors on tail don't match. Add adjustment layer to the fin - RMB > Create clipping mask - with Hue/Saturation.
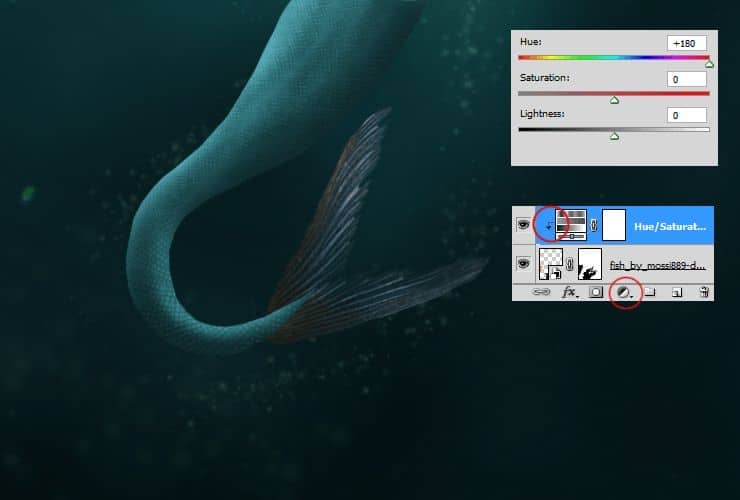
Step 35
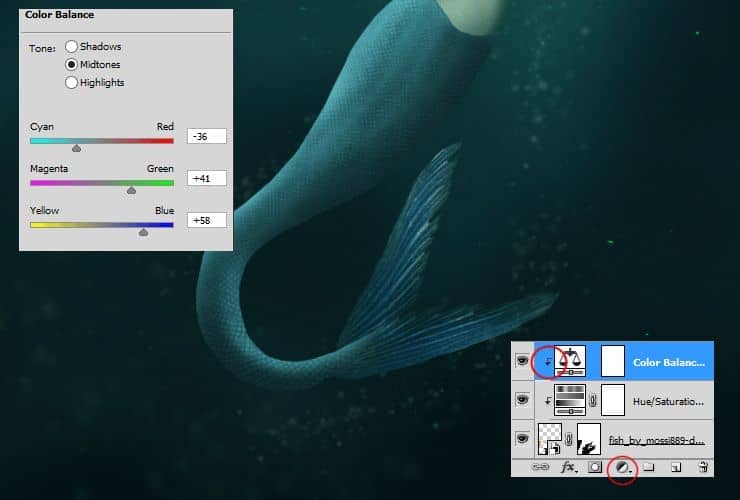
Now you should fix yellow/orange/brown tone on the top of tail. Add adjustment layer with Color Balance and make it a clipping mask.
Step 36
Go to the op of your layers. Again place "Fish" stock, as is shown.
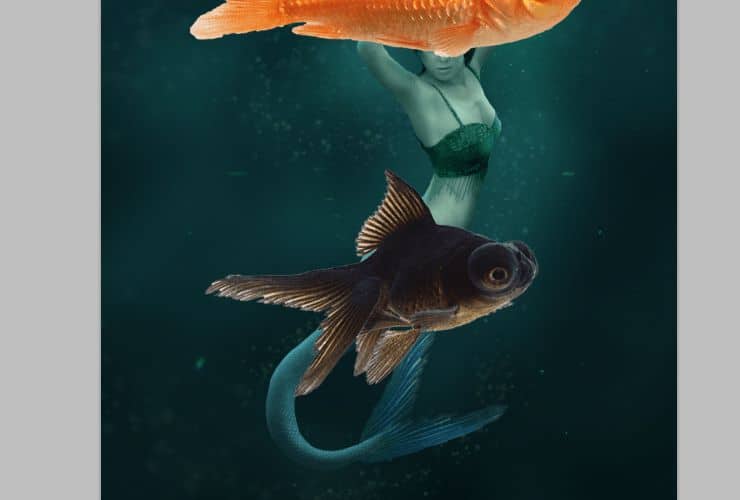
Step 37
Mask unnecessary parts of fishes. Leave only tail from top. Use soft brush for mixing created tail with fish tail.
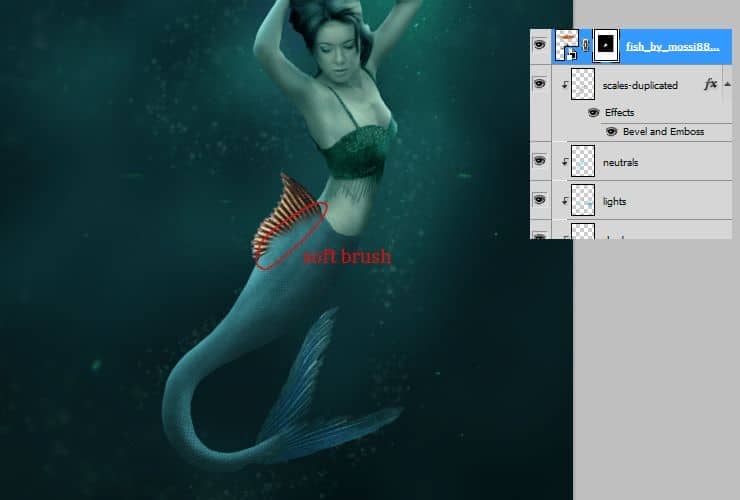
Step 38
Of course stock doesn't match with whole mermaid. Fix it by adding adjustment layer with Color balance. Then, click on created layer with RMB and choose Create Clipping Mask.
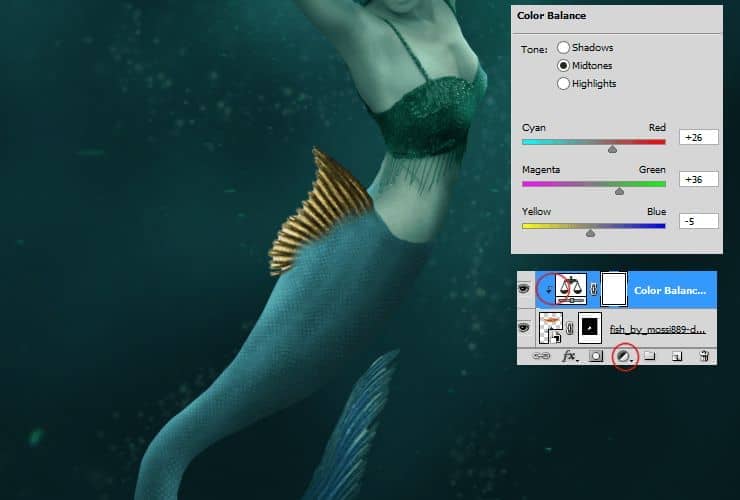
Step 39
Then, add Hue/Saturation adjustment, clipping layer. It will change whole color of tail.
Step 40
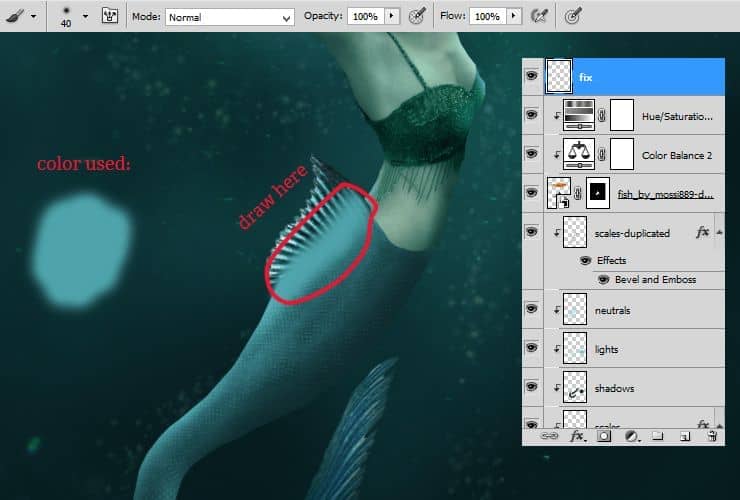
In my opinion edge between tail and stock is really big. Fix it. Create new layer. Pick color from mermaid tail and draw stroke below fish tail.
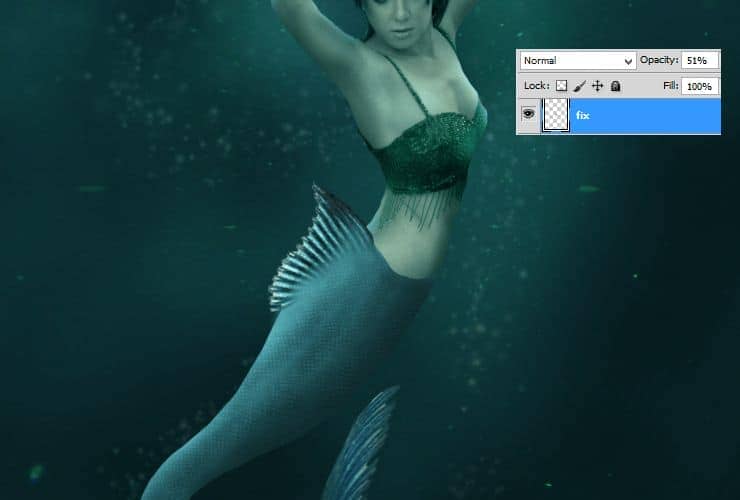
Now decrease opacity of created layer to 50%.
Step 41
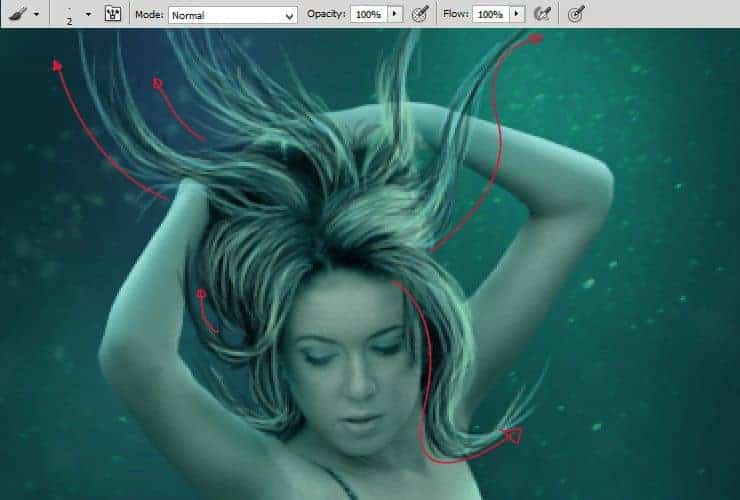
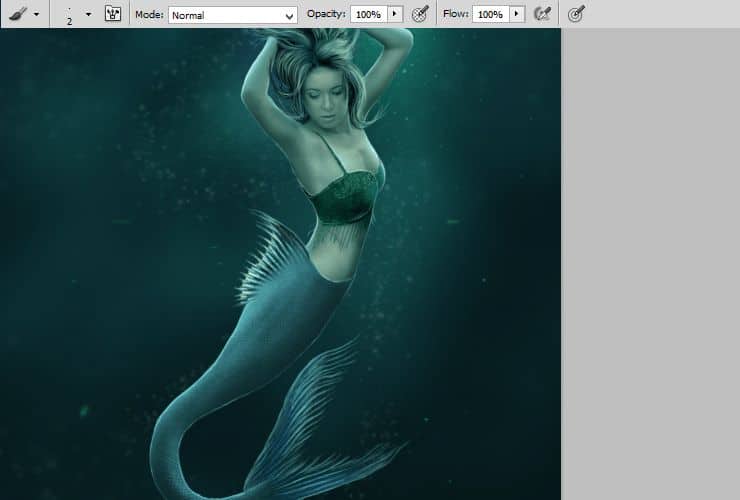
You should draw hair. Add new layer and draw some strands. Use 2px soft brush. Remember about changing colors - I used tones of turquoise and black.
Step 42
Now You will make outline. Use light turquoise. Draw some strokes on both tails!
Step 43
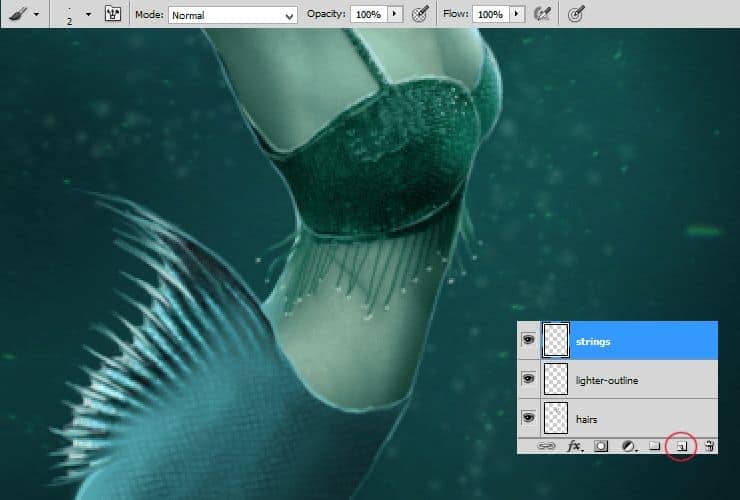
Cool! again add new layer. You should repair mermaid's bra. Draw some strings by 2px soft brush. At the end of every string you should draw white dots - like pearls!
Step 44
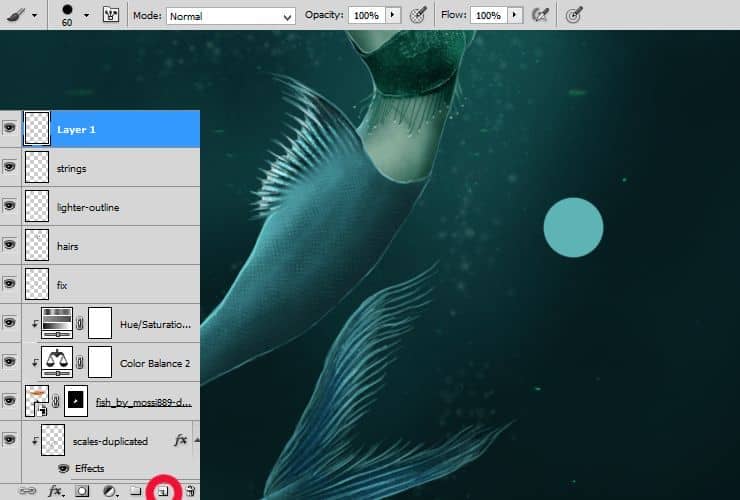
I will show you, how to draw bubbles. Let's start! Create new layer. Choose 60px hard round brush and draw dot somewhere.
Step 45
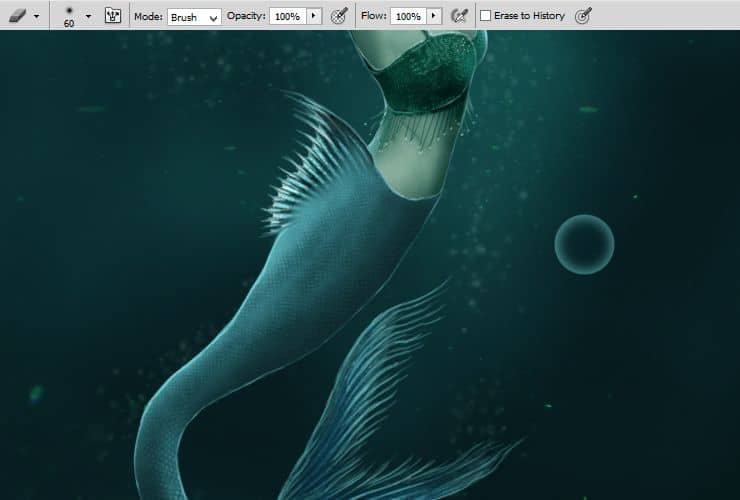
Now choose erase tool. Set soft brush with the same as before size - here: 60px and erase center of dot.
Step 46
It's time to make it sparkling! By small, hard round brush draw some sparkles on bubble.
Step 47
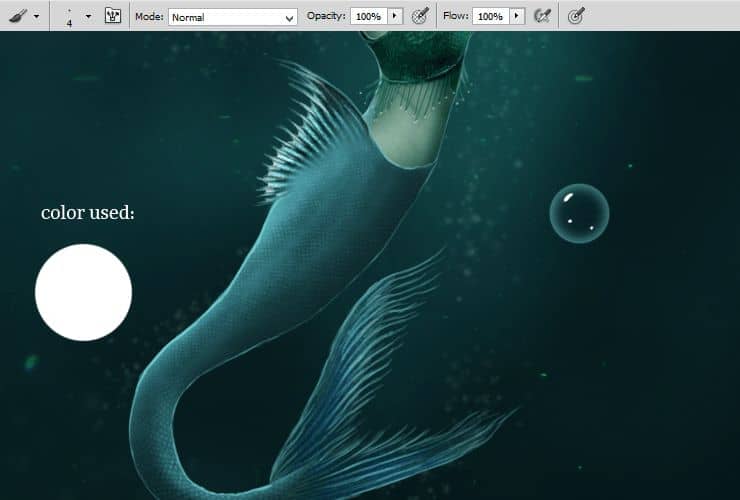
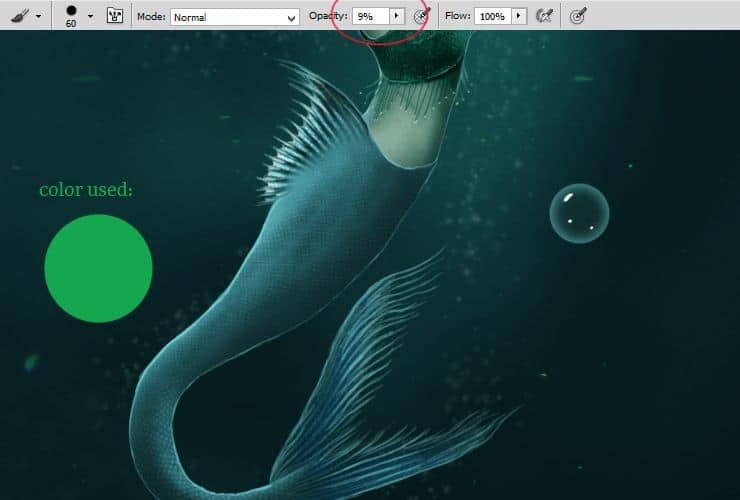
Now, pick hard round brush, with size as you used in step 44. Set opacity of brush to around 8% and draw the same dot as before. Use tones of blue or green.
Step 48
At the end, draw some white shine around bubble. Use around 23% opacity, white, soft round brush, 19px. Draw strokes on top-left edge and smaller stroke on right bottom.


10 comments on “Create an Underwater Scene of a Mermaid”
thank you!!
How do you download the brushes.
Thanks
MsRiotte DigitalArt :)
This dosent take too long and looks awesome! Saved my grade in photo class
thanks :D
Next time I am looking at some downtime with photoshop, I will be trying this tutorial out. Thanks for posting the steps so clearly!
its really helpful for new learners like me..
That's totally amazing! I want to try to make one tomorrow. If nothing else, I'm going to learn a ton of new stuff about adjustment layers (haven't been using photoshop for many years, and never knew about them). Thanks a lot for your effort in making this tutorial!
Vicky tu trouve pas quelle ressemble a annabelle?!
Oui a la des airs :)