Luminar AI lets you turn your ideas into reality with powerful, intelligent AI. Download the photo editor and see how you can completely transform your photos in a few clicks.
Learn how to create a detailed 2D painting in Photoshop using a Wacom tablet. This tutorial will show you some techniques and methods that the author uses for coloring.
Preview of Final Results
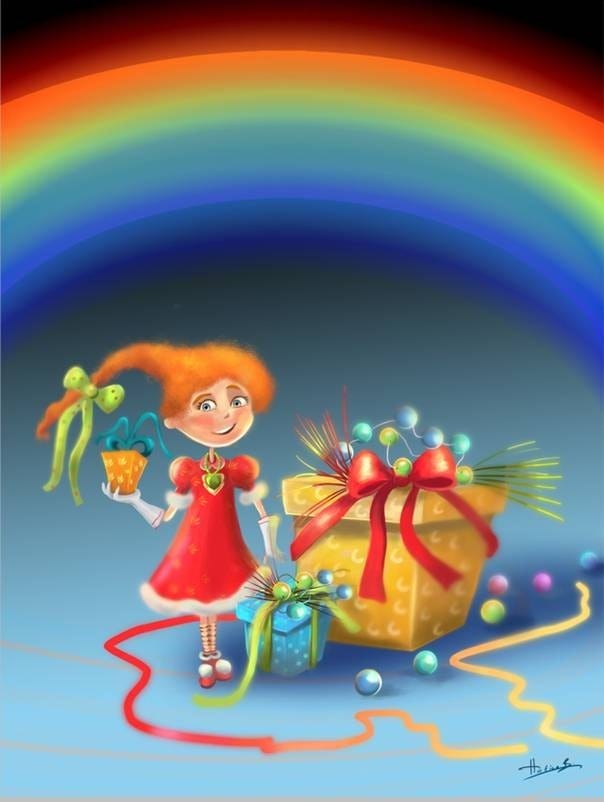
Painting "Girl With the Rainbow" Photoshop Tutorial
Step 1
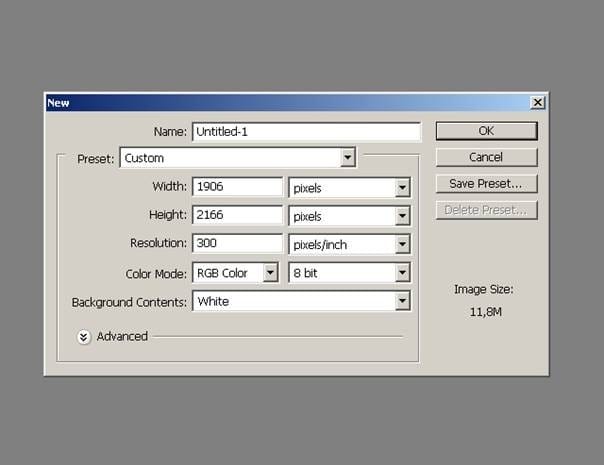
First I opened a new Photoshop file.
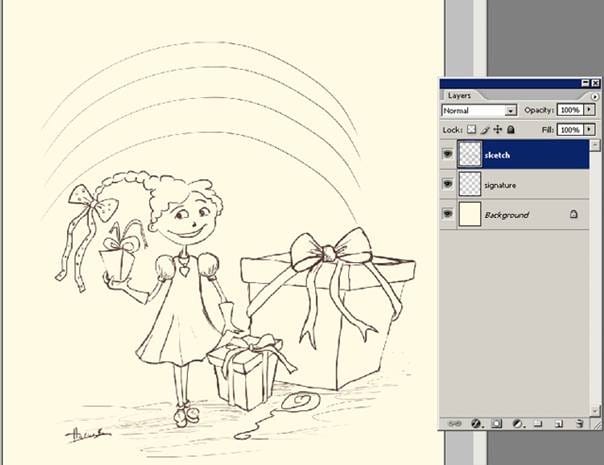
And after that I created a new layer with the name "sketch" And I draw a quick sketch on this layer. You can draw a sketch like this by using either the traditional paper and pencil method or drawing on the computer. İf you do a pencil sketch, you will, of need to scan the image into your computer.
Here is my sketch. I decide to paint a cartoon girl with some gift box and a rainbow. So my illustrations' name will be "Girl with the Rainbow". Here is the simple sketch work I did with Photoshop for the initial sketch work. On this stage the sketch is still visible as a multiply layer over the painting layer.
Step 2
This is a very important stage in creating your artwork is to decide which colors are best for your painting. Here are my colors selection. I want to do something really colorful and cold colors for the cartoon girl painting . I decided for background a dark blue color . Other colors are for the character face and his clothing. Open an another file and save your colors. And always keep open that new file when you are painting.

Step 3
Chose a simple standard brush. Here as you see I marked with red the brushes which I want to use. I'll use first one for the basic coloring and I'll use the other soft rounded brush for the smoothing areas on my illustration.
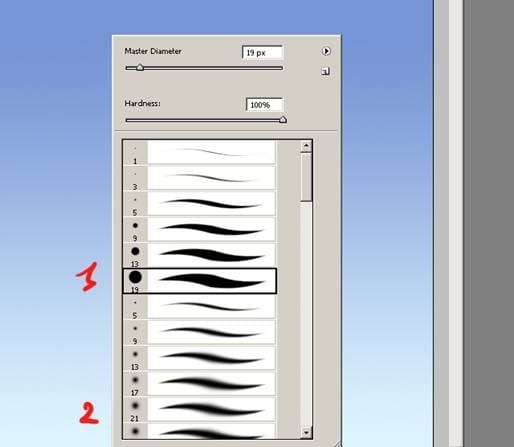
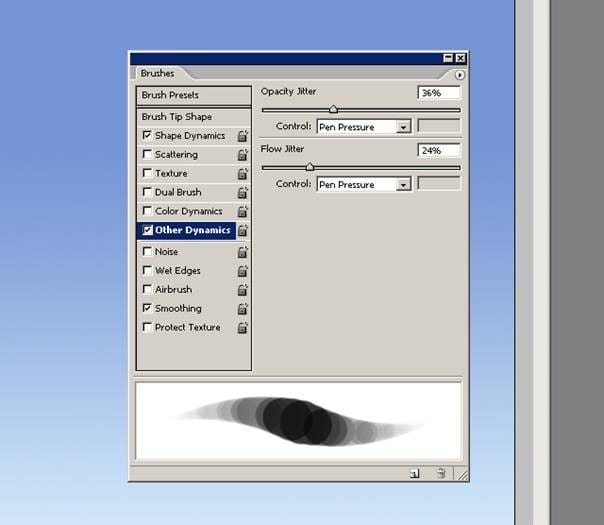
After that from brush panel choose "Other Dynamics" with the numbers as shown on the picture.
And now we are going to begin adding colors and some details. Please select the Gradient Tool and do as you see an the picture.
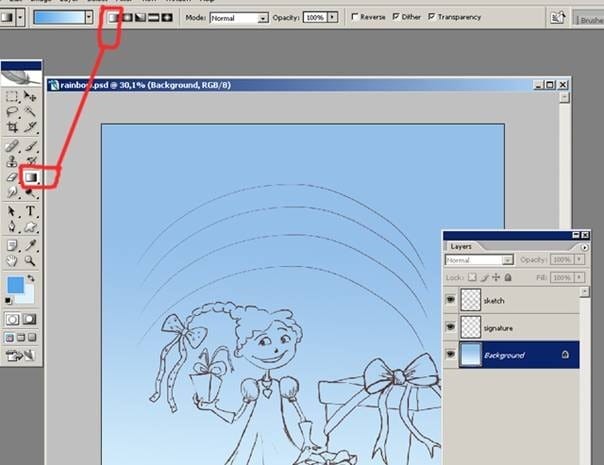
So we have opened a new layer with the name "character color" And now here as you see I have 5 layers. You do the same on your project. Why so much layer for such simple artwork ? Because if I am not satisfied with the color and want to change I can make some changes via help of those layers. This step is very important. Working carefully like this gives you tremendous control.

Step 4
Now that I have decided upon the colors. I can start to add details. In this step. I started with coloring hair of my character. First select the character_color layer and began begin adding the character colors. I have decided to quickly paint some orange hair.

And I do add some strokes with the Smudge tool too. I use this because I want to add soft areas on the her hair and her hair ribbon. I'll now begin to detail the face, adding more pink on her cheeks. By the way don't forget at this step you don't have to over detail everything. I am pretty much finished with painting her face.

Next for her jewelry I used Color Dodge tool for the shiny areas. This is how it looks once all the adjustments are done with the Color Dodge and Burn tool.

Step 5
And here I have drawn a simple rainbow shape with the selected tool on a new layer as you see on the image.

I copy the rainbow layer. And I choose from Edit panel Motion Blur.

And here make the setting as you see. Now at this stage rainbow is finished. Now we can continue to character detailing and smoothing.

Now that the general details are almost fixed. I can began a very detailed painting process. Here are my layer order as you see. I generally begin the real painting work on this step.

And also I do want to show you how I added those shiny areas on my illustration. it is very easy :) I used Dodge tool for this effect. I always use this when I want to add some light areas on my illustrations.

And also you can use Linear Light option for to add some light on the cloth.

And here as you see I have changed her clothing a little bit and also you see what kind of details I added for the gift box. You can add an unlimited amount of details on your illustration.

And here as you see I have changed the main painting a little bit because I do wish to add some more details for the gift box. Here are my layer order and please pay attention the layer names.

Now I created a new layer on the top of shadows layer and I am painting some little colorful balls near the gift box.

Step 6: Final Touches
Now I am going to add some final touches with a different way. You can see the effect on this image too.

Now for the give this nice effect first I have merged all my layers except my signature layer . I name the new layer as "finished illustration" after that I duplicate the layer and give my new layer Blur effect and so as you see

I delete some areas on my image on this new layer and here is the final. When I delete some areas I used the soft brush which I have show you at the previous page. With that soft rounded brush carefully delete areas which you want detailed display for your illustration.

Final Results
And here's the final image. Thank you for reading. I hope you enjoy this detailed making of the whole artwork.
![image024[1] image024[1]](https://cdn.photoshoptutorials.ws/images/stories/583c763ed4da_12C0C/image0241.jpg?strip=all&lossy=1&quality=70&webp=70&avif=70&w=1920&ssl=1)
One comment on “Painting “Girl With the Rainbow” in Photoshop”
very nice, thank you!