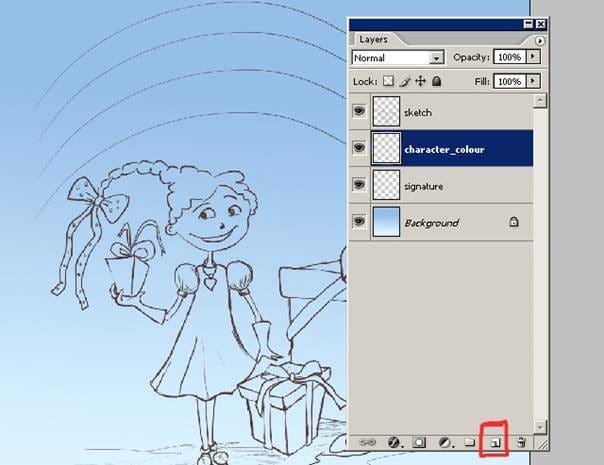
Step 4
Now that I have decided upon the colors. I can start to add details. In this step. I started with coloring hair of my character. First select the character_color layer and began begin adding the character colors. I have decided to quickly paint some orange hair.
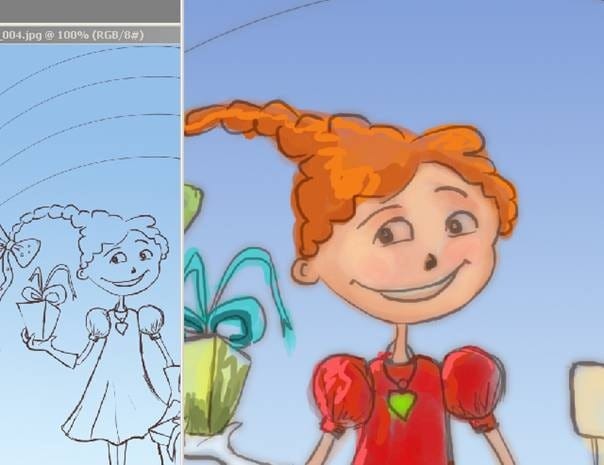
And I do add some strokes with the Smudge tool too. I use this because I want to add soft areas on the her hair and her hair ribbon. I’ll now begin to detail the face, adding more pink on her cheeks. By the way don’t forget at this step you don’t have to over detail everything. I am pretty much finished with painting her face.

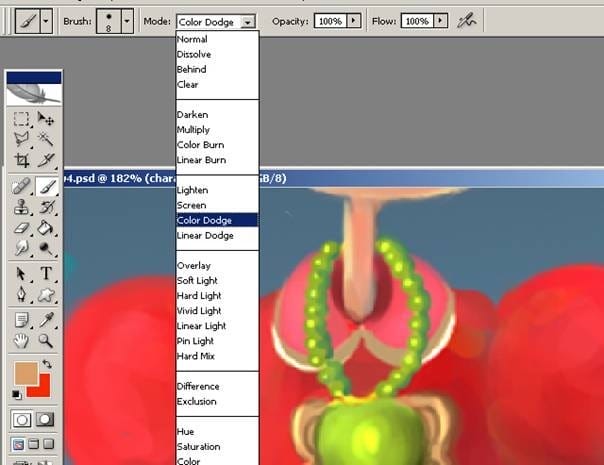
Next for her jewelry I used Color Dodge tool for the shiny areas. This is how it looks once all the adjustments are done with the Color Dodge and Burn tool.
Step 5
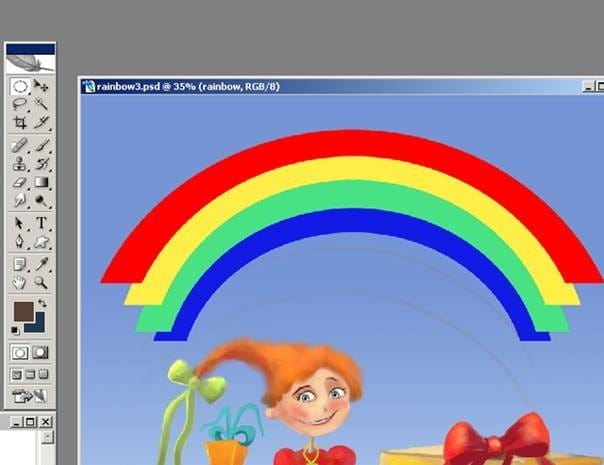
And here I have drawn a simple rainbow shape with the selected tool on a new layer as you see on the image.
I copy the rainbow layer. And I choose from Edit panel Motion Blur.
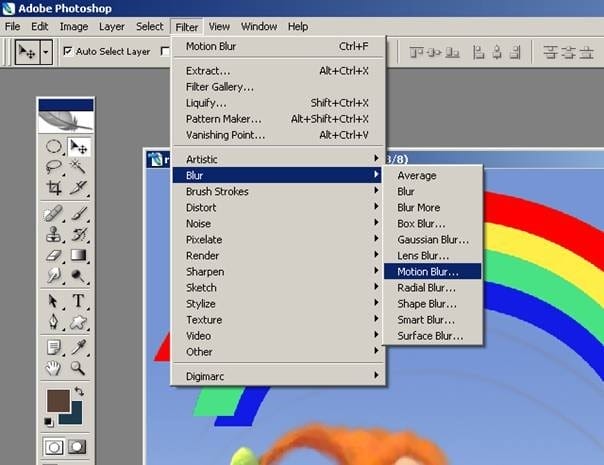
And here make the setting as you see. Now at this stage rainbow is finished. Now we can continue to character detailing and smoothing.

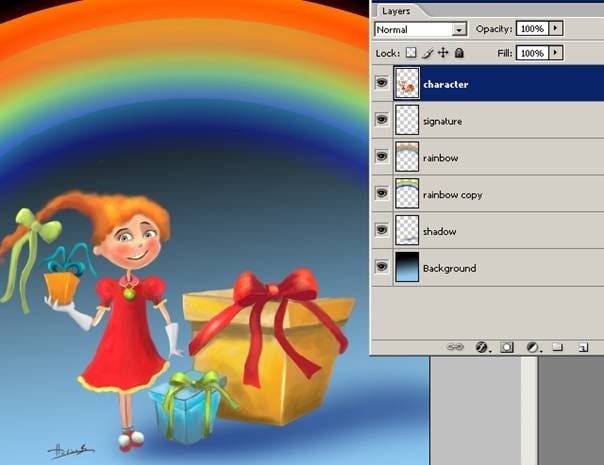
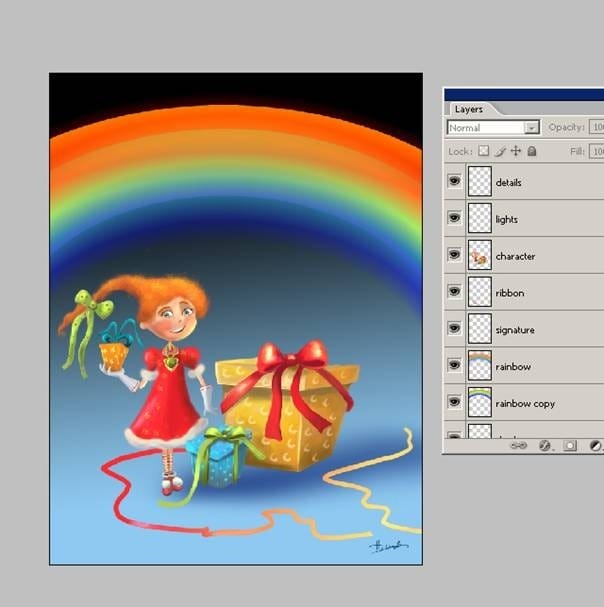
Now that the general details are almost fixed. I can began a very detailed painting process. Here are my layer order as you see. I generally begin the real painting work on this step.
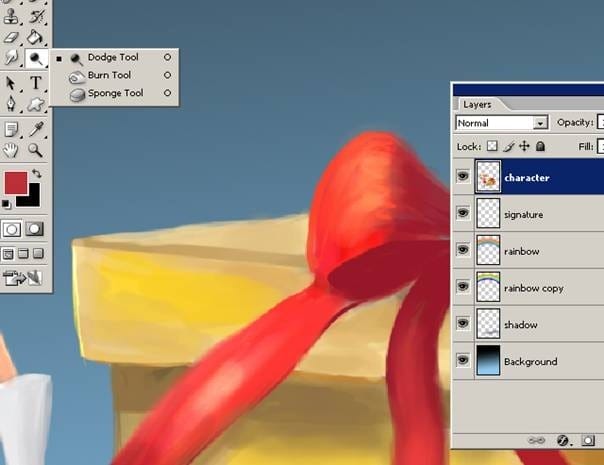
And also I do want to show you how I added those shiny areas on my illustration. it is very easy :) I used Dodge tool for this effect. I always use this when I want to add some light areas on my illustrations.
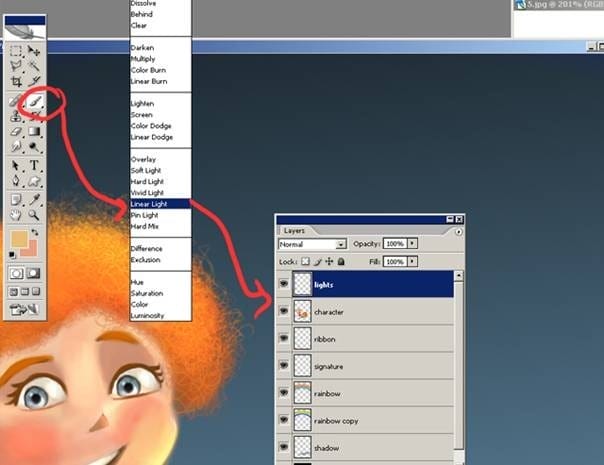
And also you can use Linear Light option for to add some light on the cloth.
And here as you see I have changed her clothing a little bit and also you see what kind of details I added for the gift box. You can add an unlimited amount of details on your illustration.

And here as you see I have changed the main painting a little bit because I do wish to add some more details for the gift box. Here are my layer order and please pay attention the layer names.
Now I created a new layer on the top of shadows layer and I am painting some little colorful balls near the gift box.
One response to “Painting “Girl With the Rainbow” in Photoshop”
-
very nice, thank you!


Leave a Reply