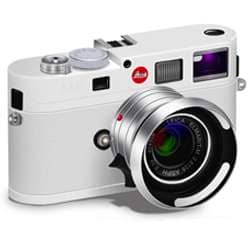
Turn any photo into a dot grid artwork with these Photoshop actions. You'll get great results with dots that change size. They get larger in brighter areas and smaller in darker areas. Free download available.
![step 102a[1] step 102a[1]](https://cdn.photoshoptutorials.ws/images/stories/5cde552890ea_ED74/step102a1.png?strip=all&lossy=1&quality=70&webp=70&avif=70&w=1920&ssl=1)
![step 102b[1] step 102b[1]](https://cdn.photoshoptutorials.ws/images/stories/5cde552890ea_ED74/step102b1.png?strip=all&lossy=1&quality=70&webp=70&avif=70&w=1920&ssl=1)
![step 102c[1] step 102c[1]](https://cdn.photoshoptutorials.ws/images/stories/5cde552890ea_ED74/step102c1.png?strip=all&lossy=1&quality=70&webp=70&avif=70&w=1920&ssl=1)
Step 103
Create a new layer (Ctrl +Shift + N). Using pen tool (P) create a new path (step 103a). Brush (B) the edges of the selection with color (#ffffff). Use the brush settings like in the picture: master diameter 50px, hardness 100%, opacity and flow 100%, mode: normal (step 103b). Set the layer on Soft Light from the Layer menu window (step 103c).
![step 103a[1] step 103a[1]](https://cdn.photoshoptutorials.ws/images/stories/5cde552890ea_ED74/step103a1.png?strip=all&lossy=1&quality=70&webp=70&avif=70&w=1920&ssl=1)
![step 103b[1] step 103b[1]](https://cdn.photoshoptutorials.ws/images/stories/5cde552890ea_ED74/step103b1.png?strip=all&lossy=1&quality=70&webp=70&avif=70&w=1920&ssl=1)
![step 103c[1] step 103c[1]](https://cdn.photoshoptutorials.ws/images/stories/5cde552890ea_ED74/step103c1.png?strip=all&lossy=1&quality=70&webp=70&avif=70&w=1920&ssl=1)
Step 104
Create a new layer (Ctrl +Shift + N). Using pen tool (P) create a new path (step 104a). Set the brush tool (B) on 3px and black color (#000000). Stroke the path by using right click options of pen tool (P). Set the stroke on brush with simulate pressure off (step 104b).
![step 104a[1] step 104a[1]](https://cdn.photoshoptutorials.ws/images/stories/5cde552890ea_ED74/step104a1.png?strip=all&lossy=1&quality=70&webp=70&avif=70&w=1920&ssl=1)
![step 104b[1] step 104b[1]](https://cdn.photoshoptutorials.ws/images/stories/5cde552890ea_ED74/step104b1.png?strip=all&lossy=1&quality=70&webp=70&avif=70&w=1920&ssl=1)
Step 105
Create a new layer (Ctrl +Shift + N). Using pen tool (P) create a new path (step 105a). Set the brush tool (B) on 2px and white color (#ffffff). Stroke the path by using right click options of pen tool (P). Set the stroke on brush with simulate pressure off and set the layer on Overlay from the Layer options window (step 105b).
![step 105a[1] step 105a[1]](https://cdn.photoshoptutorials.ws/images/stories/5cde552890ea_ED74/step105a1.png?strip=all&lossy=1&quality=70&webp=70&avif=70&w=1920&ssl=1)
![step 105b[1] step 105b[1]](https://cdn.photoshoptutorials.ws/images/stories/5cde552890ea_ED74/step105b1.png?strip=all&lossy=1&quality=70&webp=70&avif=70&w=1920&ssl=1)
Step 106
Create a new layer (Ctrl +Shift + N). Using lasso tool (L) create a new selection (feather 0.5px) and than make another one to remove the inside part of it (step106a). Brush (B) the edges of the selection with color (#878788). Use the brush settings like in the picture: master diameter 50px, hardness 100%, opacity and flow 100%, mode: normal (step 106b).
![step 106a[1] step 106a[1]](https://cdn.photoshoptutorials.ws/images/stories/5cde552890ea_ED74/step106a1.png?strip=all&lossy=1&quality=70&webp=70&avif=70&w=1920&ssl=1)
![step 106b[1] step 106b[1]](https://cdn.photoshoptutorials.ws/images/stories/5cde552890ea_ED74/step106b1.png?strip=all&lossy=1&quality=70&webp=70&avif=70&w=1920&ssl=1)
Step 107
Create a new layer (Ctrl +Shift + N). Using lasso tool (L) create a new selection (feather 0.5px) (step 107a). Select from the right click option “Fill… ”. Fill the selection with color (#e2e2e4) (step 107b). Set the layer on Soft Light from the Layer menu window (step 107c).
![step 107a[1] step 107a[1]](https://cdn.photoshoptutorials.ws/images/stories/5cde552890ea_ED74/step107a1.png?strip=all&lossy=1&quality=70&webp=70&avif=70&w=1920&ssl=1)
![step 107b[1] step 107b[1]](https://cdn.photoshoptutorials.ws/images/stories/5cde552890ea_ED74/step107b1.png?strip=all&lossy=1&quality=70&webp=70&avif=70&w=1920&ssl=1)
![step 107c[1] step 107c[1]](https://cdn.photoshoptutorials.ws/images/stories/5cde552890ea_ED74/step107c1.png?strip=all&lossy=1&quality=70&webp=70&avif=70&w=1920&ssl=1)
Step 108
Create a new layer (Ctrl +Shift + N). Using pen tool (P) create a new path shape (step 108a).Make selection using right click options. Brush (B) the selections with color (#9bff00). Use the brush settings like in the picture: master diameter 50px, hardness 100%, opacity and flow 100%, mode: normal (step 108b). Set the layer on Overlay from the Layer menu window (step 108c). Load selection of layer created on step 107 and using right click options select inverse and delete the excess using Eraser tool (E) (step 108d). Make a copy of the layer using “Duplicate layer…” (step 108e).


4 comments on “Render a High Detail Leica M8 Camera with Photoshop”
Step 1: Draw a camera with the pen tool
:O/
+1 LOL
This is so good. I am impressed
That is some impressive PS work!